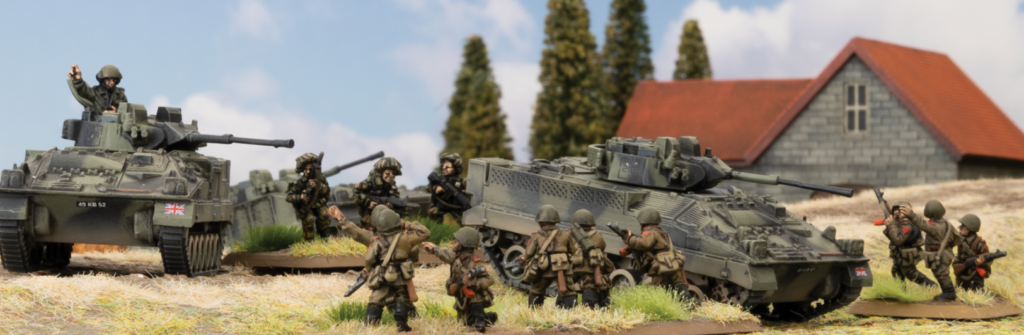
British transport tactics in Team Yankee are about far more than simply getting infantry onto an objective.
Each vehicle changes army size, mobility, protection, and how much support remains available elsewhere. The FV432, Bulldog, and Warrior family therefore fill very different battlefield roles. Choosing correctly means matching the transport to your mission and expected threats. This is a summary of a community post found here.
British Transport Tactics Depend on Mass, Protection, and Firepower
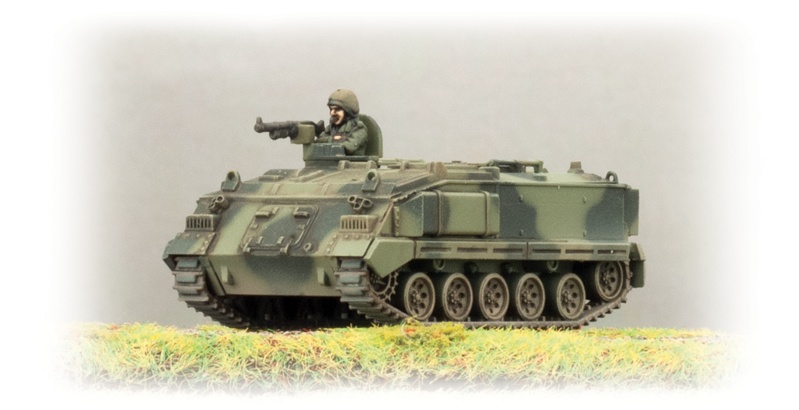
The standard FV432 is the cheapest option, working exactly like a traditional battlefield taxi. It carries infantry forward, protects them from small arms and fragments, then ideally disappears behind cover. On the table, Front 1 and Side 1 mean prolonged exposure is asking for trouble. However, its low cost lets commanders field more infantry, tanks, artillery, reconnaissance, or aircraft elsewhere. The Bulldog keeps that same transport philosophy but adds dramatically better protection.
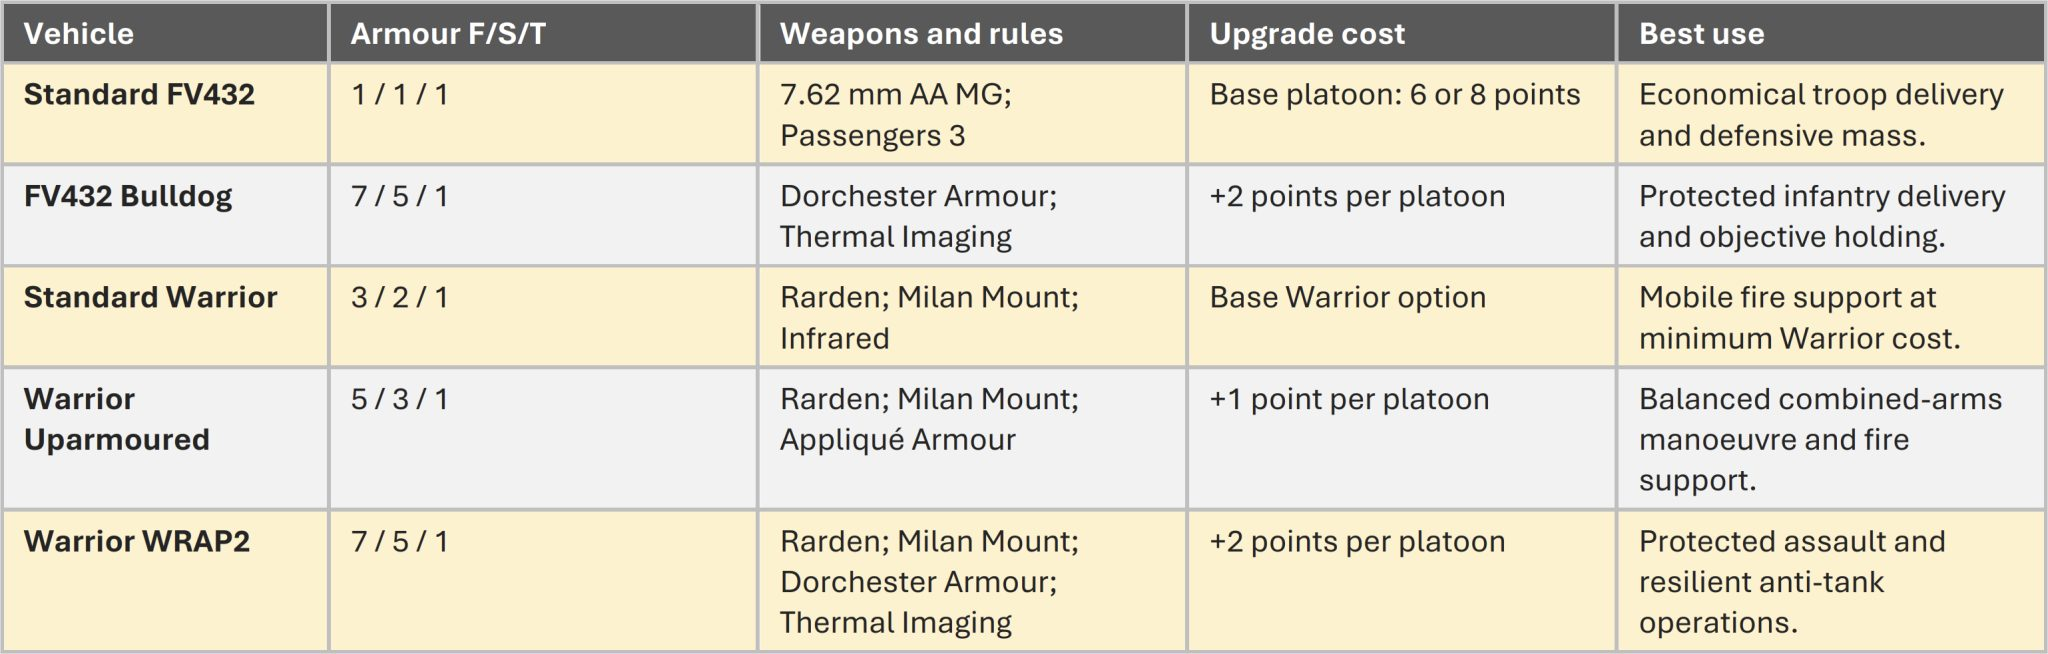
Front 7, Side 5, Dorchester Armour, and Thermal Imaging make it much safer under incoming fire. Moreover, the platoon upgrade costs only two points, making protected mobility surprisingly affordable. The tradeoff is that Bulldog still brings only a machine gun and no serious anti-tank capability.
Warrior changes the equation because it is a true infantry fighting vehicle rather than a protected taxi. Even the standard version carries the 30mm Rarden cannon and a Milan Mount. Additionally, its strong dash speeds let mechanised infantry shift rapidly between threatened sectors. Mounted Milan reaches Anti-tank 21, while Milan 2 reaches 24 and adds Thermal Imaging. Standard Warrior is the economical IFV, although Front 3 and Side 2 still demand careful use of cover.
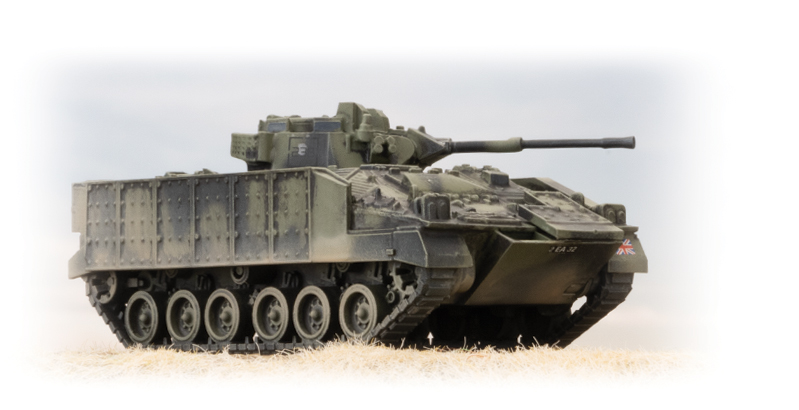
Uparmoured Warrior looks like the strongest all-purpose choice because one extra point adds Appliqué Armour. Against HEAT, that effectively raises its frontal and side protection to 13. Meanwhile, the Rarden and Milan options remain intact, so durability arrives without sacrificing firepower. WRAP2 pushes protection further with Front 7, Side 5, Dorchester Armour, and Thermal Imaging. However, paying two extra points concentrates even more value into a small number of vehicles. That matters because Soviet tank guns can still punch through them. The opposition should therefore drive British transport tactics as much as the mission. BMP-2 autocannons can shred FV432s and threaten standard Warriors through sheer fire volume. Likewise, T-72s and T-80s remain dangerous to every transport variant, including WRAP2. Artillery, Salvos, and minelets can pin infantry while disrupting movement through predictable routes.
Meanwhile, strike aircraft and helicopters threaten expensive Warriors from angles their armour cannot easily solve. Guided missiles and infantry HEAT weapons also punish careless approaches, especially with lighter transports. Finally, massed Soviet assaults can isolate even tough carriers if British forces overextend. For that reason, smoke, concealment, withdrawal routes, and mobile reserves remain essential.
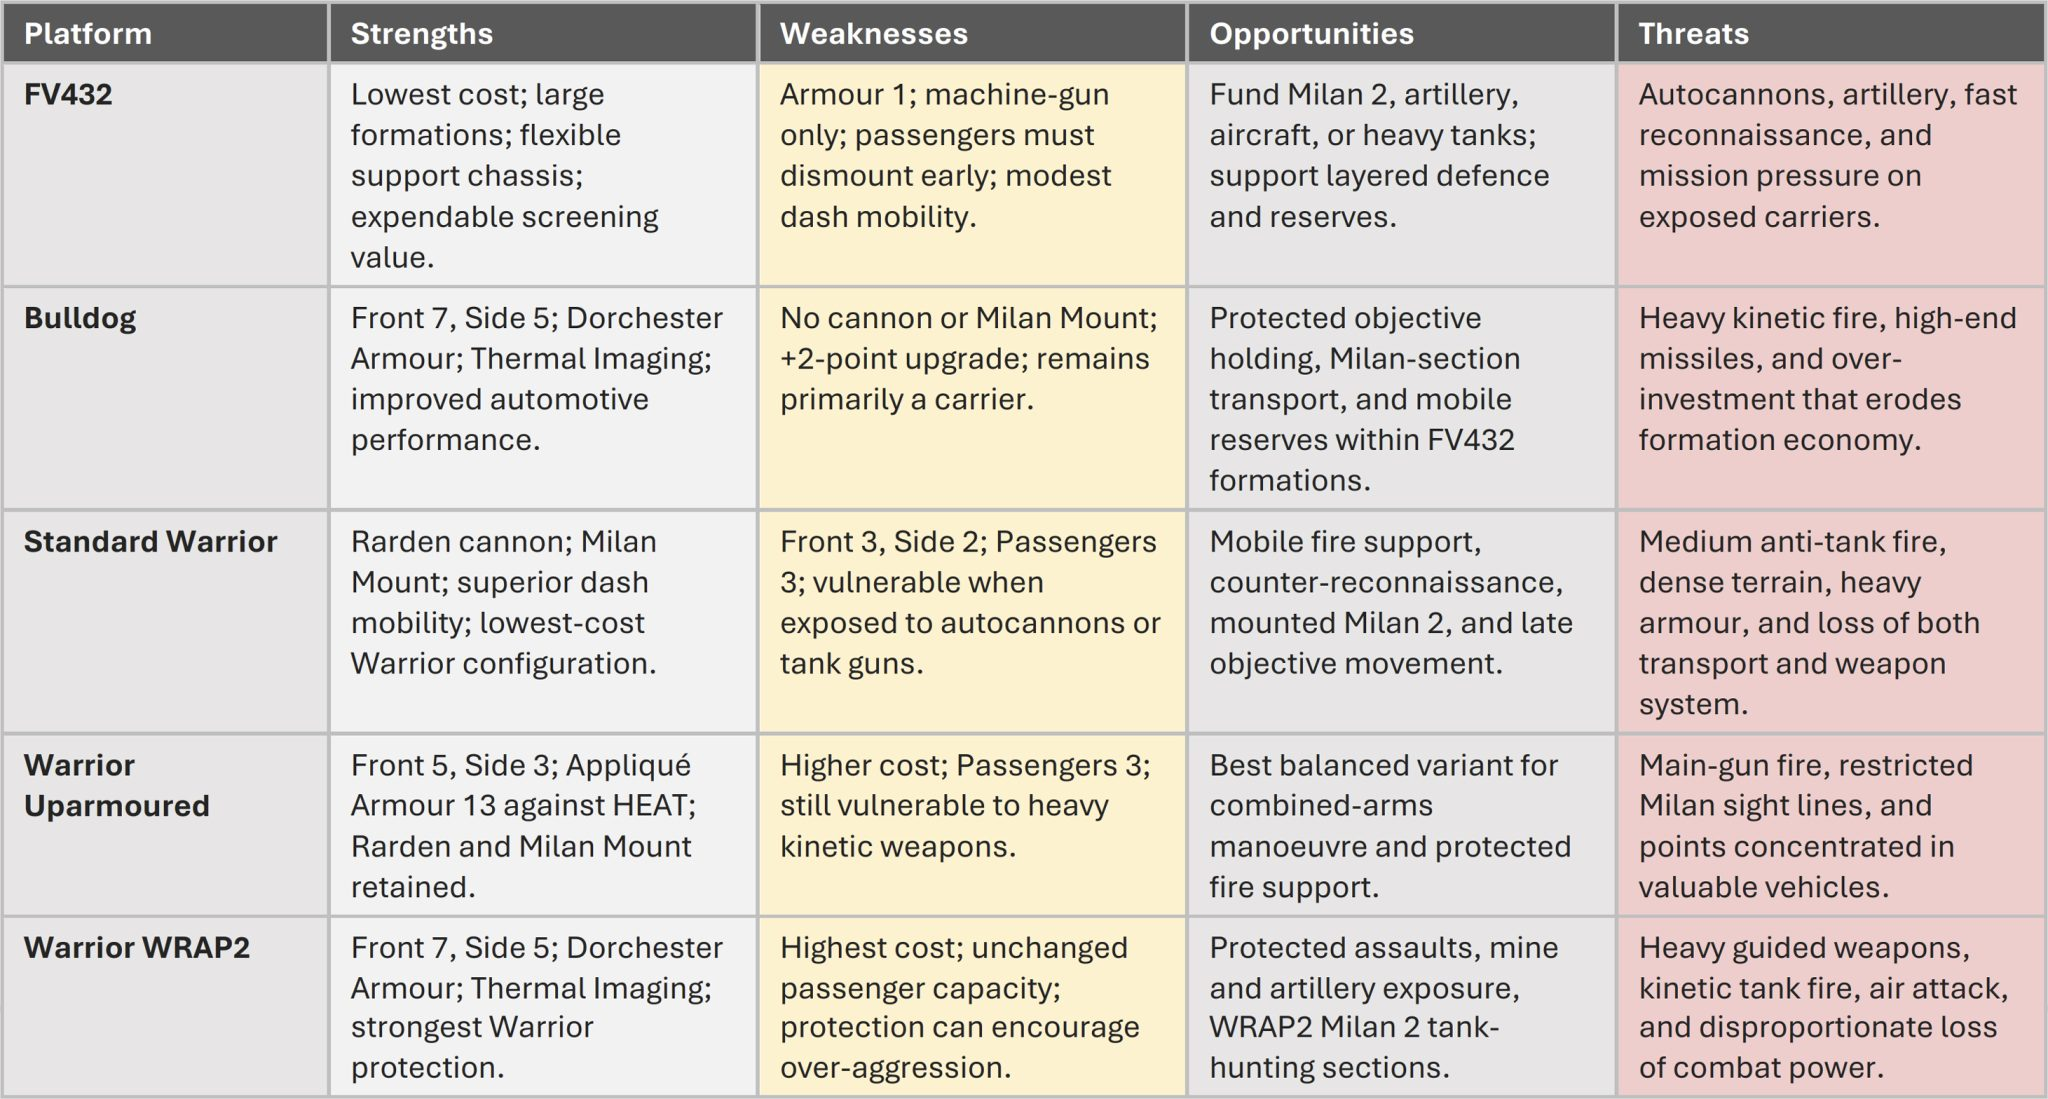
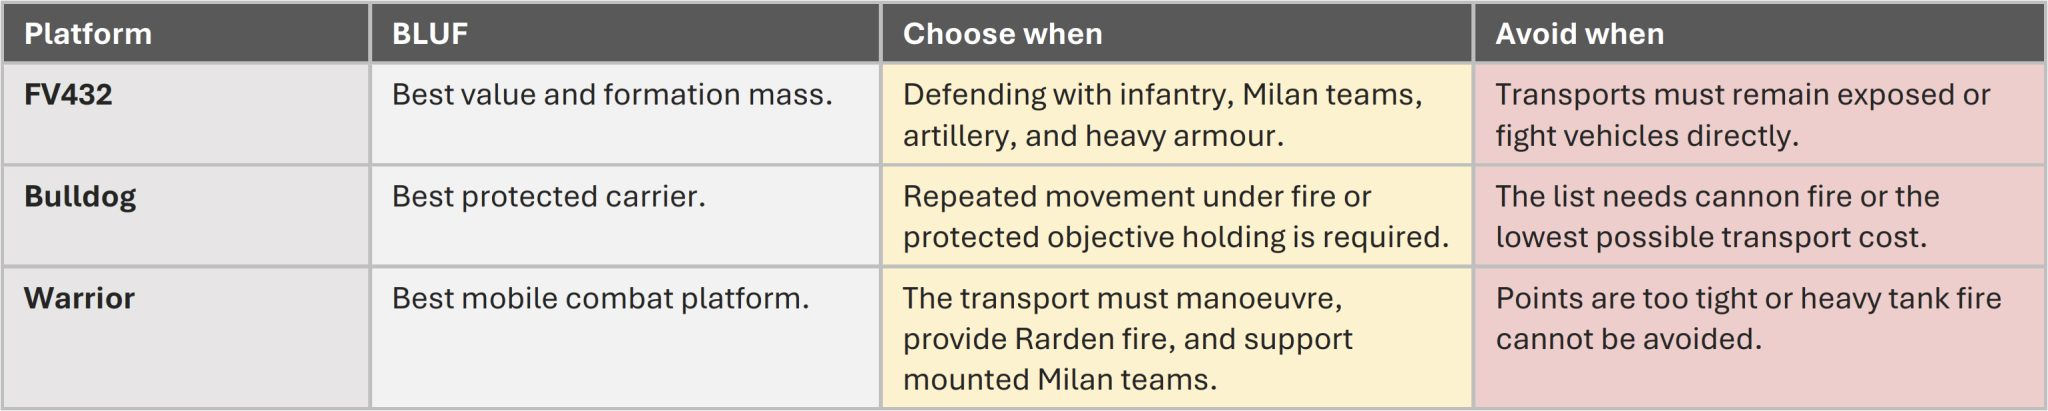
Overall, Uparmoured Warrior offers the best general-purpose balance of protection, price, and useful fire support. However, FV432s remain excellent for infantry-heavy defensive lists where points matter more than carrier survivability. Bulldog is the logical middle ground when those formations need protection without becoming Warrior formations. Standard Warrior works when points are tight, while WRAP2 makes sense when its additional armour serves a clear purpose. For the complete statistics, threat analysis, and recommendations, see the original source provided with this article.
Final Thoughts
British transport tactics work best when players stop treating every carrier as interchangeable. FV432s buy mass, Bulldogs buy survivability, and Warriors buy combat power alongside transportation. Meanwhile, paying for armour only helps when the mission actually exposes those vehicles to relevant threats. For most balanced forces, Uparmoured Warrior looks like the sweet spot.