Blitzkrieg is here, and it brought a very tempting British Army Deal with it. So the goal is simple: get a BEF force on the table fast, using the new shiny plastics, and still be semi competitive.
Because the box is built like a starter toolkit, you can avoid the hobby pile of shame trap. Meanwhile, the included A5 rulebook is a real win, since it saves new players money immediately. Therefore, the article walks through multiple 100 point build paths using formations from the Blitzkrieg book.
What’s in the Army Deal and why the sprues matter
The set includes the complete A5 rulebook, a Rifle Company HQ, two Rifle Platoons, a Mortar Section, a Machine Gun Platoon, two 2pdr gun teams, three A13 or A13 Mk II, three Vickers Light Mk VI B or C, and nine unit cards. The plastics are flexible too. You can build A13s as basic versions or as up armoured Mk IIs, and you can arm the Mk VI with either a .5 inch or 15mm gun. Also, the infantry sprues are sneaky good value, since each one includes an extra command team, a mortar team, and two HMG teams. So when you combine two sprues, you basically have a full rifle company, which is exactly what this box is trying to hand you.
Rifle Company first: use everything, then add punch
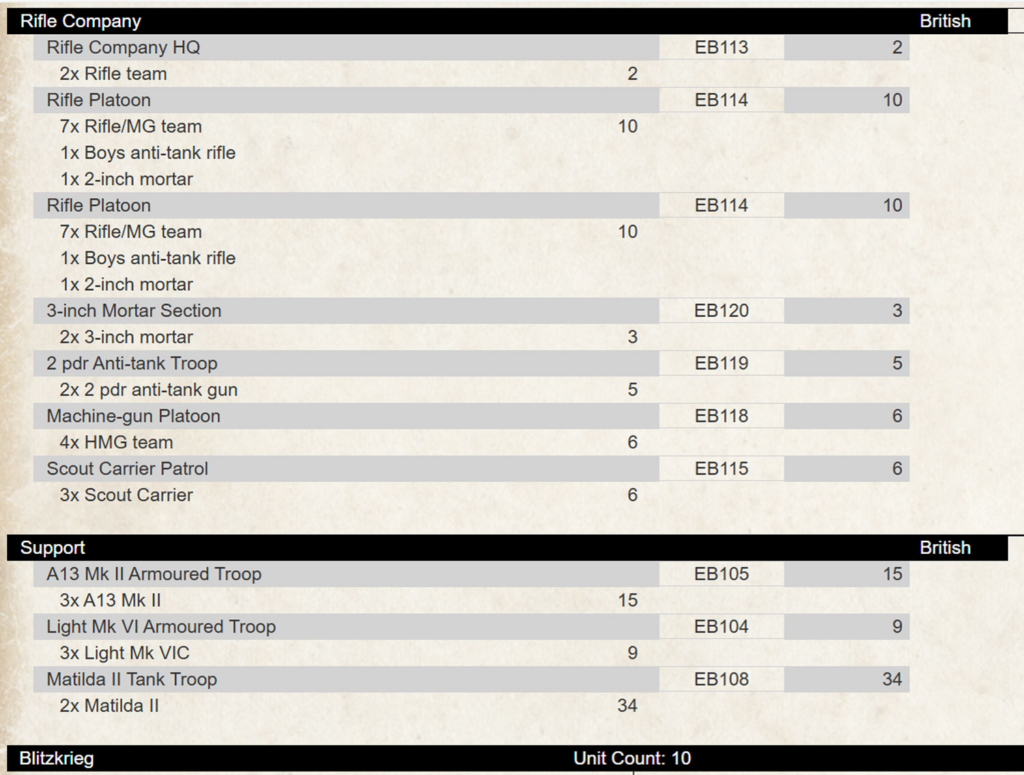
The Rifle Company formation includes an HQ, two to three Rifle Platoons, optional 3 inch mortars, optional 2pdr anti tank, up to two MG platoons, and up to three scout carrier platoons. The first 100 point idea uses seven units for a solid formation break. Your infantry sit on objectives, while 2pdrs and HMGs support them. Meanwhile, mortars bring a template to pin enemy infantry. Then your A13 Mk IIs and Mk VI Cs hunt tanks, while Matilda IIs add a terrifying armor brick with FA7 SA6 TA2 and a 3+ counterattack, which means they want to get stuck in. Finally, scout carriers add spearhead when missions allow, and they also act like annoying mobile fire support.
To build that list, the suggested buys are the British Rifle Company box, a Scout Carrier platoon, and two Matilda II packs, totaling $168.
More formations: tanks, territorials, and armoured cars
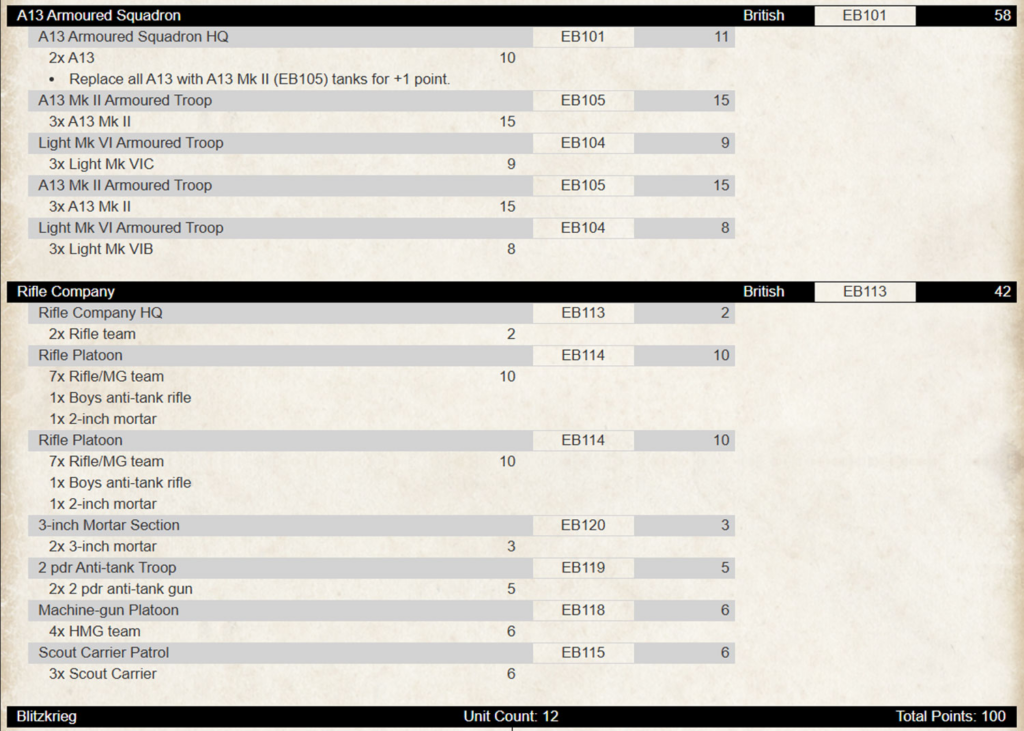
If you want a second tank formation, you can drop the Matildas and reorganize your existing tank troops into an A13 Armoured Squadron. Then you add the extra tank HQ and troop boxes to make a proper hammer and anvil setup, with infantry holding and tanks swinging. That path costs $246, adding a Mk VI troop, an A13 troop, and scout carriers.
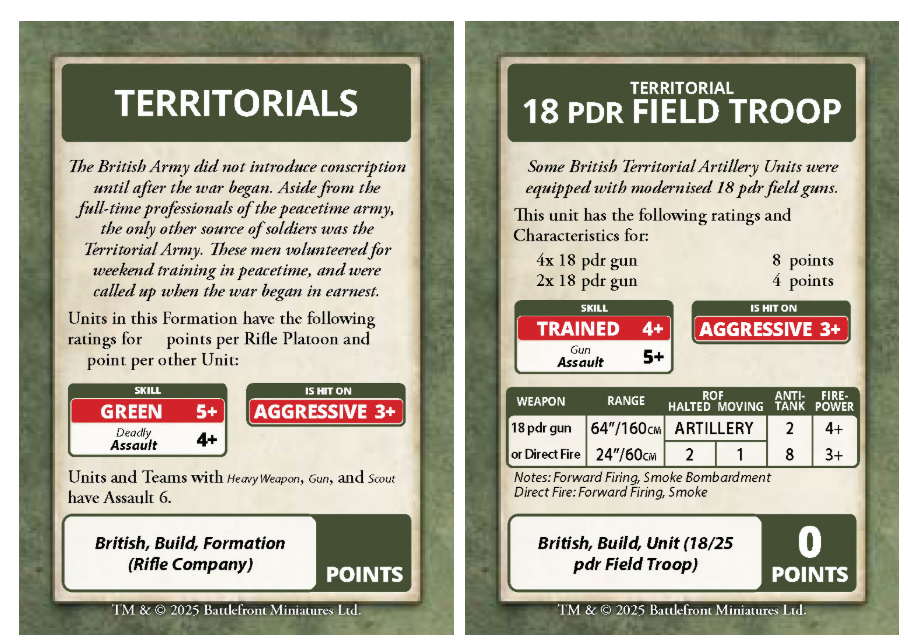
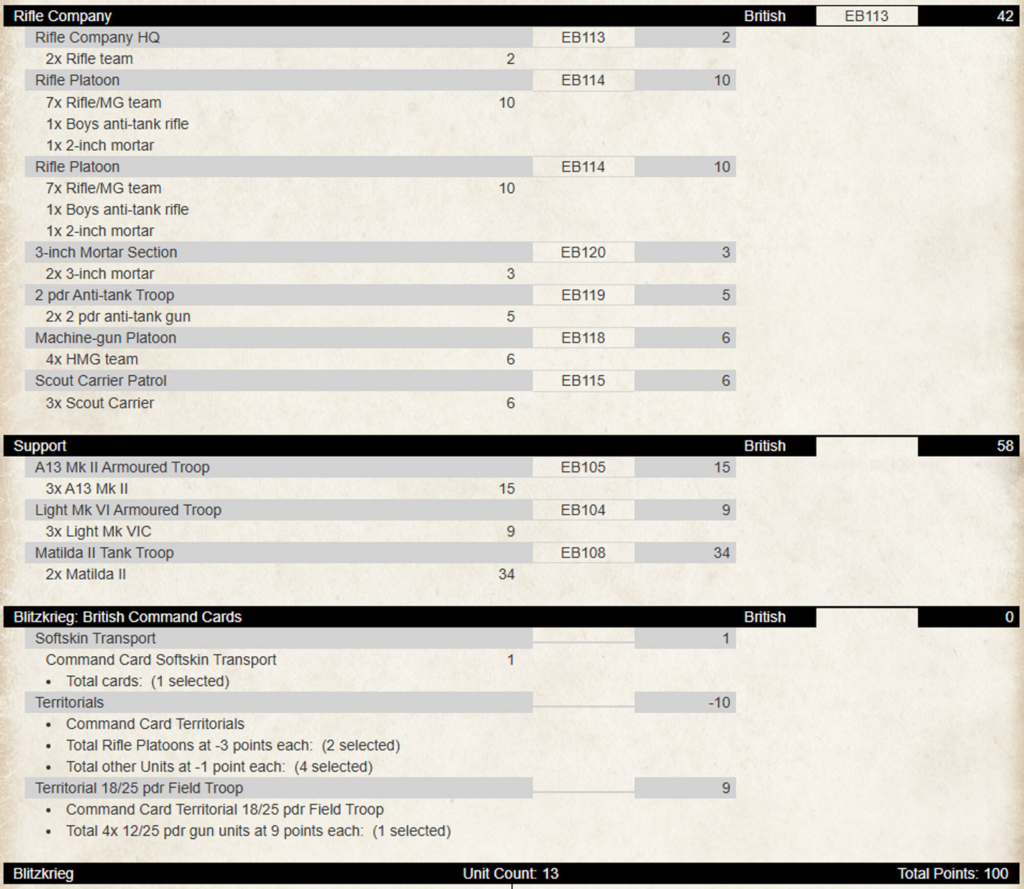
Next, the Territorial Rifle Company uses the same structure, but it gets themed by Territorial command cards. However, the trade is worse ratings. Skill drops from Trained 4+ to Green 5+, assault gets worse, artillery shifts from Veteran 3+ to Trained 4+, and they become easier to hit at Aggressive 3+ instead of Careful 4+. Therefore, the list leans more defensive, adding an 18 or 25pdr troop plus a transport card to reposition it. That version costs $227 with artillery, scout carriers, and Matildas.
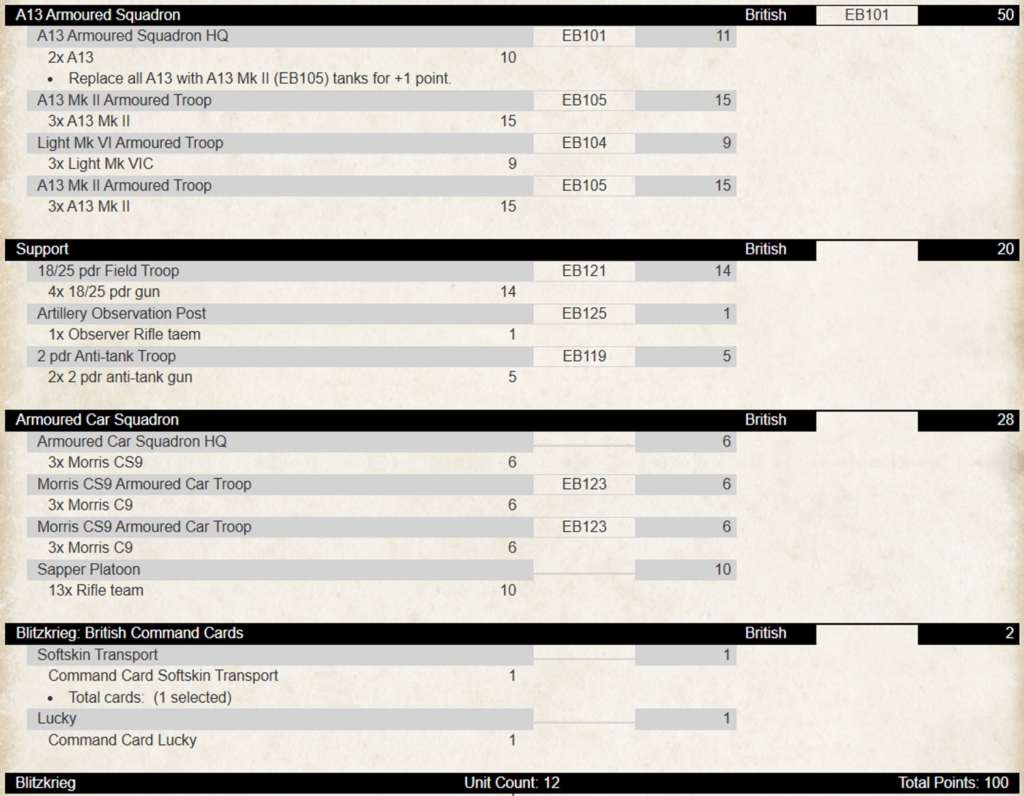
Finally, the A13 Armoured Squadron plus Armoured Car Squadron route builds two small formations. You use a sapper platoon to turn your box infantry into a formation unit, while Morris CS9 armoured cars spearhead and poke light armor with AT4 Boys rifles. Tanks still do the heavy lifting, supported by sappers and dual purpose 18 or 25pdrs. This is the priciest route at $375 because you are buying multiple CS9 troops.
Summary
This guide shows several 100 point ways to stretch the BEF Army Deal into real lists, from a classic Rifle Company core to a two formation infantry and tank setup. Moreover, it covers a Territorial themed option that trades quality for flavor and artillery flexibility. Finally, it offers a fast cavalry style build with armoured cars and sappers for players who love spearhead pressure.
And remember, Frontline Gaming sells gaming products at a discount, every day in their webcart!

