

Norway is getting its moment in the snowstorm with Nordic Forces, and it looks mean on the table.
Even though you only get two formations to start, Leopard 1 tanks and M113 mech infantry, the Leopard build is where the competitive bite shows first. And because this is WW3 Team Yankee, speed plus positioning usually beats trying to stat check people. So this article sets up Norway’s Leopard 1 formation, then it walks you through two sample lists and how the pieces actually work together.
A Quick History and Some Very Hobby Friendly Flavor
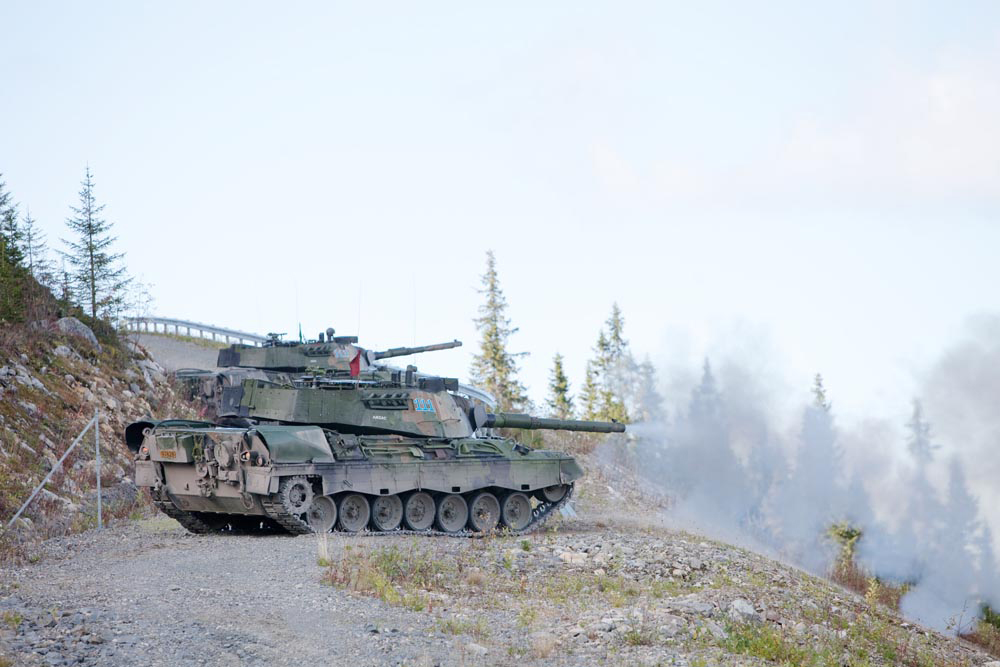
Norway’s NATO status opened the gear pipeline, so they picked up 172 Leopard 1 tanks in 1968 via Germany. Over time, those tanks were upgraded through several iterations, ending with the Leopard 1A5. They stayed in service until 2011, which is a chunky 42 year run.
Meanwhile, Norwegian armored units leaned into Viking iconology for vehicle naming and morale. That vibe got some criticism in modern deployments, yet it still lived on culturally. So if you like markings, names, and unit personality, you have easy modeling hooks here.
List One: Double Leopard Formations and a Knife Fight Plan
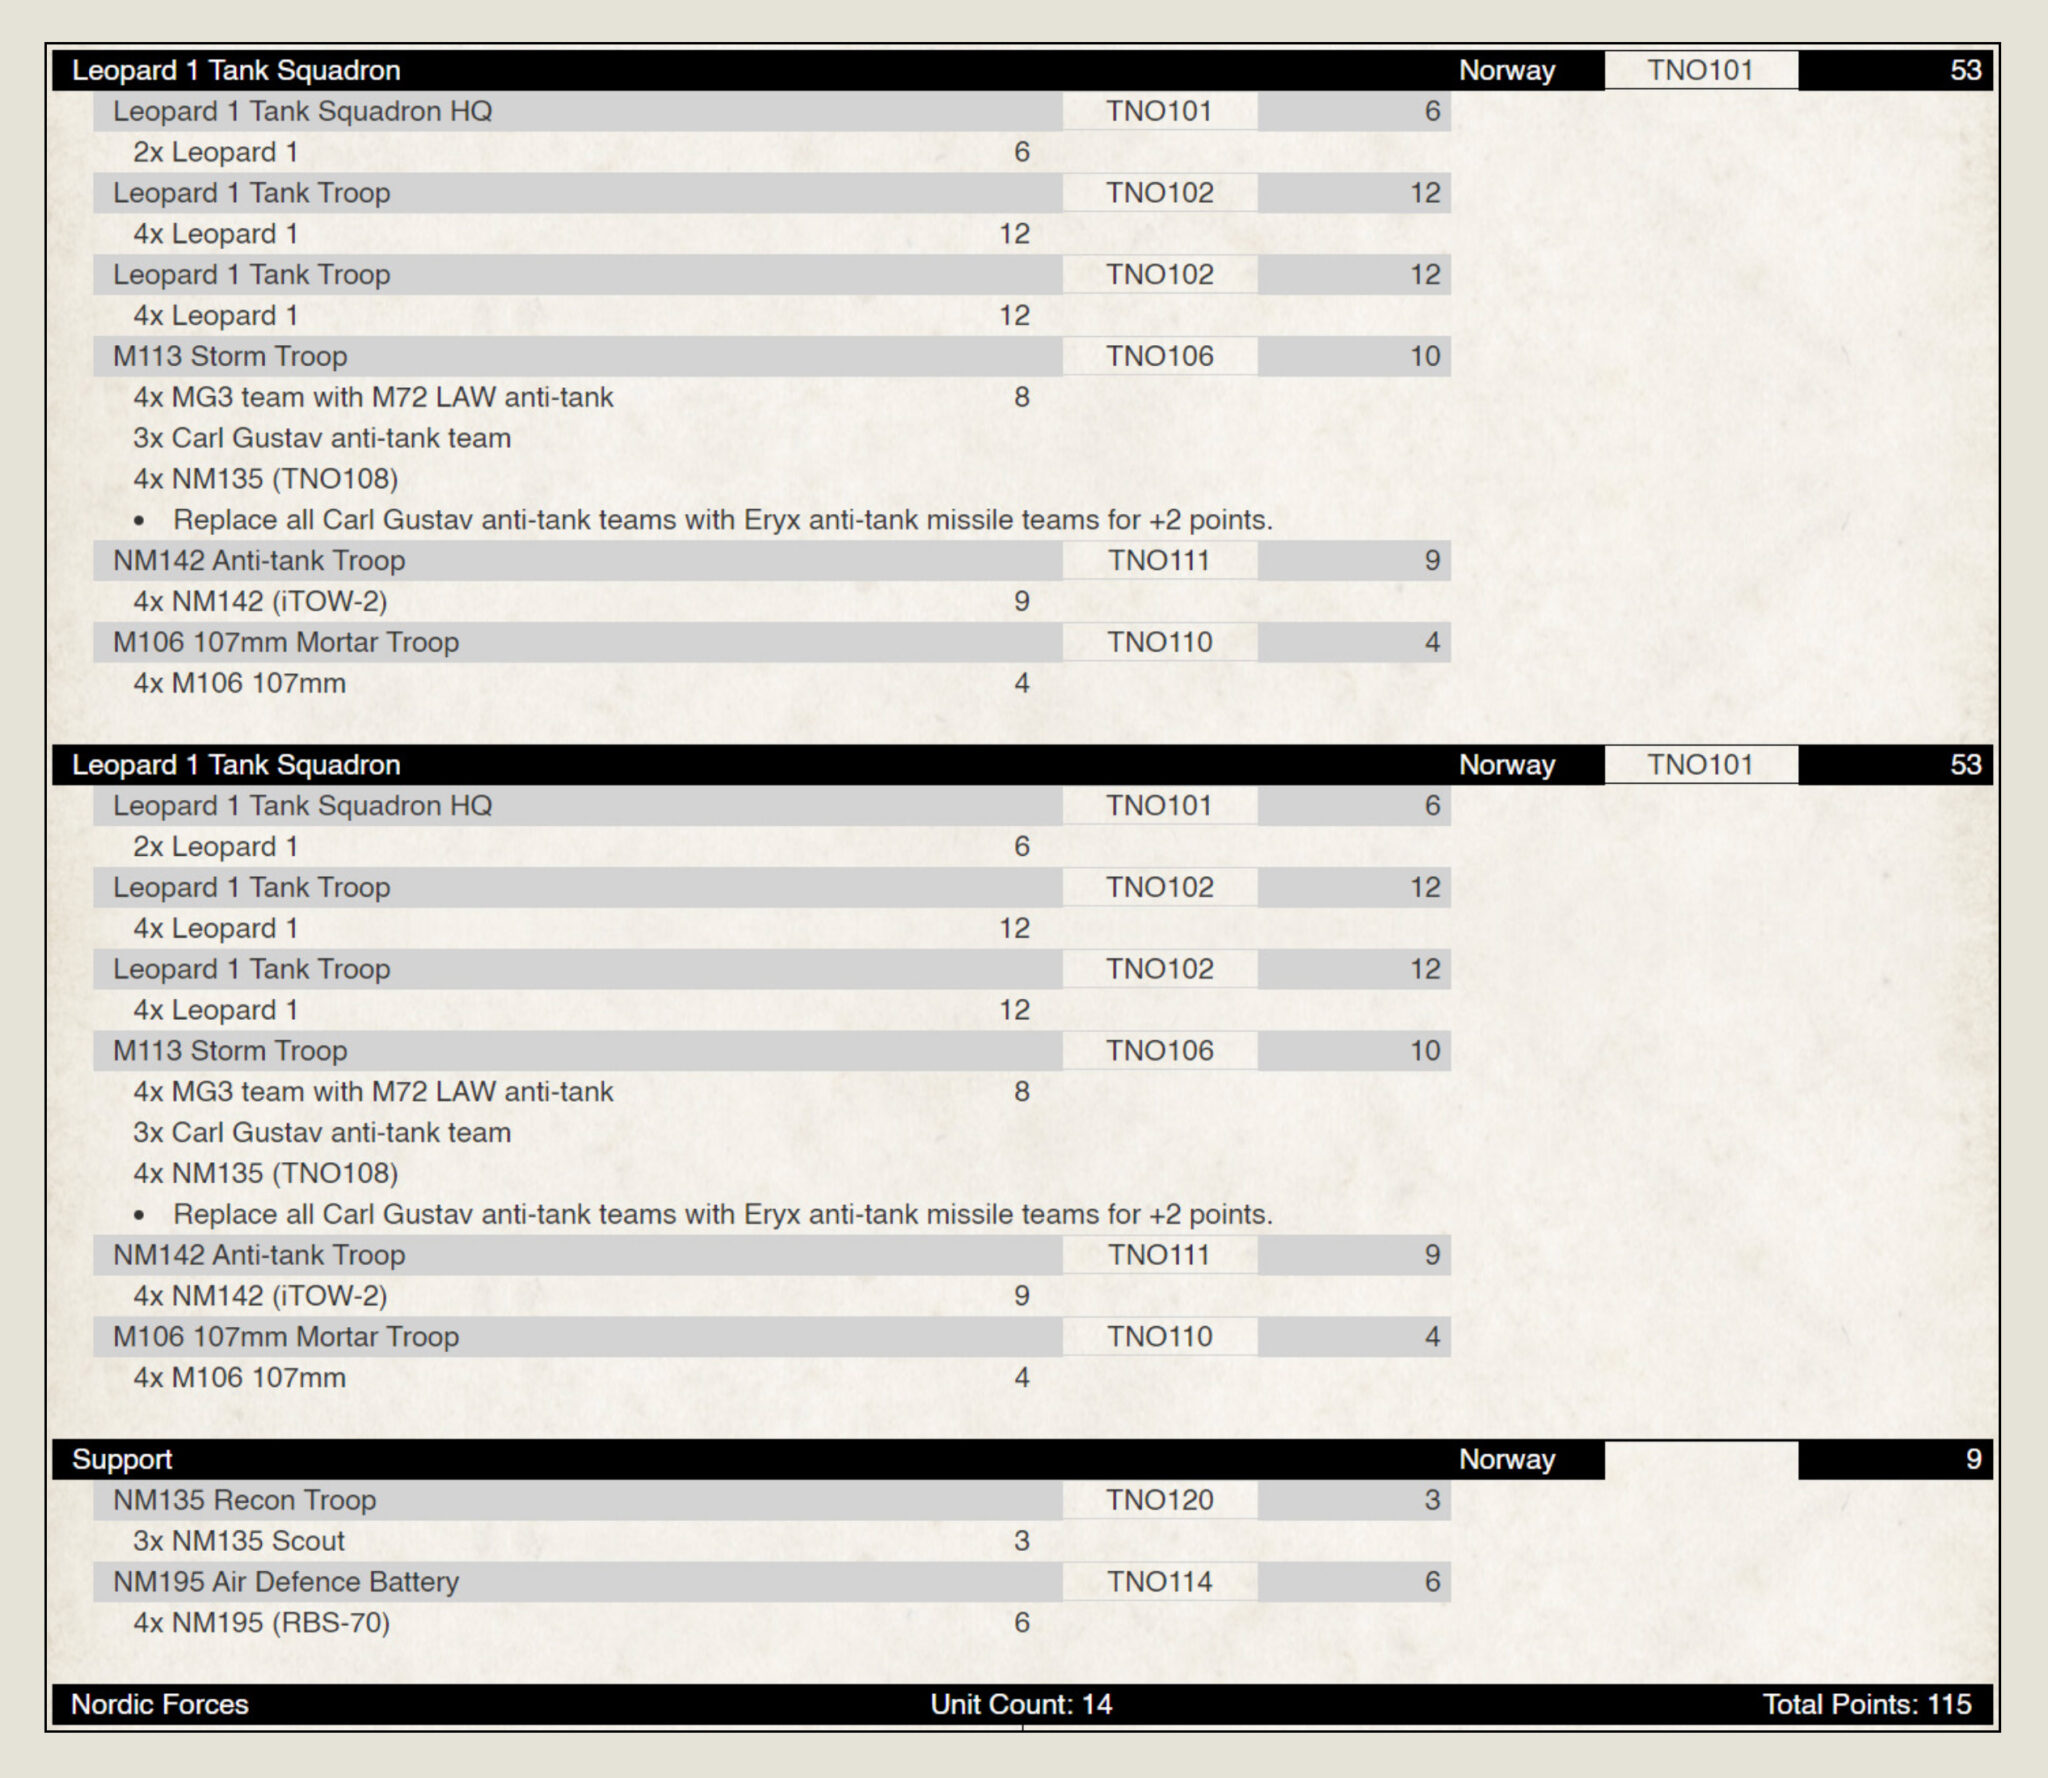
The first sample is two Leopard formations for a total of 20 Leopards. Each formation stacks three tank platoons, infantry, mortars, plus an infantry unit upgraded with Eryx missiles. You also get scouts and RBS 70 air defense to round it out.
The game plan is aggressive flanking. Leopards can move 14 inches, and with Rate of Fire 2 they can punish exposed sides. The catch is morale. Many stats sit at 4+, so once you are down to the last tank, Norwegian units are more likely to bail. However, their 3+ Skill and 3+ Remount help, and the Leopard’s excellent 2+ Cross makes terrain play feel almost unfair.
How the Key Units Actually Win Games
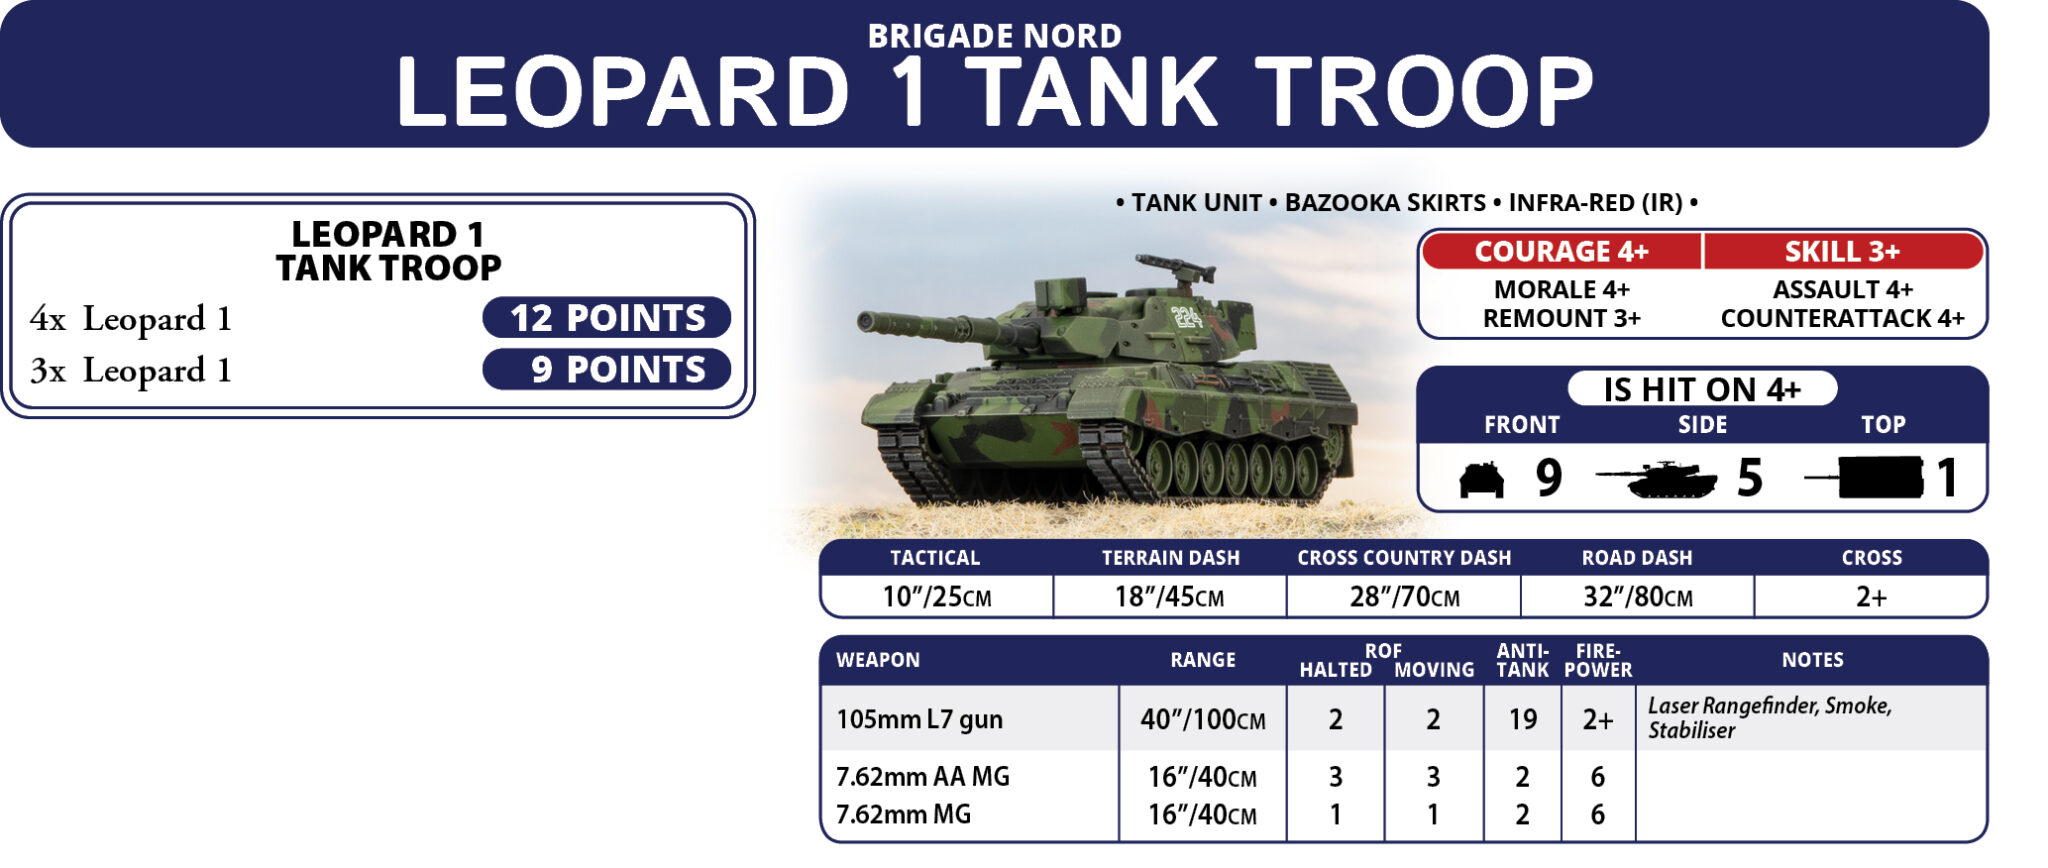
Leopards want cover, angles, and repetition. You blitz to reach safety faster, then you use Shoot and Scoot to duck back after firing. That also lets you keep fire support near your infantry, especially if they get pinned and cannot fully leverage Eryx shots.
Recon acts like your opportunist piece. With Spearhead, it helps you set up smoke or bombardments from better positions. And because it carries a solid 20mm gun, it can also hunt light threats, artillery, or annoying air defense skirmishers.
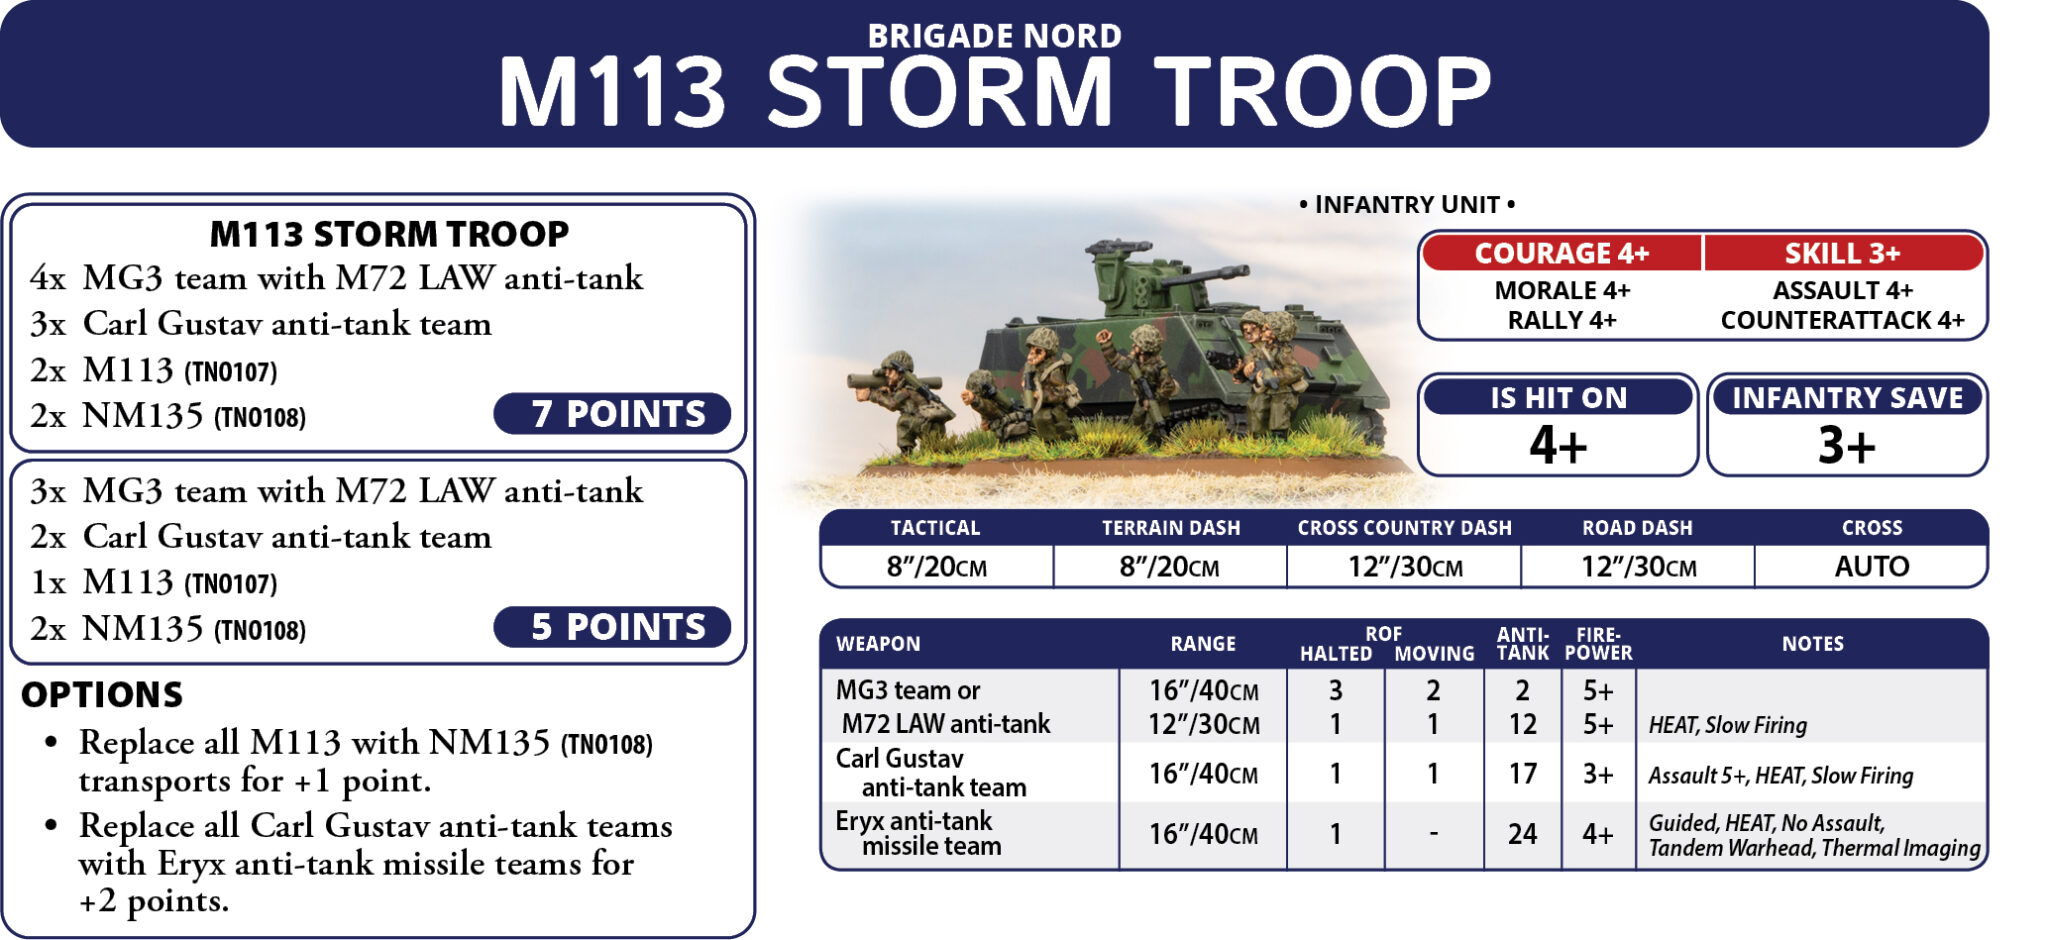
Infantry with Eryx are your objective bully unit. The AT24 tandem warhead is nasty, yet pinning shuts them down, and Norway’s Rally is only 4+. So the smart move is keeping Leopards nearby as a quick reaction force. Meanwhile, the second list adds extra infantry without Eryx, which helps create overlapping fire arcs and steadier board control.
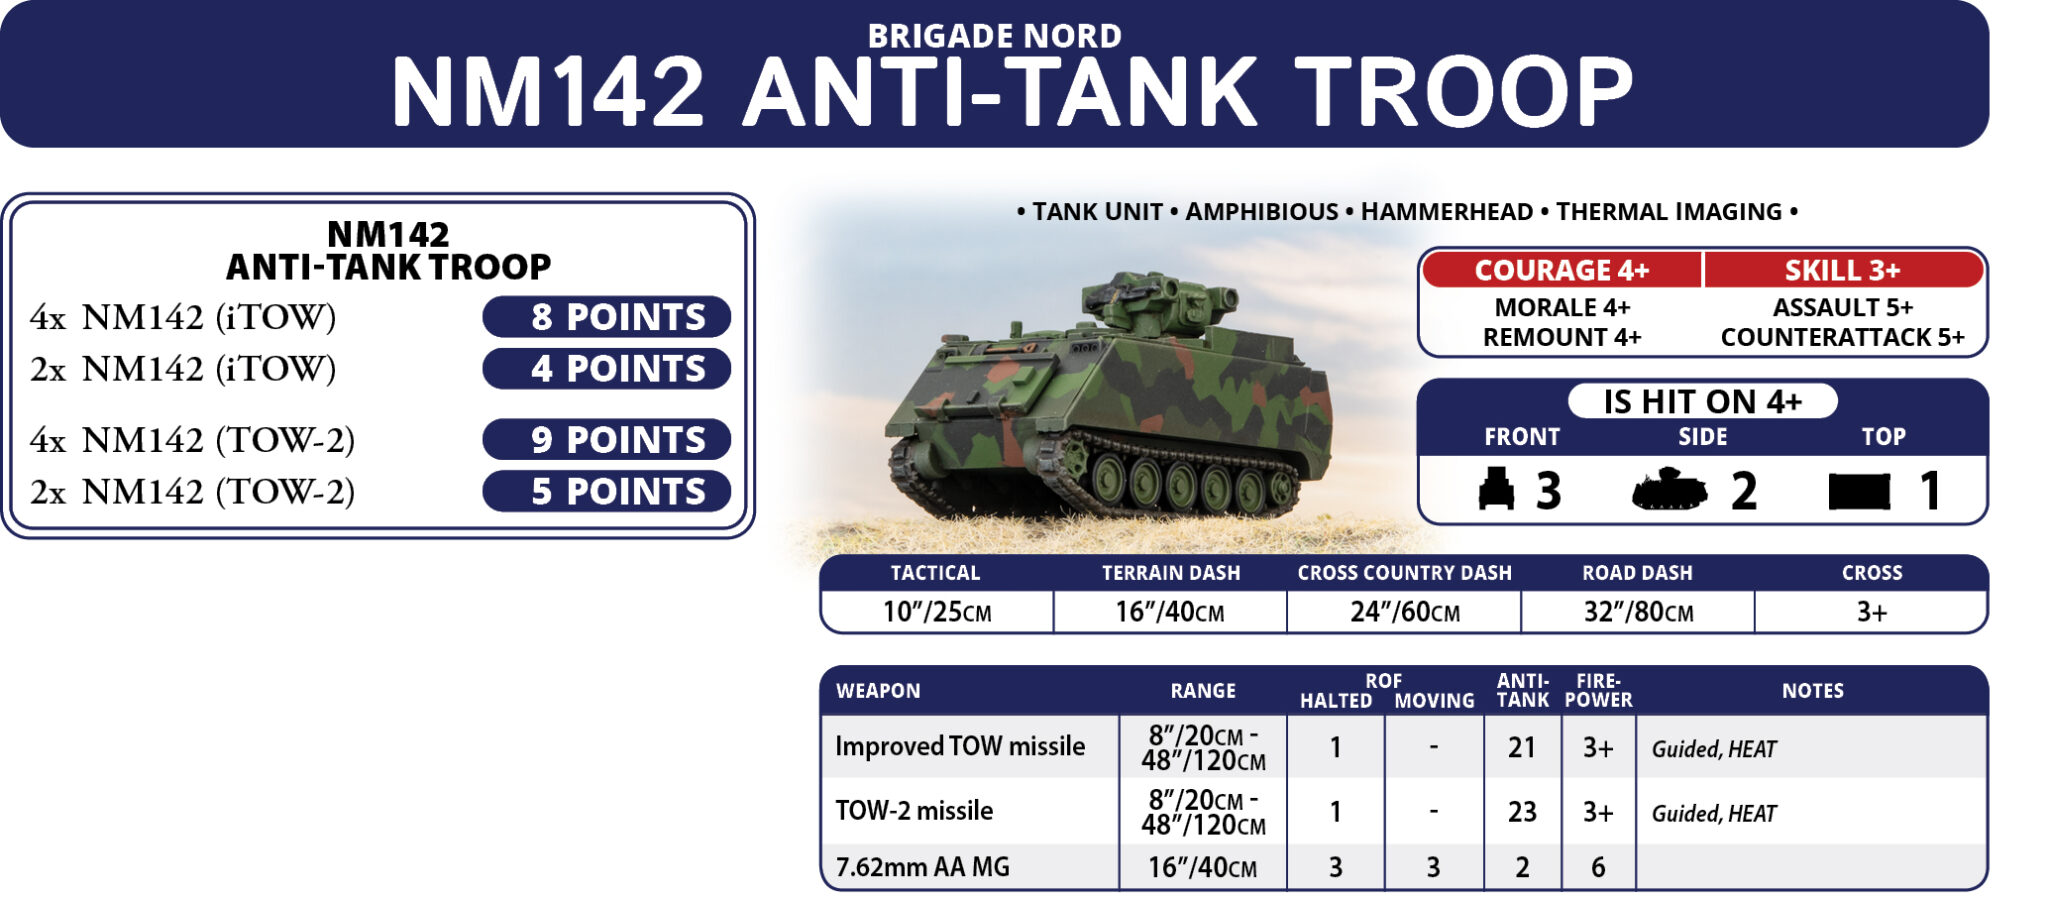
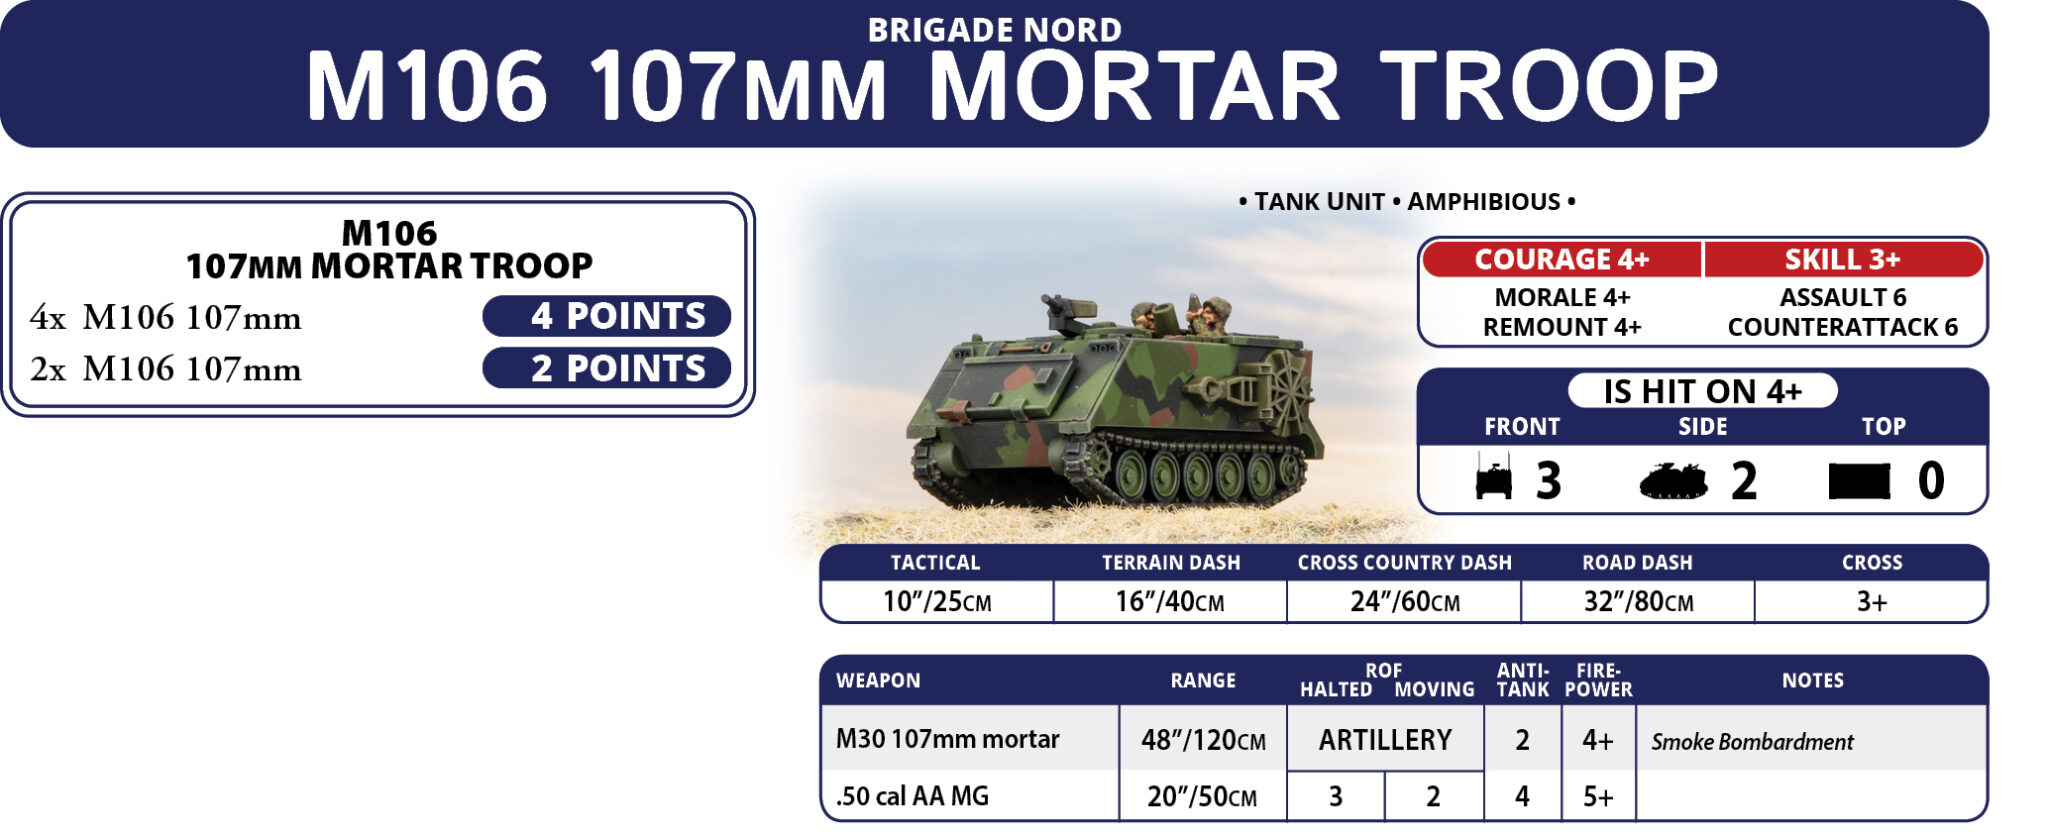
NM142s with TOW 2 and Hammerhead are your stand off anti tank tool. They want cover, and they love deleting targets the Leopards cannot realistically crack from the front. RBS 70 then covers strike aircraft threats, and mortars do the unglamorous work. You throw smoke to protect advances, and you stack bombardments to force infantry to move or eat repeats.
Summary
Norway’s Leopards are all about speed, skill, and abusing terrain, rather than raw armor. So you flank hard, shoot from cover, and scoot back before the clapback lands. Meanwhile, Eryx infantry and NM142s provide the scary anti tank spikes, yet you must manage pinning with tight support. Finally, mortars and smoke keep your momentum alive, while RBS 70 stops air units from turning your plan into scrap. If you play them like predators instead of brawlers, Norway feels lethal, and honestly pretty fun to model too.
And remember, Frontline Gaming sells gaming products at a discount, every day in their webcart!


