The Soviet section of Operation Bagration is stacked, and it hits like a freight train.
As a longtime tabletop grinder, I love when a book lets you build lists that feel cinematic yet play tight. Here, you can tailor hammer blows, surgical ambushes, or relentless infantry floods. Moreover, the background and missions glue it all into one brutal campaign arc. Consequently, if you crave big armor, nasty sappers, and river assaults, this is your playground.
You are getting a fully loaded Soviet toolbox set during the 1944 Byelorussian offensive. Inside, there is historical context, faction special rules, a handy “know your tanks and infantry” primer, and a force diagram bursting with choices. Furthermore, there are river crossing rules and three bespoke missions to recreate those set piece assaults. Therefore, you can run the narrative or tune hard for events without losing theme.
Heavy Armor Headliners

First up are the poster children of steel. The IS-2 Guards Heavy Tank Regiment brings front-10 armor and a brutal 122 mm that deletes dug-in targets, while an IS-85 option trades punch for rate of fire. Meanwhile, older heavies still stalk the north, with KV-1s regiments, and even Churchill lend-lease formations for that stubborn, slow grind.

Additionally, the Heavy SP Artillery Regiment unlocks ISU-122 and ISU-152, which drop direct-fire sledgehammers or artillery barrages from behind the line. Consequently, you can anchor objectives with slabs of steel or crack bunkers and big cats on demand.
Tank Killers and Mobile Guns

If your meta leans armor heavy, the Medium SP Artillery Regiment is your scalpel. The SU-85 brings reliable AT 12, the SU-85M adds thicker front armor, and the SU-100 spikes to AT 15 for long-range threat. Additionally, the Light SP Artillery Regiment fields SU-76 batteries that flex between barrage support and opportunistic flanking shots. Therefore, you can layer threats so your opponent never knows which angle is safe.
Elite Sappers and Shock Troops

The Engineer-Sapper Battalion is your breach team in camo suits and body armor. They bring smoke pots, minesweeping, and a menu of upgrades like panzerfausts, HMGs, flamers, and mortars. Moreover, the Hero Shock Rifle Battalion delivers veteran infantry with strong motivation and optioned Storm Groups for surgical assaults. Meanwhile, the standard Rifle Battalion remains a big, stubborn anvil, with Penal Companies as fearless blenders for softening lines. Consequently, you can pair sappers to punch holes and shove shock companies straight through.
Breakthrough Lances and Hero Companies

For mobile spearheads, the Hero T-34 (85) Tank Battalion is a compact, efficient killer with organic AA, mortars, AT guns, and SMG infantry. Additionally, the Hero T-34 Tank Battalion mixes 76s and 85s and even folds in T-70s or Valentine light tanks for variety. If you fancy lend-lease flavor, the Hero M4 Sherman Battalion brings Emchas with 75 mm or 76 mm guns and the same combined-arms spine. Therefore, your breakthrough force can be tailored to range bands, terrain, and expected armor.
Mixed Armor and Old Soldiers

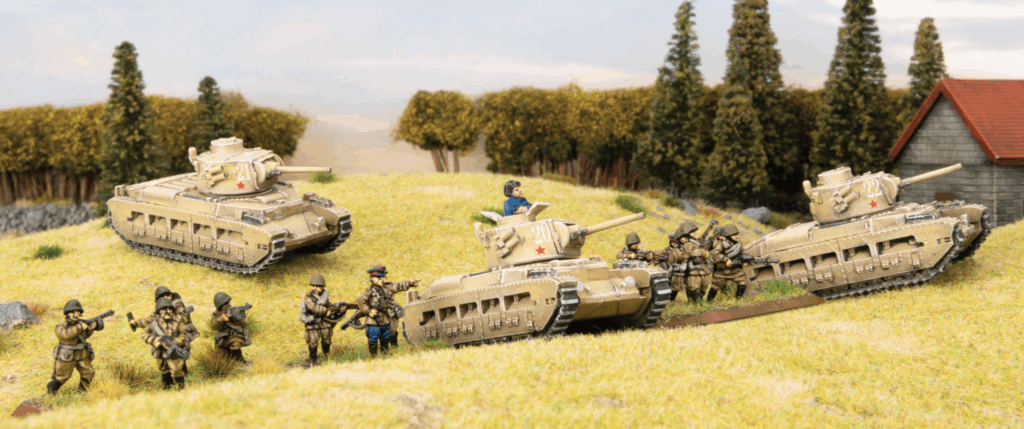
Not every unit got the newest kit, and the book embraces that feel. You will find mixed T-34 Battalions, plus Matilda and M3 Lee Battalions that still soldier on in 1944. Moreover, regular Motor Rifle Battalions play as near self-contained battlegroups with machine guns, mortars, AT, AA, recon, and attached tanks. Consequently, you can field that gritty, transitional look while still putting down real table pressure.
Recon Screens and Big Support

The Reconnaissance Company runs PPSh squads in M3 scout cars or captured 251s, with Spearhead to outflank and BA-64 cars to probe and harass. Additionally, support is stacked: flame tanks to burn bunkers, AT guns up to the 100 mm for long-range duels, and artillery from 76 mm batteries to iconic Katyusha rockets. Finally, the skies light up with IL-2 Shturmovik variants, letting you threaten armor with cannons, bombs, and rockets. Therefore, your list can project threat in every phase and every lane.
Rivers, Ramps, and Red Steel

Operation Bagration did not avoid rivers, and the book leans in. There are River Assault rules, three crossing missions, and a linked campaign that stitches them to the core missions. Moreover, this lets you test pontoon timing, smoke placement, and barrage choreography while your heavies and sappers grind forward. Consequently, your table nights can feel like a mini-campaign without extra homework.
How It Plays on the Table

Practically, you can engineer a one-two punch: ISU barrages and SU-100 lanes force your opponent to hide, then sappers and Hero Shock sweep the breach. Alternatively, you bully midfield with IS-2 bricks and dare anything to trade. Additionally, recon screens set your terms of engagement, while Katyushas pin and shape movement. Therefore, Soviet lists here pivot smoothly between methodical demolition and rapid exploitation.
Summary
Operation Bagration’s Soviet roster is a festival of armor, assault engineers, and combined arms that rewards layered play. Moreover, the formations are deep, the support is wide, and the missions push cinematic objectives like river crossings. Consequently, you can build theme-rich forces that still have tournament bite. If you love red steel, smoke-wreathed assaults, and thunderous barrages, this section absolutely sings.
That is the Soviet spotlight in a single blast furnace of a book. As you sketch lists, start with your breach plan, then pick the hammer that finishes the job. Furthermore, test a river mission and track how your sappers sync with guns and tanks. Finally, paint some dust on those IS-2s and let the Katyushas howl. The steppe is calling, comrade.
And remember, Frontline Gaming sells gaming products at a discount, every day in their webcart!


