Hey everyone, Danny from TFG Radio here, and the deep dive into the World Eaters codex continues just like the blood on the battlefield! Today, we are going to look into the stratagems, relics, and warlord traits available for those that follow Angron and the Eightfold Path! Of course, if you want to show your support, be sure to use this link when shopping at Frontline Gaming to tell me to keep writing about World Eaters, but I’ll keep doing it anyway.
If you haven’t read it yet, my first part of the review focuses on the overall army rules and general concepts, so make sure to hit that up as we keep churning forward and look at the ways to customize your Blood for the Blood God needs. With that in mind, let’s start with how to make your characters go get them skulls.
Warlord Traits:
It is worth noting that there are very few Warlord Traits here, and this really seems to be like the new system going forward, which again makes me think of a new edition coming very soon. There are only 3 generic Warlord traits at all, partially because in Disciples of the Red Angel, only Angron can be the Warlord. Each named Character has their own Warlord trait on their datasheet, but I am only going to focus on Angron and Invocatus as 99% of the time, one of these character is going to be your Warlord unless playing a Boarding Action game. Let’s Dive in!
Battle Lust –
The character can Heroically Intervene within 6″ rather than 3″ and gains Always Fights First.
This is not a novel or unique trait, but on the beatstick characters that you can make like a Daemon Prince, this can be a great way to area-deny an objective. You can screen the character with a squad to protect them while on the edge of an objective, and with 6″ of HI, there is no place an enemy can land and control the objective without being in range of the intervention. Again, this isn’t bad by any means, but it is not the standout choice.
Favoured of Khorne –
In your Command Phase, if the Warlord is on the table, gain 1 BTP.
Here is the standout choice if you are taking a generic warlord. Getting up to an extra 5 BTP is pretty sweet, and since you won’t have Angron here to soak up 6 BTP for Reborn in Blood, you can get some of the other buffs much faster. Even just for the first turn, getting 1 extra means that you just need to kill 2 units, or 1 vehicle, to get the +1 charge bonus, which is a huge help for an army that needs to make charges to win. Whether it be Boarding Action or a full 2K game, this is the standout choice for a Warlord Trait, especially since you can slap it on even a Master of Executions to hide all game.
True Berserker –
The Warlord takes half damage (rounding up) from melee attacks.
This one is fun that does combo well with Helm of Brazen Ire for a really, really annoying Jugger Lord that is annoying as hell to kill. With half damage and -1 to Wound, especially on T6 with 8 Wounds on a 2+/4++, a Jugger Lord can start to tank some pretty heavy melee threats for at least a round or two. Again, is this better than Favoured of Khorne? Sadly no.

The Red Angel –
Enemy units lose Objective Secured when within 6″ of Angron.
You will likely end up with this one as if you take Angron, he has to be Warlord, so this is the Warlord trait that you are going to get. It certainly isn’t bad as shutting down ObSec means that you can snake objectives if you combo Angron and other forces like Eightbound into the same objective, or if you happen to leave just one model alive after Angron murders the rest. Especially since Angron is designed to come back and be a problem in the late game, shutting down ObSec gives you a bit more leverage on the mission, and that’s not bad at all. He still can’t win against a few models in terms of controlling objectives, but still, there is play here, so don’t forget it.
The Eightfold Path –
Invocatus and up to 2 Core Units within 9″ can make a Normal Move before the first turn begins.
Here is the money Warlord Trait as it opens up a highly effective, if predictable, game plan that leverages everything that World Eaters want to do. The “Avocado Pin” is essentially taking this Warlord Trait with 2×5 or 2×6 Eightbound and then rocket them up the board on the first turn. With correct positioning, you can move the Eightbound up 11″ before the game begins and then if you are going first, move up another 11, so that’s 22″ away from where you deployed, and right within prime charge range of your opponent. You can even further combo this with a first turn Dreadclaw full of Berserkers, and now you have your opponent pinned into their deployment zone as they have to fight through your first wave. All of this is certainly cheap enough to also have a second wave lined up to crash in later. For a lot of highly competitive lists, this is going to be what you see as the Warlord Trait as the ability to pin your opponent on the very first turn is incredibly strong, and this is likely the best way to counter the bad matchups against Tau, Guard, and Votann.
Well, that’s it really for Warlord Traits, but what about shiny gifts to give to your generic characters? Let’s take a look at the loot available for Khorne’s most favoured mortals and immortals. These are separated by whether they are for Standard World Eaters or Disciples of the Red Angel.
Standard WE:
Berserker Glaive: Lord on Juggernaught or Master of Execution only
S+2 AP-3 D2 and on a hit of 6, score 2 additional hits.
This isn’t a terrible relic by any means as on a Jugger Lord, that is 8 attacks on the charge at S9 AP-3 D2, so just statistically, you are going to score about 9 hits from this, let alone have the opportunity to spike into the double digit range. If taking a generic Jugger Lord, this can make them a solid piece-trade unit that is only 125 points that can take on a decent squad of Primaris or wreck most characters in a single round. That said, it’s also not amazing either as D2 isn’t as strong as it used to be as there is a lot of negative -1 Damage out there, but if you have the CP and the Jugger Lord, this is not bad for making a missile. It is very much wasted on a Master of Executions as they lose their inherent ability to do mortal wounds as that is on their standard weapon, which this replaces.
Helm of Brazen Ire
-1 to to wound against the bearer.
This is the best of the standard WE relics as it makes either a Jugger Lord or a Daemon Prince far harder to kill, either at range or in melee. -1 to hit can be easy to get like say, cover, but -1 to wound is a bit rarer, and when you throw it on a T6 model, even lascannons are only wounding half the time now. A WE Daemon Prince can do some considerable damage, so being able to throw them into a fight and even survive the clapback is gold. A standard Jugger Lord is actually the tankiest generic character WE have thanks to a 3+/4++ on T6 with 8 wounds, so just having more of a doorstop that can tank a heavier threat while you position to deal with it can be incredibly helpful.
Talisman of Rage
In Command phase, select one Core unit within 9″ and give them 6s to hit autowound.
You can already get this for your whole army with BTP, but that is expensive, so there is some place to this for an early game punch like the Lord Invocatus super-moving Turn 1 Eightbound bomb, but really, that’s about it. This one is generally going to be ignored unless relics start being free.
DotRA
Burning Plate
+1 armor save and +1 wounds to the bearer
Just a solid, dependable relic that is very similar to the Helm of Brazen Ire, making either a DP or a Jugger Lord more survivable. Again, the Jugger Lord gets a bit more mileage out of this thanks to a 4++ all the time, not just against shooting, so if you want a fast, tanky character to absorb a threat for a turn or 2, here you go.
Soul Burner
Range 12″ Assault 2d6 S7 AP-2 D1 autohitting gun for a Daemon Prince.
This isn’t a bad relic actually as it gives Disciples a bit of ranged threat, perfect for clearing chaff to open up charge lanes. A winged DP can essentially act as a harassment unit, flaming down chaff to open up charges, and whether armed with an Axe or Sword (but in WE, Sword is honestly better, which is a shame), the DP can still take on decent threat units or characters while hopefully staying safe behind some Eightbound. Would I take it over Burning Plate? It just depends on what I feel my list would need, but if I wanted just more pure offense, this is a good choice.
The Skull of An’Gr’Ant
In the command phase, select one enemy unit that is visible to the bearer. The bearer rerolls all wounds in melee against that unit.
So for pure offense, this really is the best, making either a Jugger Lord or a DP an absolute murder machine. This is the one relic that is likely the one being taken as it increases damage output by a wide margin. a DP with the Skull is going to put in a ton of work against just about any target, and they become a reliable hard-target killer as on average, a DP with Sword (with no BTP bonuses active) is going to put 16.67 wounds on against a Knight chassis, but if you start adding BTP bonuses like AP-4 or exploding 6s to hit, and suddenly, it becomes almost average for the DP to just one shot that bad boy. If you want to be able to just choose a unit and let a DP go HAM, here you are.
And that is all the relics, a very slimmed down selection, which on one hand is nice as it removes a lot of analysis paralysis from the equation, but of course, on the other hand, when a relic is not as strong as another, it is very obvious. Also, WE lack a custom stratagem to purchase an additional relic, which means right now, you only ever get one, making it even more obvious that there is generally one “correct” answer per subfaction.
But what about your tactical decisions in the game itself? That’s where Stratagems come in, and again, they are very paired down, which means they are easier to remember, but you definitely don’t have the same bench to pull from when corner-case decisions reveal themselves.
World Eaters
Aggressive Intervention: 1 CP
Use in opponent’s Charge Phase. One World Eater Core unit in your army can Heroicially intervene and may do so within 6″.
This is just an amazing stratagem that offers some great counter-play and really leans into the MSU style of the World Eaters. If you have a lot of units that are often layered over each other, an opponent charging in to take one can suddenly get caught by another unit, so not only are you losing a unit for 1 BPT, you are killing another for 1 more, and then bonus, you are in the better position for your next turn. Being able to move in your opponent’s turn is just amazingly powerful when played right, and this stratagem alone is a great reason to stay in just World Eaters rather than Red Angels. It also means that you need Core in your army, so Berserkers, Terminators, and Eightbound (or even Helbrutes).
Blood Frenzy: 1CP/2CP
Use in the Fight phase when an enemy unit is selected to fight. Select one Core unit, and if it dies before being able to fight, after an enemy unit resolves its attacks, any destroyed models may make their attacks before being removed from play. 1 CP for Berserkers and 2 CP for anything else.
This is another amazing stratagem that ensures you are going to win the war of attrition. Fight on Death is amazingly powerful, especially for World Eaters who are just about the best melee army around, and since you can use it on Berserkers for only 1 CP, you get a ton of mileage out of this. You can put a small (or even larger) squad of Berserkers out front to absorb a charge, and when they die, they get to punch right back, and Berserkers are not slouches at all, so most units are going to either be wiped as well or crippled. For 2 CP, this also pays dividends on Terminators or Eightbound, but it is really optimal with Berserkers who die easier and you spend less to activate this. This is also a mean, mean combination with Aggressive Intervention as a super hard melee threat like Mortarion or Skarbrand can come in, hit a unit, get intervened by another, and then have the one unit that is being murdered swing on death while your other unit also gets to finish them off. Just a top tier strat that you should never forget.
Gory Dismemberment: 1 CP
Use in the Fight phase and target either a Core or Character unit. When that unit fights, any natural 6 to wound is a mortal wound (capped to 6 total).
This is another just amazingly great stratagem that pushes the damage output of even a basic unit so much higher. Berserkers, Eightbound, and Terminators get a lot of mileage out of this stratagem as they have the volume of attacks to really have a good chance of reaching that cap. 5 Berserkers get 2.8 MW on average, 3 Eightbound get 2.1 MW, and 5 Terminators get 3.32 MW, which isn’t bad when you consider this is all minimum squads, and these numbers jump if you get +1 to hit from Blood Tithe into the equation, upping the average outcome to 3.5/2.6/4.1 MWs respectively. This is again for minimum units, so large units of Berserkers can really, really get you that 6 MW cap. This also works on Angron if doing his sweep as his 39 attacks are going to mostly cap you out. This is another stratagem that is so cheap for so much extra damage that you should never forget it.
Icon of Wrath – 1 CP
Use this in the Charge Phase when an ICON unit (just Berserkers so far) charges. Roll 3d6 and drop the lowest die for that charge.
This is another amazing, going to be used every game style stratagem that gives Berserkers a ton of additional threat. Even on the first turn, Berserkers near Invocatus are moving 8″ and then can charge 3d6, drop the lowest, which is pretty decent threat range, so if your opponent tries to be crafty and move around the mid board, even your “slowest” unit can suddenly rush through and tag them. Really, this also makes Berserkers in Dreadclaws/Termites incredibly effective as once you have the +1 to charge Tithe up, an 8″ 3d6, drop the lowest (with a CP reroll if needed) is something you can start to expect to happen rather than hope to happen. Again, whether building for an out of reserve surprise or just trying to fish for a long charge, this is an amazing stratagem and a big reason why you should be spending 5 points on an Icon.
Red Butchers – 2 CP
Use in the Fight Phase when a Terminator or Eightbound units fights. Until the end of that phase, they gain +1 damage.
Another stellar stratagem that is a bit spendy, but it makes Terminators and Eightbound the two scariest melee units that WE have outside of Angron. Eightbound are already D2 (with the unit leader being D3 base with Lacerators), so pushing them up to D3 can mean that they will annihilate other heavy infantry or even most vehicles. 3 Eightbound do 20.71 wounds to a Bladeguard Unit, so 5 dead. Terminators also get some big mileage here, doing 18.3 wounds through, so 4 dead Bladeguard. This is all without any Blood Tithe bonuses, so the damage potential can go way up with +1 to hit or autowounds on 6s to hit. It is worth noting that a minimum Eightbound squad is 55 points cheaper than minimum Terminators, but Terminators are generally more survivable. All told, even a small squad gets a big boost in damage, so taking either yields dividends here.
Scorn of Sorcery – 1 CP
Use in the opponent’s Psychic Phase after a test is passed by an enemy within 24″ of a WE unit. On a 4+, the power is denied.
A classic, standard anti-psyker stratagem that can be game-winning against certain armies. Need to stop a Quicken or Gate of Infinity? Here you go. Need to shut down a blessing? Here’s a chance. While it is only one attempt, it is still a nice back pocket to have, and it combos insanely well with a Khorne Daemon Patrol of Karanak and 10 khorne dogs, as they give you deny chances as well as another stratagem that does the same thing. This can be enough psychic defense to shut down crucial elements of an enemy’s plans.
Skulls for the Skull Throne! 1/2 CP
Use when an enemy Warlord is destroyed by a melee attack by a WE character. You gain one of the following: 2 BTP or +1 to advance/charge for the WE character for the rest of the game. If you spend 2 CP instead of 1, you gain both.
This is a very much a cornercase of cornercase stratagems, but when it hits, it’s sweet. The best possible use for this is Angron hitting an enemy Warlord, killing them, and then getting the permanent +1 to charge, so when he dies and comes back, he only needs a 7 on the dice to hit a charge out of reserve. Otherwise, this probably won’t come up much.
Smokescreen
Use in your opponent’s shooting phase. One smoke screen unit is -1 to hit at range.
Standard pop-smoke, but a bit sad that it is a stratagem here, and well, this is useless if not running Rhinos or a Landraider, but hey, sometimes it may be clutch, I guess.
Red Angels
Apoplectic Frenzy – 1 CP
Use in your movement phase. When a selected unit advances, do not roll; they just move an additional 6″.
This is an interesting stratagem that would have been far more powerful if there was a WE unit capable of advancing and charging. Especially in Red Angels with a very limited roster of choices, this one feels odd, but it has plays. Do you have first turn and your opponent deployed super far back? Send Angron a blistering 22 inches forward and make them have to deal with him. Late game objective grabbing? Eightbound and Exalted move 15″ with this, so that can absolutely be critical for jumping from one objective to another, especially with objective secured units. It is not a stratagem that is likely going to be essential, but it is a nice back pocket.
Bloodscent – 1 CP
Use this is your opponent’s movement phase when an enemy unit falls back from an Eightbound unit. That Eightbound unit can move consolidate up to 6″ after the enemy moves.
This is one of the main stratagems to remember if playing Red Angels as it allows you to hit a unit, force it fall back, and then follow up and either tag more enemy units or keep it engaged. This is great movement control, and being able to move in your opponent’s turn is just so, so good as it generally, that is the one phase that a player has total control over, so taking some of that control can absolutely derail a perfect plan. The hardest part of this is getting your Eightbound to where this can be maximized, but if you get there, this can be one of the fulcrum points of the game for sure. You need to build your game plan around this stratagem.
Bloodthirsty Determination – 1 CP
Use in the charge phase and select a unit. It ignores any or all modifiers to charge rolls for that phase.
This is another backpocket stratagem that isn’t going to be useful every game, but when it is, it can absolutely be amazing. Whether it is getting around Tanglefoot Grenades or just charging across craters, don’t forget you have this, but also, you can’t expect to use it every game.
Diabolic Machines – 1/2 CP
Use in your Command Phase and select one Daemon Engine or Machine Spirit unit. It acts as if at Full Wounds. If Titanic, 2CP, if not, 1 CP.
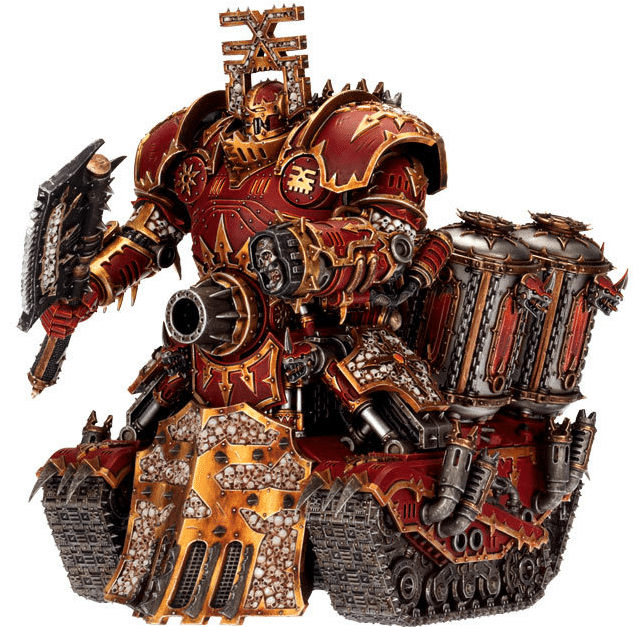
Red Angels has the most support for Daemon Engines, and this is why. Getting a Lord of Skulls to shoot at Ballistic Skill 3+ when you need it matters, or even getting a Defiler or Maulerfiend to act at full for a critical shooting and/or assault phase. If you are really going to lean into DotRA as a monster-mash style list, this is one of the cornerstones as it is the only stratagem available to World Eaters writ large that helps out Daemon Engines, who have no real support outside of this stratagem.
Furious Surge 1 CP
Use in your opponent’s shooting phase after a unit has completed its attacks. Select one Eightbound unit that lost one or more models as a result of that attack. That Eightbound unit can make a normal move.
This is a fun stratagem that isn’t as powerful as the Berserker’s native ability since it is a normal move, meaning it cannot bring you into engagement range, but it is another trick in the “move during your opponent’s turn” hat that can pay big dividends. Lose one model to just pot shots? Move the Eightbound 9 (or 11 if near Invoc) and walk out of Line of Sight of another threat or move forward to suddenly snake an objective that you were just outside range of. This can create a huge order of operations error for your opponent as they have to carefully consider how much damage they will do and if they miscalculate, it can be easy to suddenly lose a precious shooting activation or 2 as their target repositions. While odd, you can also use this to go backwards if perhaps you lost a backfield objective holder to enemy shooting, and if they take a model off of our your Eightbound, you can move back and make sure you aren’t getting skunked on the primary. Again, any time you can move when you aren’t supposed to is good.
Gratuitous Bloodletting – 1 CP
Use this stratagem in the fight phase. Select an enemy unit that is under Half-Strength that is being attacked by a World Eater unit and gain +1 to wound against it.
This is a bit of a miss, honesty. WE aren’t generally going to leave many units at just half-strength as you are either winning or losing big in melee, but if you are playing DotRA with a heavy Daemon Engine shooting component, this can let a minimum squad of Eightbound or Exalted finish up a unit with ease, but outside of that, it probably won’t come up much.
Terrifying Assault – 1 CP
Use in your charge phase. Select one enemy units being charged by a WE unit: They cannot overwatch, set to Defend, and suffer -1 to hit in the next combat phase.
This is a solid stratagem that gives DotRA some play against heavy gunline armies as turning off Overwatch is critical. The -1 to be hit also has play as perhaps you are charging a unit that you are not sure that you will kill, but you want to limit the damage you take back, this can really help. Really, the main reason that you are taking this is to turn off Overwatch, especially if you can line up a good charge where you are likely to get several units, tying them up and locking down your opponent’s line. Especially since this is DotRA, it combos very well with Bloodscent as after you get in there, kill some stuff, and they start to run away, you can keep pressing forward with your Eightbound.
Violent Dismemberment – 1 CP
Use in the Fight phase when a WE unit destroys an enemy. Until end of the turn, the unit gains an Aura that is -2 Leadership and -1 to combat attrition tests.
This is an interesting stratagem that can work, if you are going against the right enemy and you position for it. Ideally, you are in a multi-combat where you can focus on blitzing down one enemy and maybe just killing a model or two in the other, forcing a -(2+X) scenario, or even -3 with 8Bound, where even losing just two models can mean a failure. That said, you don’t want a unit to flat out die to morale because that doesn’t trigger Blood Tithe, so this one can maybe do some work, but probably not.
So in the end, the relics and stratagems are hit and miss as they tend to be, but one theme is clear to me: World Eaters are just better than DotRA. Considering that DotRA is so limited in what it can take, the lack of outstanding, army shaping relics and stratagems really pulls it down more, and the general World Eaters stratagems are just so strong. Between Red Butchers, Blood Frenzy, Icon of Wrath, and several other stronger, more corner-case strats, the standard World Eaters just really run away with it. Especially with the flexibility to make Invocatus the Warlord and skip Angron (shock, I know), you just get more mileage out of what World Eaters can do.
DotRA has moves to be sure, but if playing competitively, for me, standard World Eaters have more tricks, more power, and more movement shenanigans, and despite not having Obsec, Eightbound are better when they can Fight on Death or gain +1 Damage. That all said, still, there are plenty of ways to have fun with this codex, and that’s some of the highest praise that I can give. Thanks as always for reading, be sure to use that affiliate link when you use Frontline’s wonderful online shop, and be sure to honor Khorne in all that you do, as long as all that you do involves Kill Maim Burn! Stay turned for part 3, model highlights and lists!
#mc_embed_signup{background:#fff; clear:left; font:14px Helvetica,Arial,sans-serif; } /* Add your own Mailchimp form style overrides in your site stylesheet or in this style block. We recommend moving this block and the preceding CSS link to the HEAD of your HTML file. */And remember, Frontline Gaming sells gaming products at a discount, every day in their webcart!