Today we look at the last of the Tau troop choices. Click to read on, or check out the Tactics Corner for more reviews and strategies.
Overview
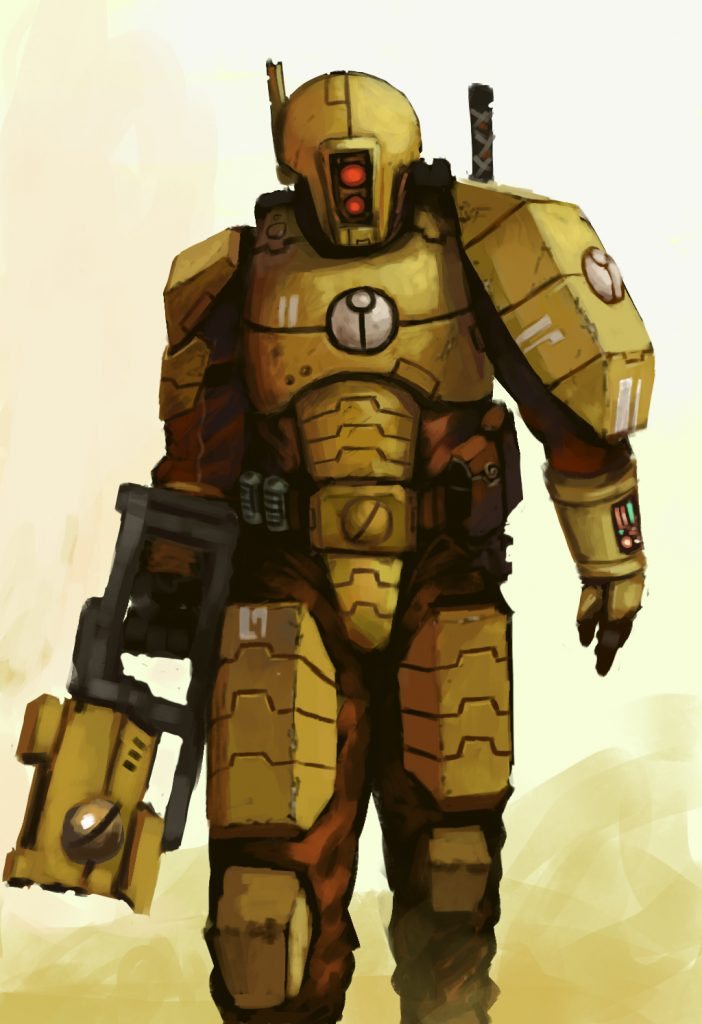
Breachers are a typical Tau infantry unit, with a statline to match. They start with a very average 6″ movement as well as strength and toughness three, all to be expected from most such models in the game. Weapon skill 5+ is rather poor, but ballistic skill 4+ is fine and is the more relevant of the two. One attack and leadership seven are both pretty middling, but a 4+ armor save is actually pretty decent, especially since they are able to easily get cover. One model in the unit can be upgraded to a Shas’ui, getting +1 attack and leadership at no additional cost. At 85pts for a squad of ten, Breachers are a very solid deal and tend to be the most common of Tau troop units.
Special Rules and Wargear
Aside from the universal special rules that come with being in a Tau detachment, Breachers only have one rule of their own- namely, their DS8 support turret, which can be deployed as an action in the exact same way as their Strike cousins can (provided it is purchased, of course.) However, as Breachers tend to be much more mobility-oriented they will rarely want to purchase the turret, so it can be considered something of a non-starter for them.
Aside from that, a Breacher’s real strength lies in its weaponry. Every member of the team comes with a Pulse Pistol (12″ S5 AP0 Dmg1 Pistol 1) as a backup weapon, but their main armament is the Pulse Blaster, which has a variable profile based on range. The “long range” mode is 14″ reach with S5 AP-1 Dmg1 Assault 2, a very respectable set of numbers on par with the Pulse Rifle, provided it can reach of course. However, the real strength is in the “short range” mode, which only goes out to 8″ but ups it to S6 and AP-2, making it a very dangerous weapon against infantry of all sorts as well as light tanks and monsters. Note that any effects that increase a weapon’s range increase both these values, so a Bor’kan Breacher can be very dangerous indeed.
The team’s Shas’ui may take a Markerlight for 5pts, giving them the ability to use it as normal. The team can also take up to two drones, with the normal Gun, Shield, and Marker available as well as the Guardian Drone (which makes wound rolls of 1-2 against the team always fail.)
Uses
Breachers are essentially just an additional loadout for Strike Teams in most respects, although they do technically have access to slightly different stratagems. But all of the strengths and weaknesses of Strike Teams apply equally to them, but with a different weapon profile on their main gun. However, despite the superficial similarity, this ends up giving Breachers a significantly different role on the battlefield.
Outside of 8″, a Breacher is just inferior to a Strike member- but with 9E being played in such close quarters much of the time, this shorter-range distinction is especially relevant, and even more so because Mont’ka is generally the philosophy of choice for Tau armies. While Breachers may have a very narrow band where they function best at, that band is the same one that many armies want to close into in order to try and catch the Tau in close combat, so they can help cover a significant weakness in the overall Tau strategy.
Moreover, Breachers are quite good at doing one of the things that Tau often struggle with, namely clearing and claiming an objective. With their Assault weapons (so they can advance) and Devilfish support, Breachers can easily leap across the table shockingly quickly and drop a load of firepower on an enemy unit, and their high strength and good AP on their guns mean that they are very likely to put serious damage onto the enemy (or even destroy them.) Using Coordinated Engagement or their own stratagem, Breach and Clear (which lets them ignore cover bonuses and reroll wounds) make this even more likely, meaning that the squad presents a very real threat to all but the very toughest of foes.
Critically, they are also Objective Secured as well, and with a large-ish squad size and small bases it isn’t hard to cram more of them into the 3″ bubble than the enemy has following your shooting phase; while Crisis or other units can often clear most of the enemies out of an area, many armies pack sources of ObSec to ensure that even a single model will keep you from tearing the objective away from them; Breachers can get past this and help a Tau player even their score out more, keeping them in the game.
Support from a Cadre Fireblade and/or Devilfish isn’t mandatory for Breachers, but it does help them a lot when doing their job- as a troop squad that wants to be actually doing something (as opposed to just sitting in the back observing), Breachers tend to need a bit of a push to really make things happen- and that means some Markerlights or other support from allied units. Similarly, a Devilfish helps them by adding both firepower and the ability to get where they need to go more easily (and avoid enemies that might otherwise be a big problem.) Breachers usually work best when you can get pairs of them working together; one squad may not finish the job, but two squads usually is enough concentrated fire to eliminate a target.
Closing Thoughts
Although not a standout choice from the Tau book, Breachers are much improved over previous iterations and the simplification of their range bands has made them a lot more workable- it’s far easier to get the whole unit within 8″ instead of within the old 5″, so you can generally rely on them all having their “good” profile when you need it. They aren’t a given over the other troop choices in the codex, but I think they do compete strongly with them and more often than not will get the nod- although having some of each remains a very viable option, and arguably still the best way to go.
As always, remember you can get your wargaming supplies at great discounts every day from the Frontline Gaming store, whether you’re looking to start a new army or expand an existing one.