

Hi everyone, Michael here with another hobby tutorial. Today, I look at putting together some chain link fences. For more reviews and analyses, check out the Tactics Corner.
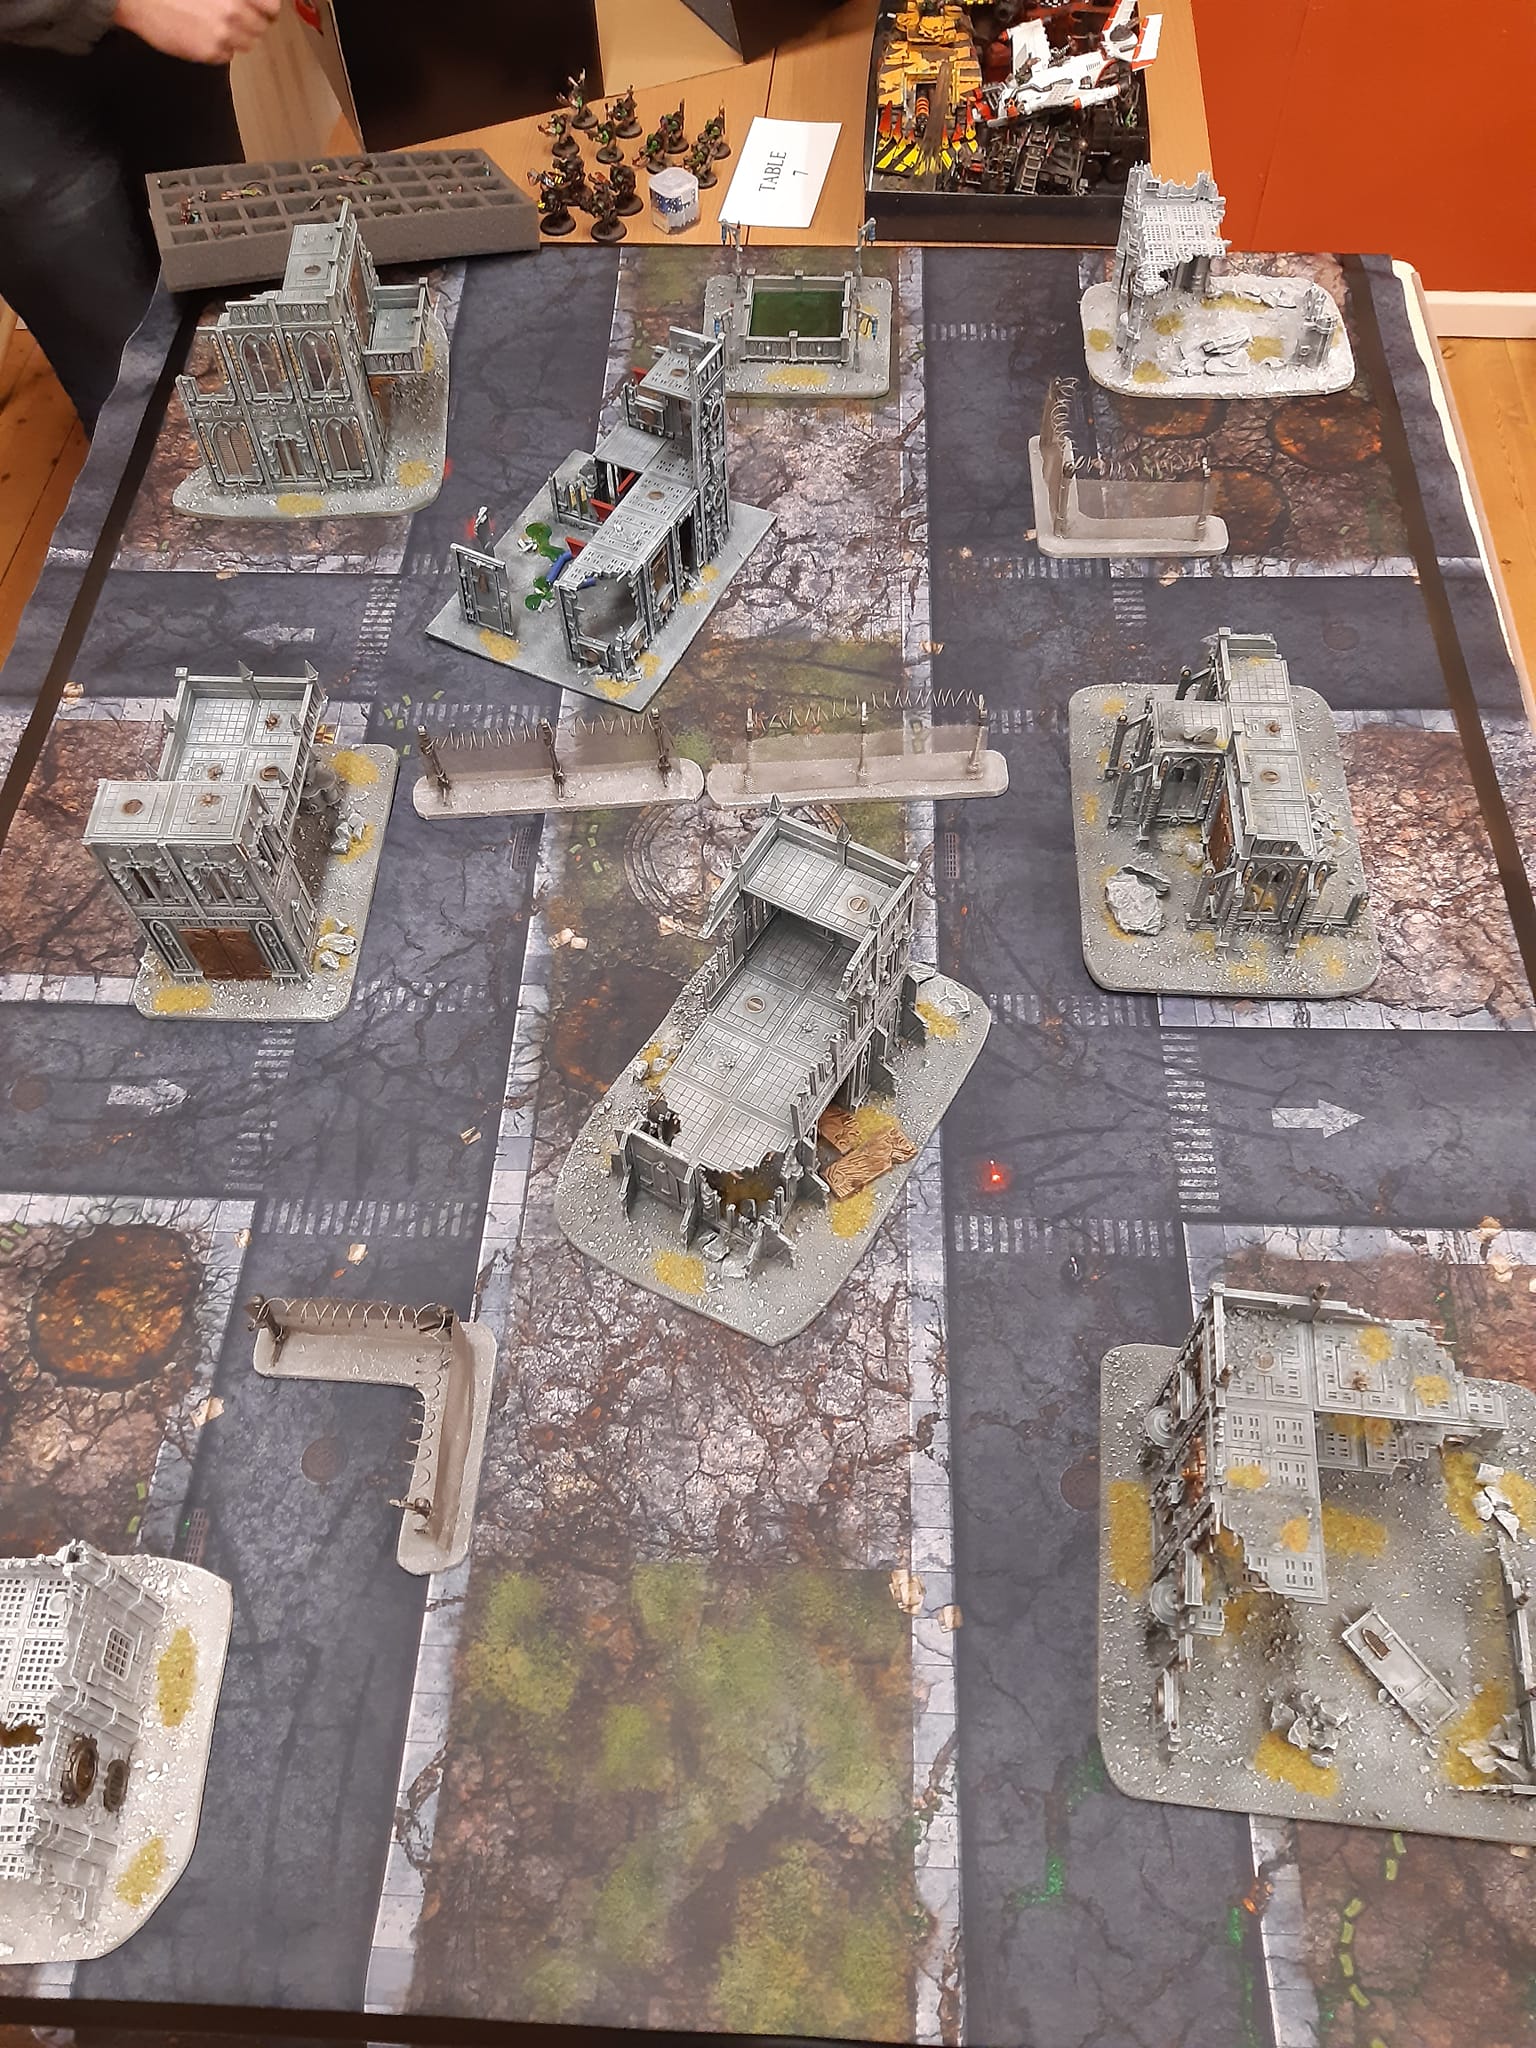
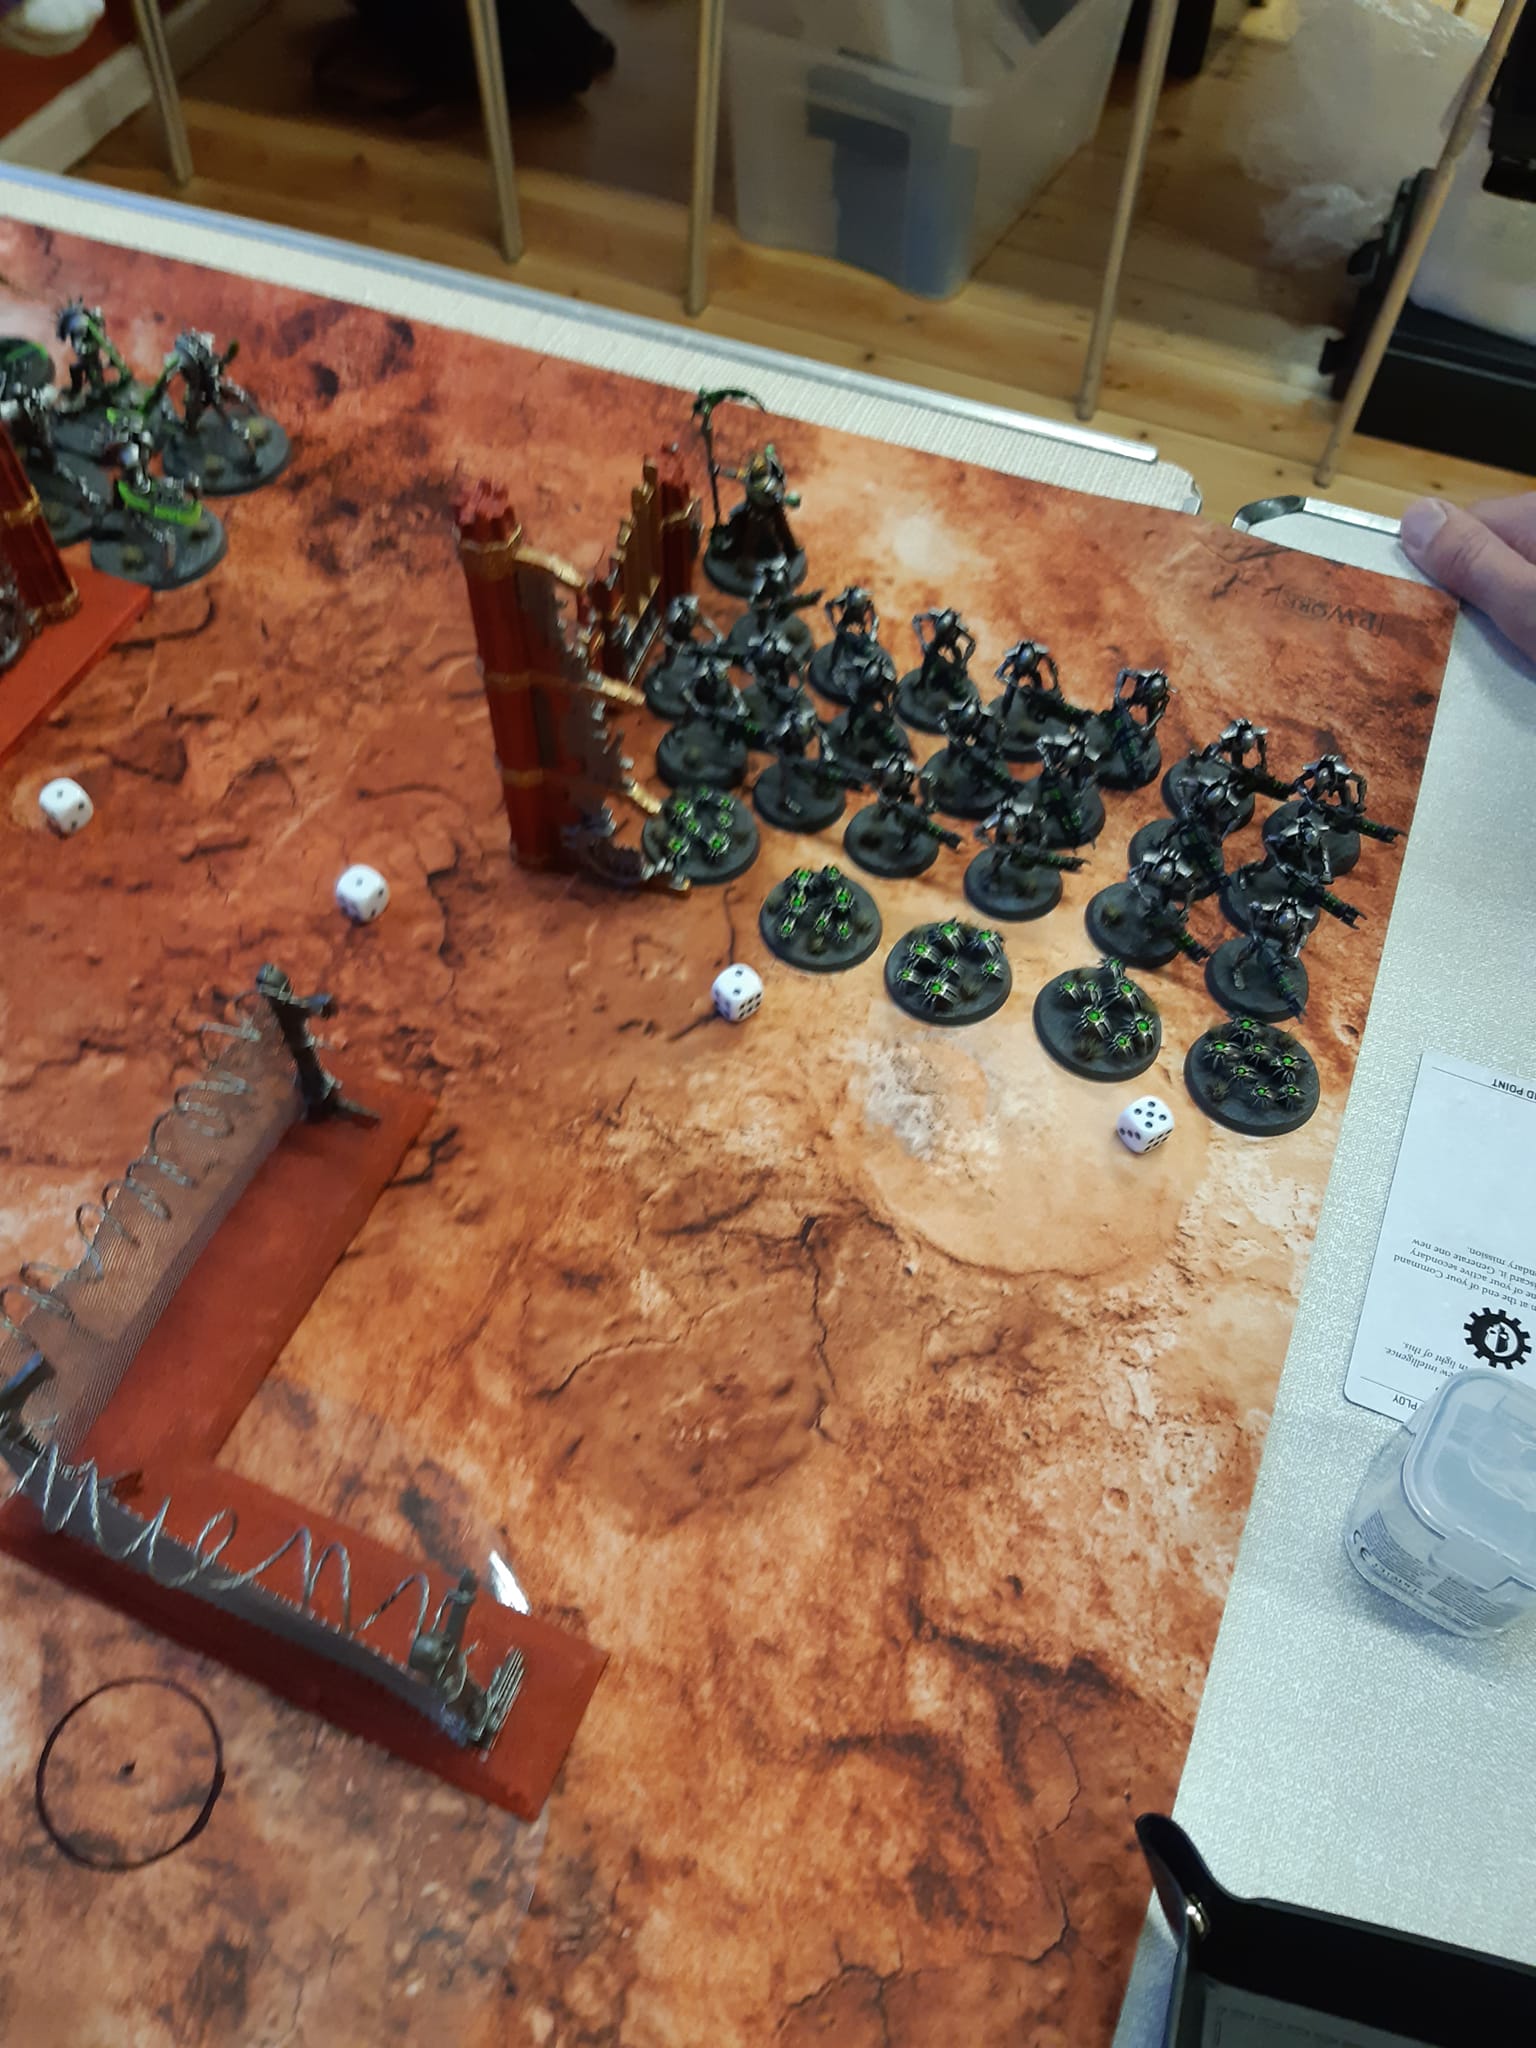
Terrain is a great way to add depth and character to your tabletops. Not only that, but it provides some great bonuses for your forces, helping them to survive the enemy firepower. This time, I’m going to take a look at some chain link fences that you can put together relatively easily.

For the fences, you will need:
- 6 mm MDF, or another sturdy material for the base.
- Garden wire
- Aluminium mesh, available from DIY stores or auto-parts stores.
- Wooden posts, or other material for the fence posts
- Sand, or other basing material
- PVA glue
- superglue
- Epoxy resin
- Paper clips
- Wire clippers or wire strippers
- Electric drill
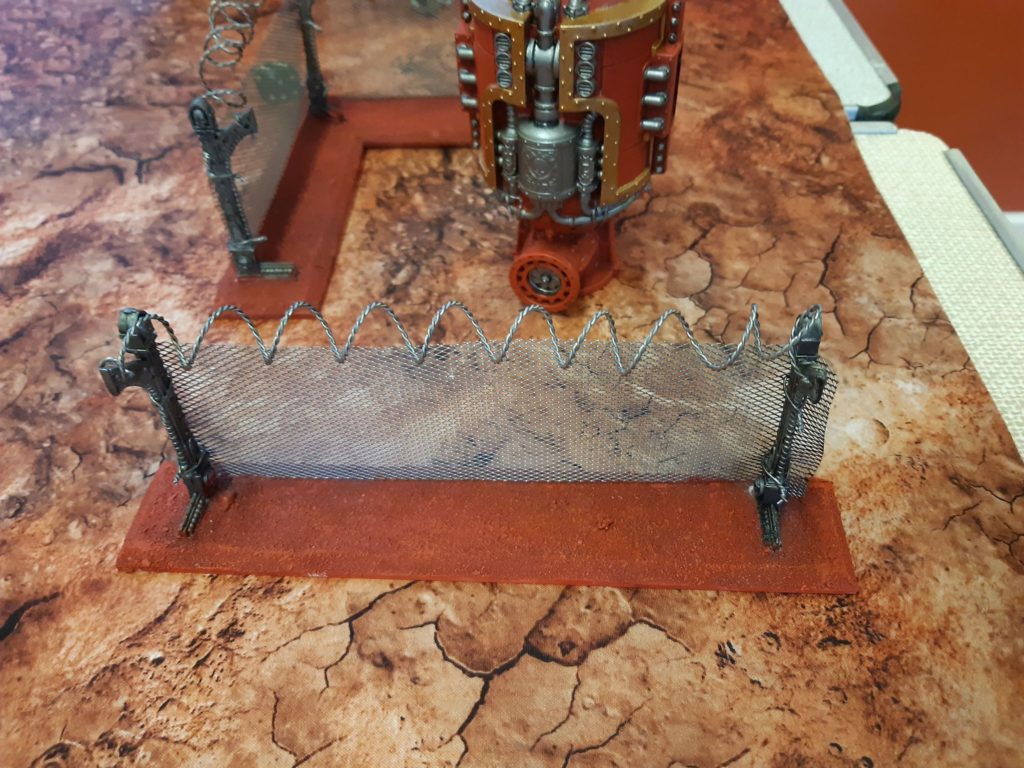
These fences provide some nice Dense cover for your tables, or can be used as obstacles and barricades.
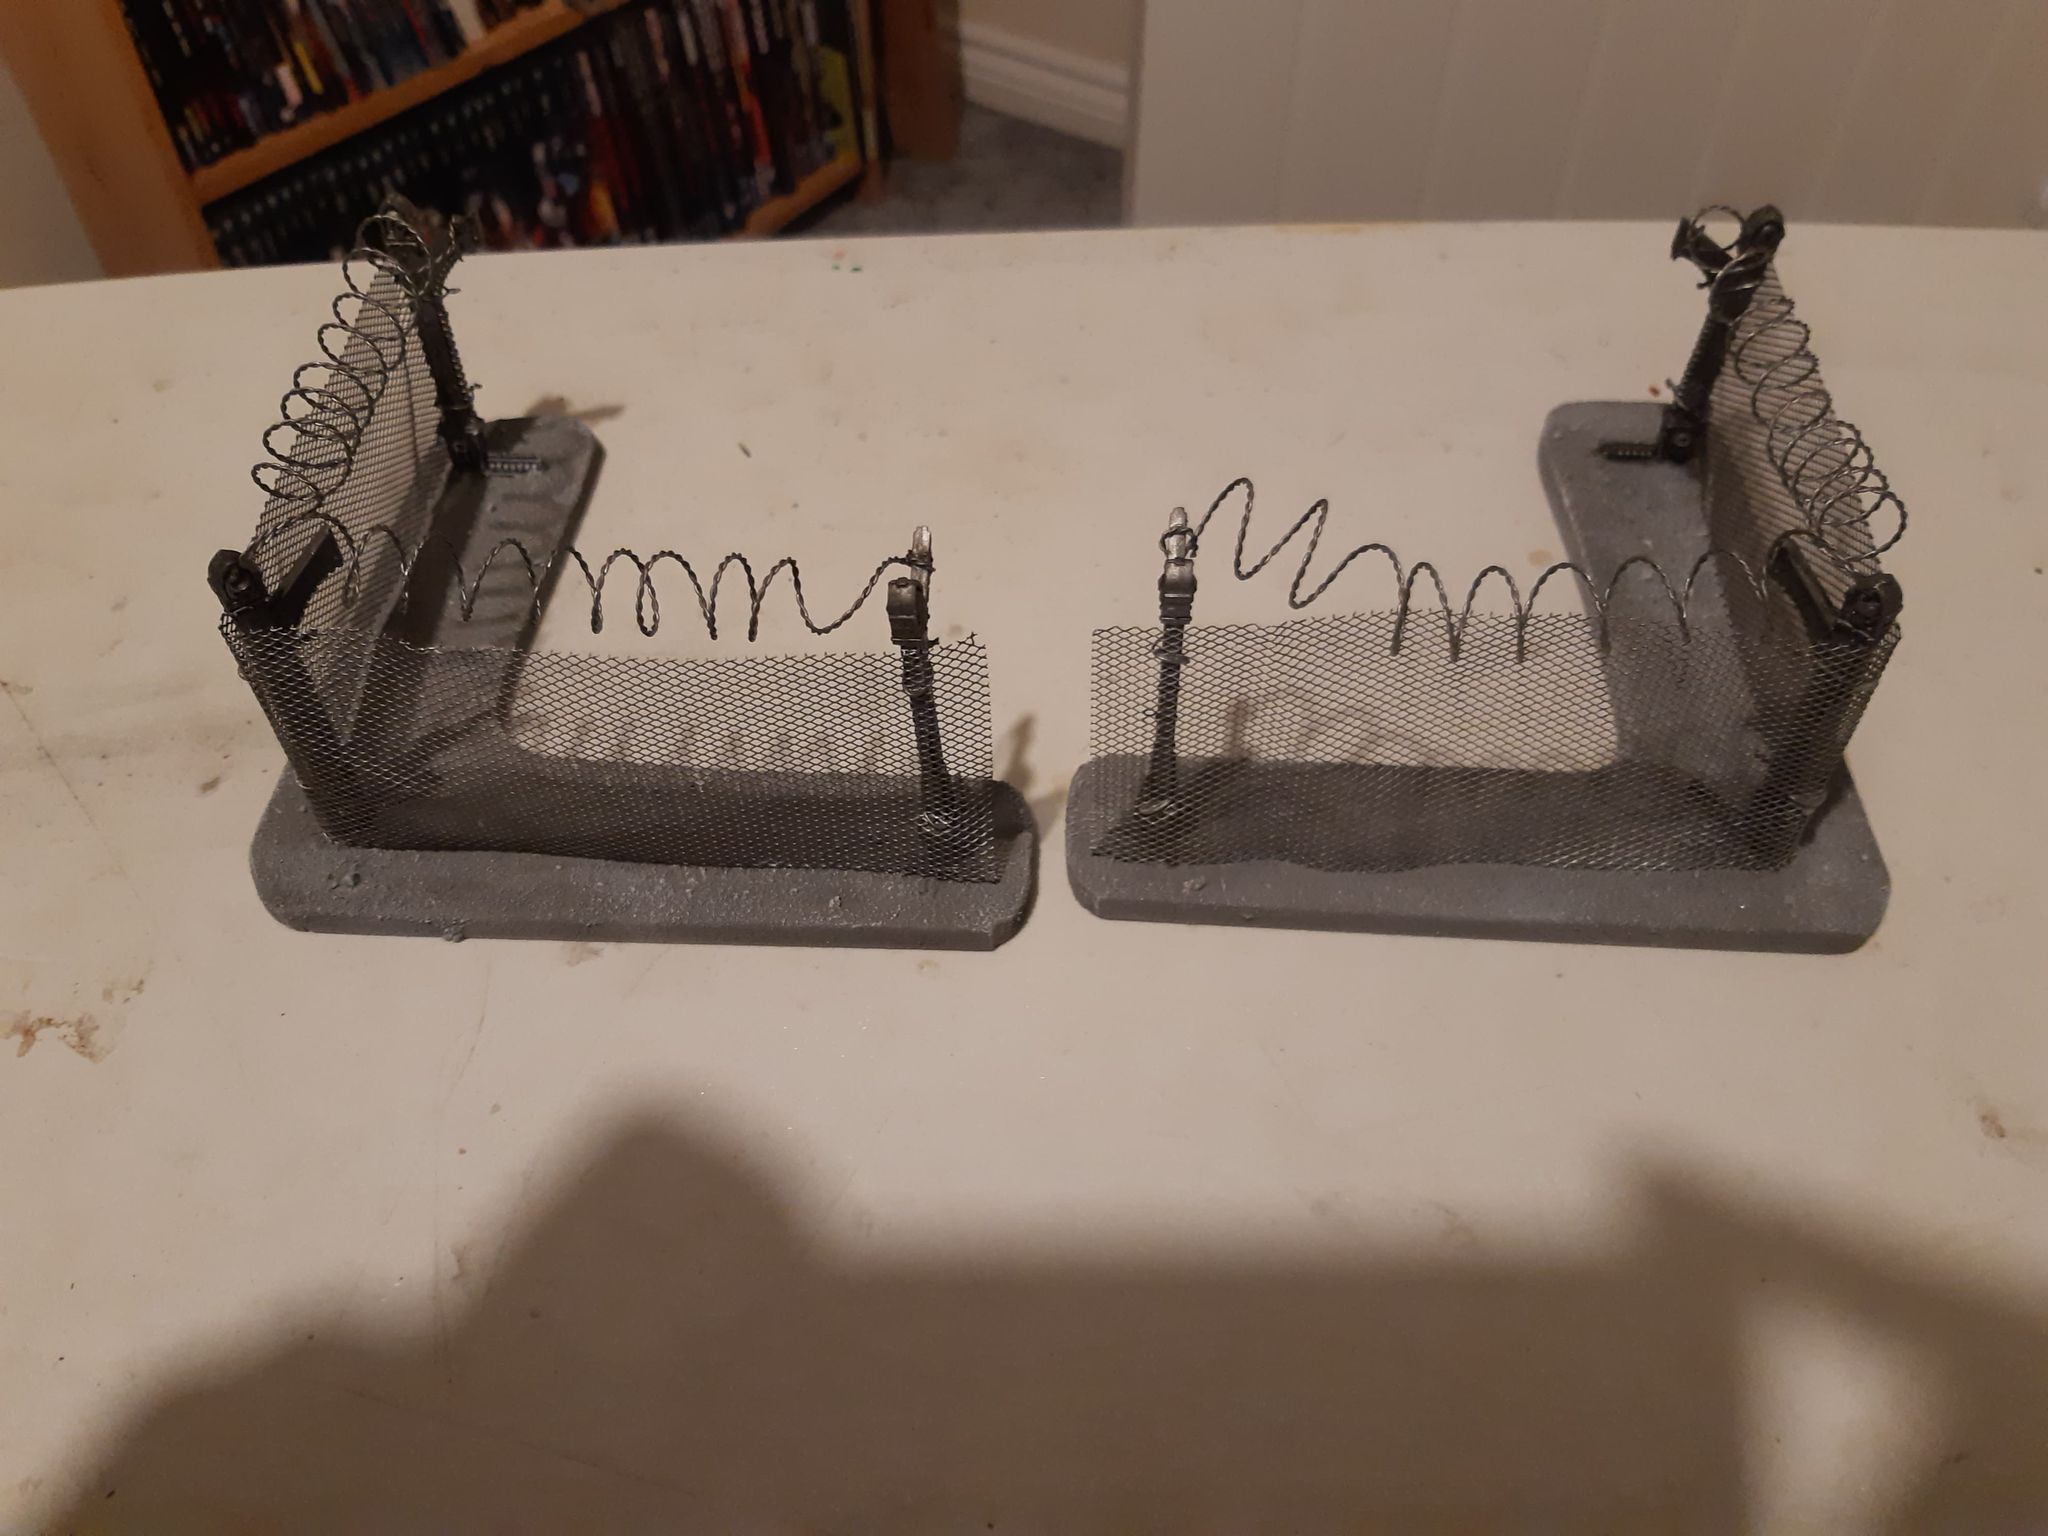
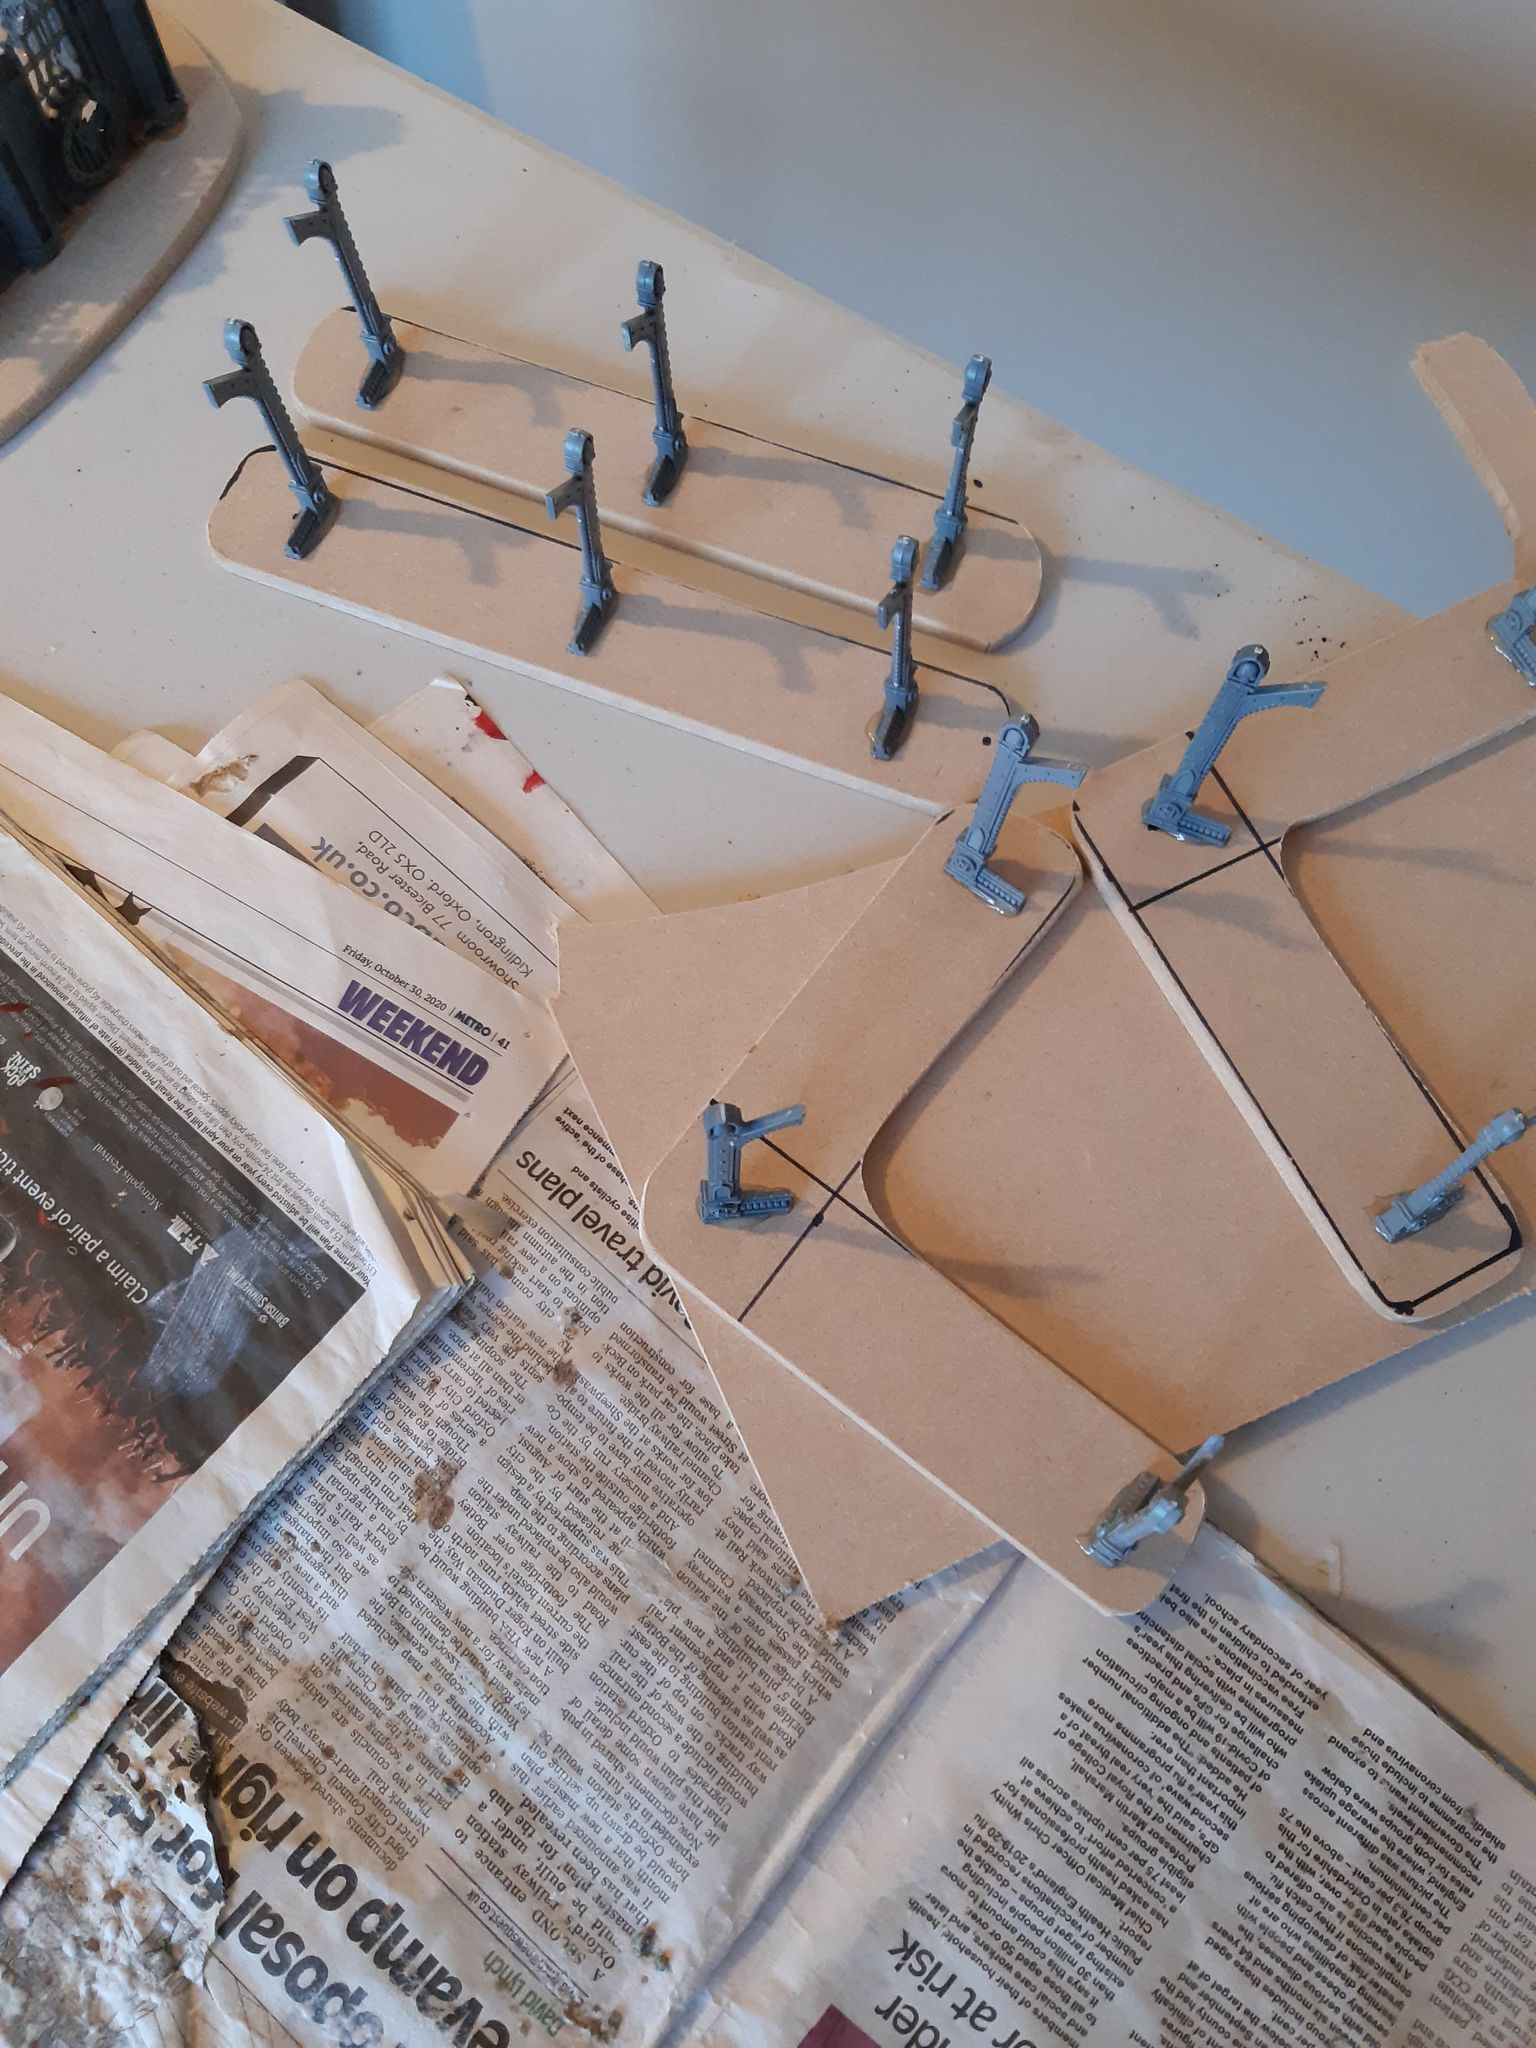
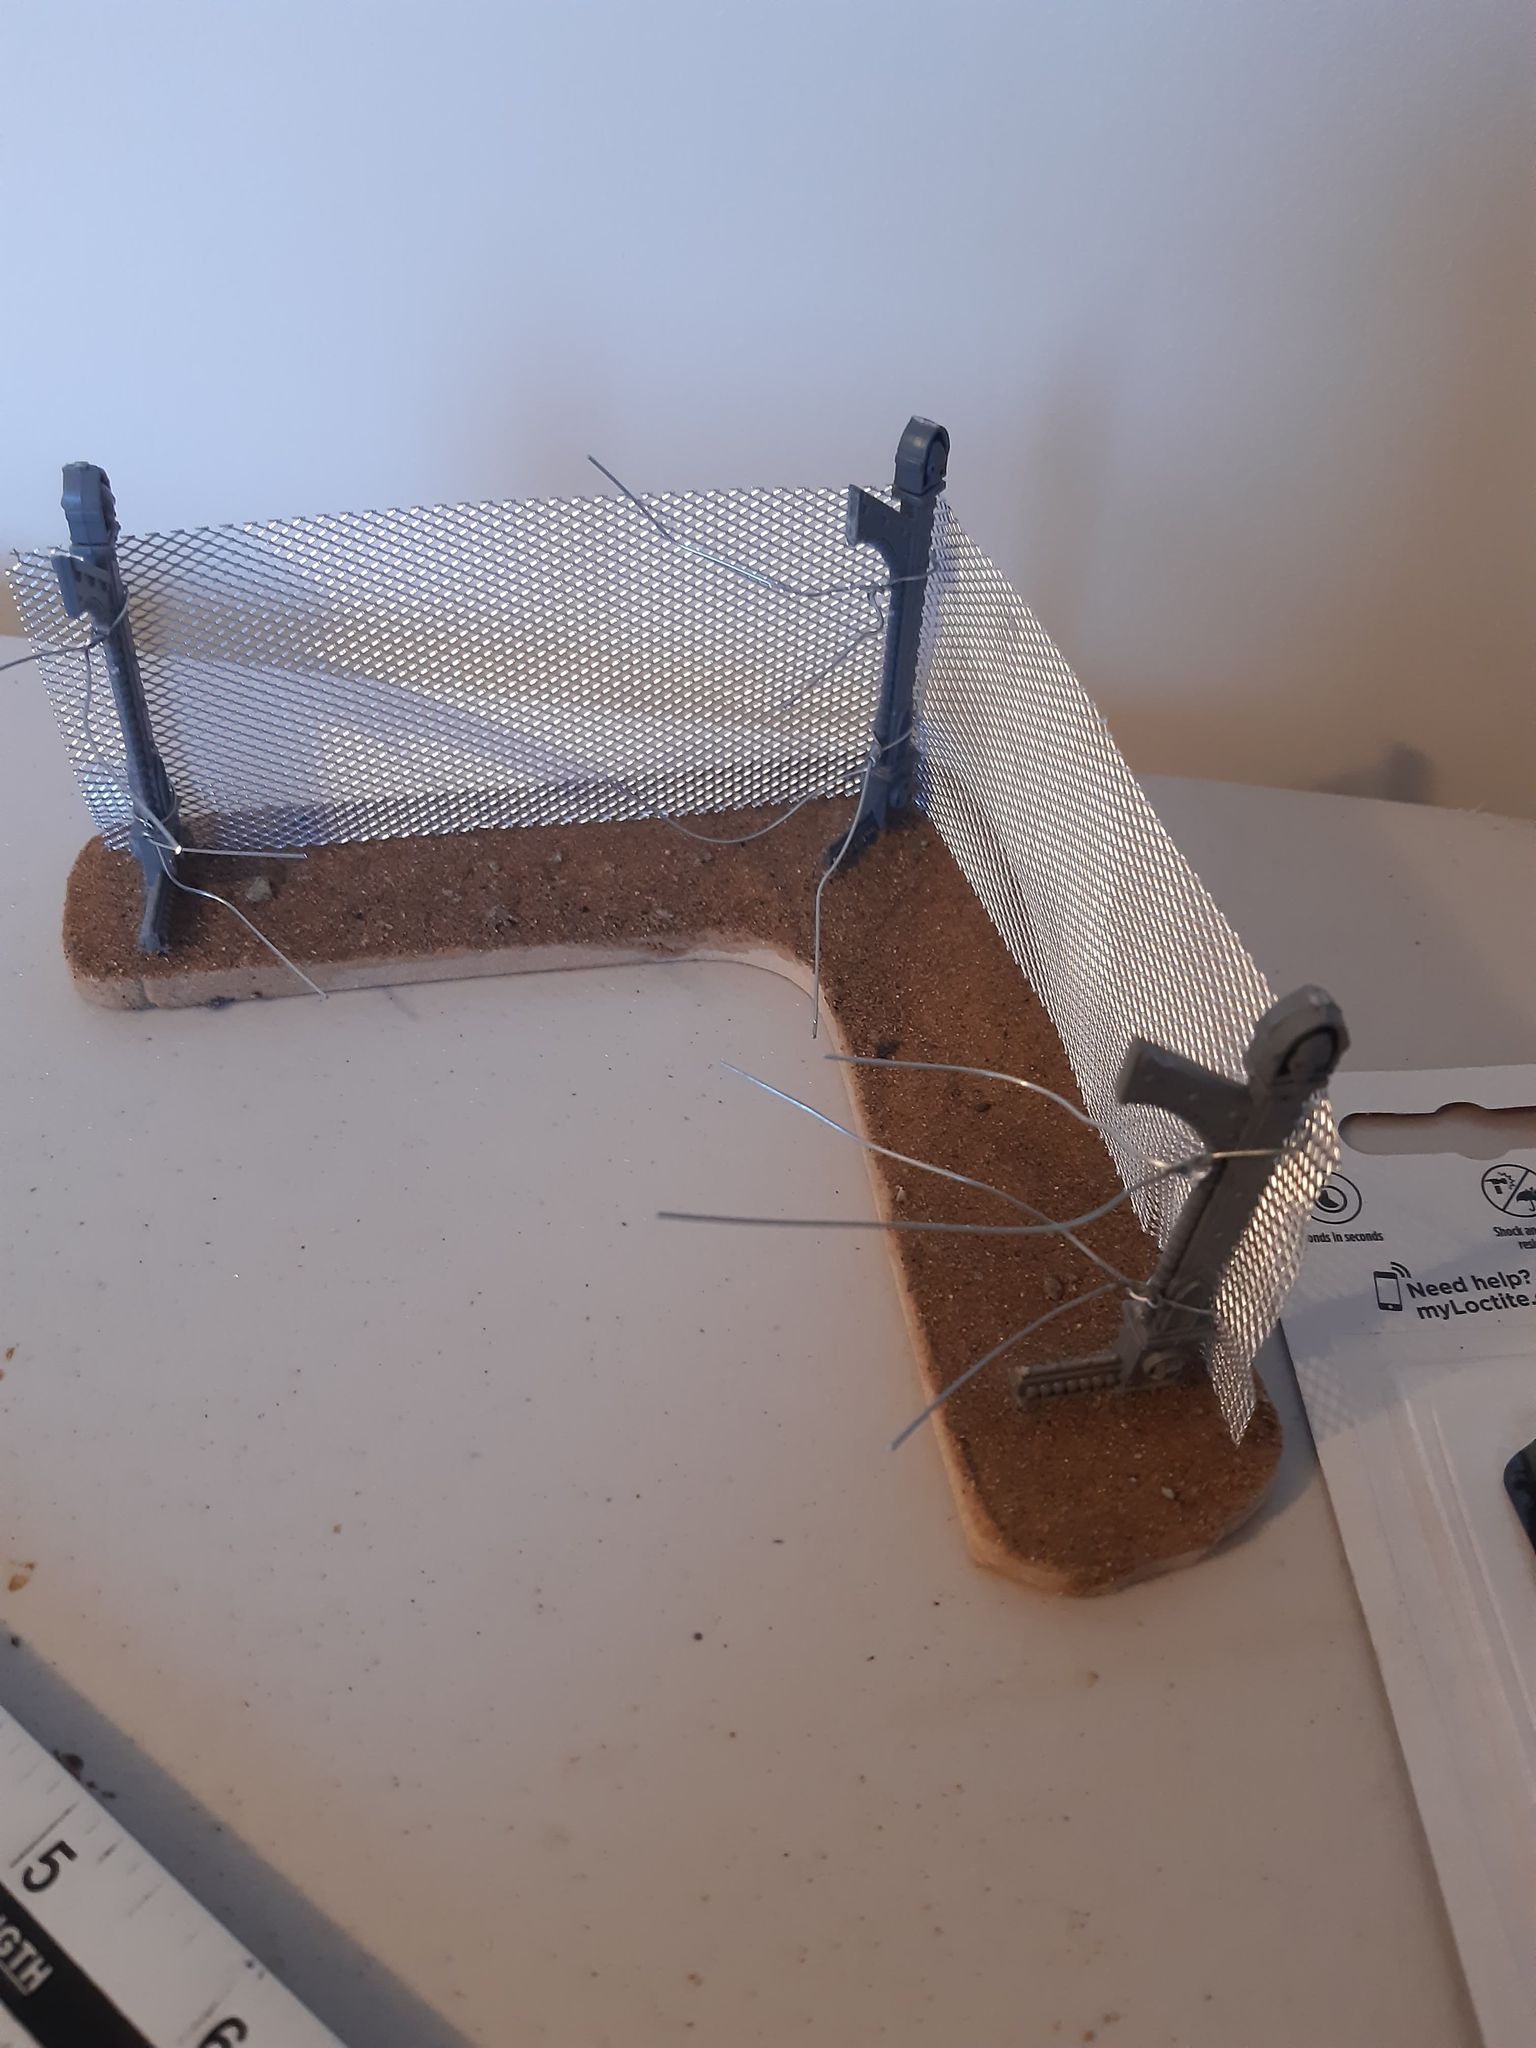
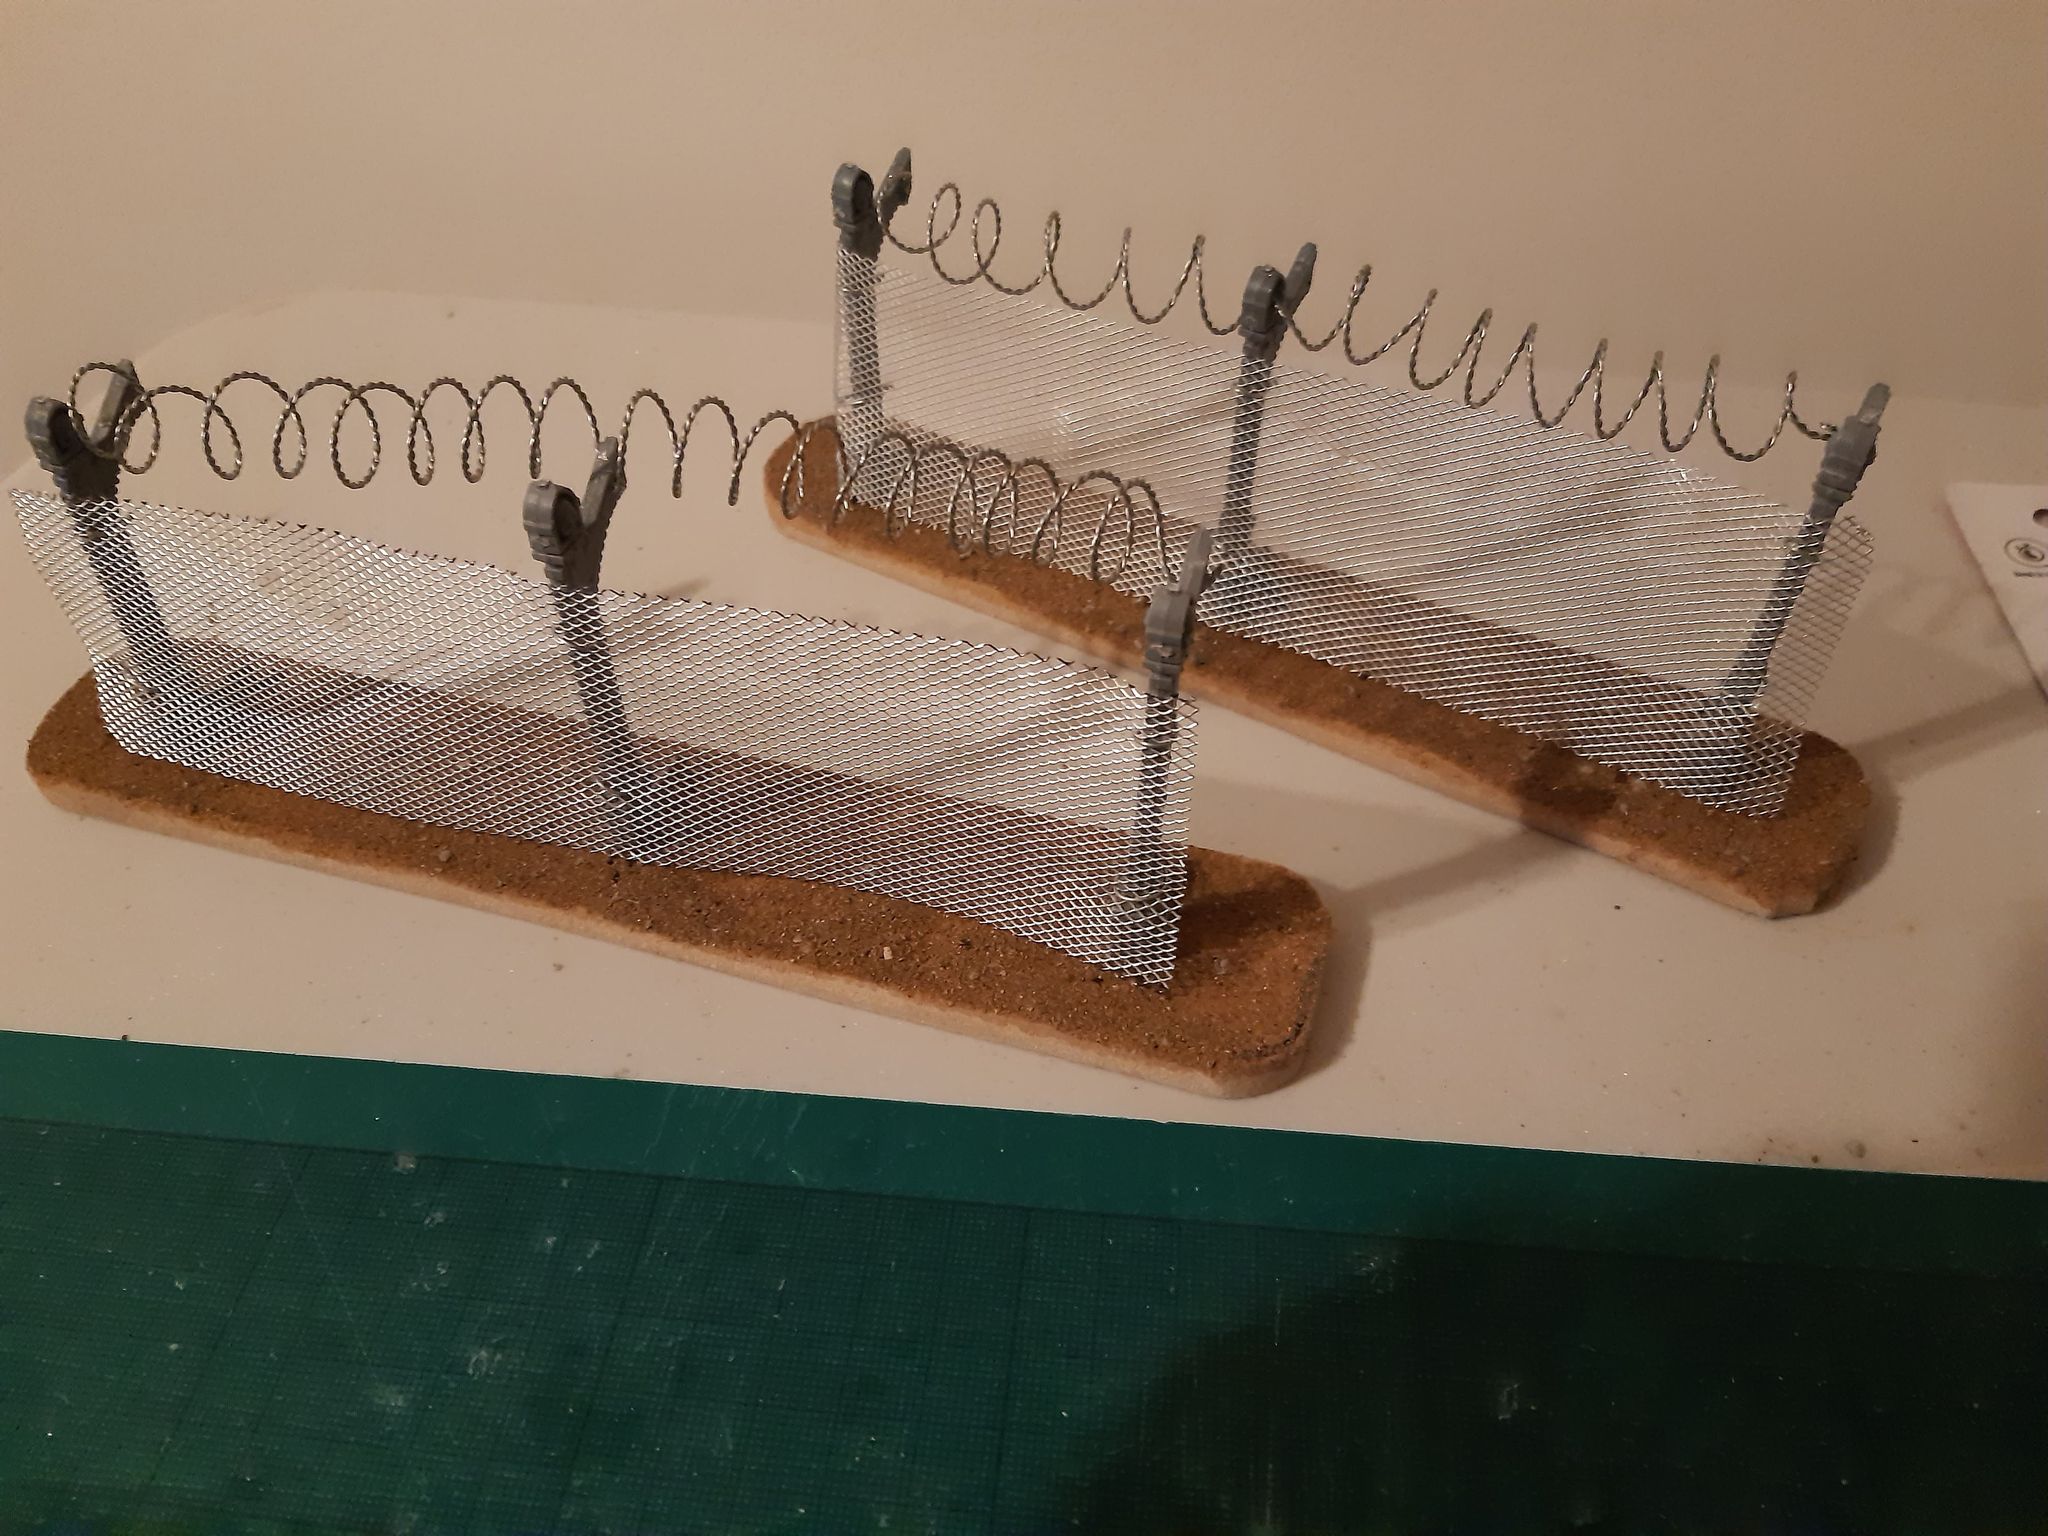
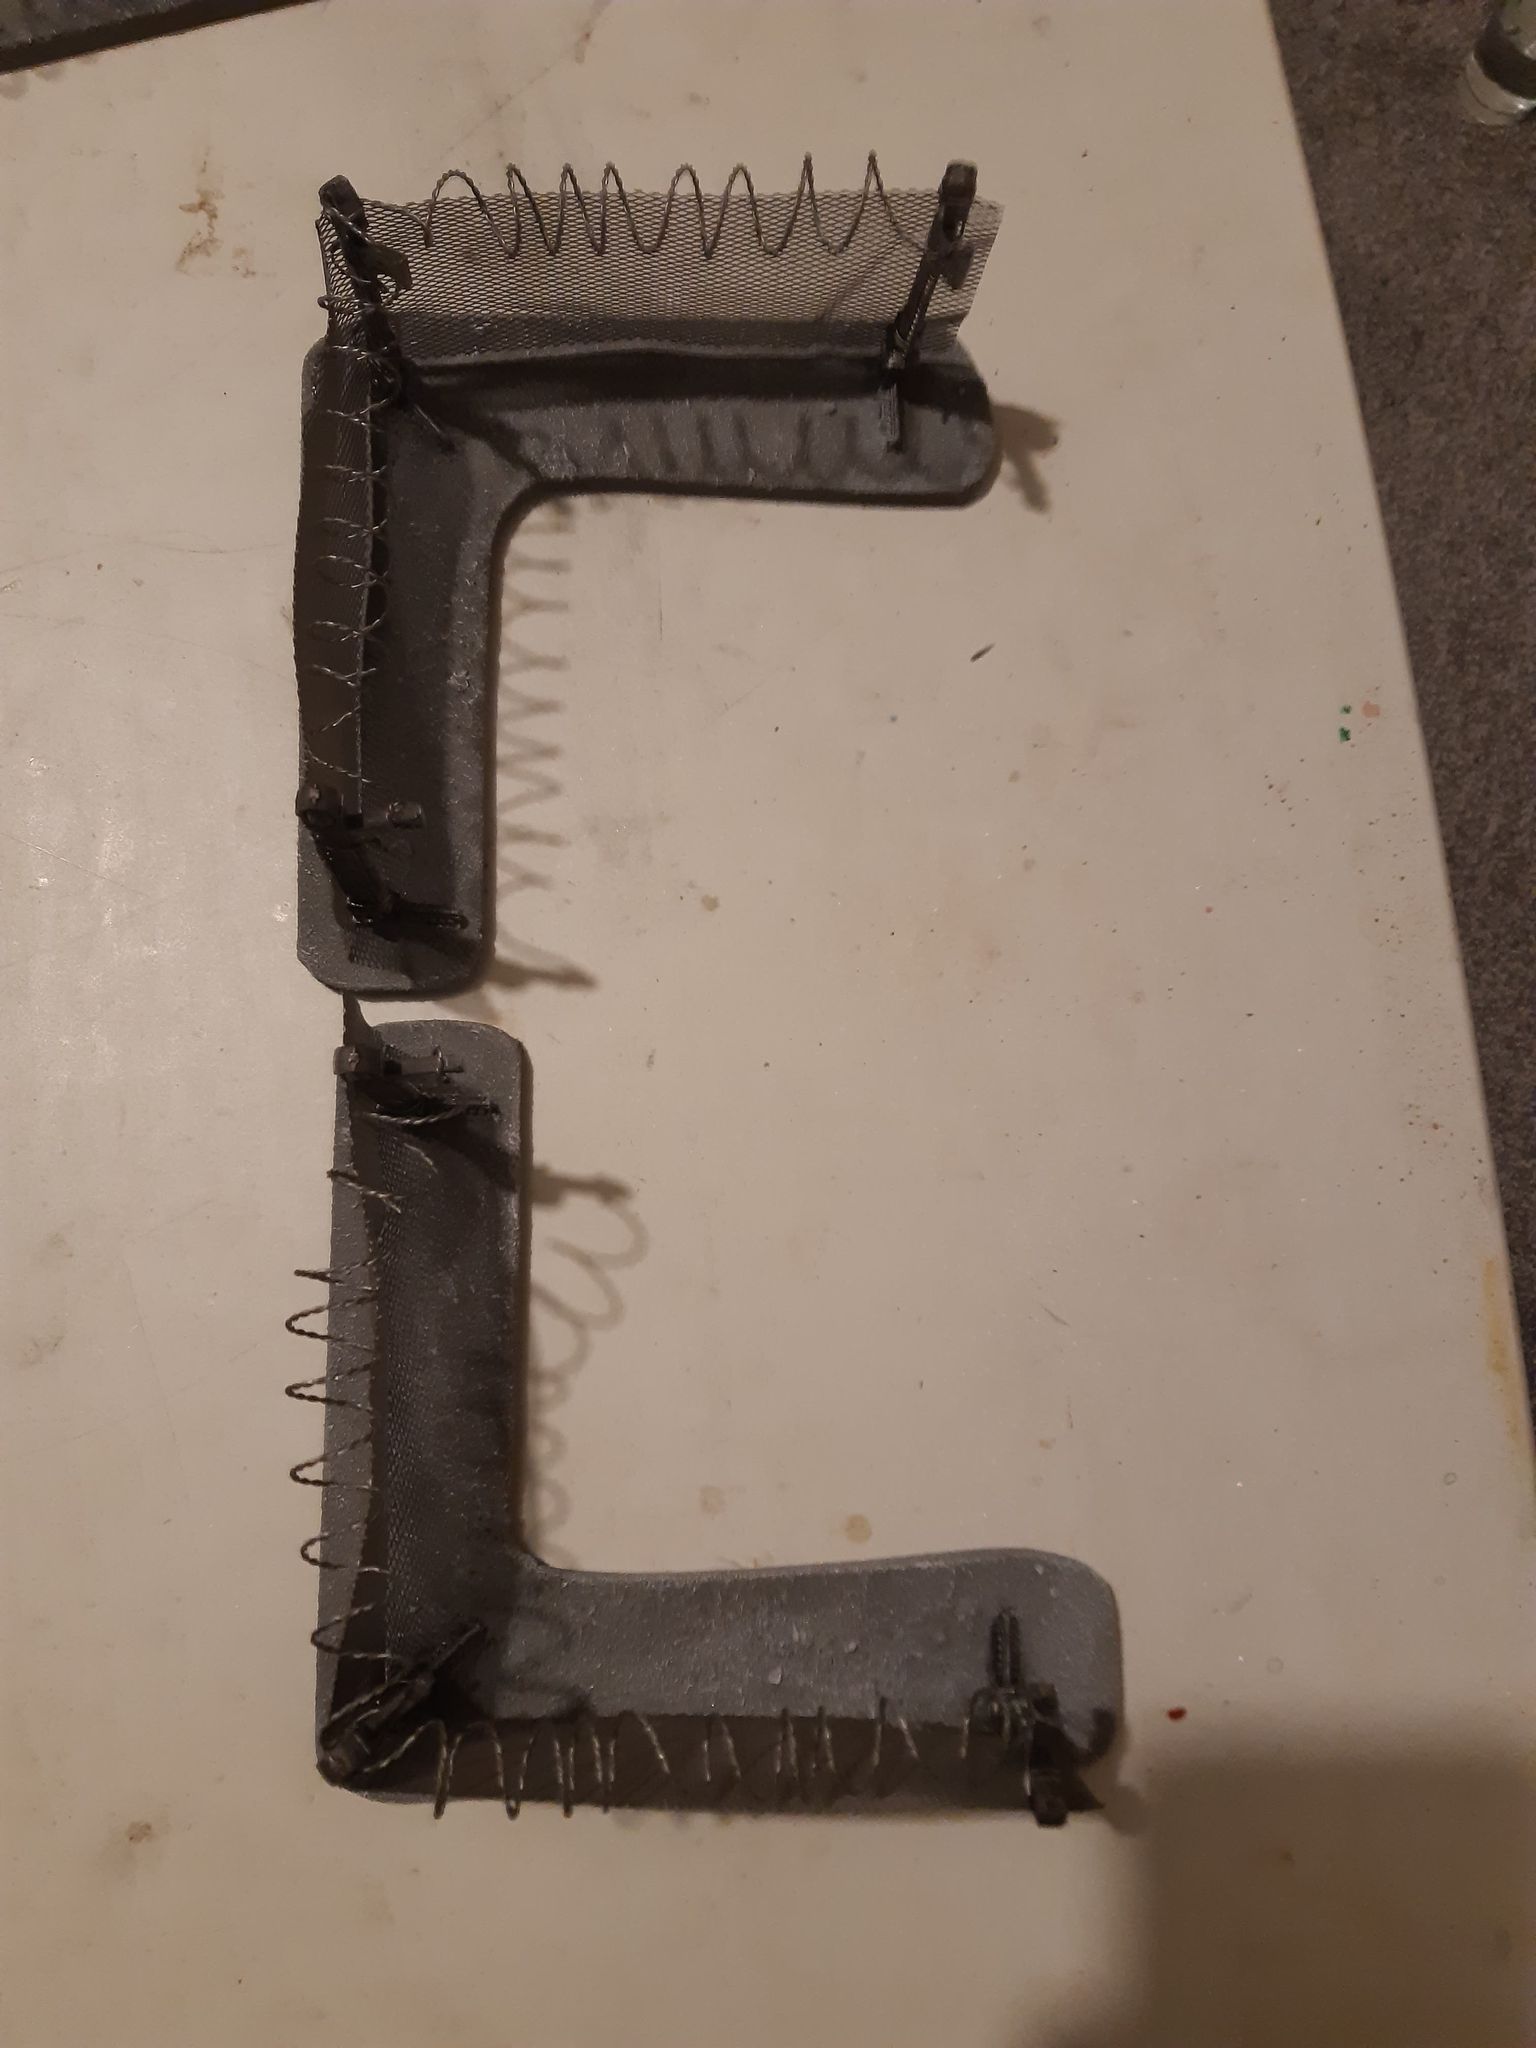
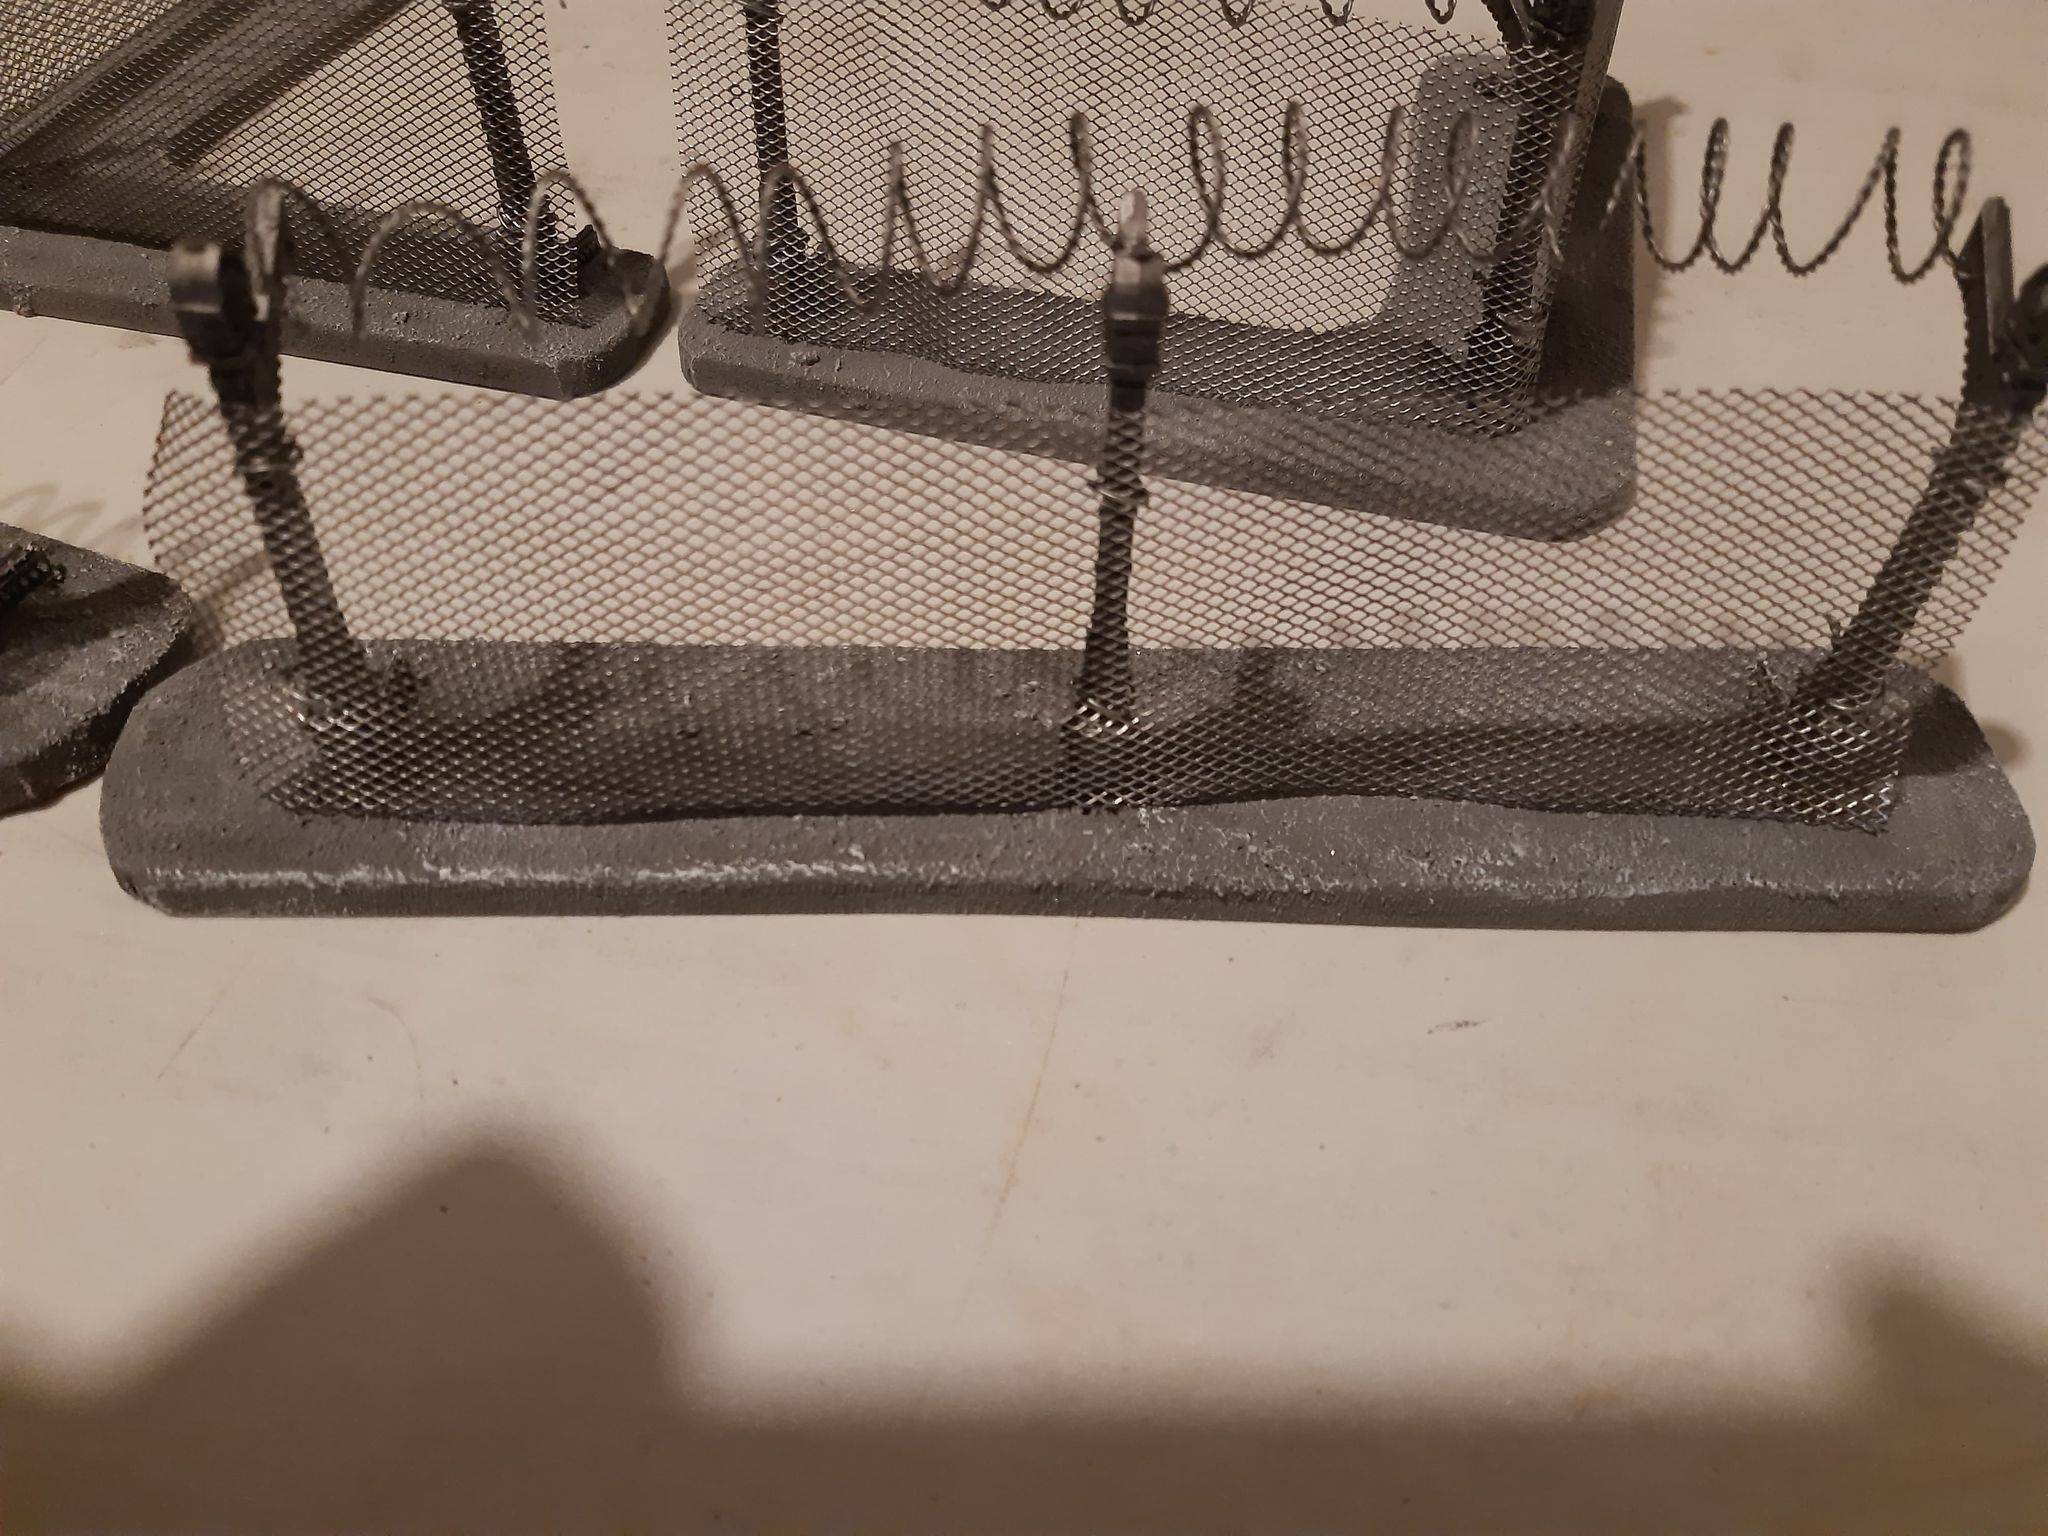
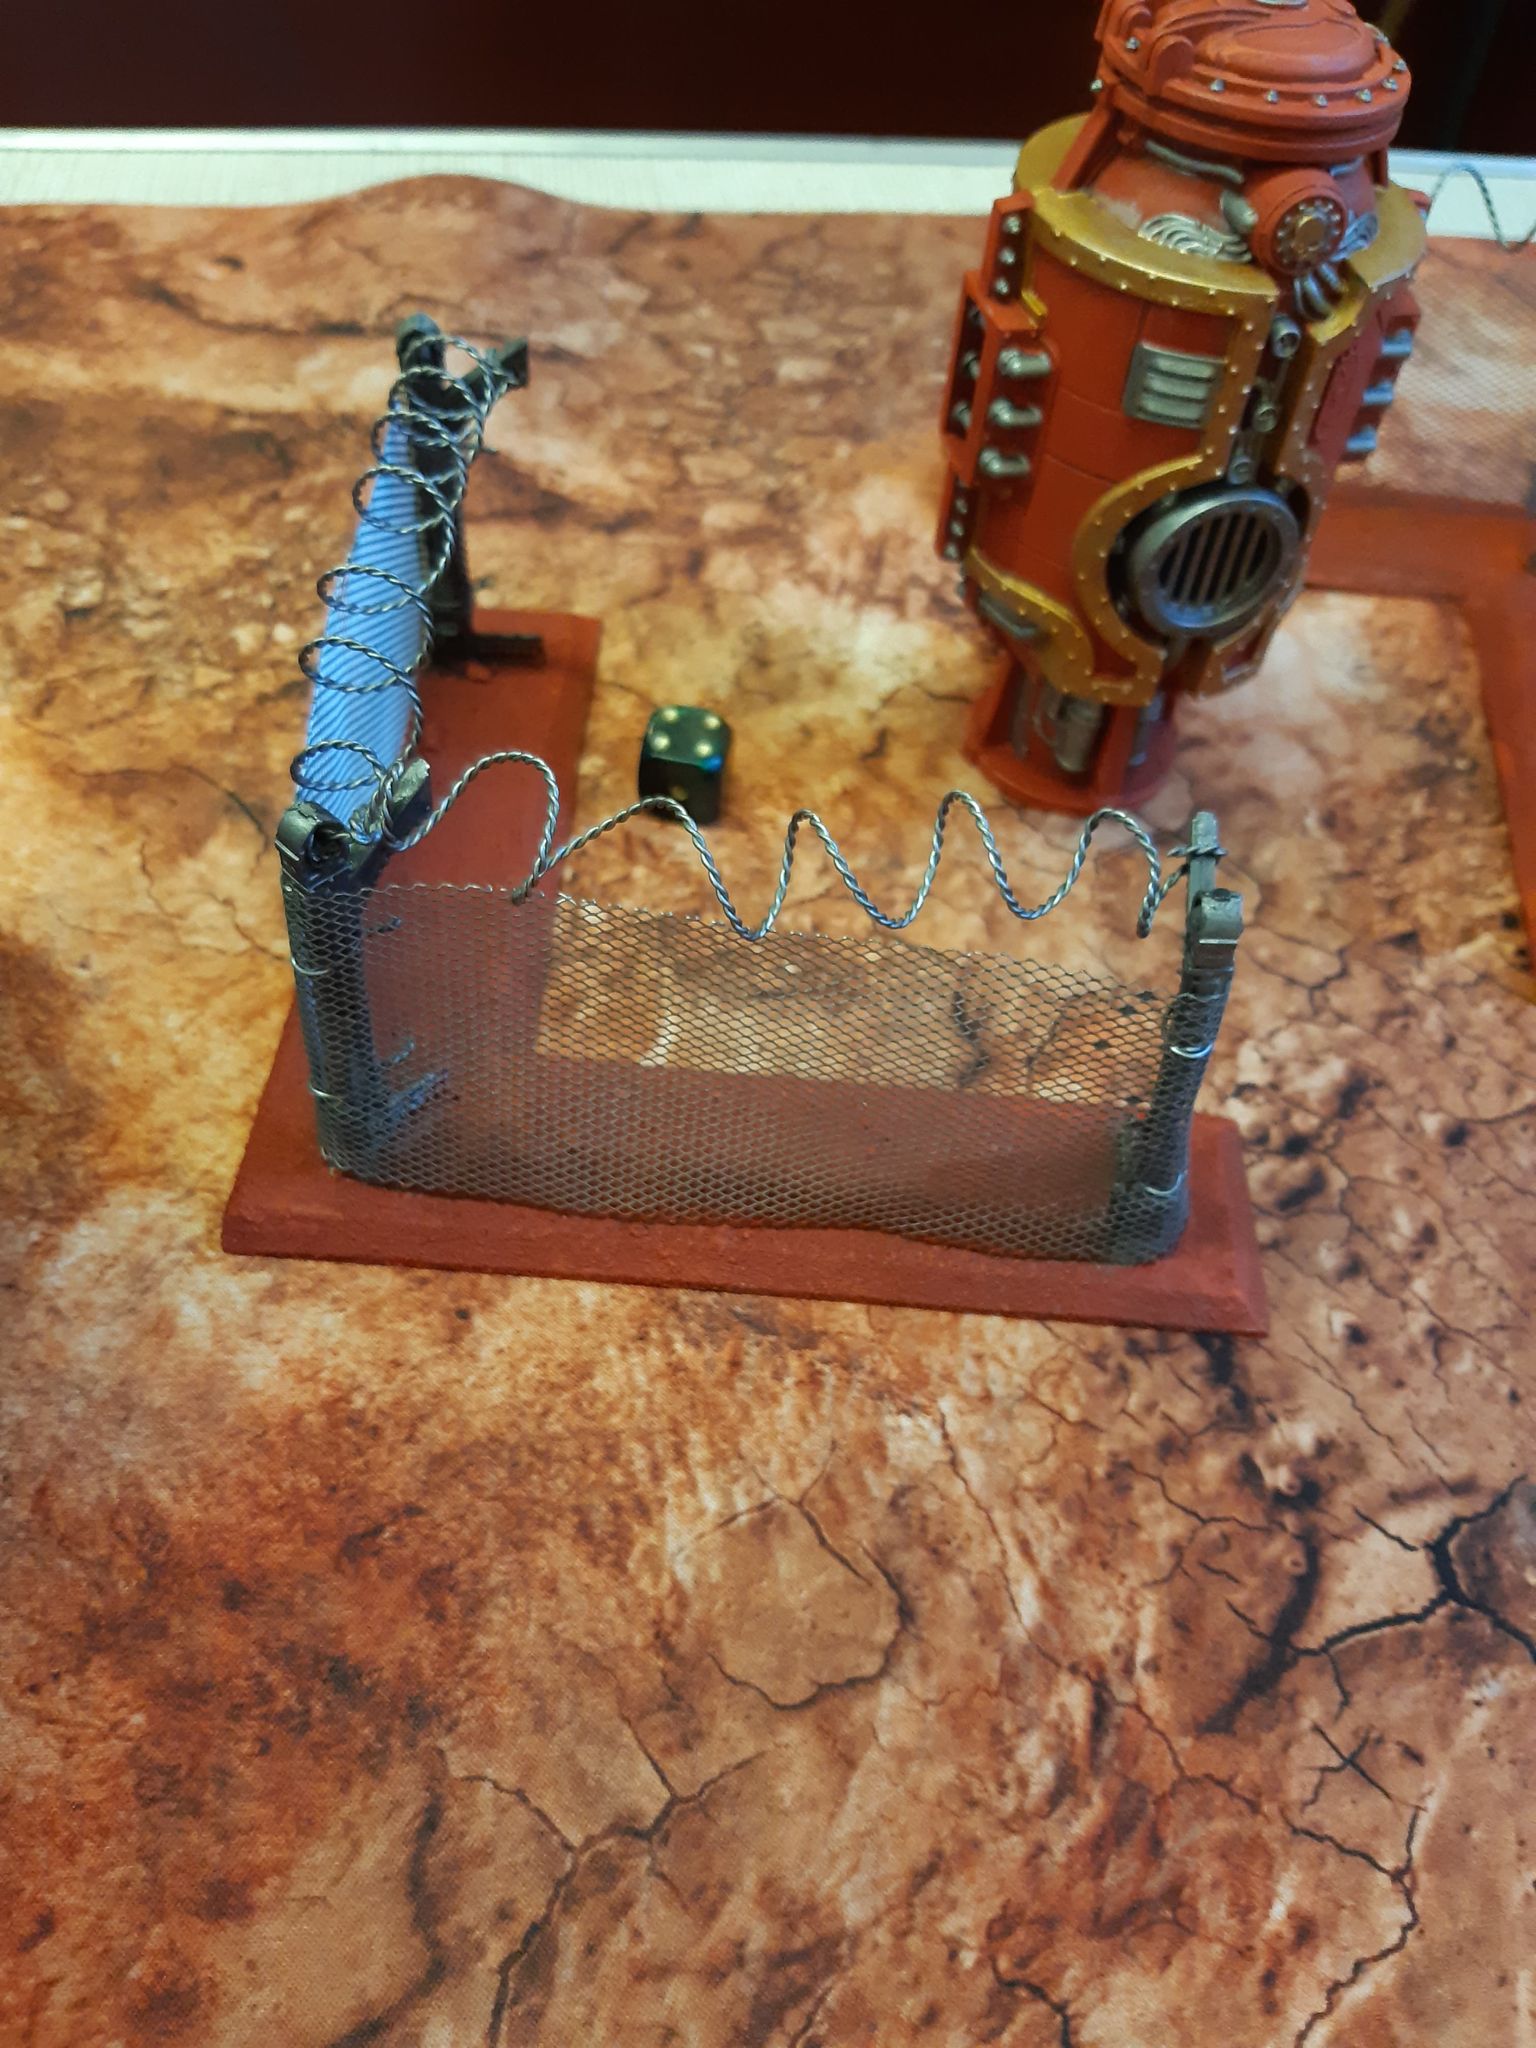
Step 1- Cut out your fence bases. I tend to cut them at twice the length of the post, to give you enough room to glue them on and paint the up. I tend to cut the bases in either straight 6″ sections, or L-shaped around 4″ on the long sides. If you are using MDF, you can also sand down the edges of the bases to help them blend into your table more.
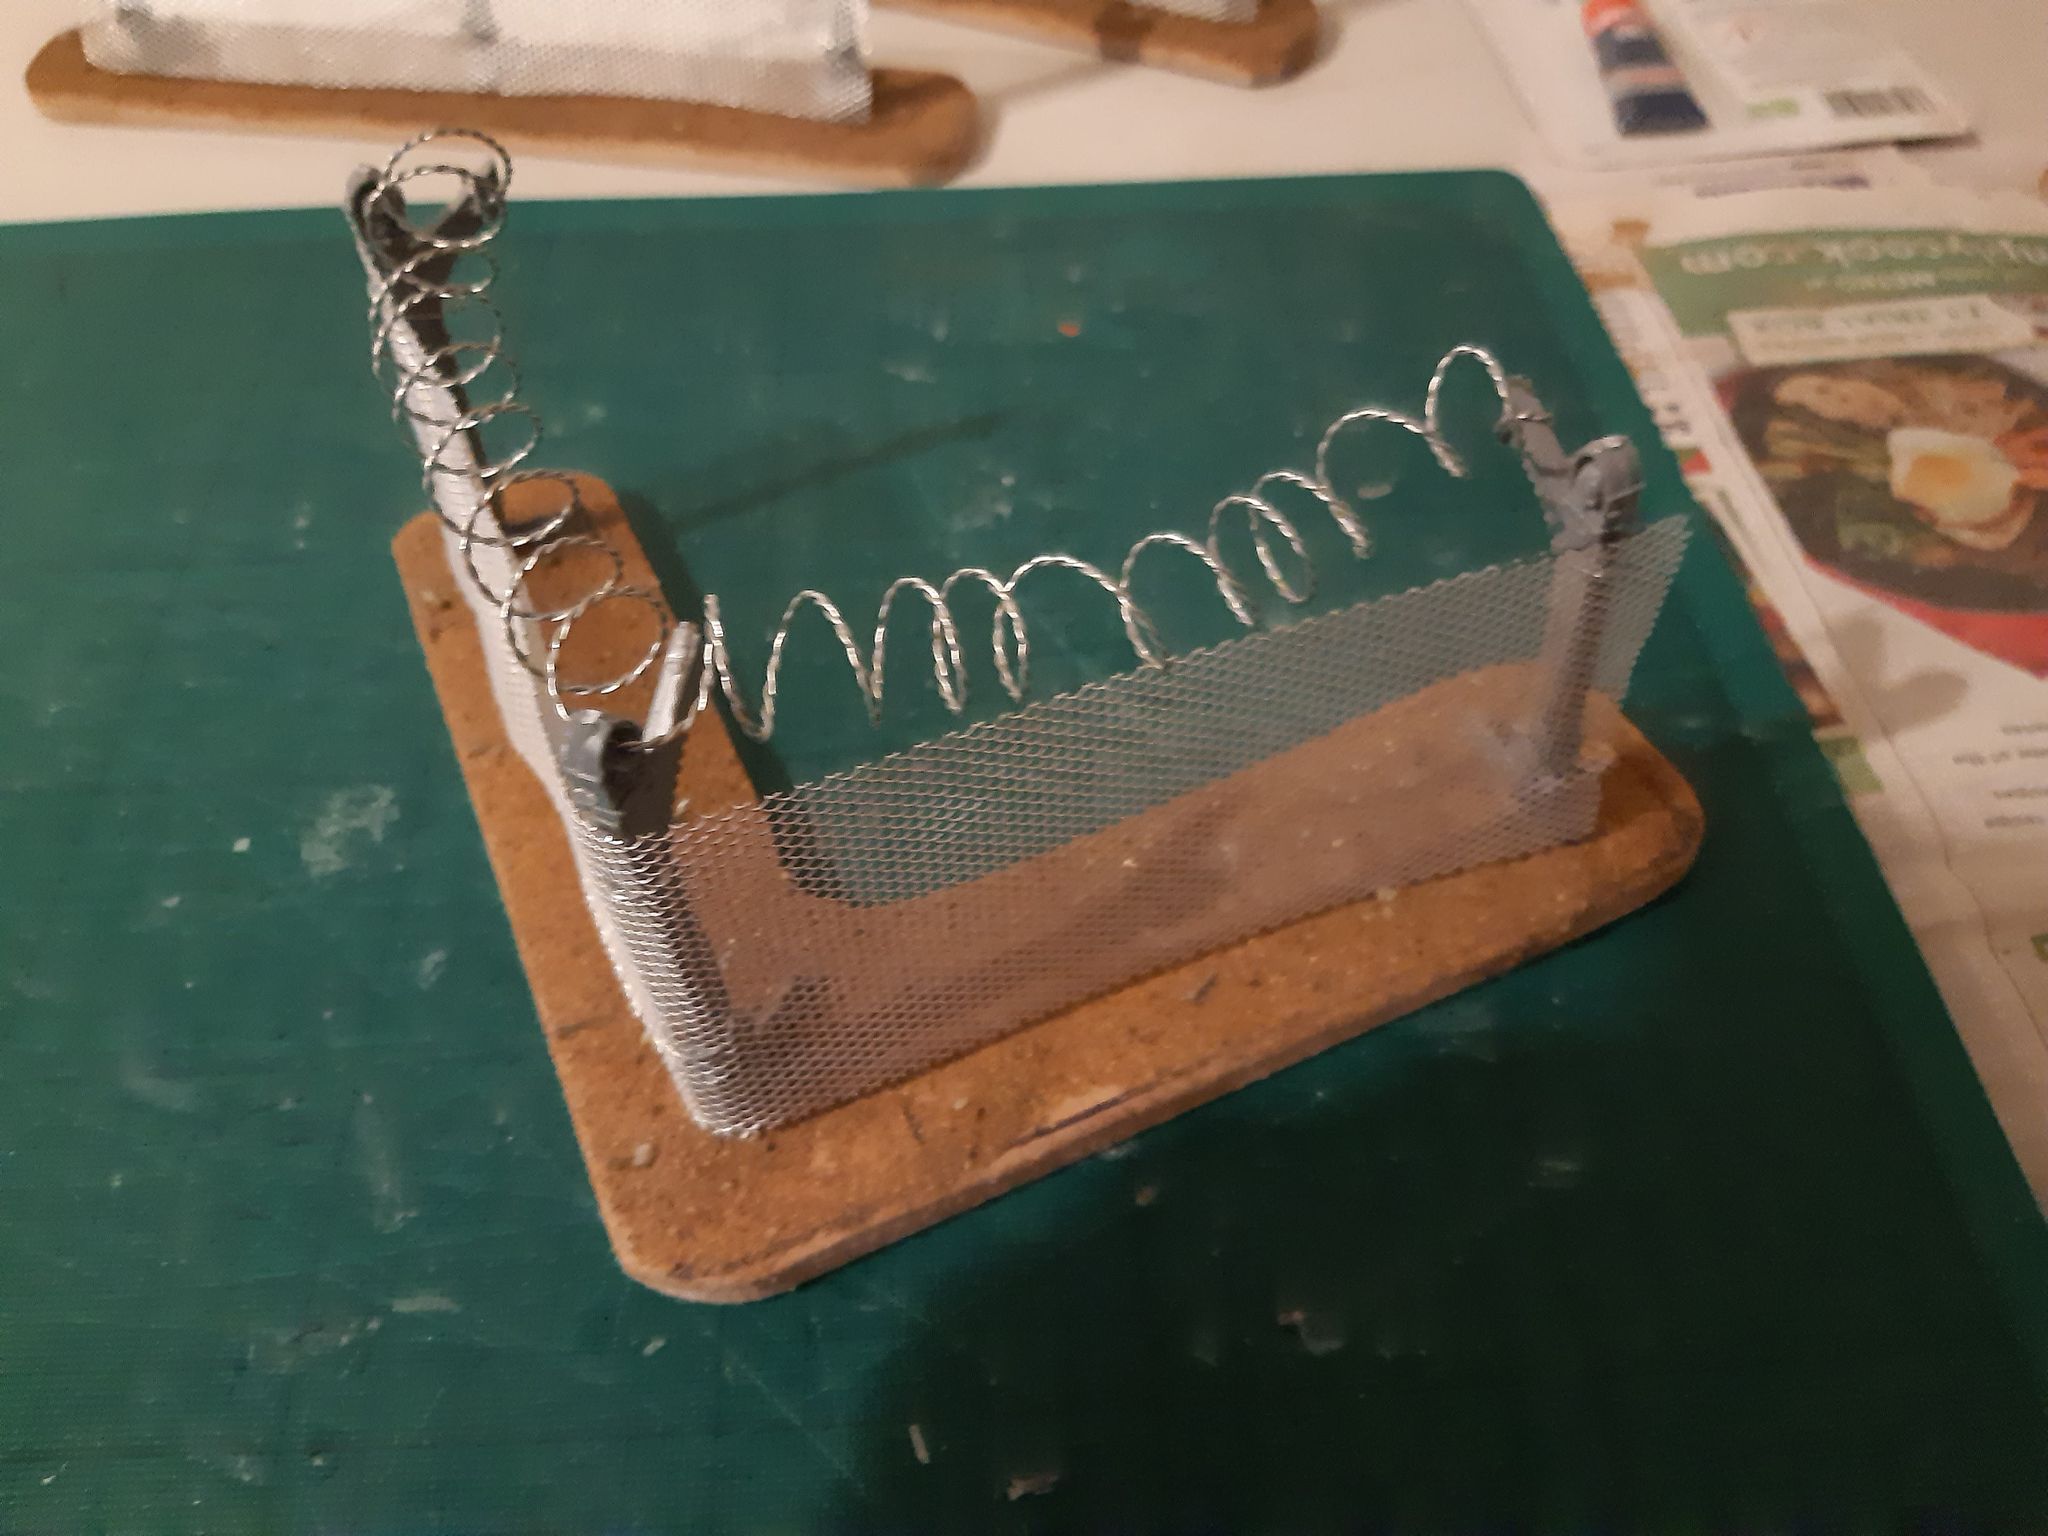
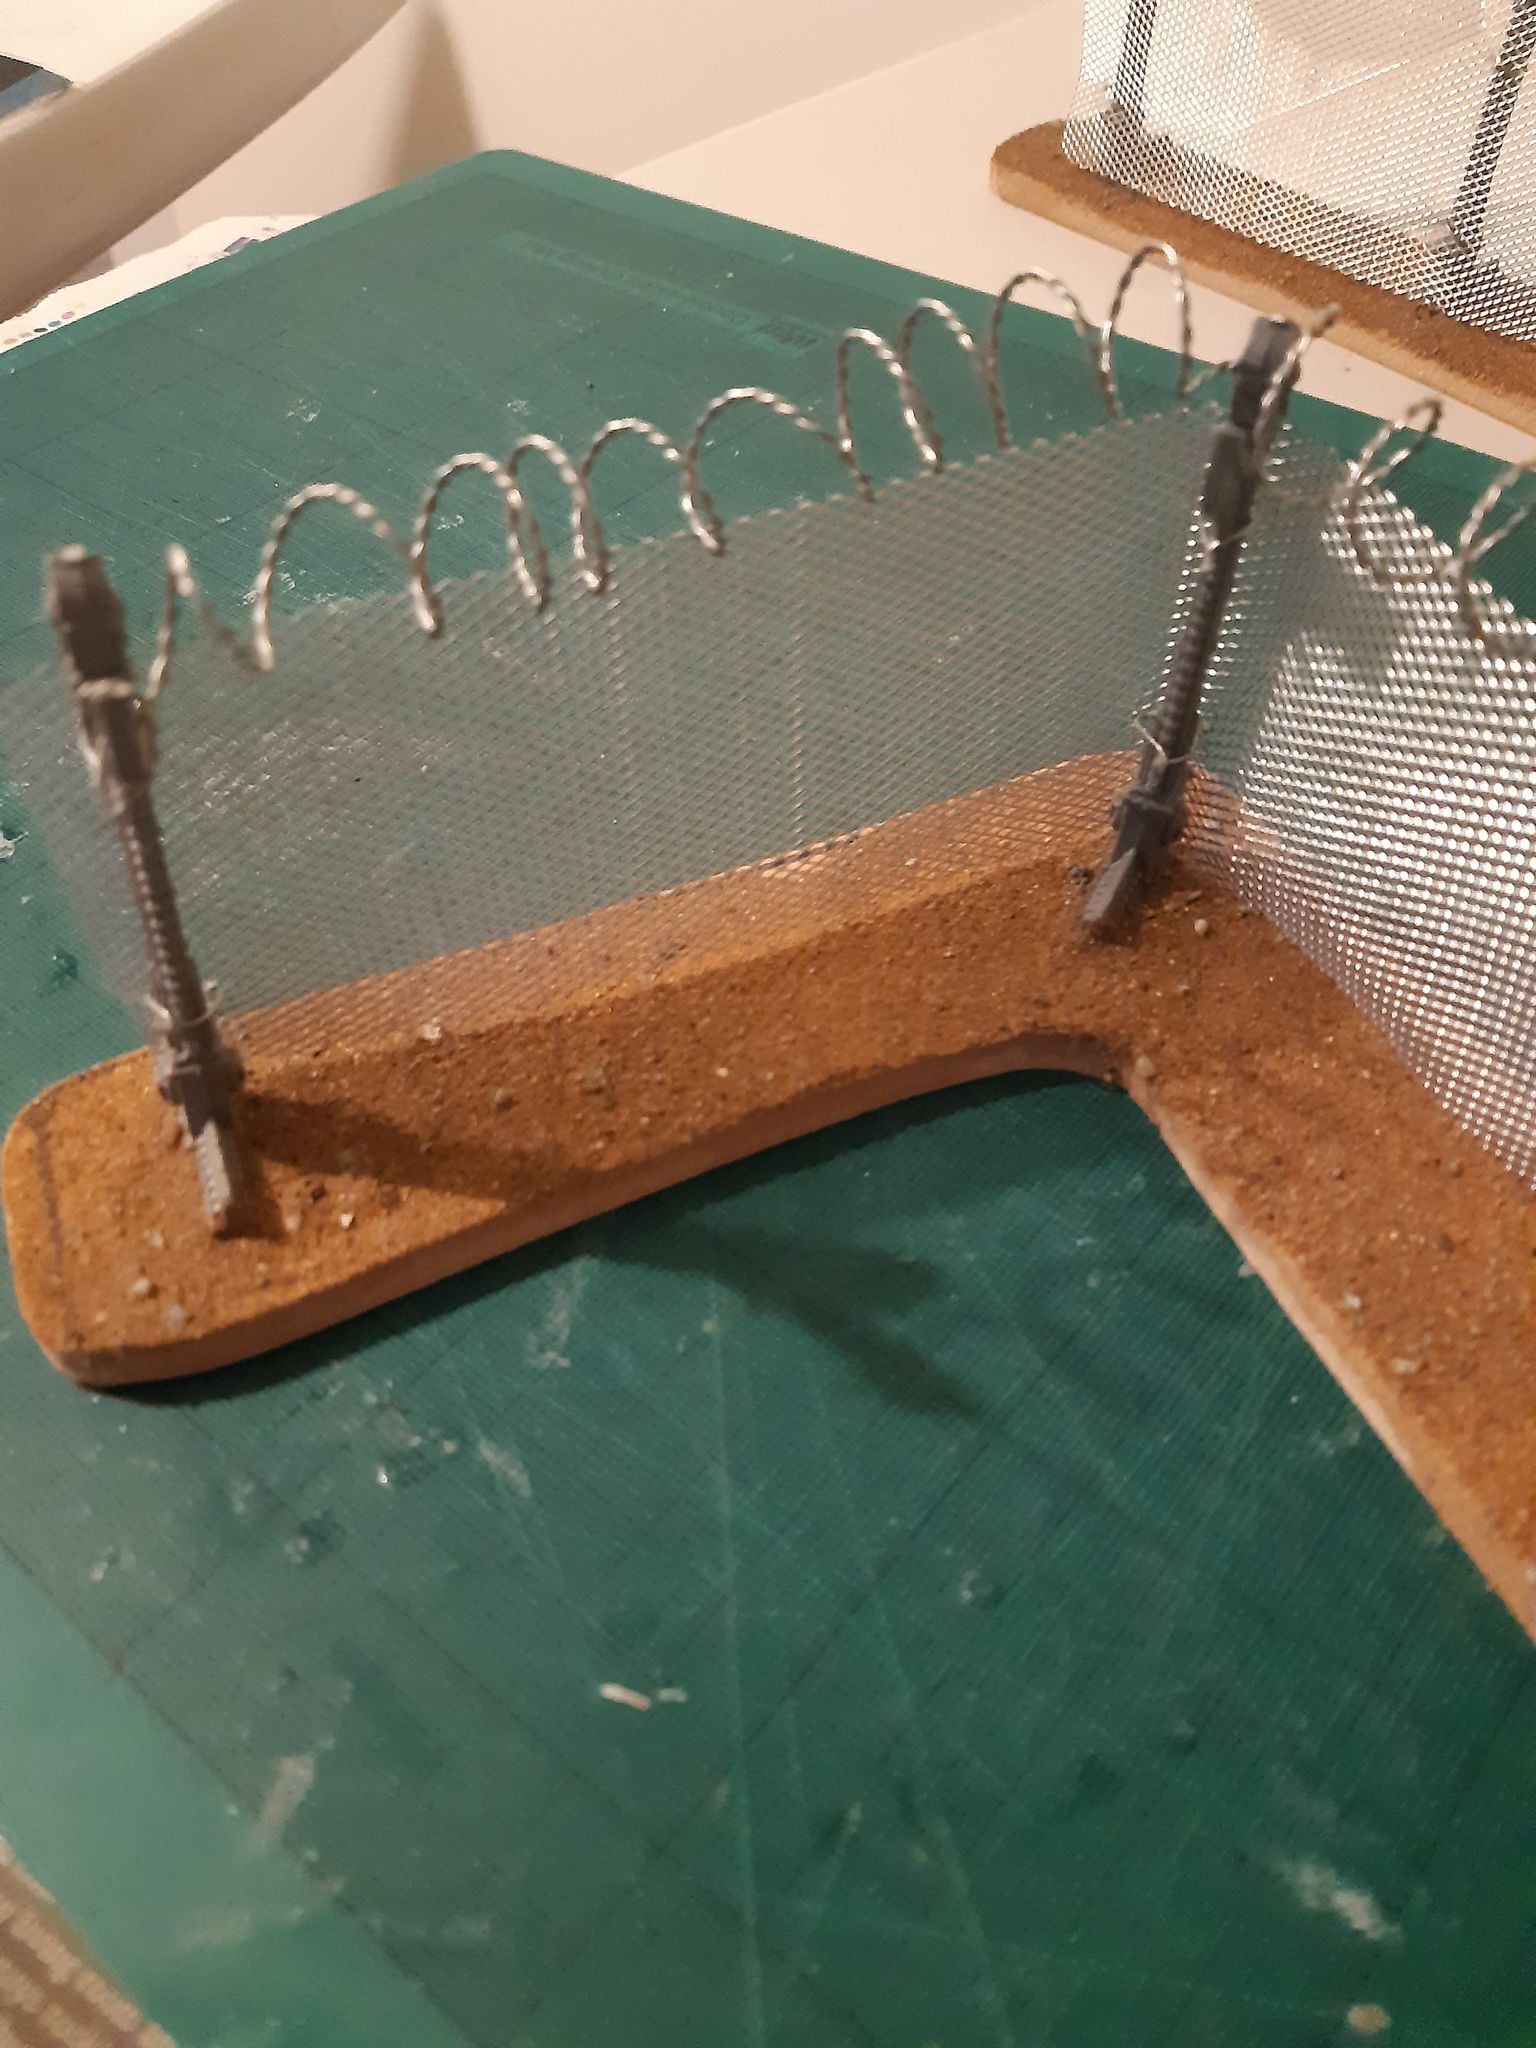
Step 2- Drill out a 1 mm hole on the top of your fence posts. This is to pass the “razorwire” through, and is easier to do before you glue them on to the base.
For my fence posts, I used some spare accessories from a GW ruins kit. I had a ton of these lying around and figured they would make great posts for the fences. You can use similar pieces that you have from your kits, or even just use some balsa wood, or even lolly sticks for your posts.
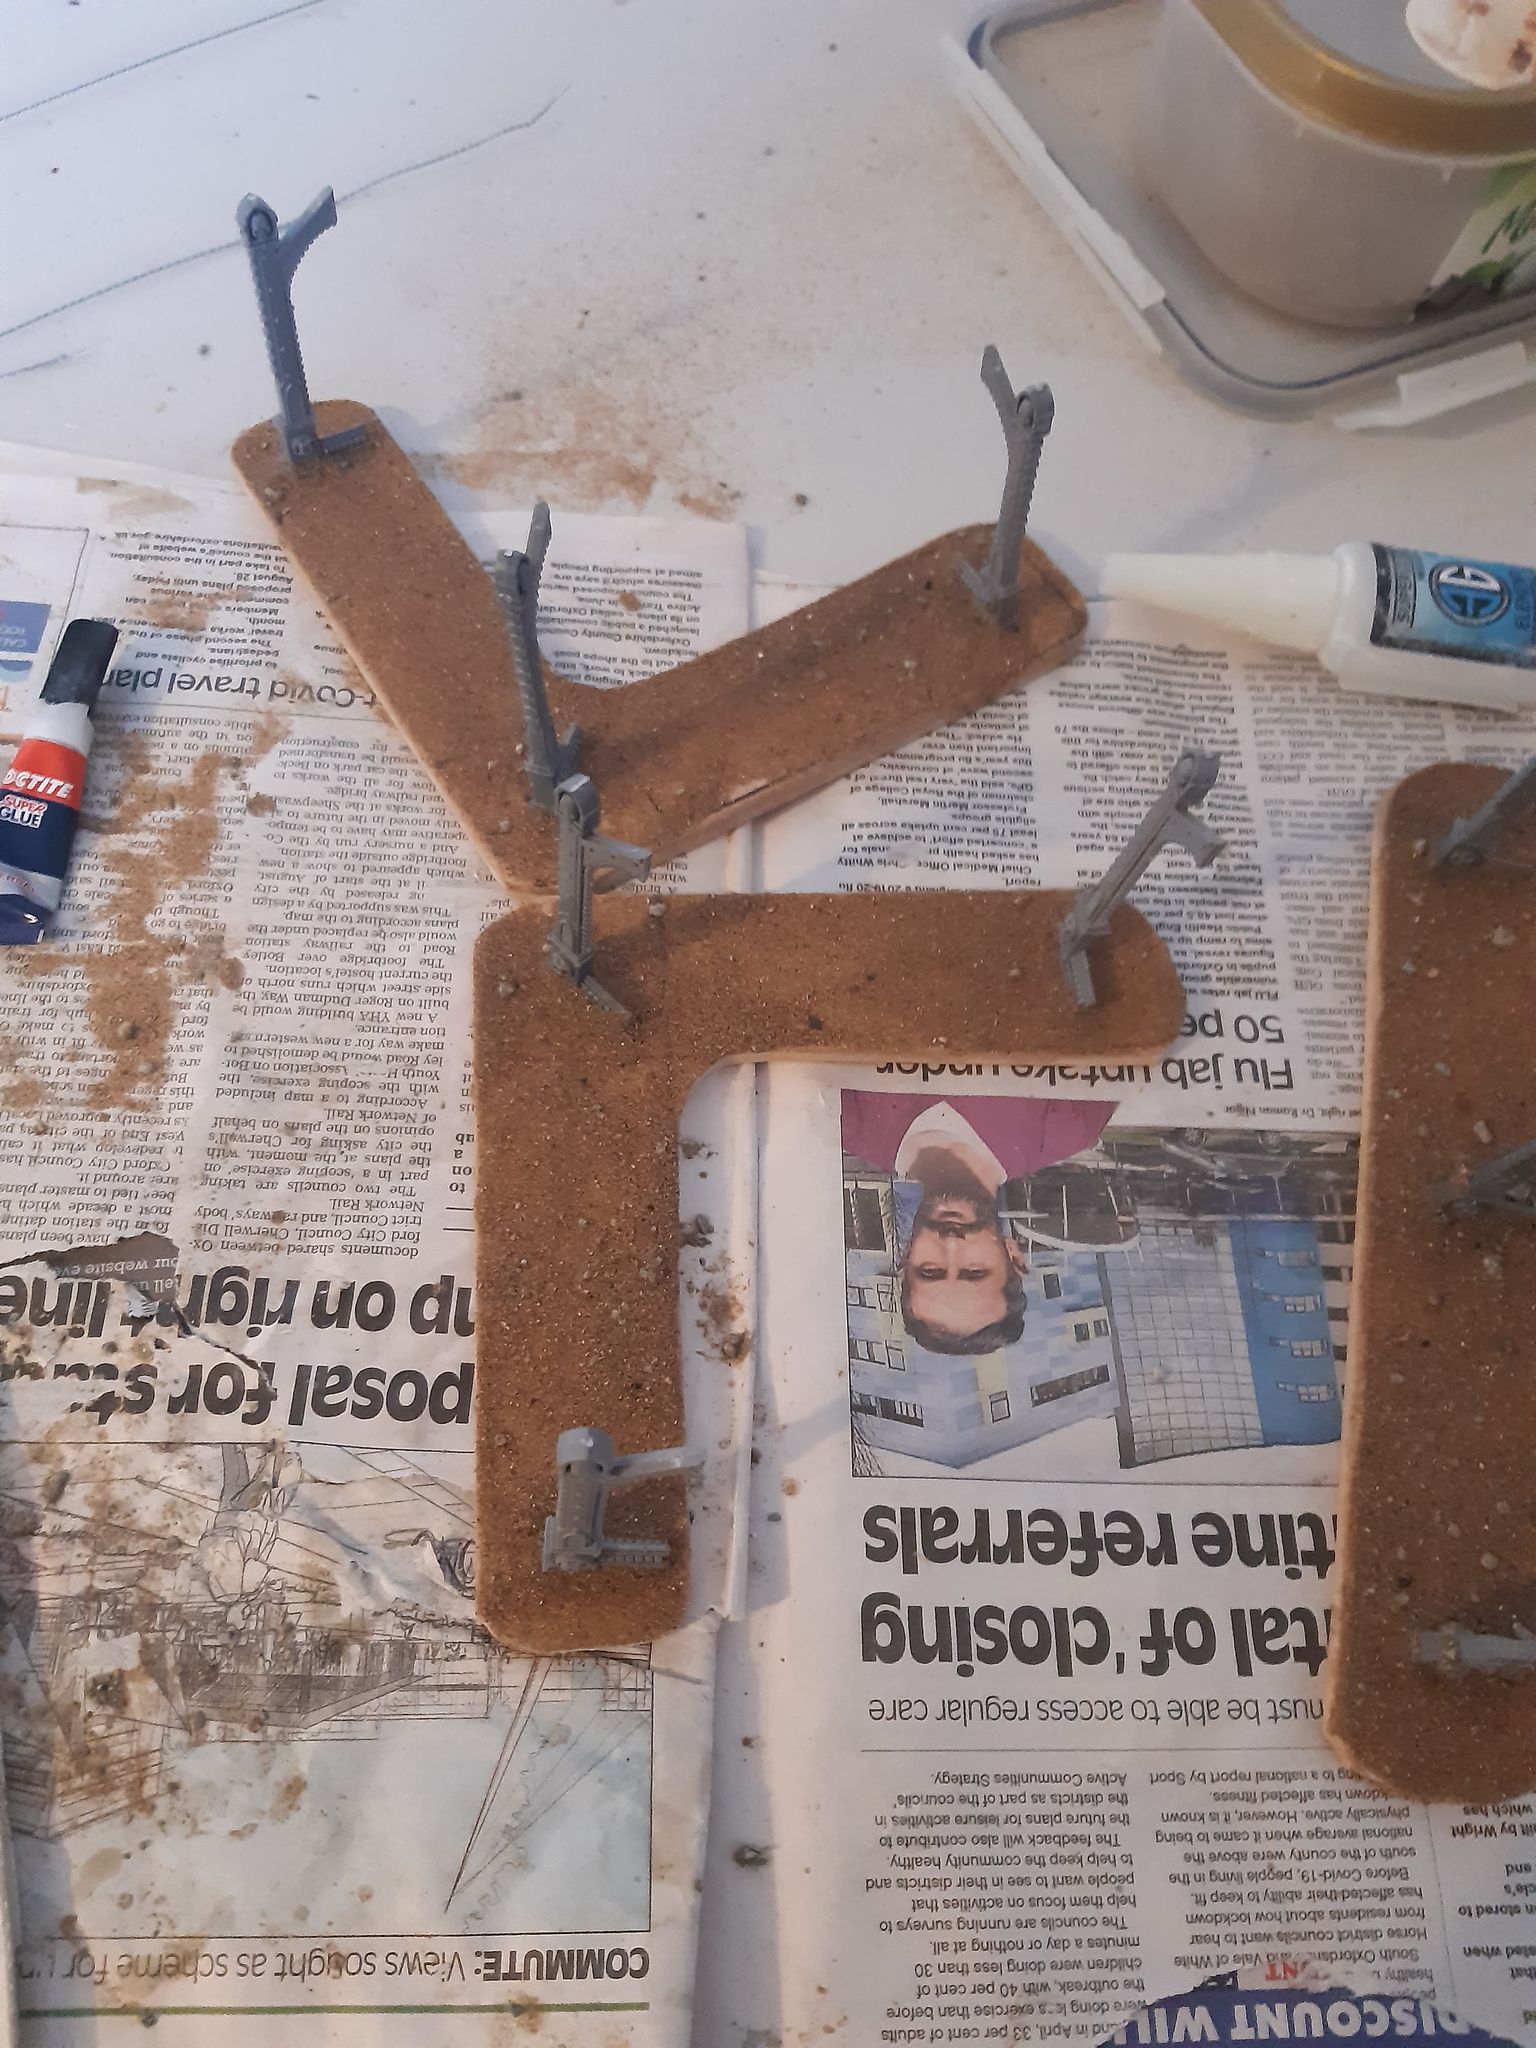
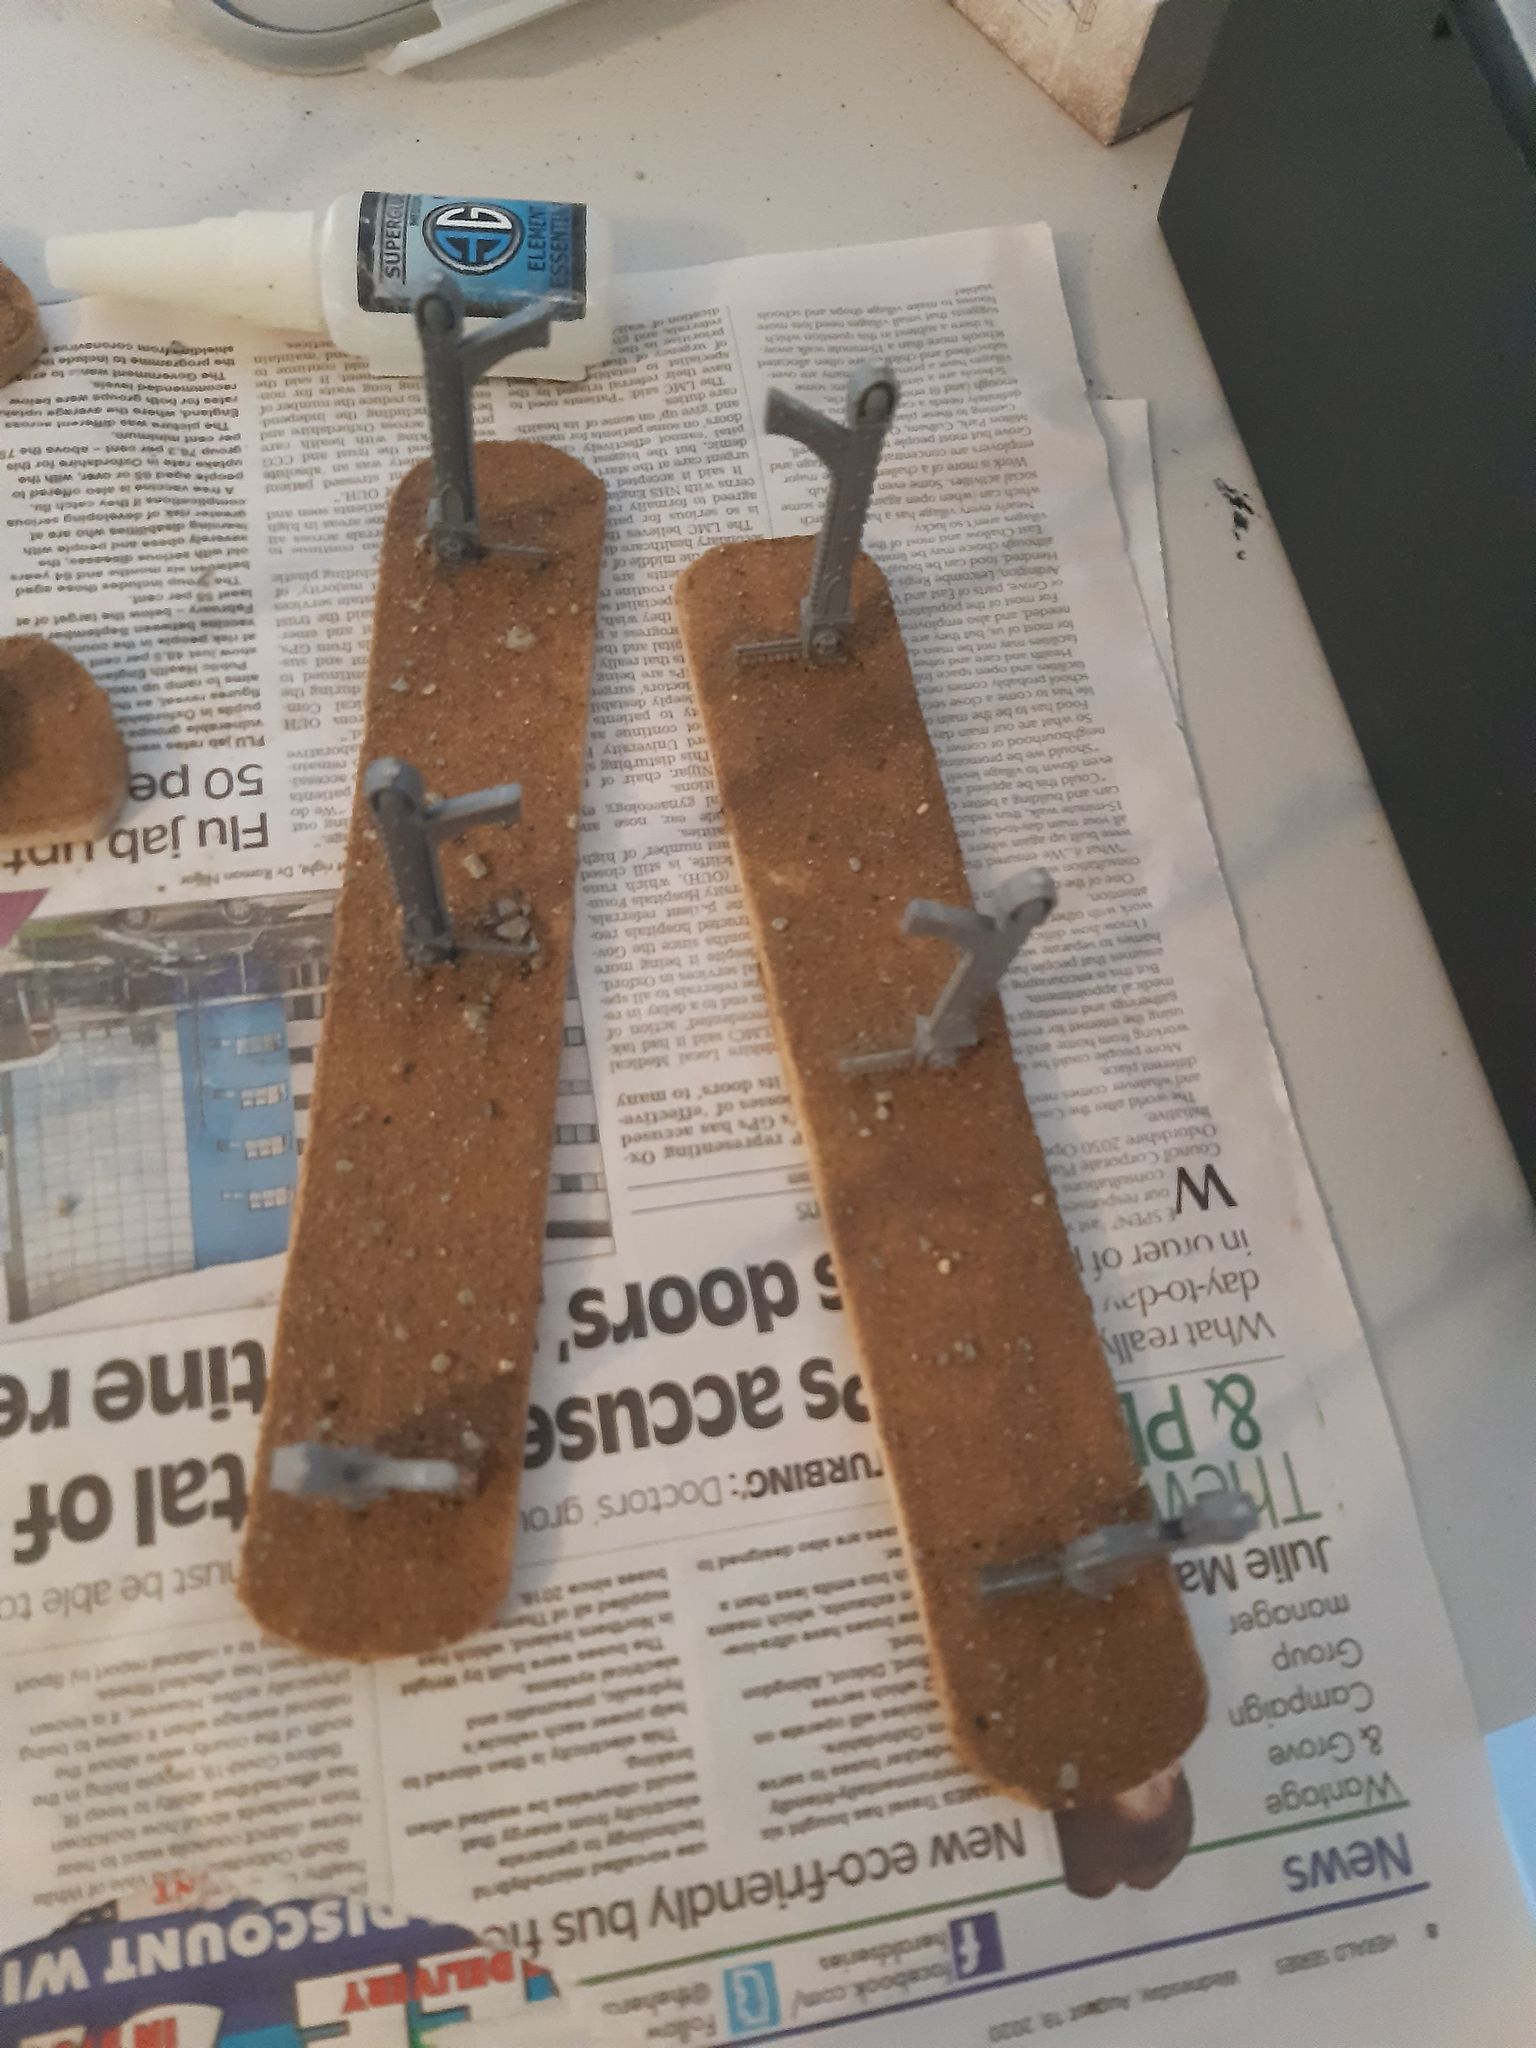
Step 3- Glue the posts to the base. I use epoxy resin to give a really strong bond that will stand up to the rigours of gaming. I find that one post every 3″ looks about right for the scale, so you will need 3 posts for your straight or L-sections.
Step 4- Glue sand to the base, or any other appropriate basing material for your table. Once the glue is dry, I go over the sand in a 1:1 mix of water:PVA, with a little bit of washing up liquid/dish soap. The dish soap helps to break the surface tension of the water and allows it to cover the sand better and create a good seal. Allow plenty of time to dry before finishing construction and painting.
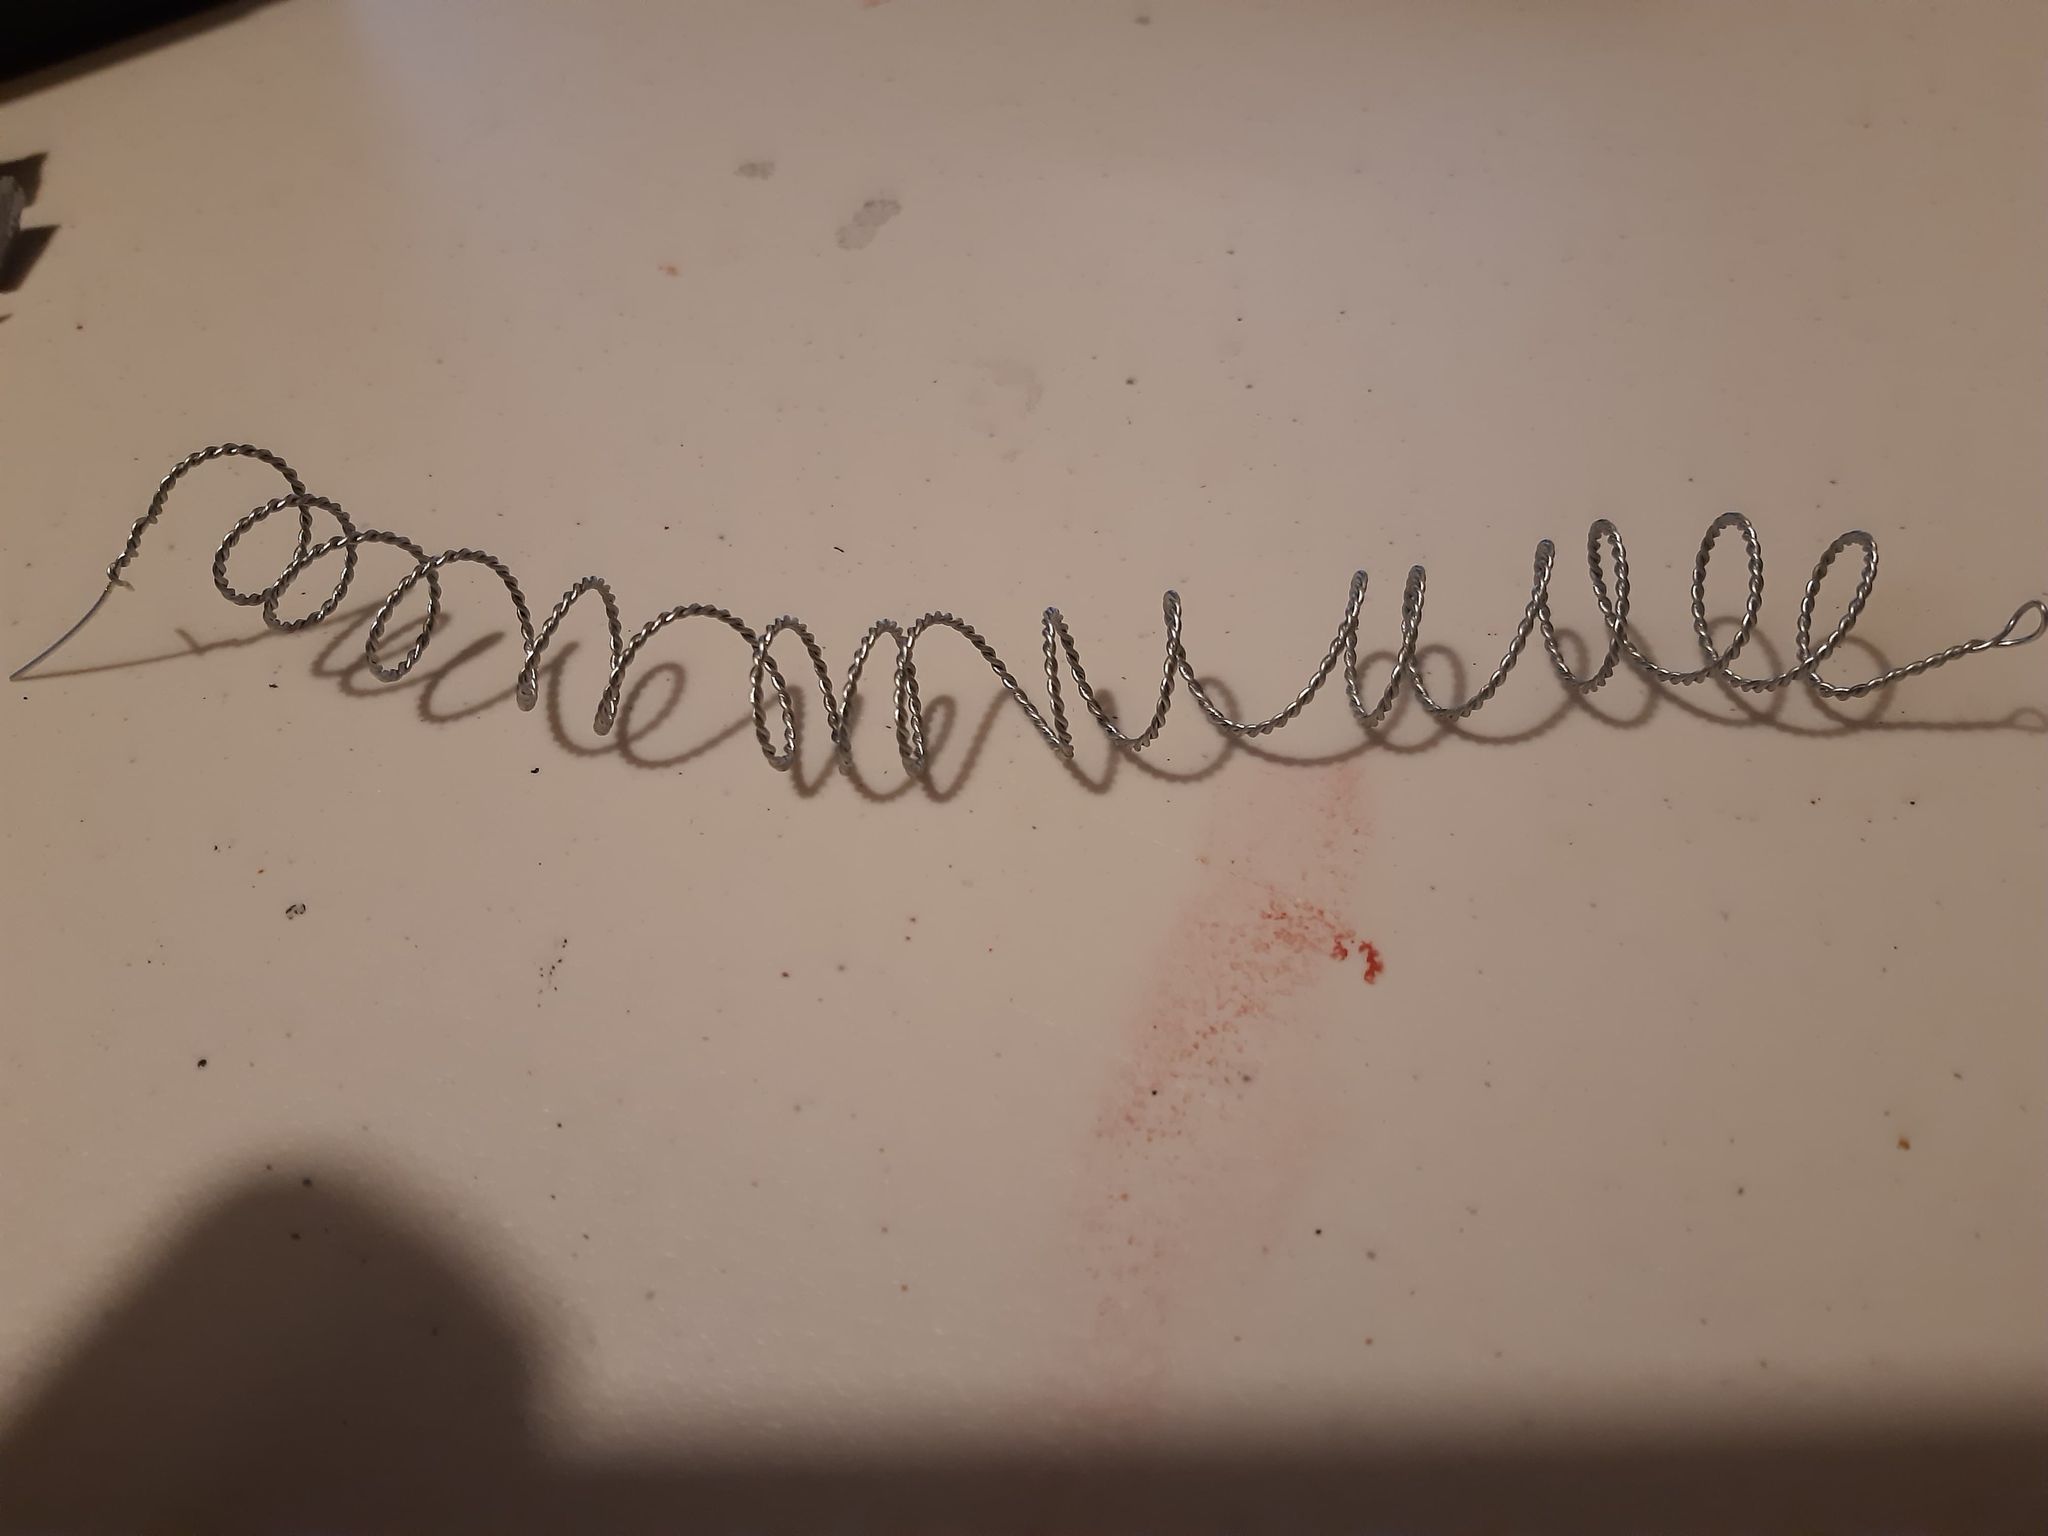
Step 5- Create the “razorwire”. For this, you want to strip lengths of the garden wire. You can use some wire strippers to do this, or can use a pair of wire cutters and some care. Alternatively, if you have an appropriate width of wire, you can just leave the plastic casing on it to save some hassle, but for me, the bare wire looks better.


For each length of razorwire, you want a length of wire around 80 cm long. With the stripped wire, you want to fold the wire in half, so that you are holding both ends, and twist both lengths together to create the razorwire effect.
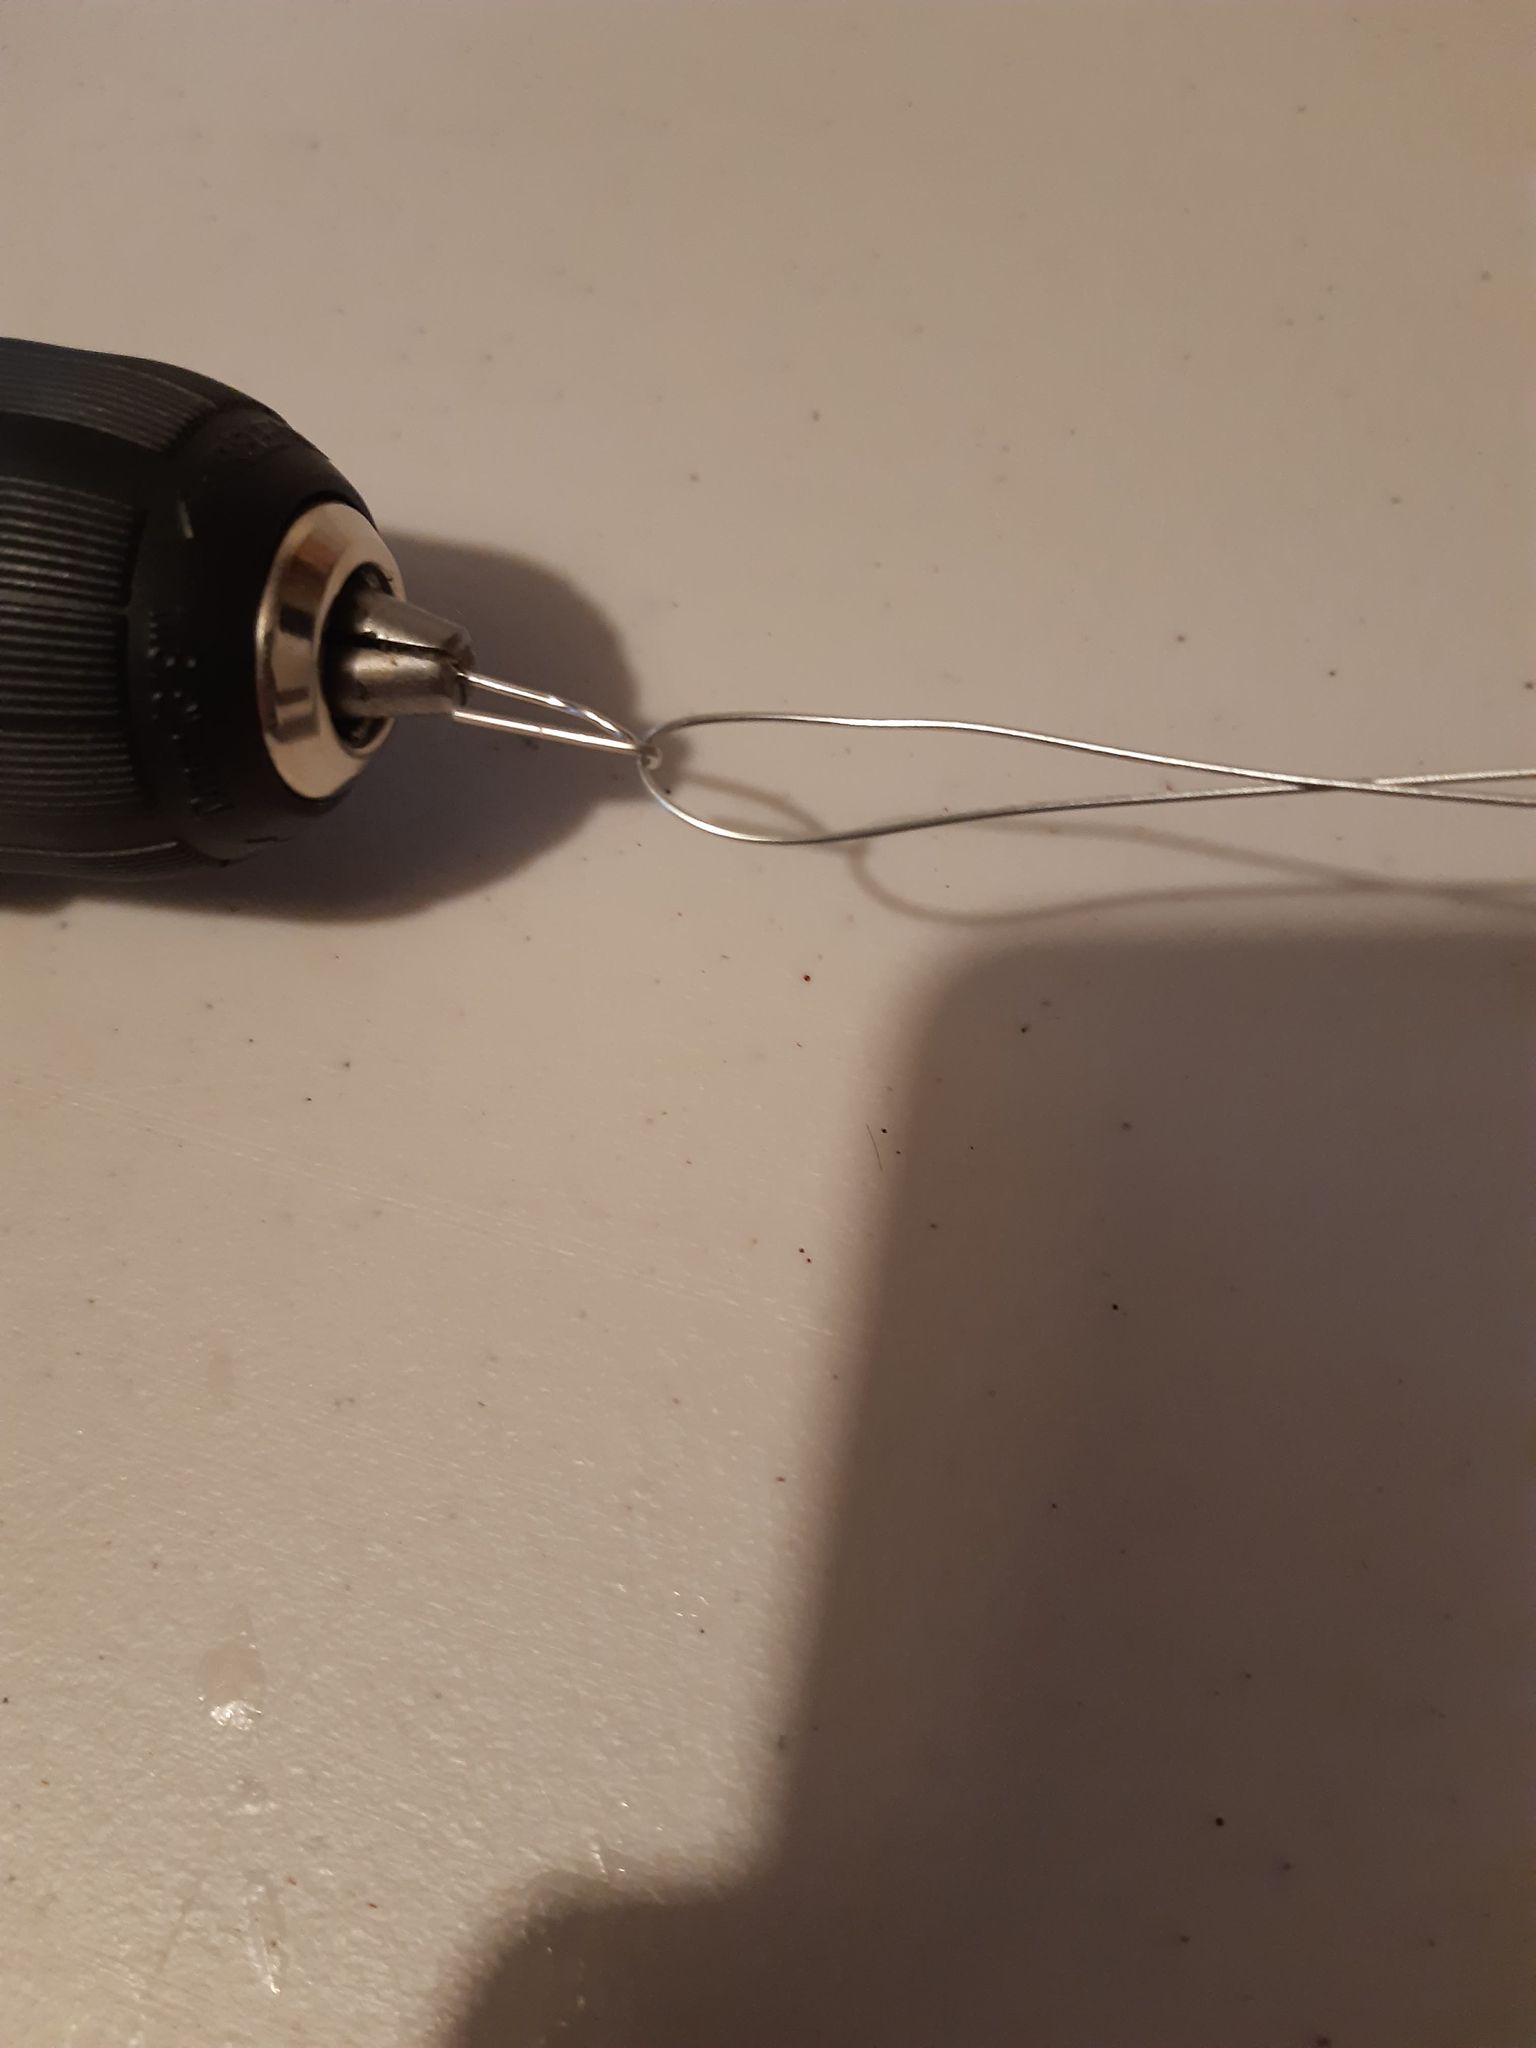
The easiest way to do this is using an electric drill and paperclip. Fit the paperclip to the drill and secure.
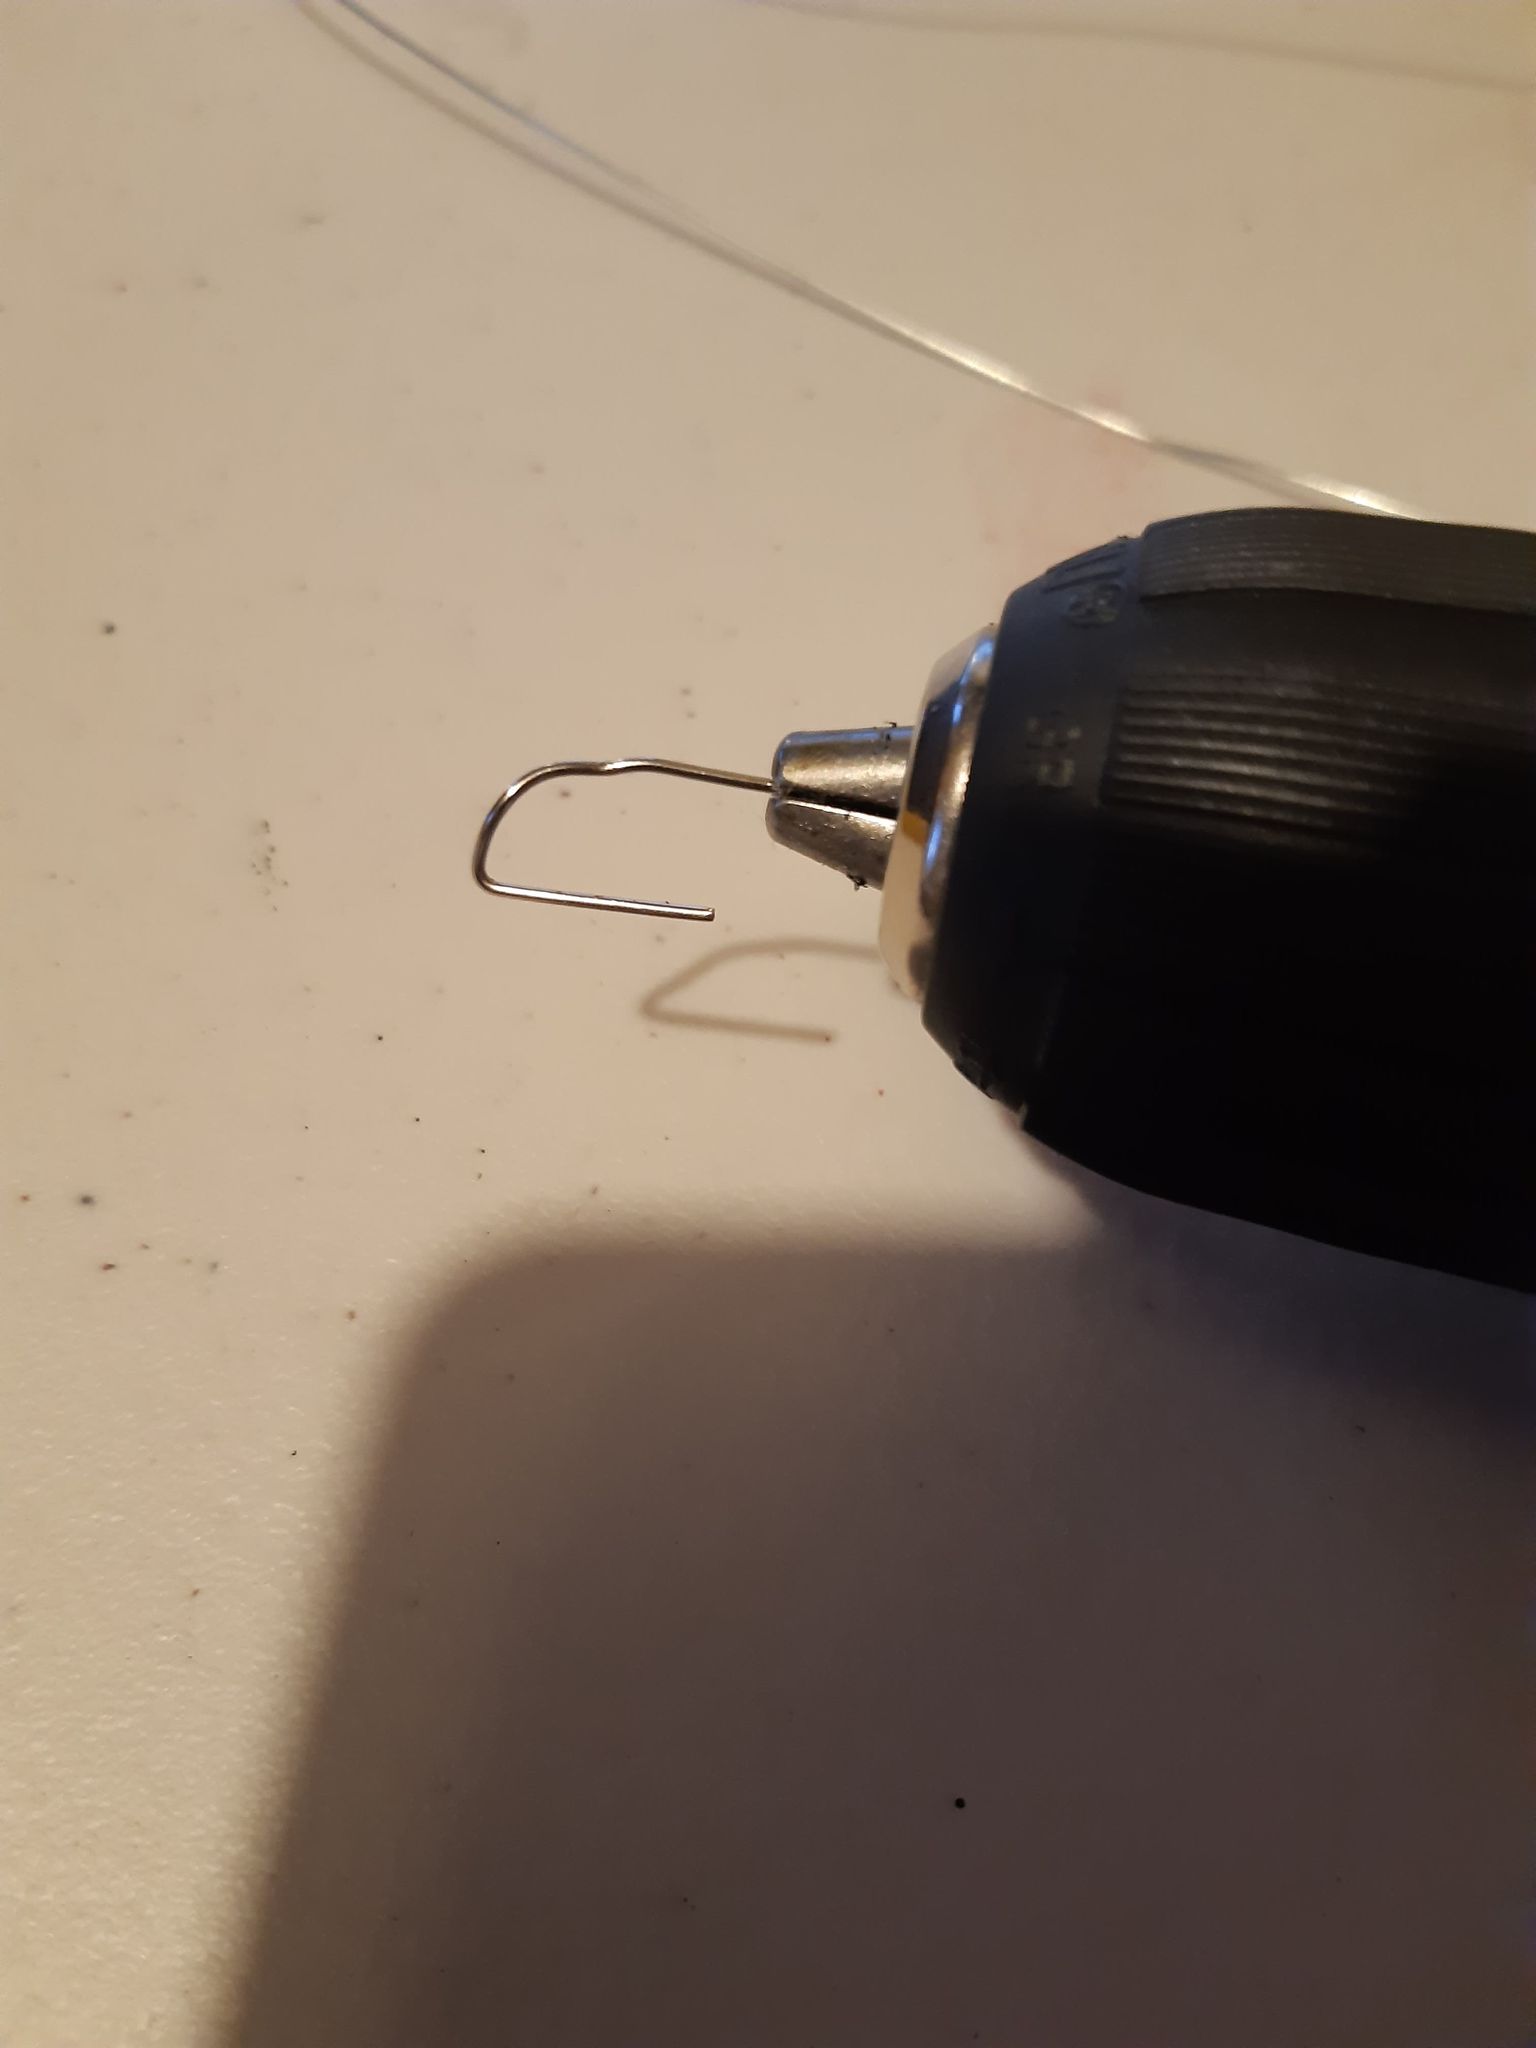
Put the “loop” of the wire through the paperclip and pull the other end to tighten the loop around the paperclip. Holding the loose ends with a pair of pliers makes this easier to do.
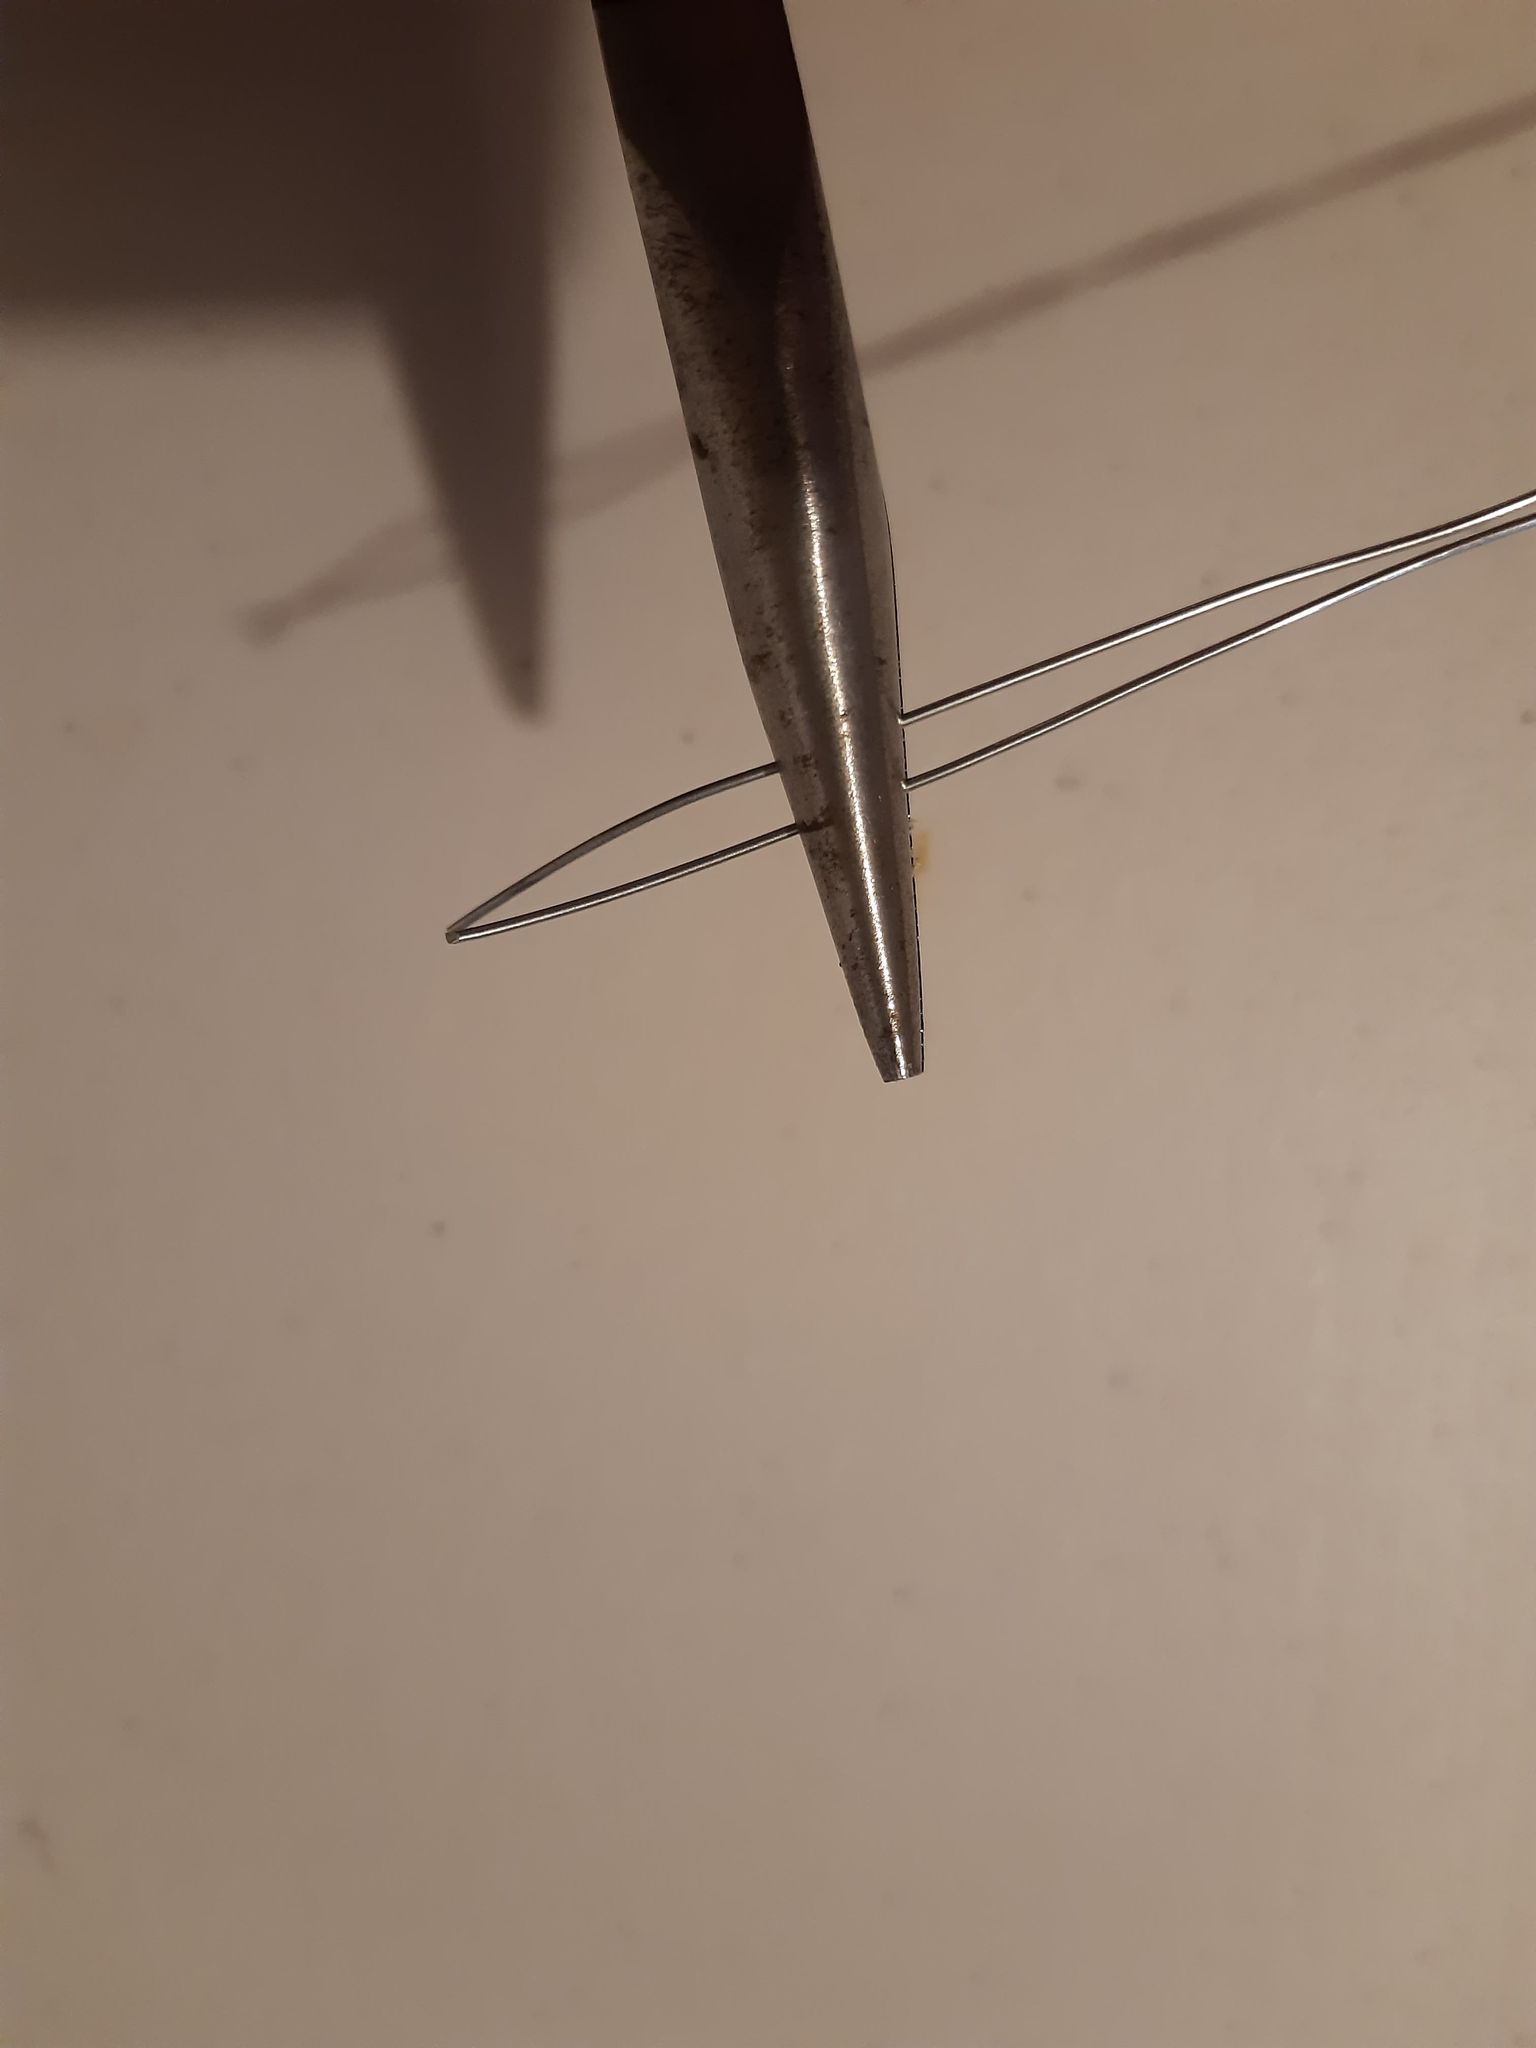
Turn on the drill to start twisting the wire. You should twist the wire until it looks appropriate for your razorwire, such as below.
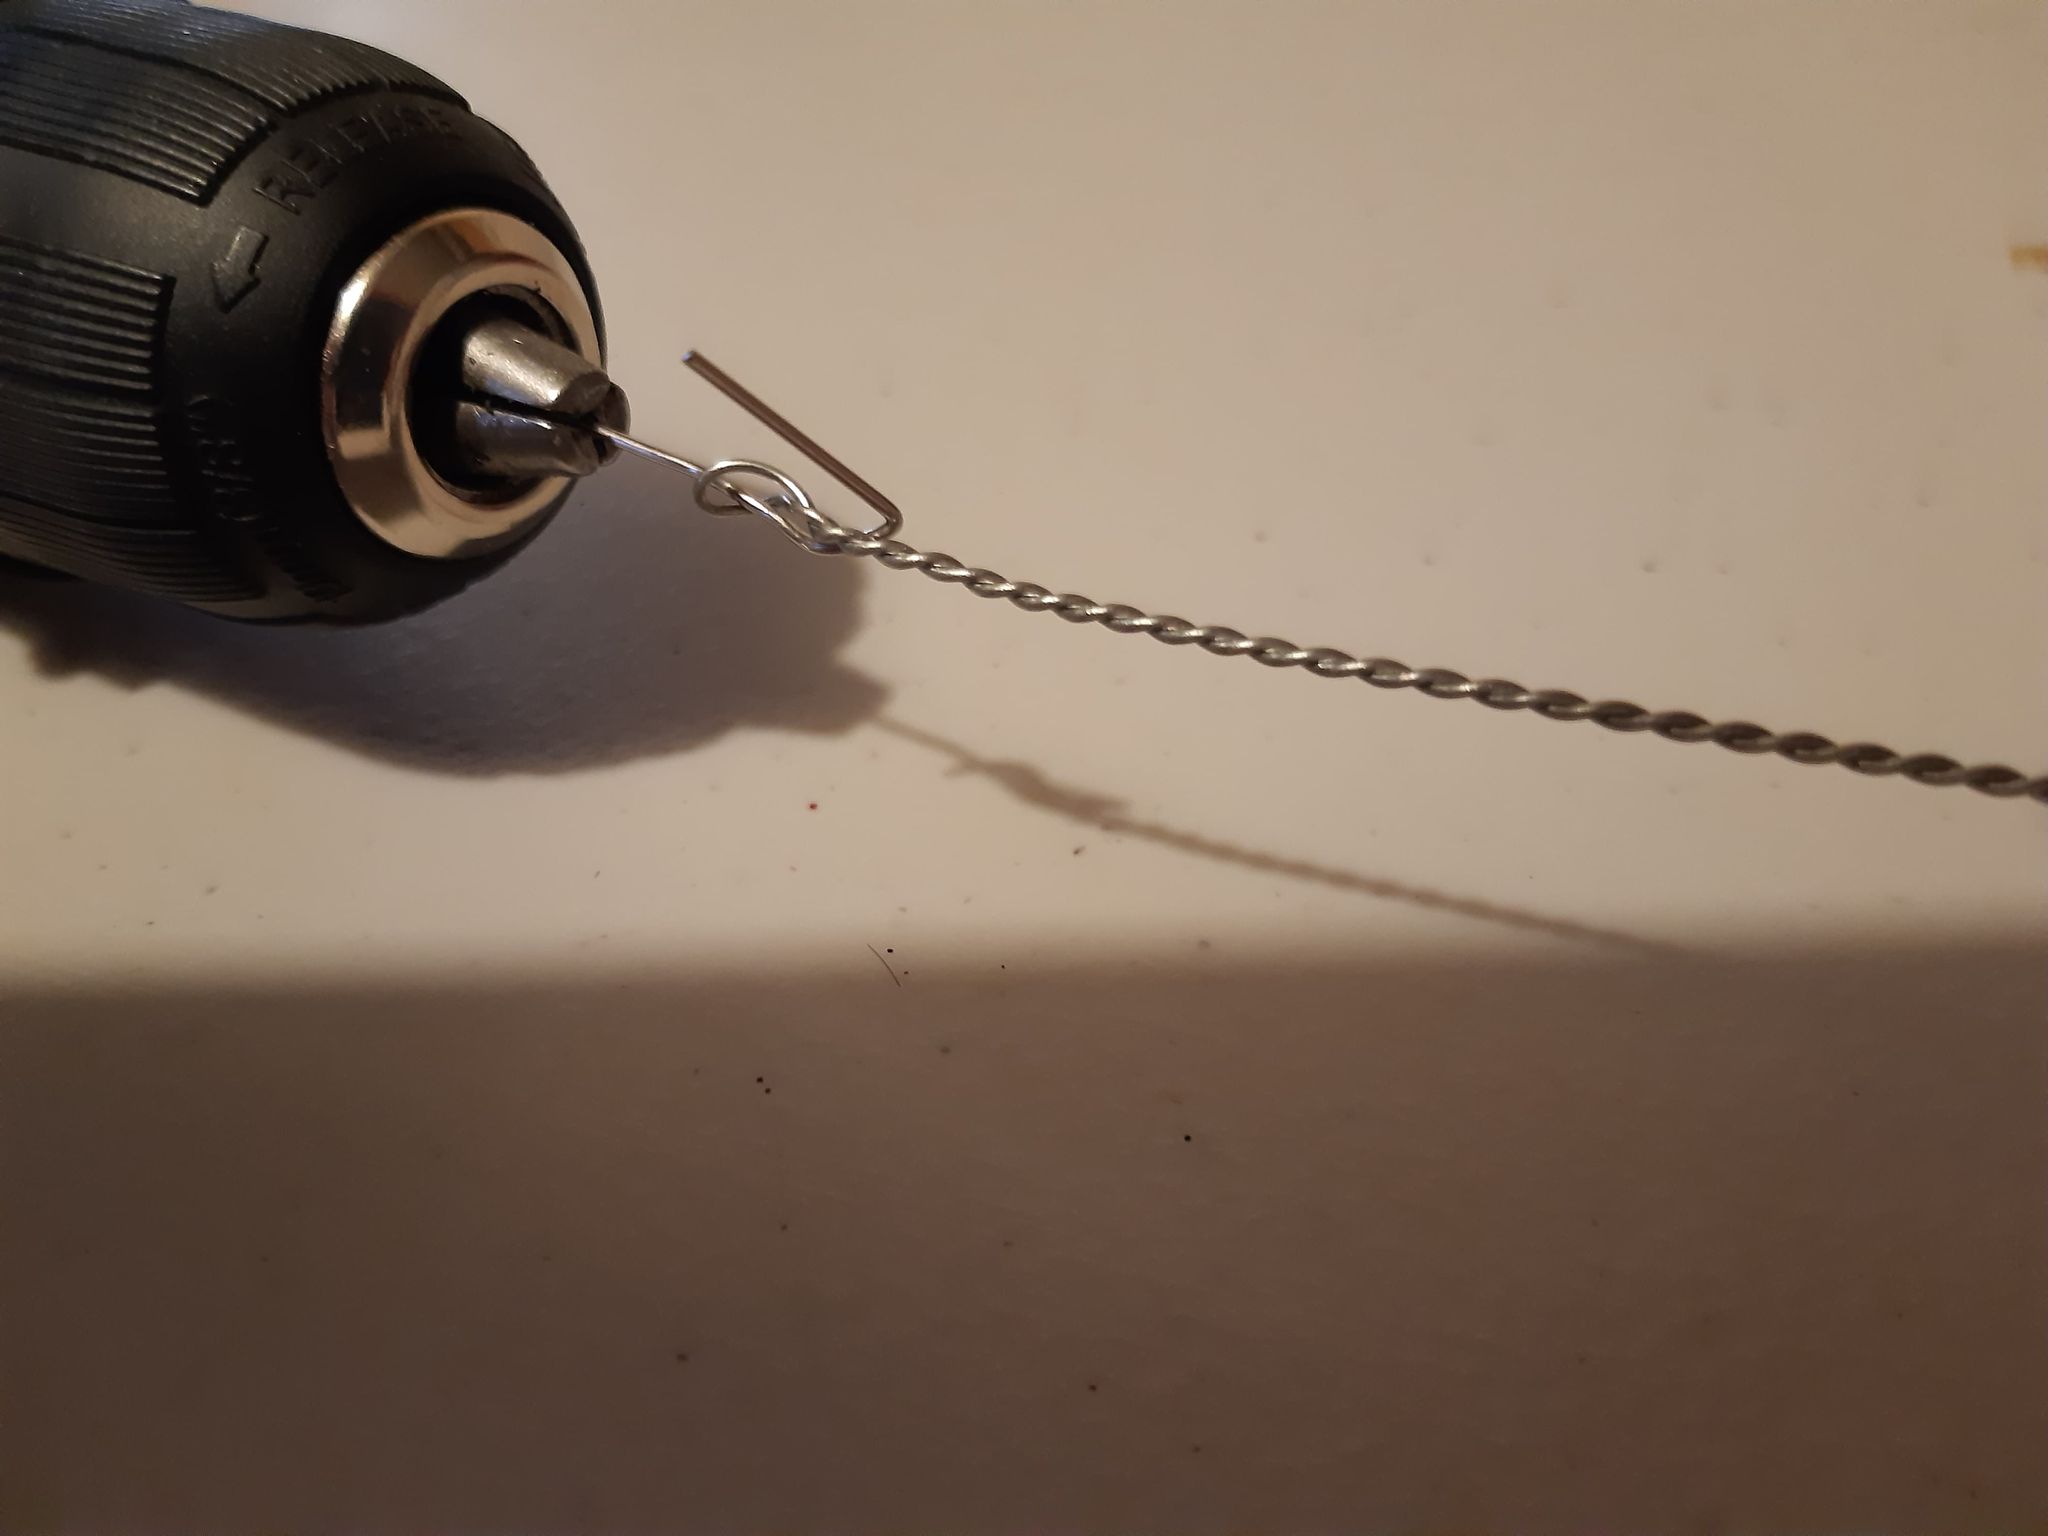
Put some superglue on either end of the wire to secure the bond and stop it from unravelling.
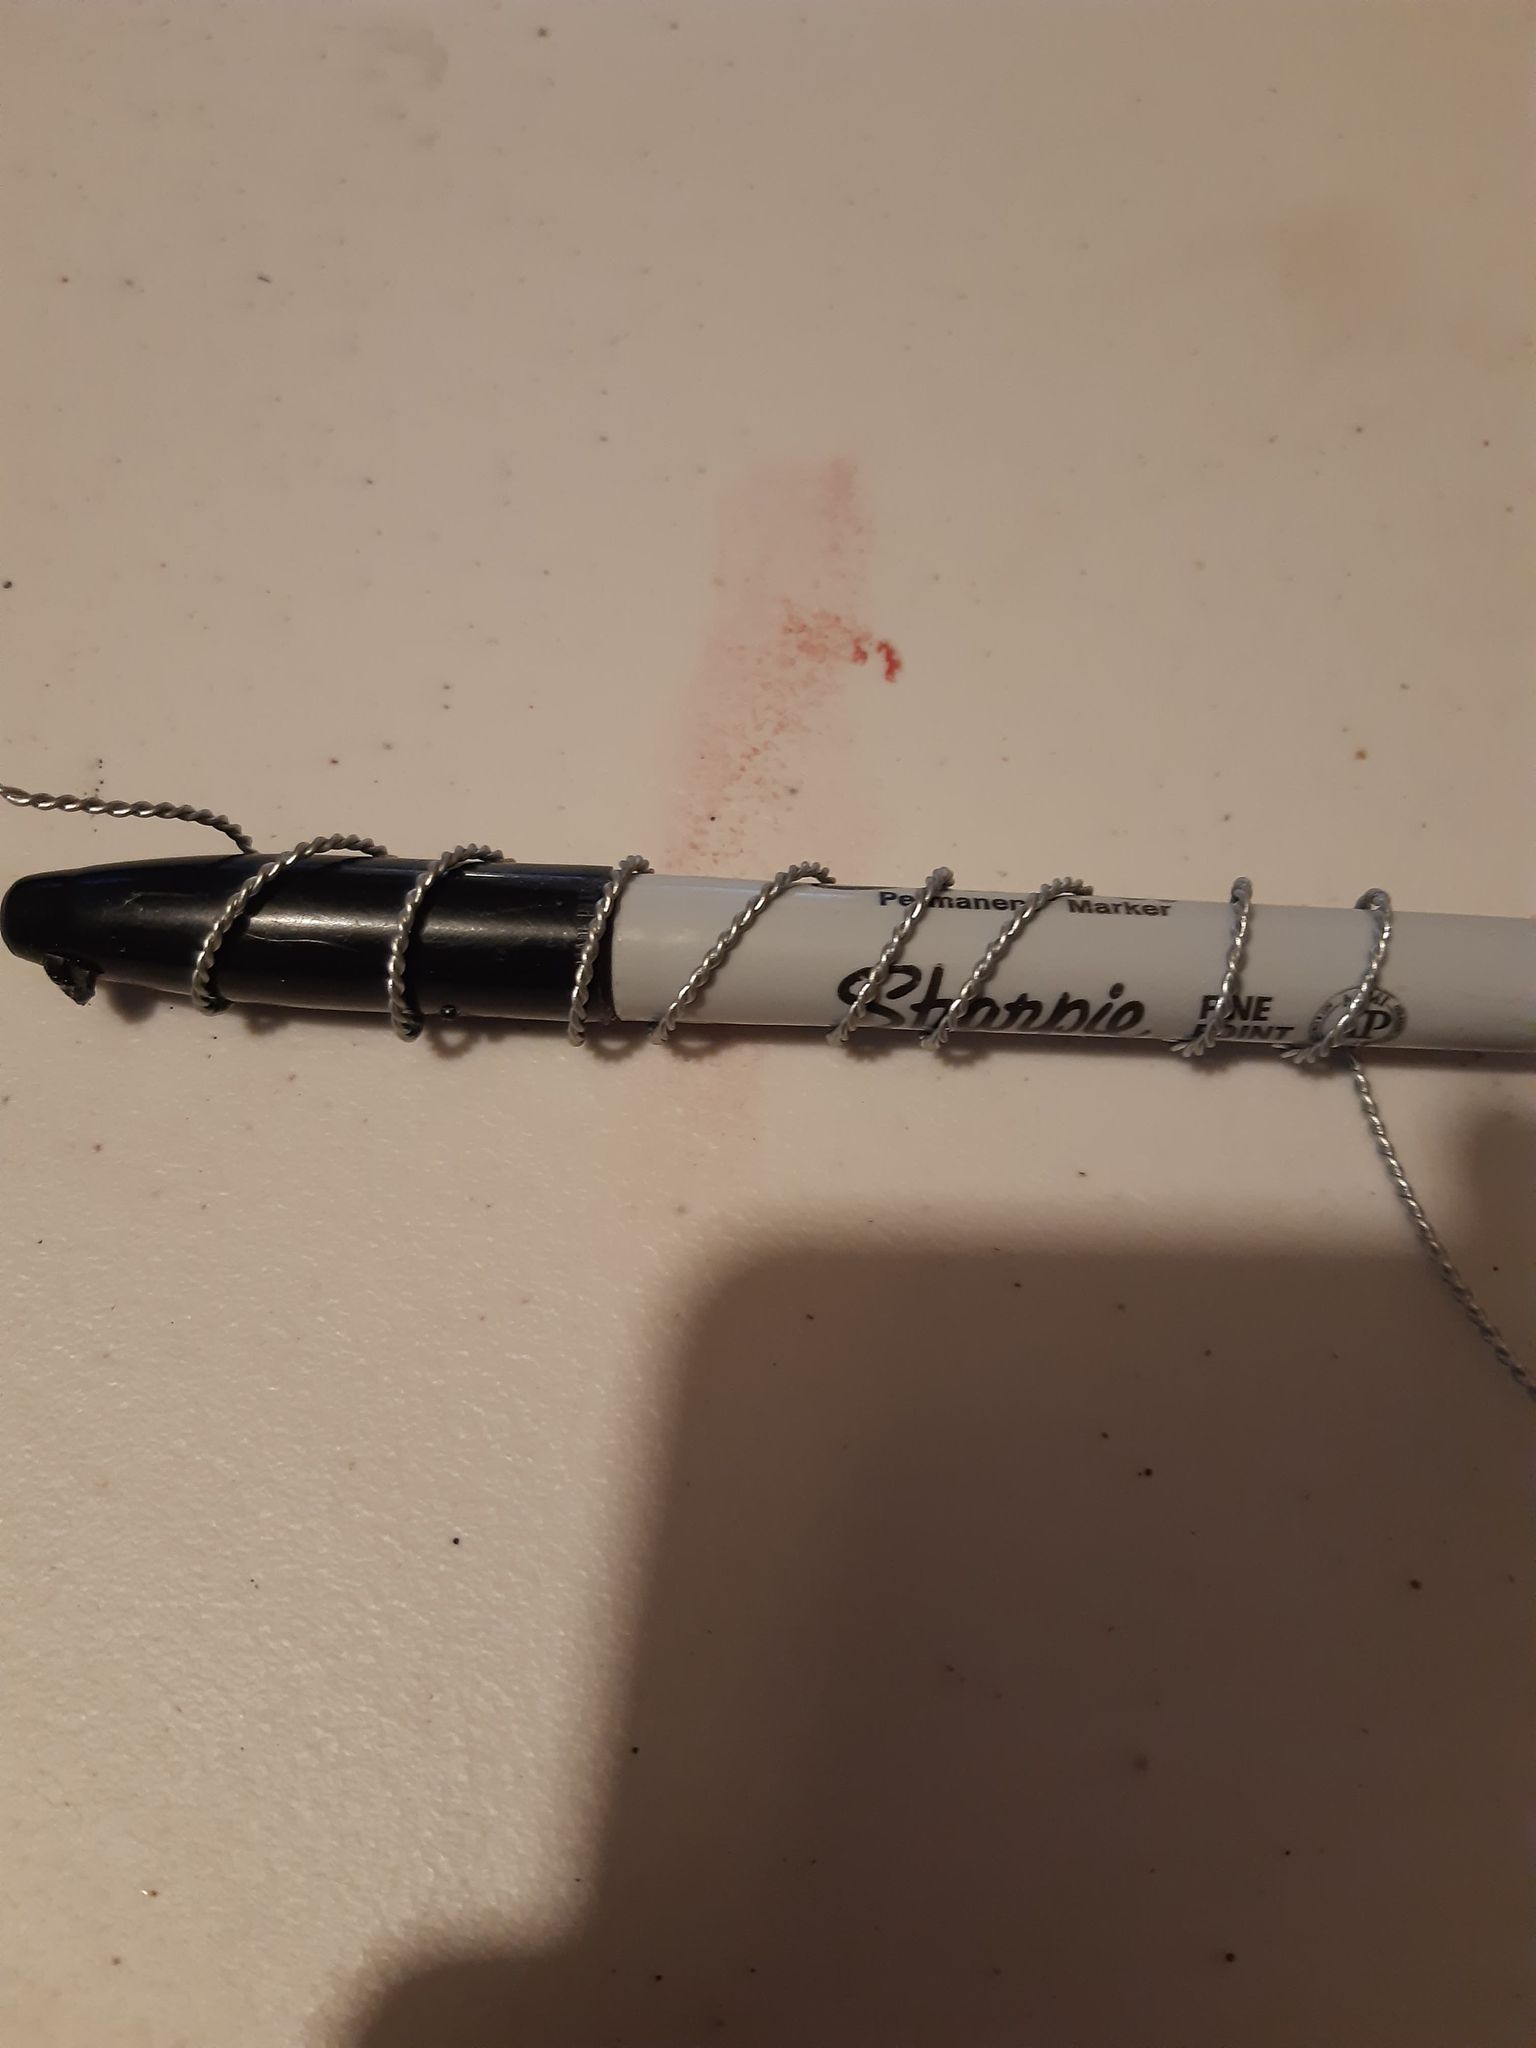
Finally, wrap the wire around a thick pen or pencil to get the shape of the rolls.
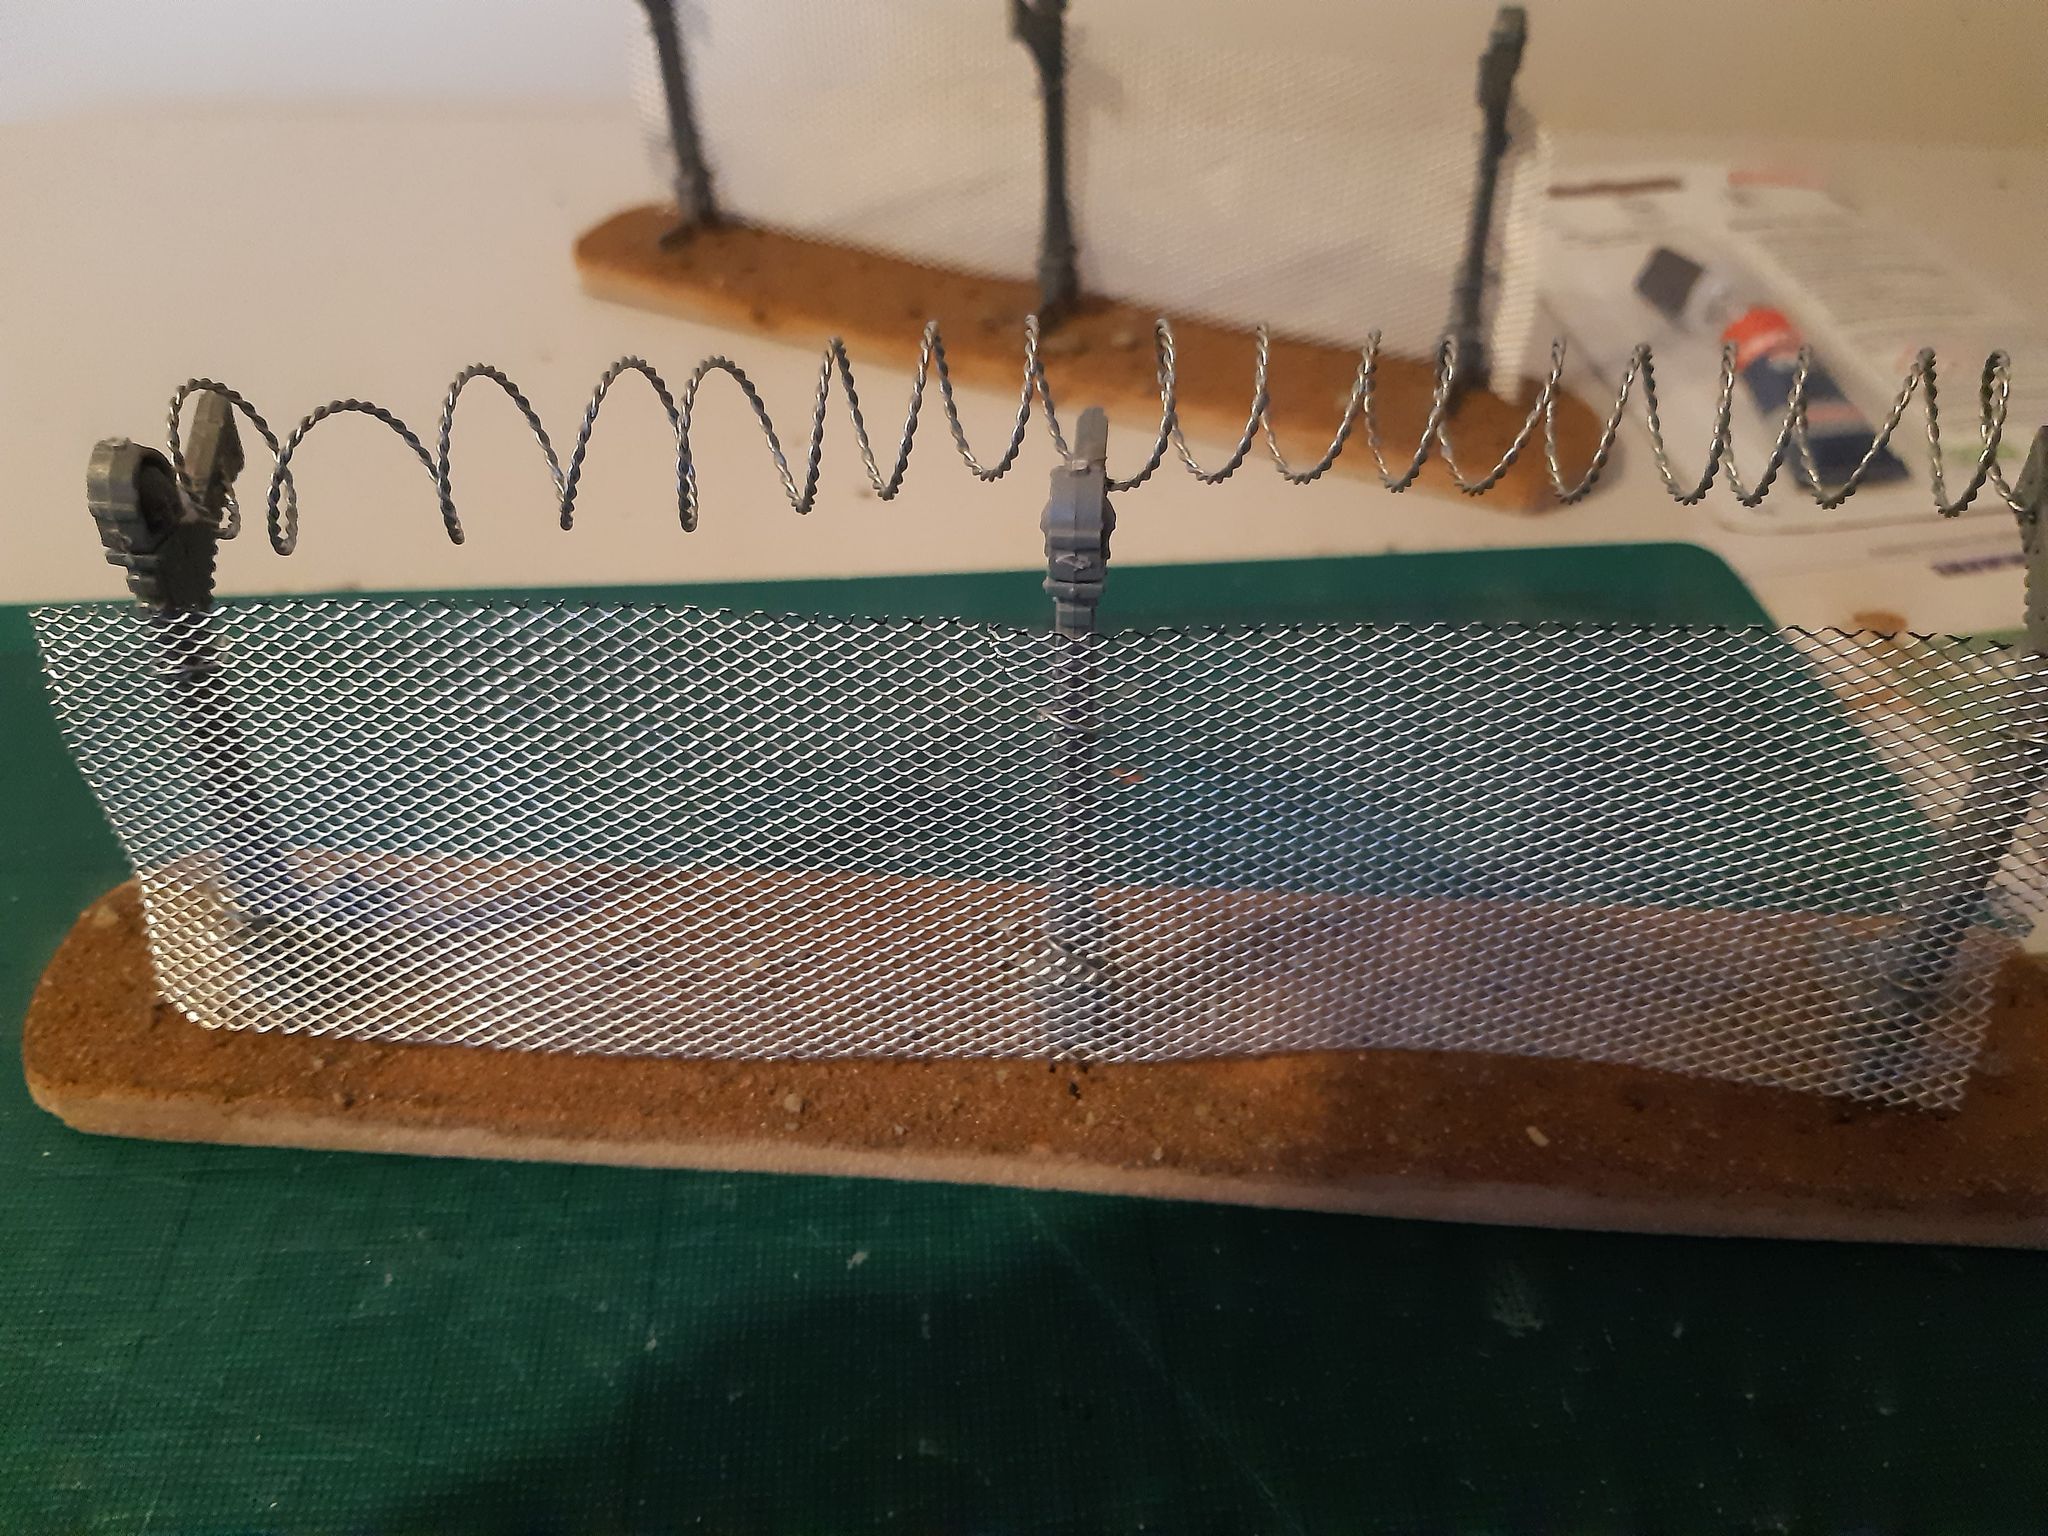
Step 6- Cut the mesh to an appropriate height and length for your fences.
Step 7- Attach the mesh to the fence posts. You can either glue them on, or use some spare wire to attach it. I run a length of wire through the holes in the mesh and twist them together to secure it to the post. Again, use some superglue to glue the twist together and stop it unravelling. Once dry, you can cut off the excess wire.
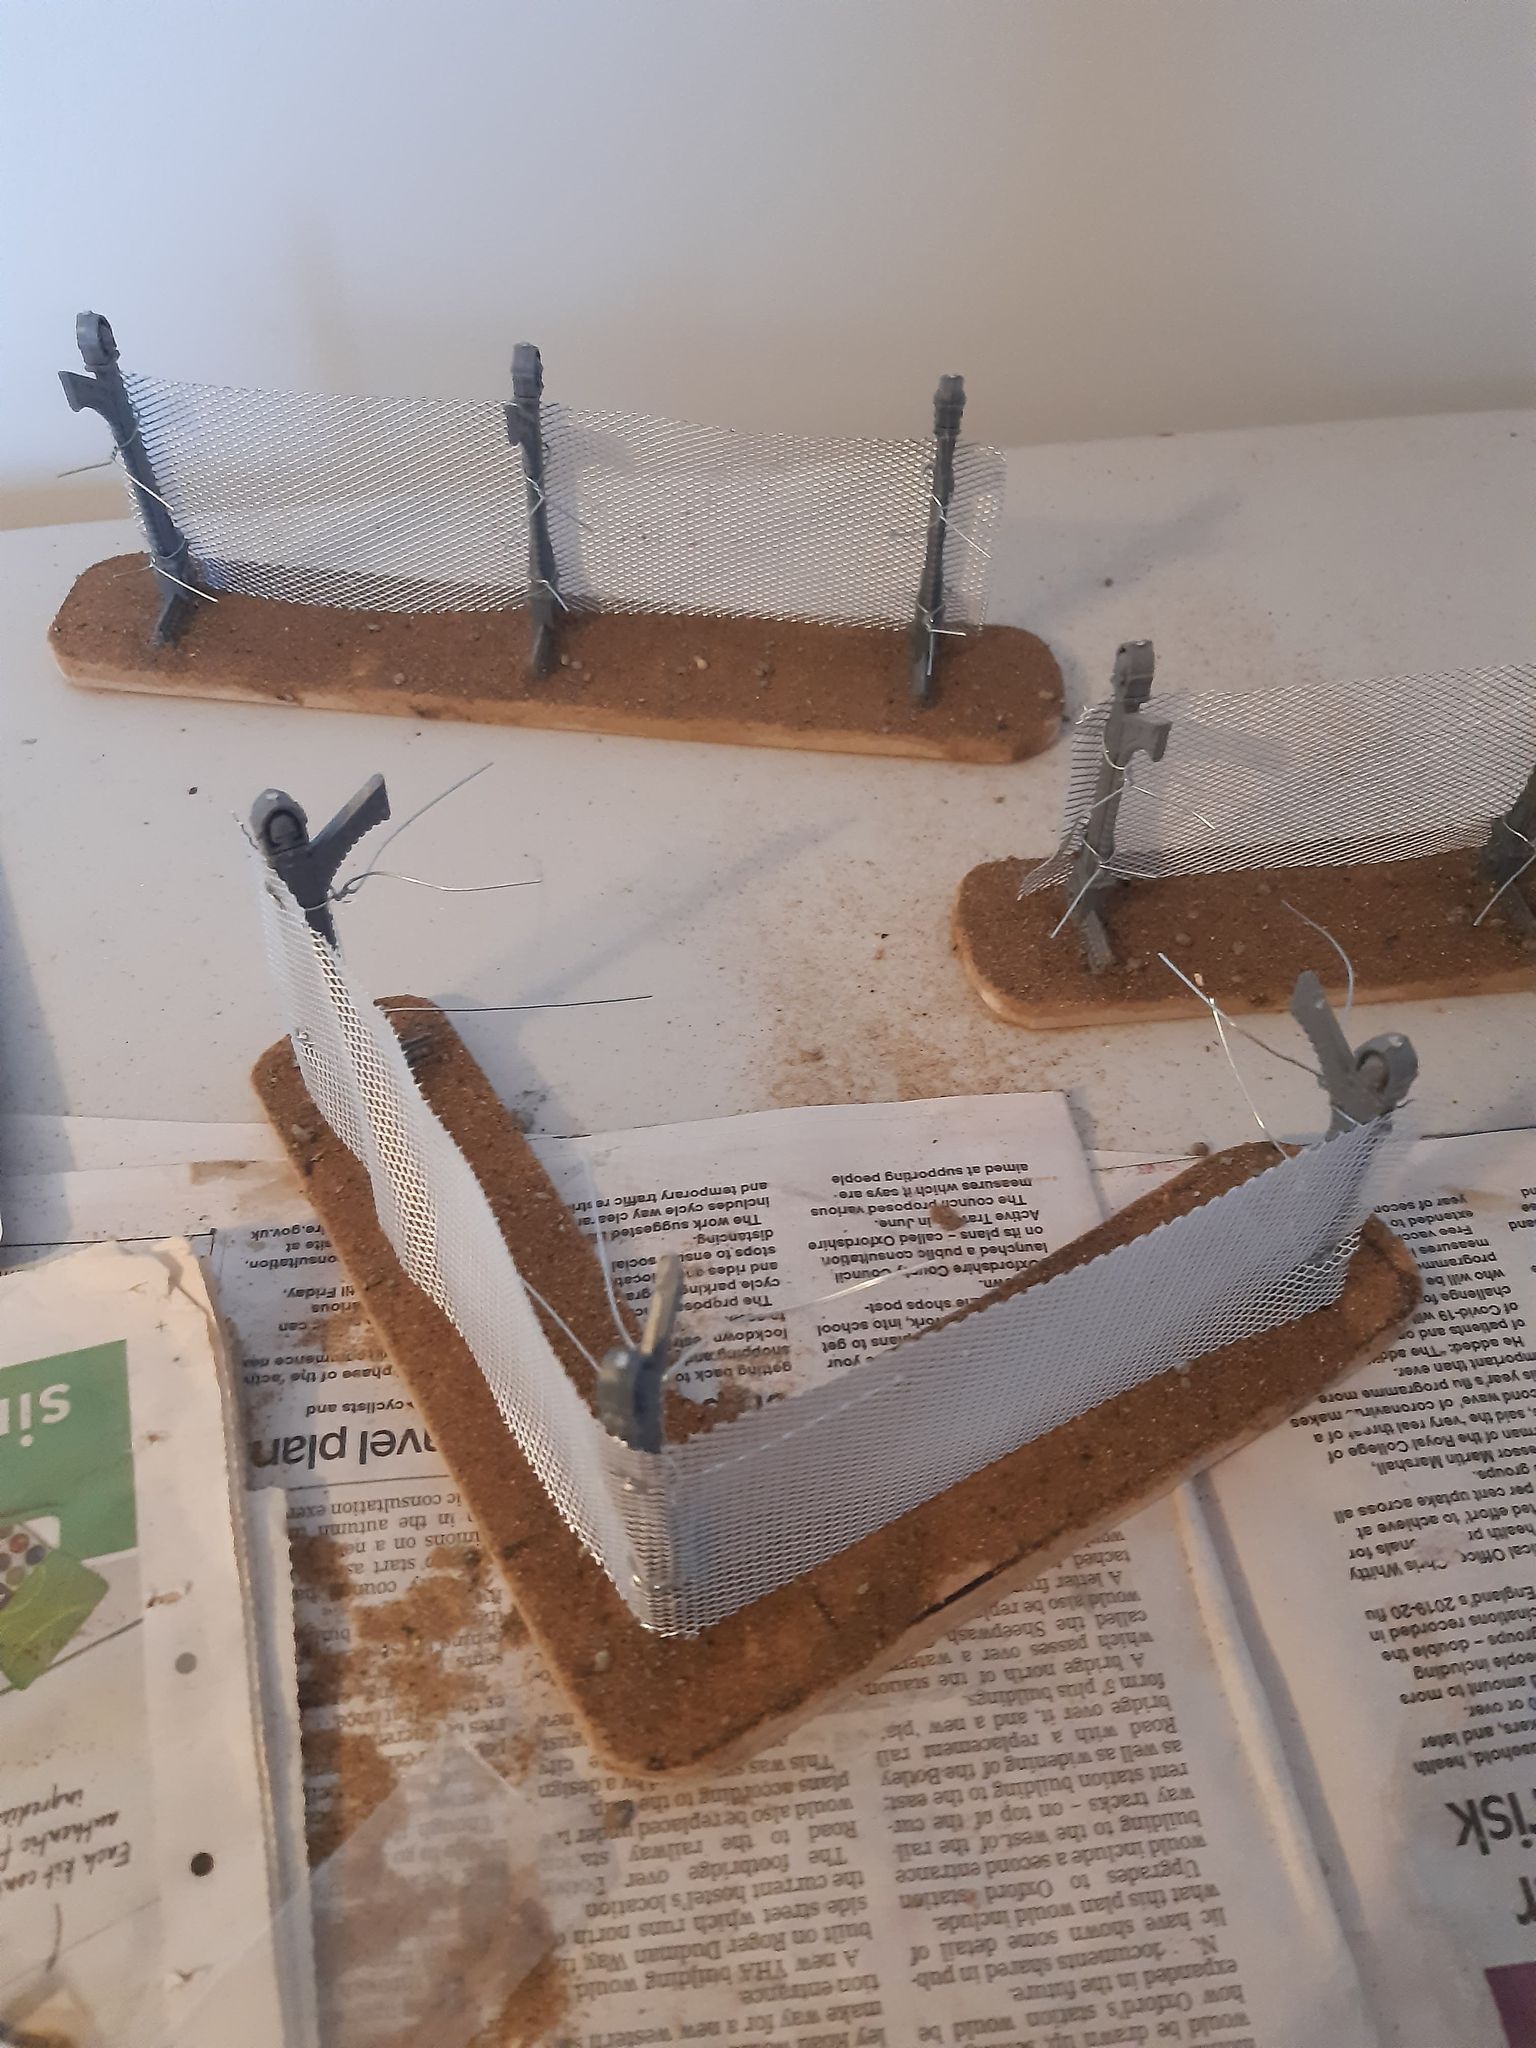
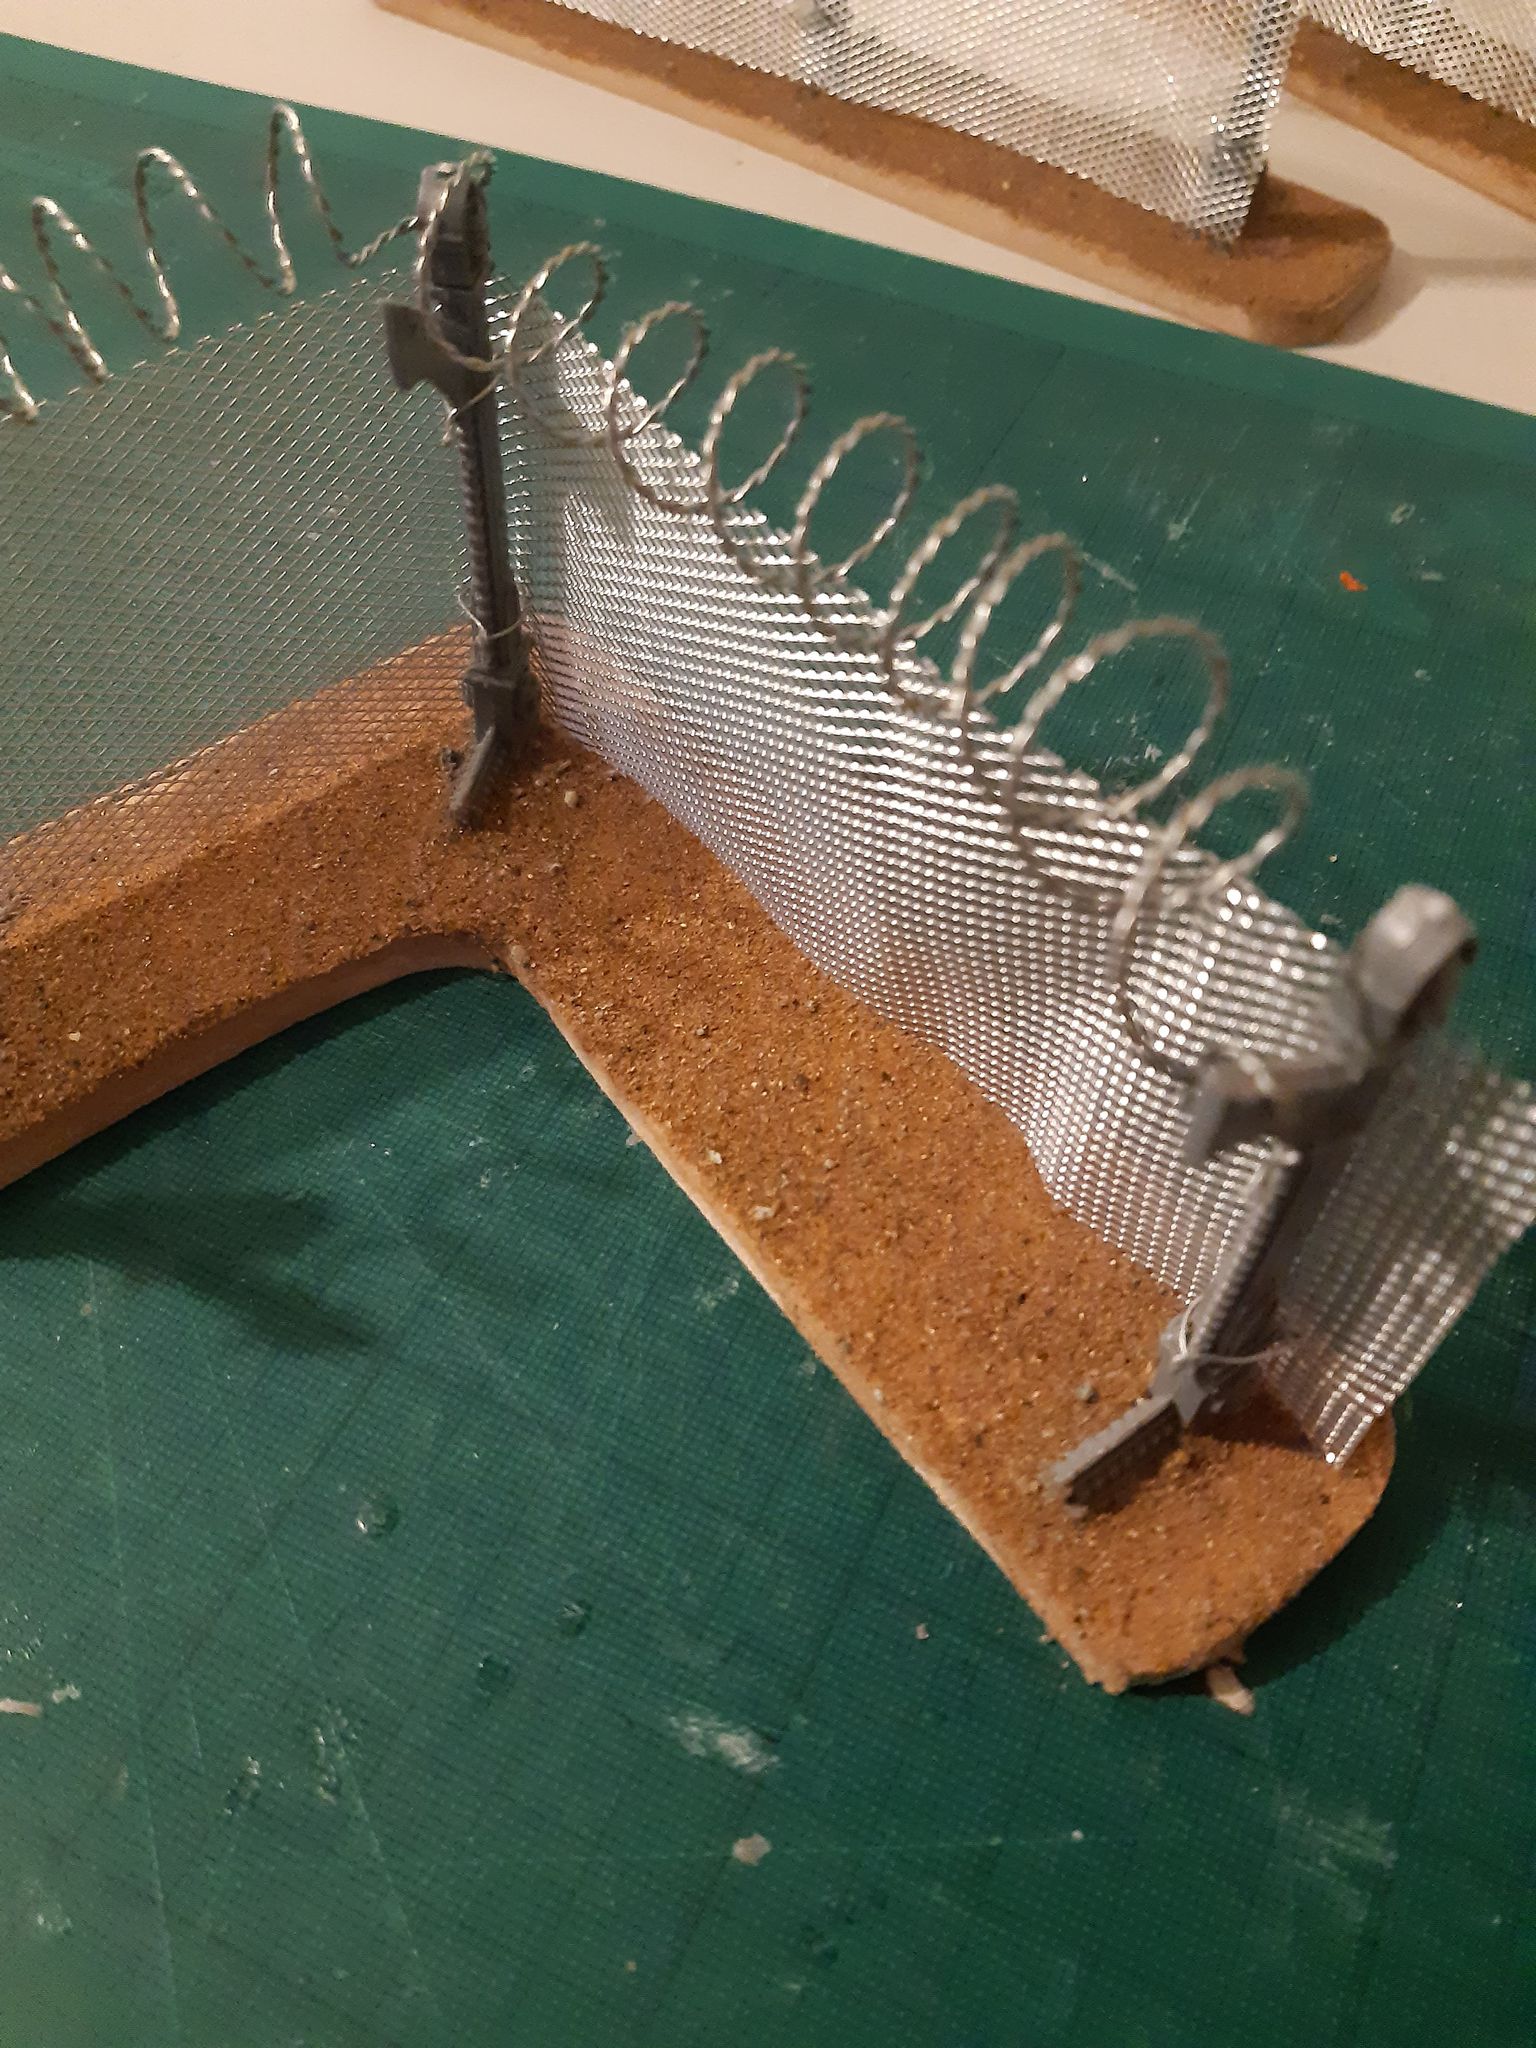
Step 8- Feed the “razorwire” sections through the holes in the post and glue in place.
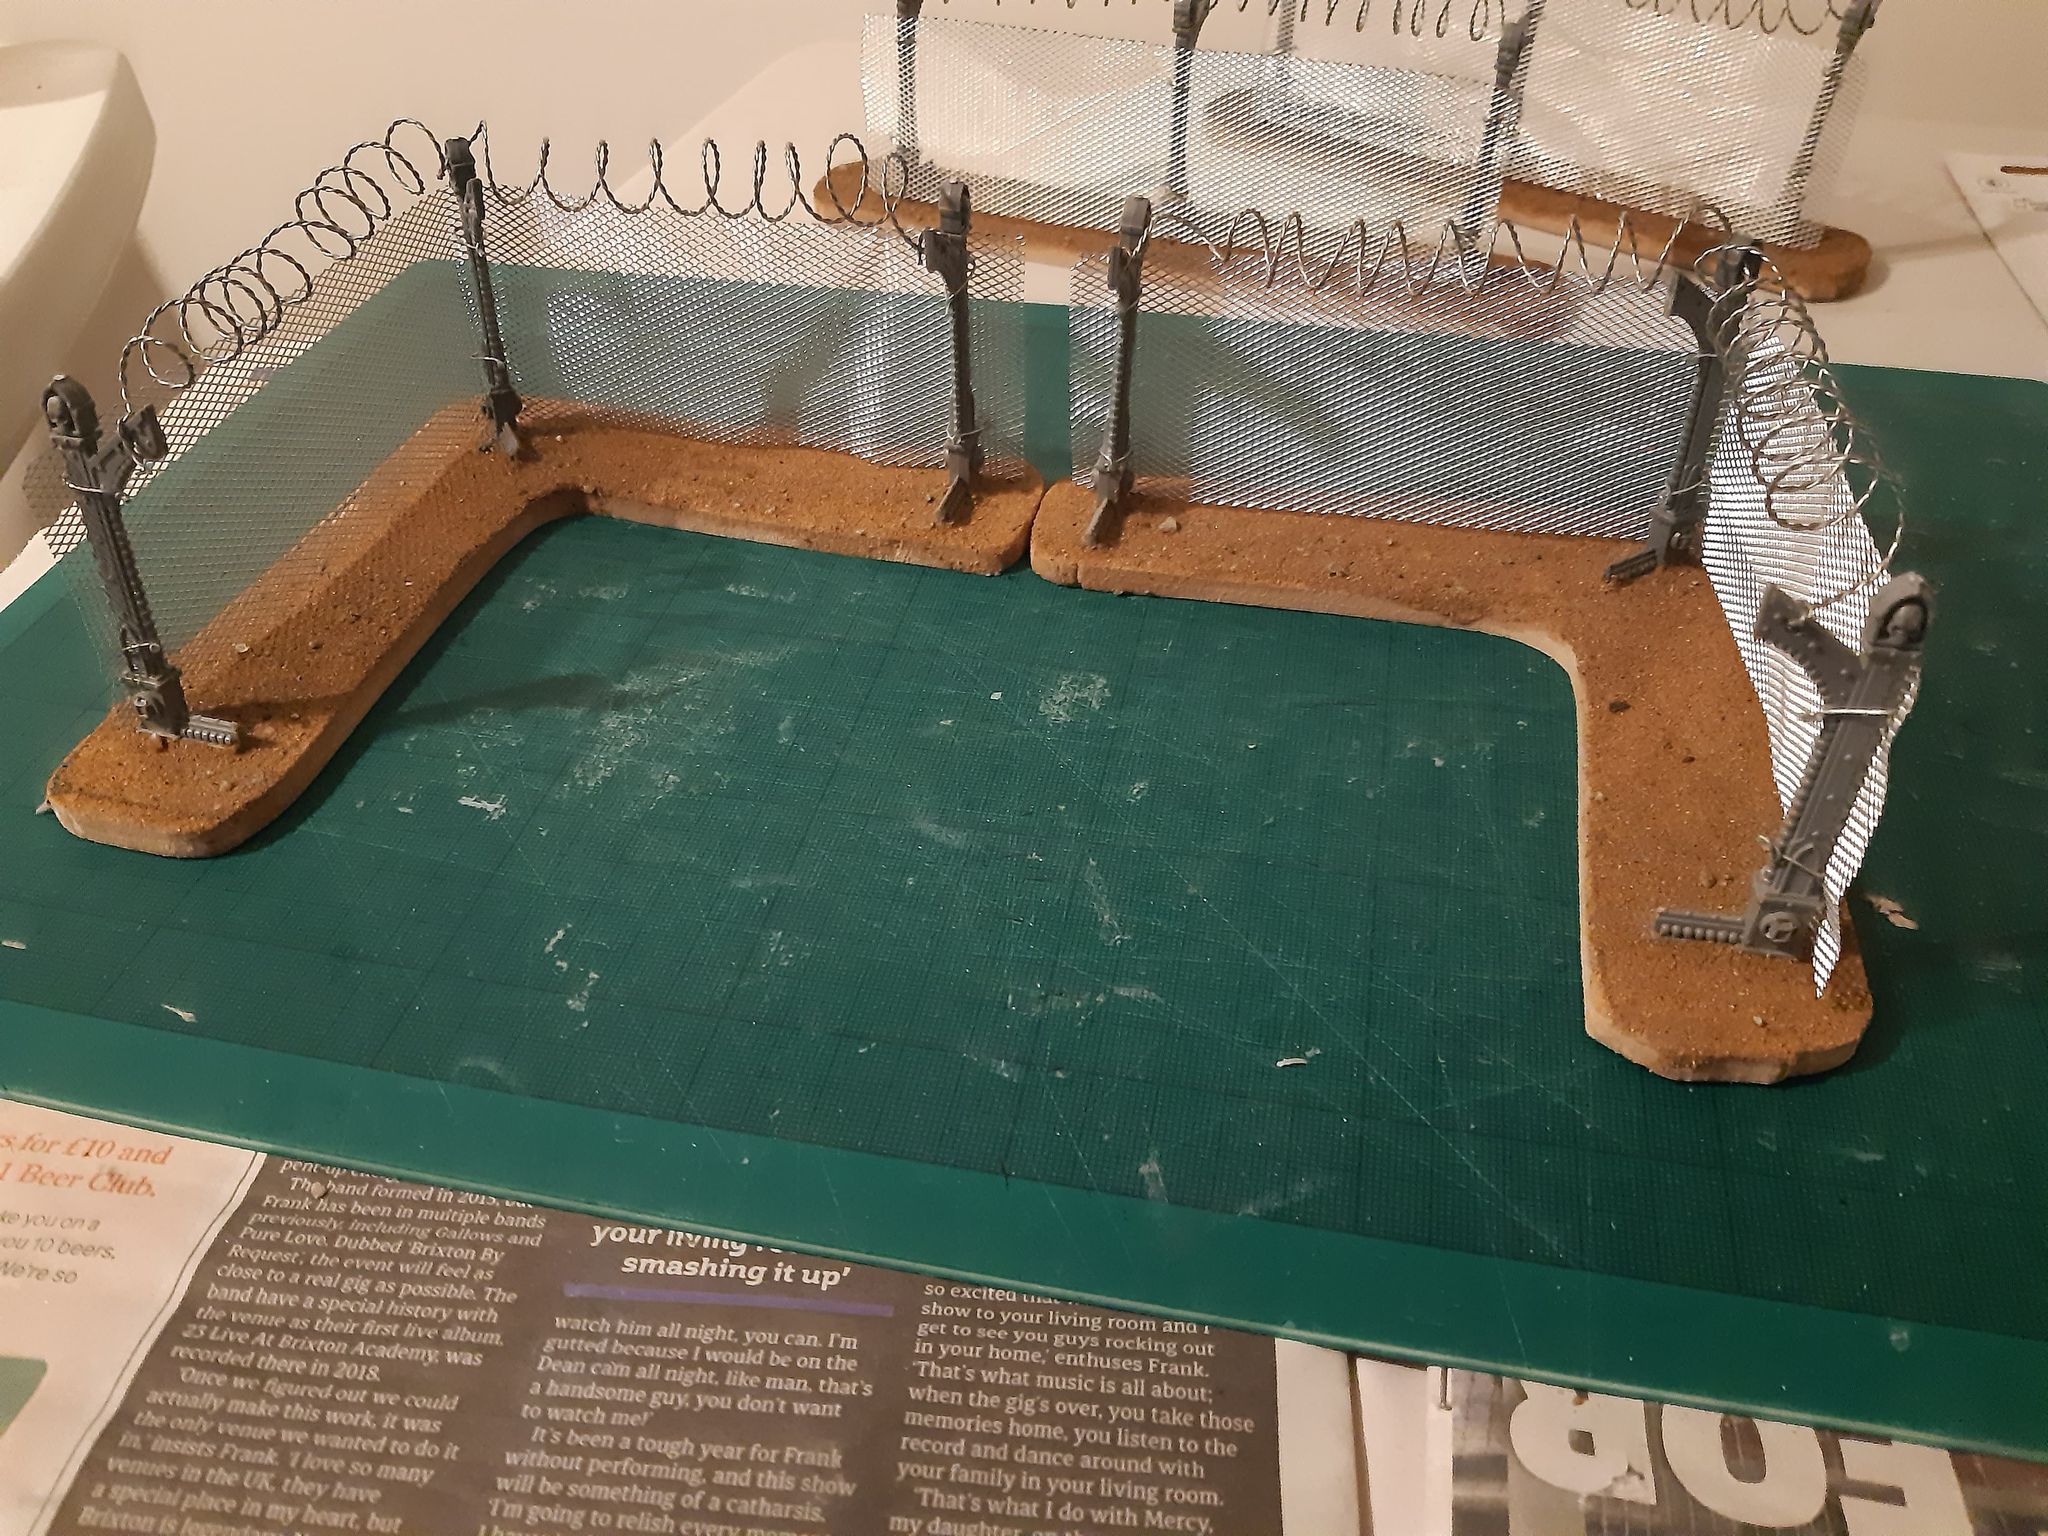
Step 9- Paint the fence. I spray the fence and posts silver. You can then highlight or shade the post/fence as you desire. Next, paint the base to match your gaming mat. I went with grey for my city board.
There you go, some nice and easy chain link fences for your games. They really add some interesting visual elements to your board and work well for a variety of tables.

So there you have it, the fence posts are complete. I hope you found this tutorial helpful.
#mc_embed_signup{background:#fff; clear:left; font:14px Helvetica,Arial,sans-serif; } /* Add your own Mailchimp form style overrides in your site stylesheet or in this style block. We recommend moving this block and the preceding CSS link to the HEAD of your HTML file. */And remember, Frontline Gaming sells gaming products at a discount, every day in their webcart!


