
Guest Writer: John Paul
I’m going to make a confession: I was never much of a sub-assembly fan. I’m a slow painter as it is, and I always felt that sub-assemblies slowed that process down all the more. I’m not a competition painter; these are gaming pieces at the end of the day. And it’s harder to play with unassembled models than it is to paint with gray ones. Plus, there’s a certain allure to fully assembling models, right? It feels “done.” That said, I recently heard an old adage: “an ounce of prevention is worth a pound of cure.” As I grow older and a bit more wise in my ways, I’ve come to realize that putting forth a little bit more time up front often buys more time on the back end. I think sub-assemblies are a great example. The time I spend trying to paint around obscuring pierces, inevitably messing up, touching up, etc. can be salvaged by applying a little forethought in advance. This Invader is a great example. I painted this piece about a year ago, and I’ve got two more that I’ve been holding off on because the first one has some extremely hard to reach spots that made it an absolute bear to paint. Fortunately, I learned some hard lessons from that experience and decided to be a bit more tactful in my assembly process, making sure not to glue every piece in place. This kit lends itself to that thanks to the fact that it’s a glorified snap-fit kit, but similar can be achieved with other models.
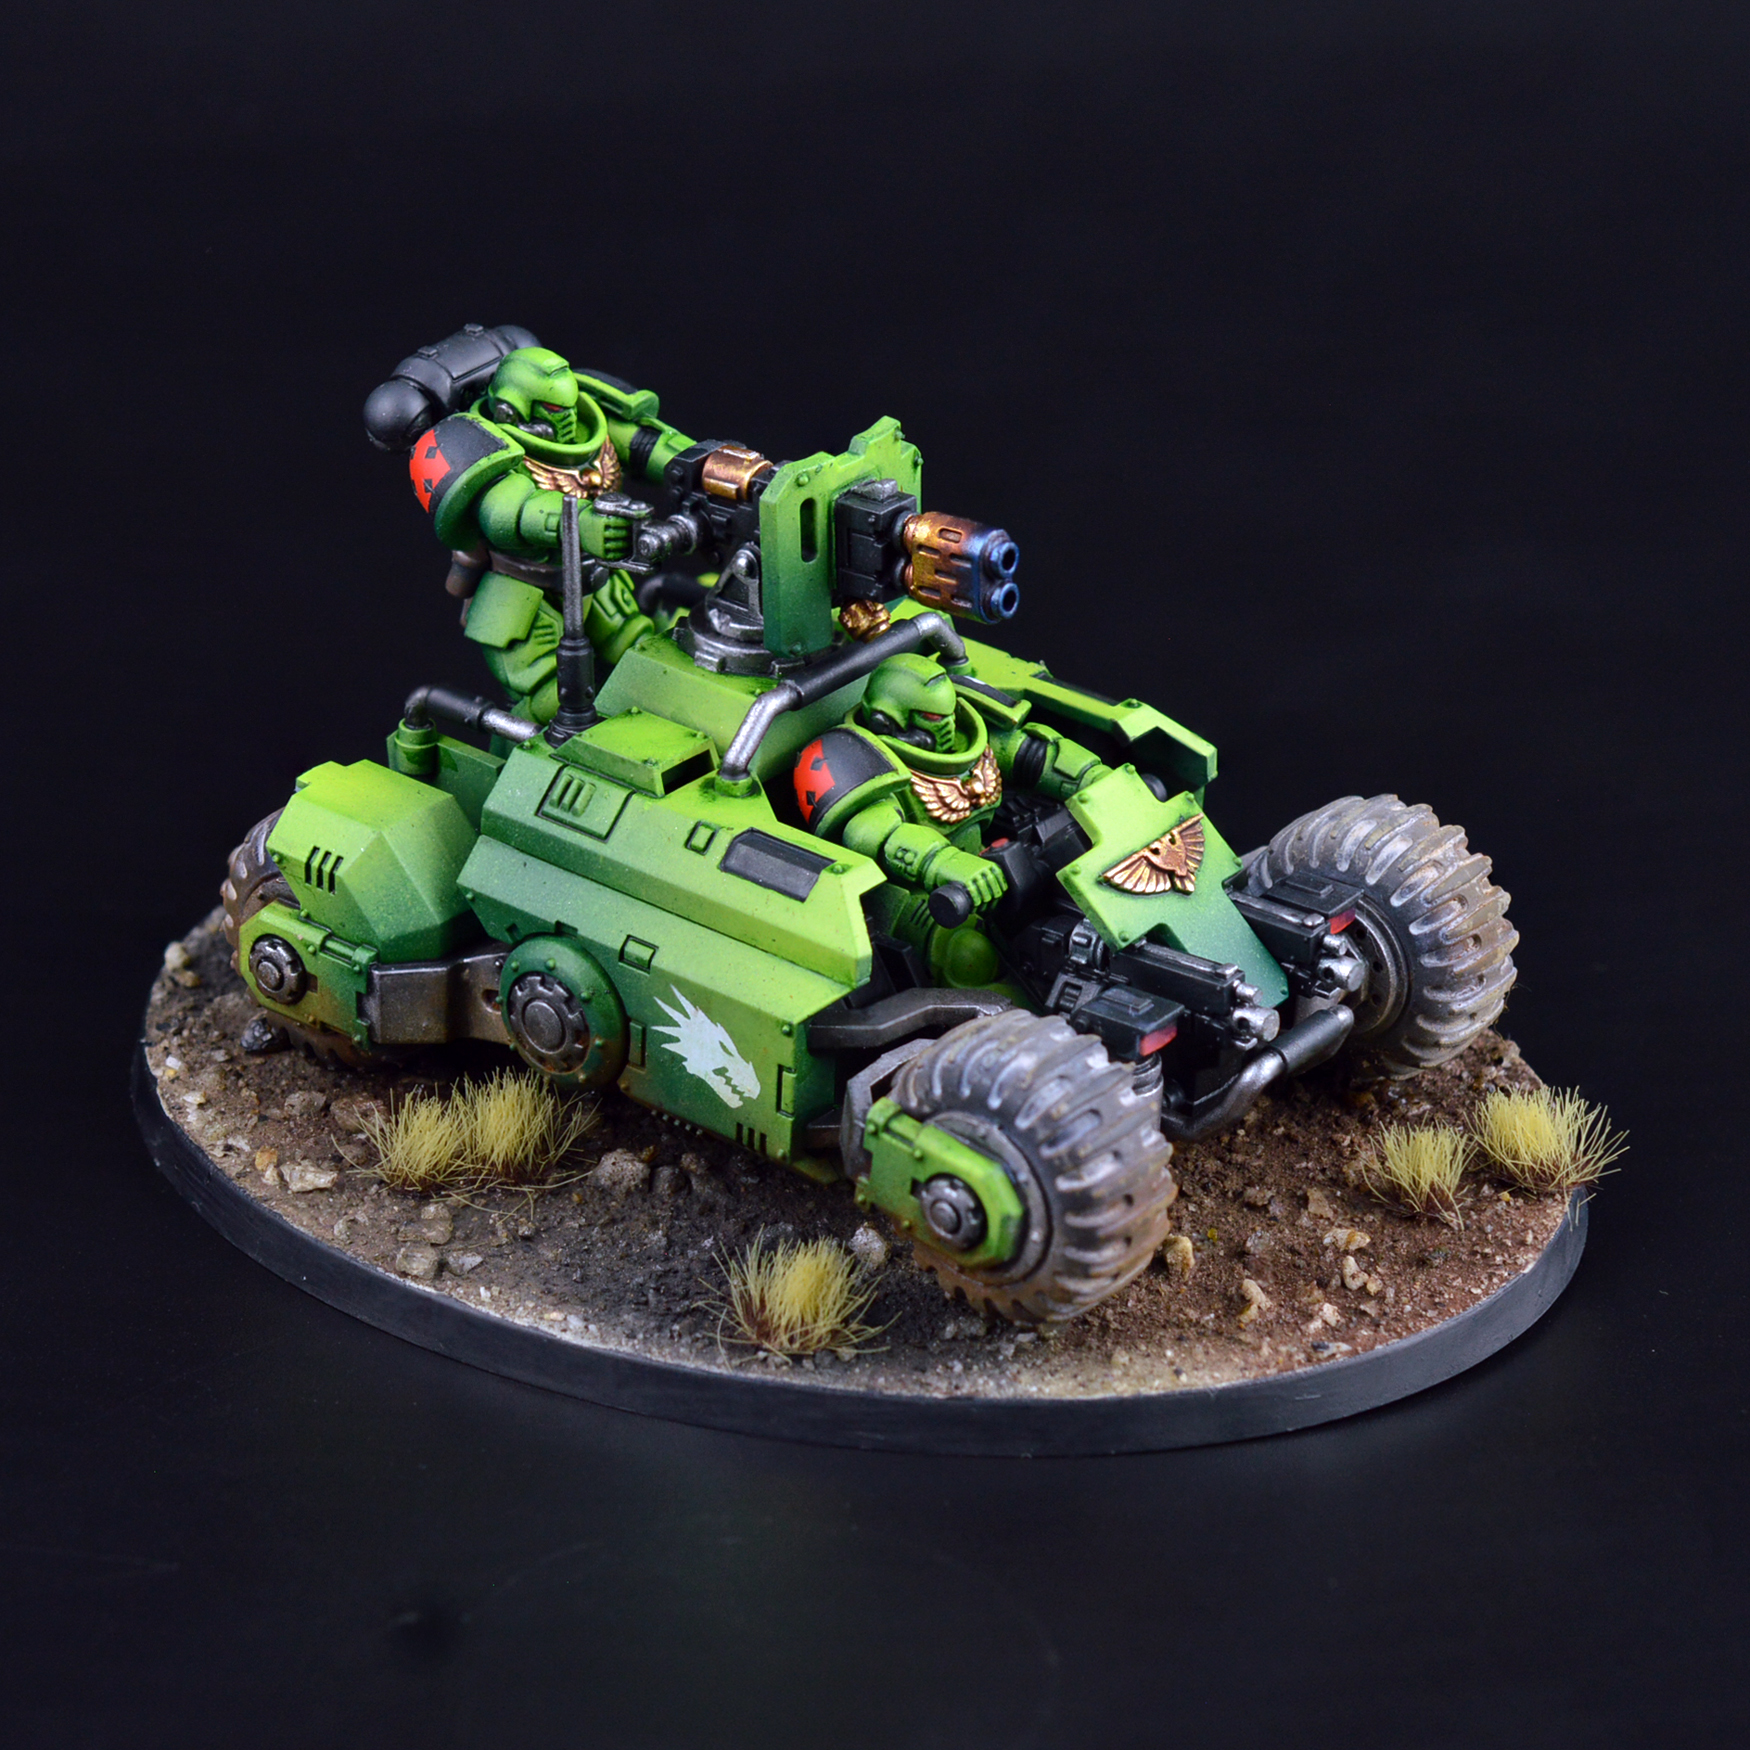
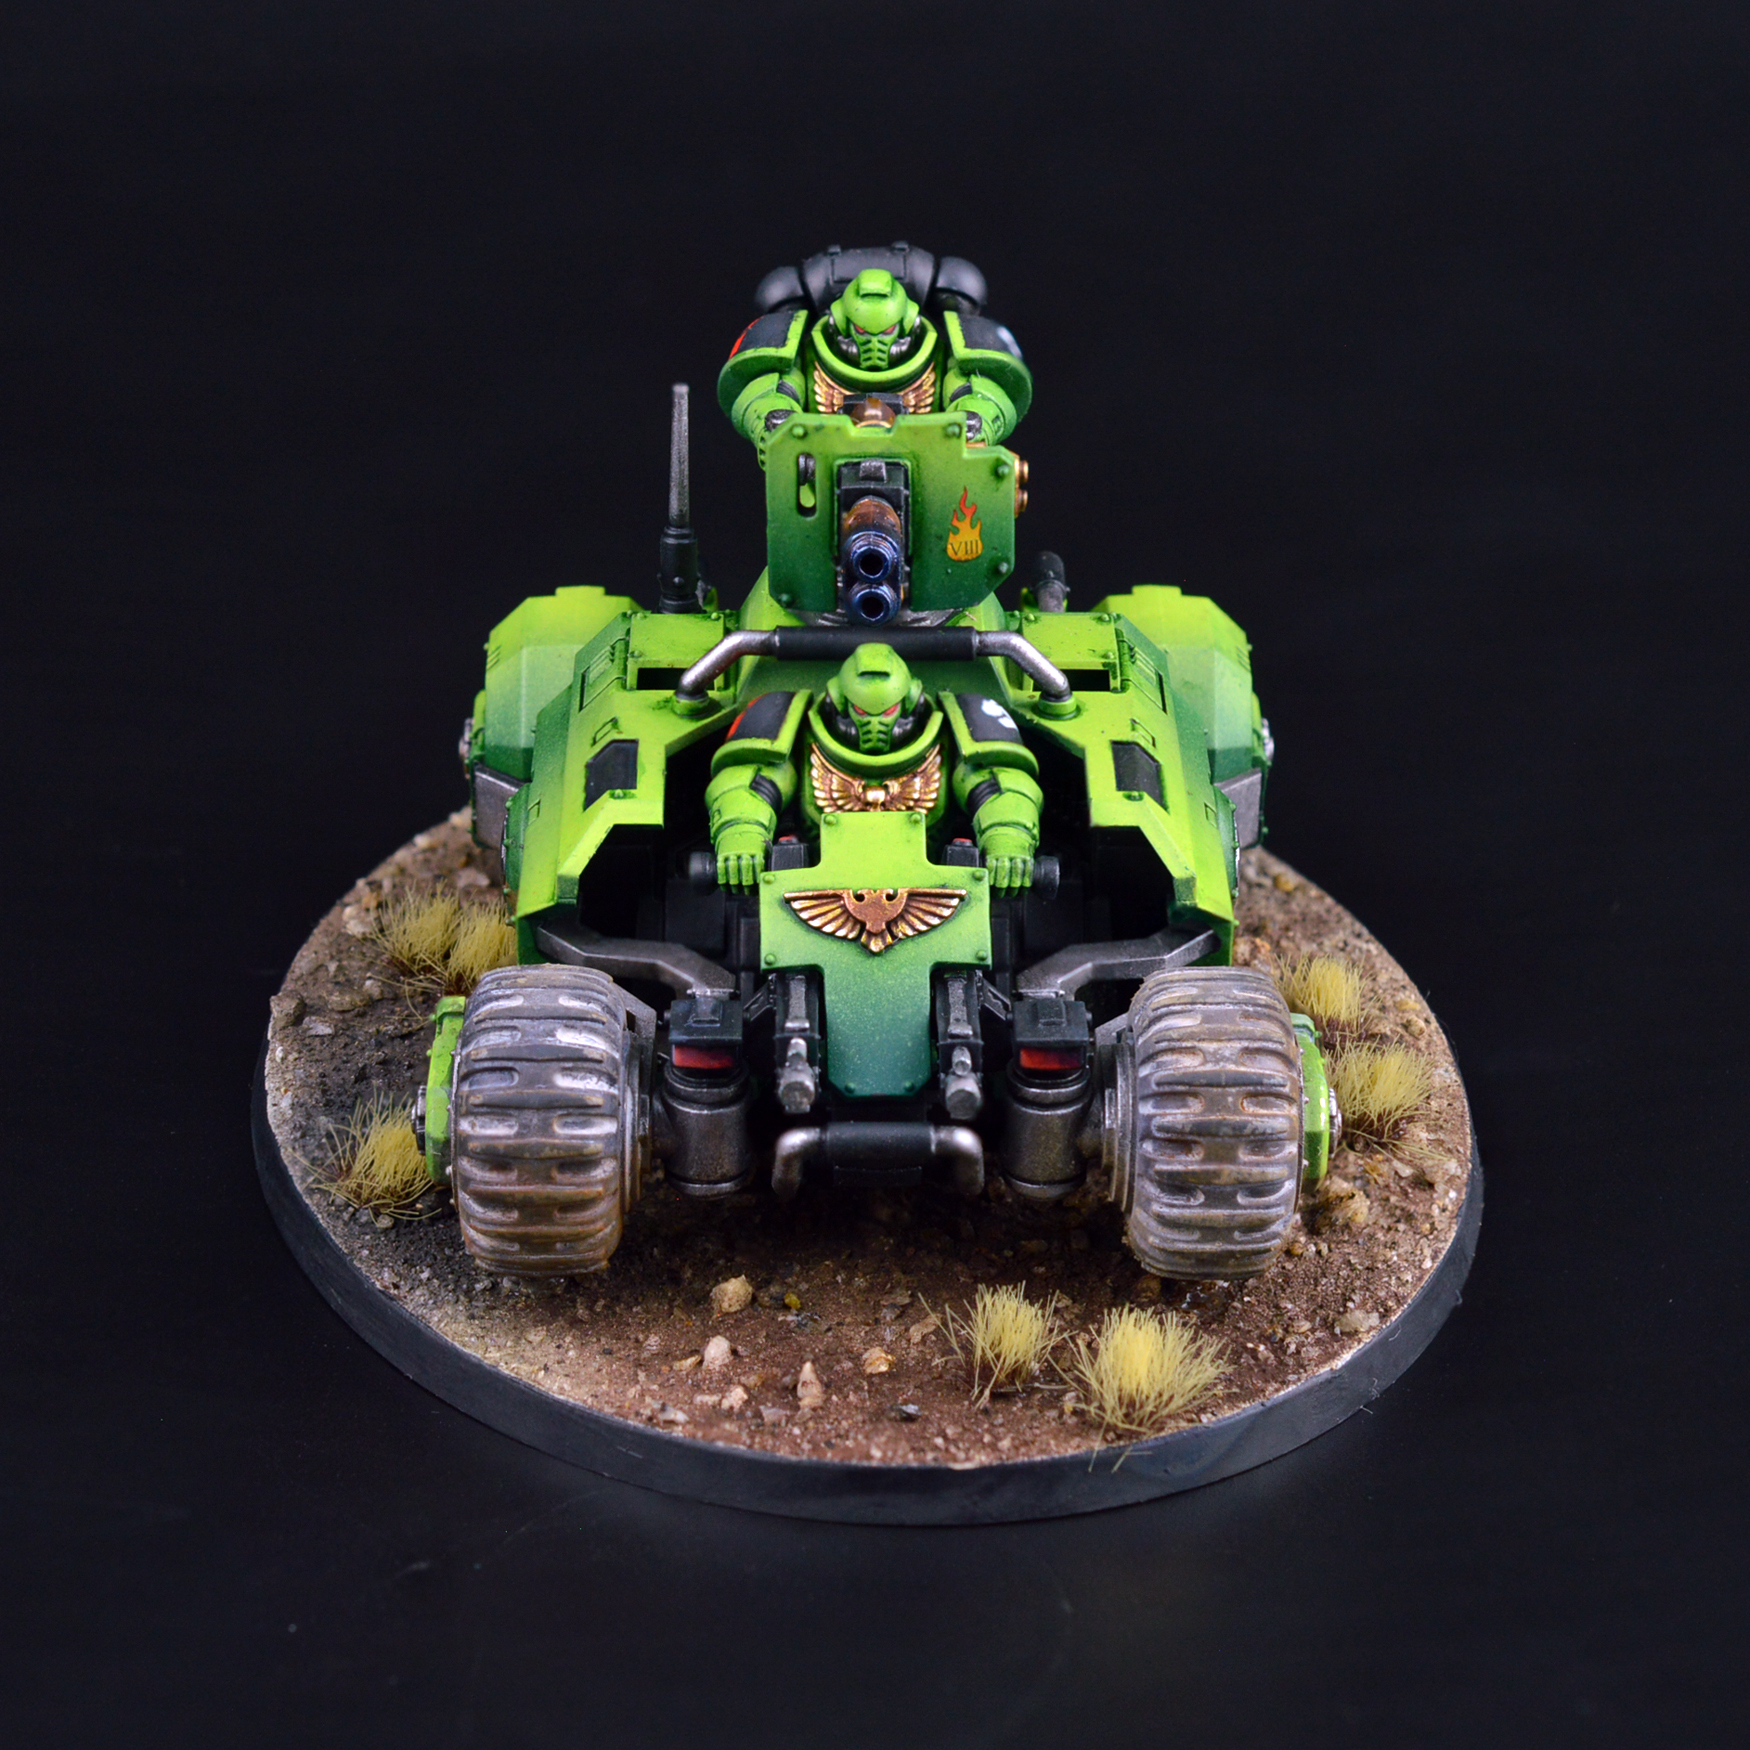
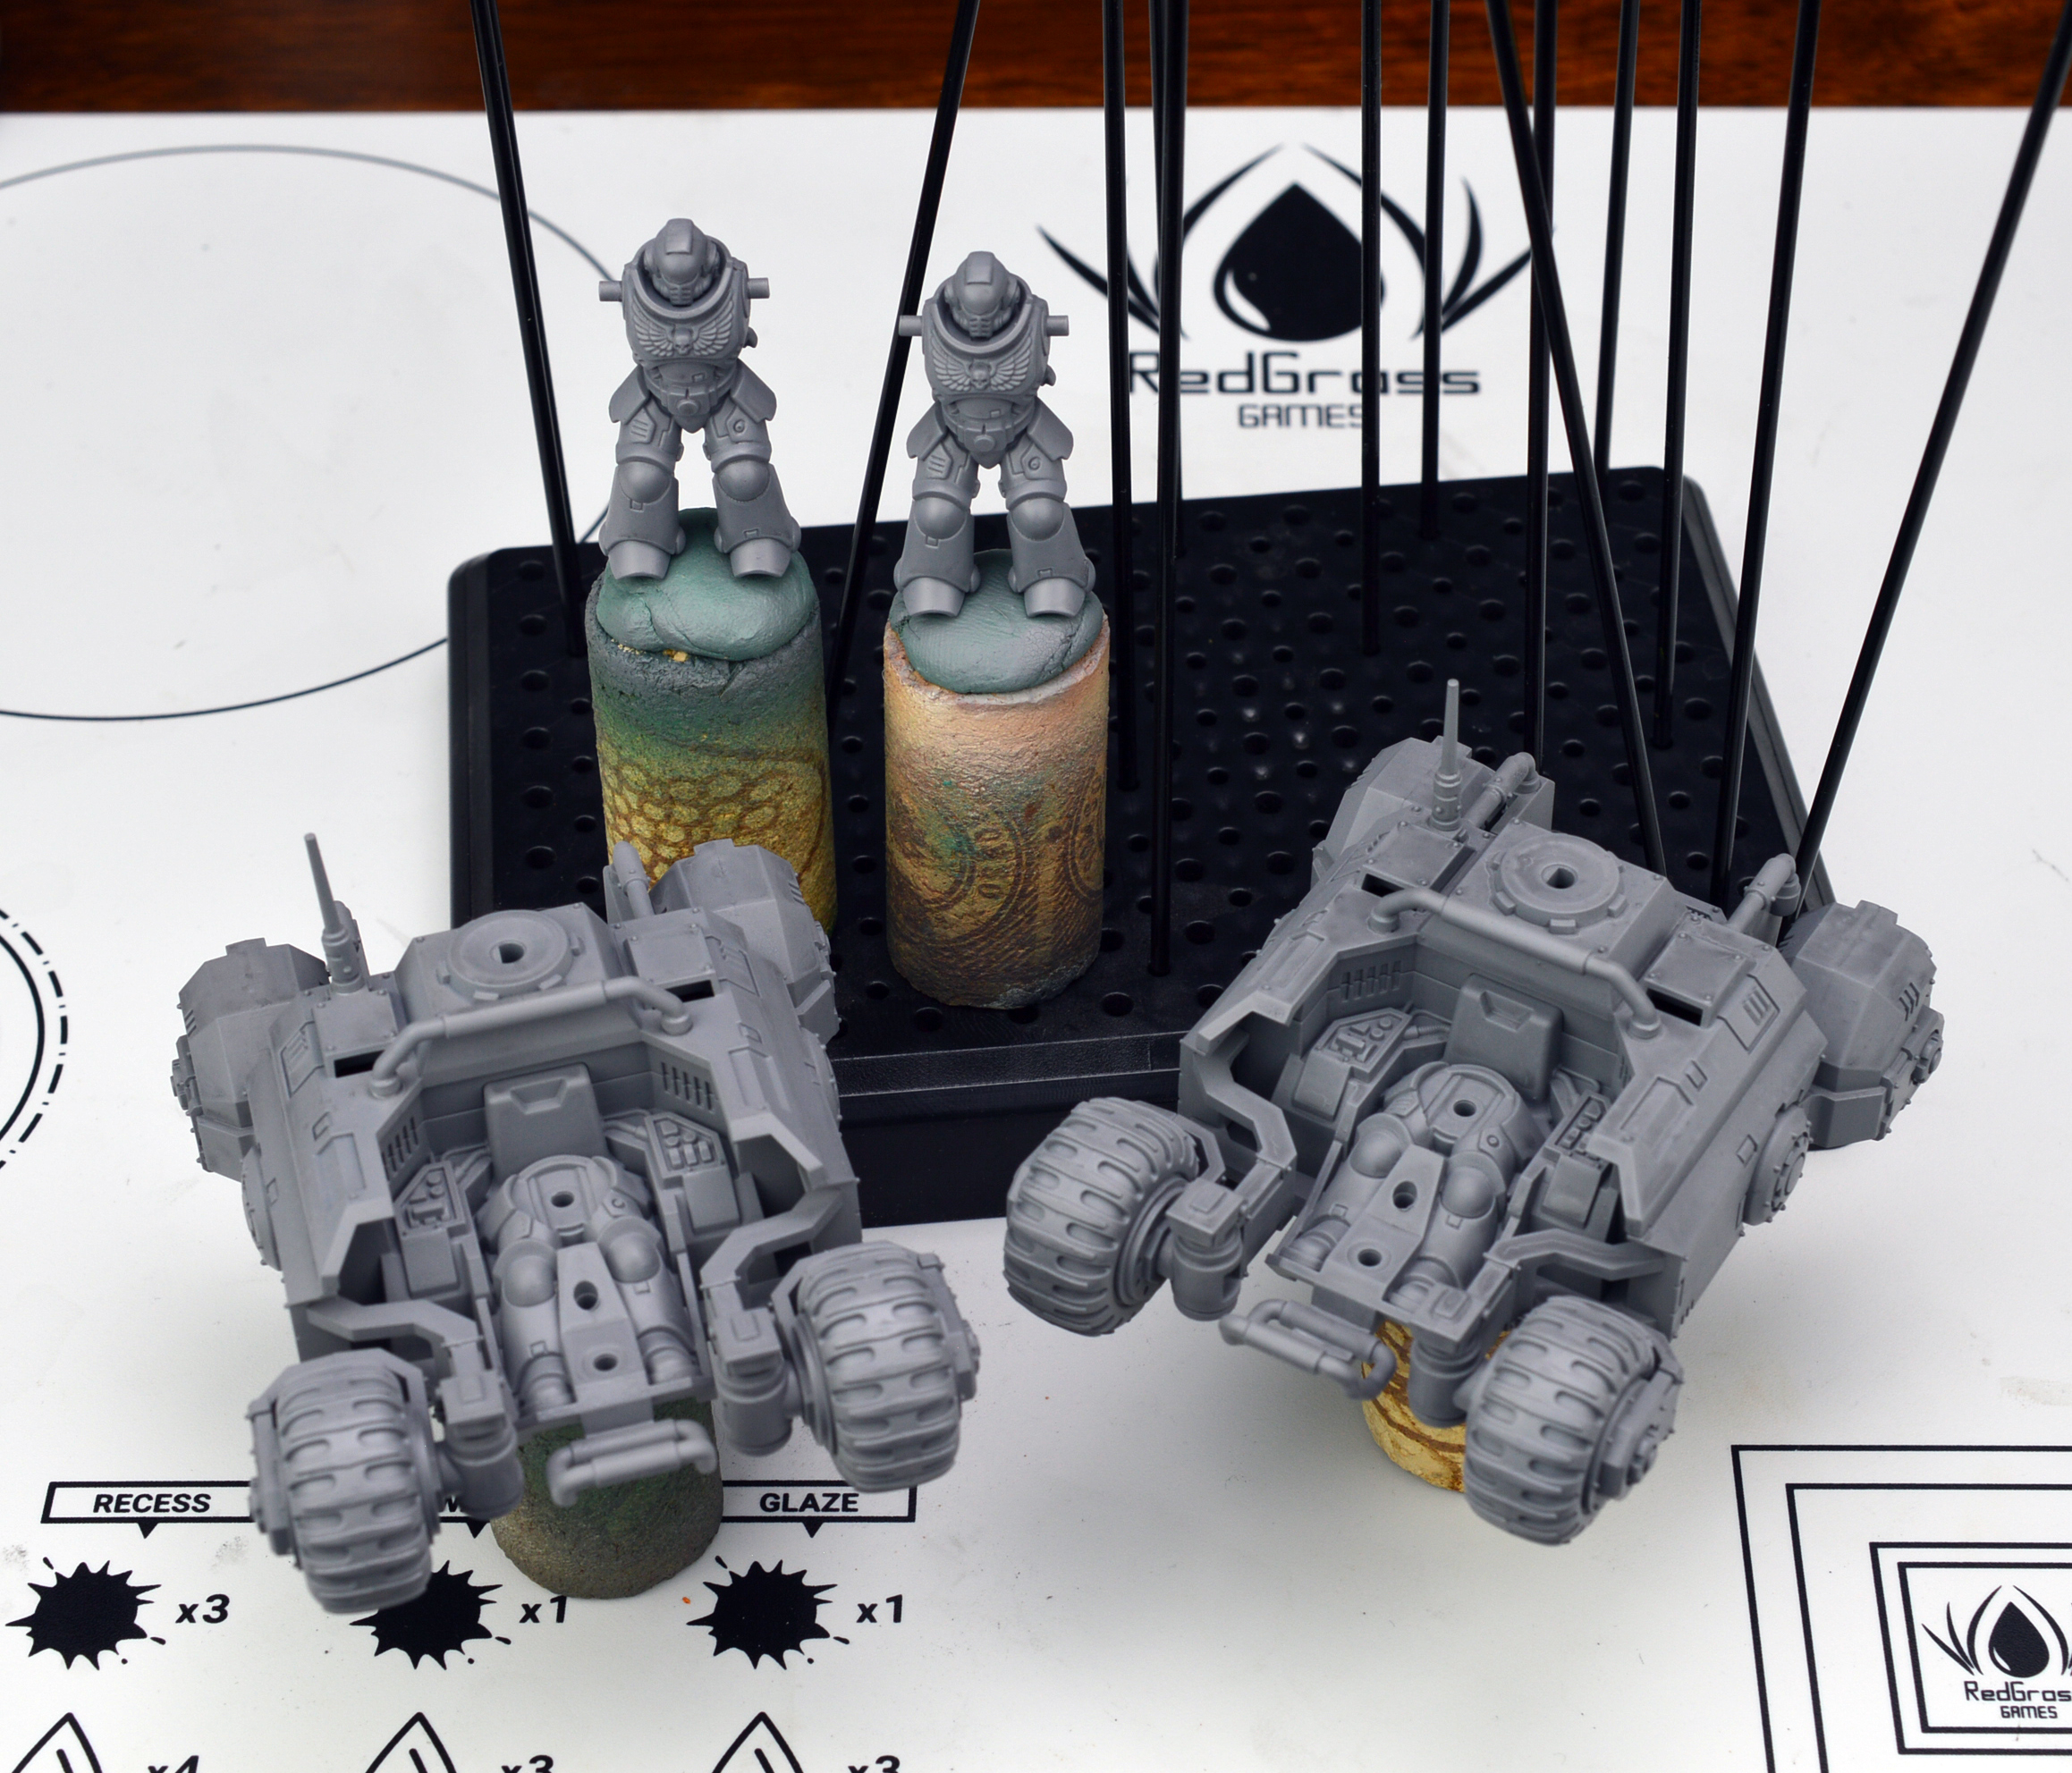
Assembled, there are several problem areas here. The actual cockpit is heavily obscured by the driver’s arms, and there are a pile of small switches and interesting details that I’d prefer not to simply paint black and hope no one looks at. The front of the gunner is also very tough to get. There are also some elements of the under-carriage that stink to paint because of other elements of the model.
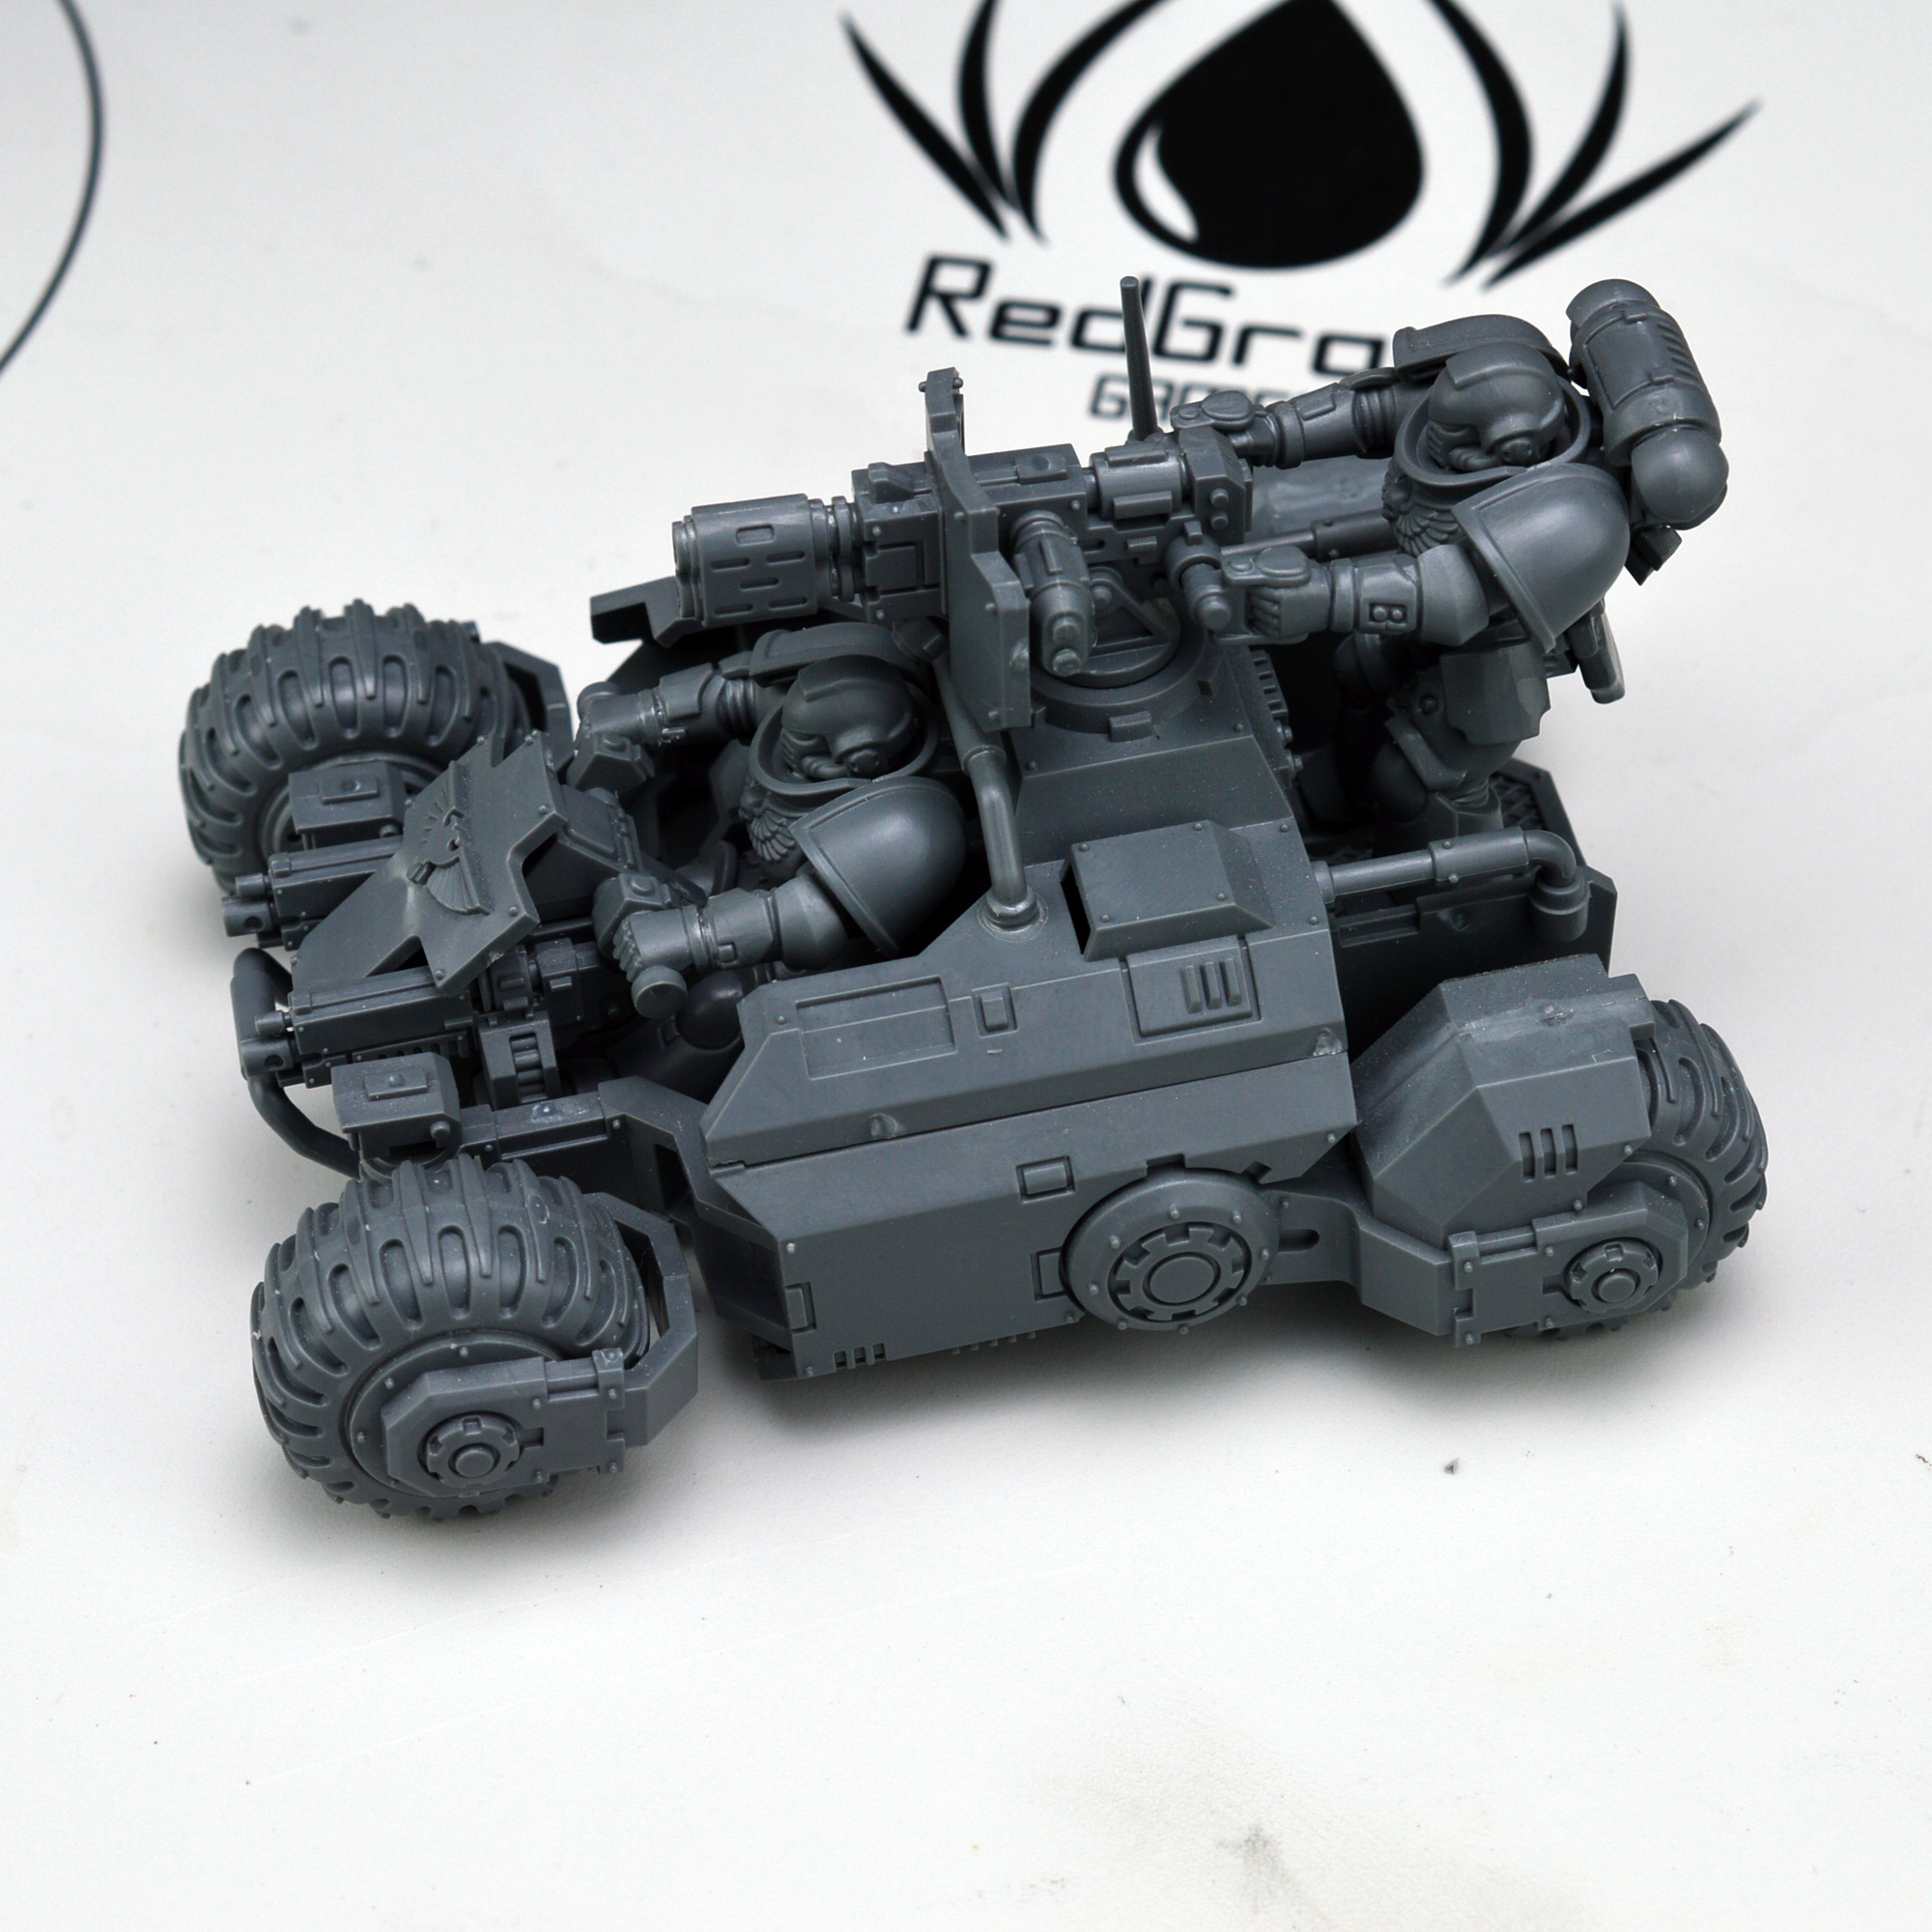
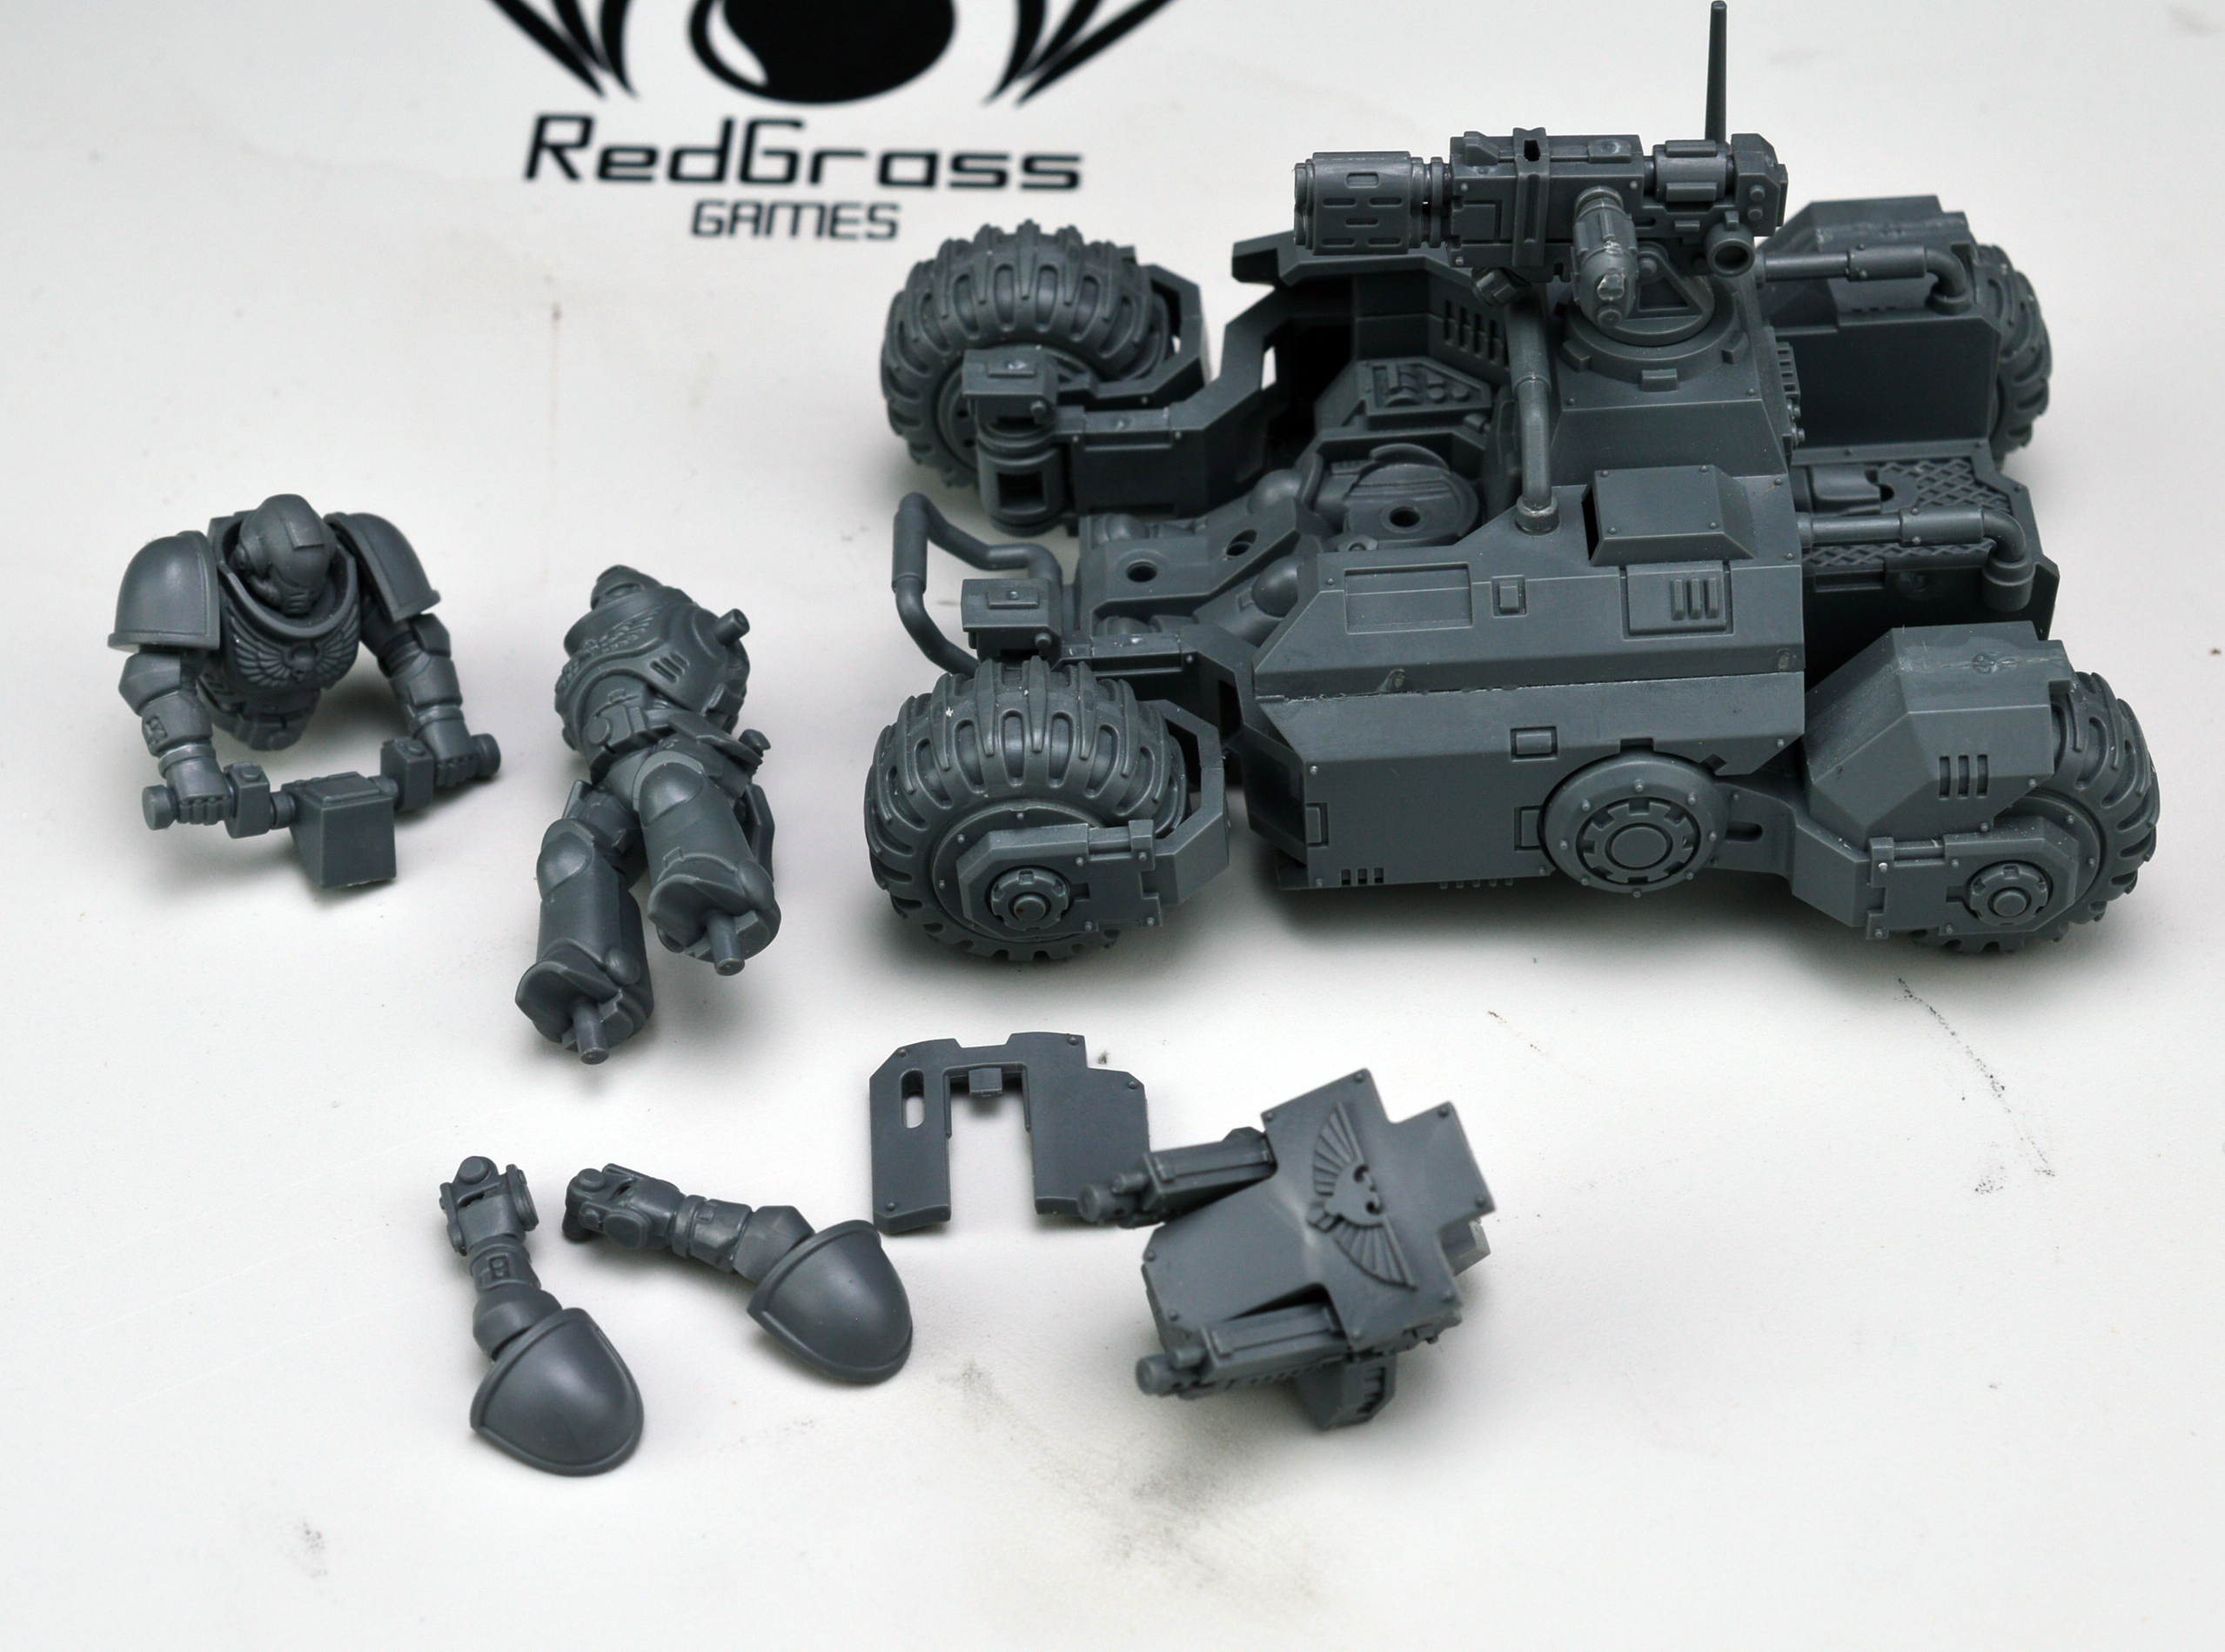
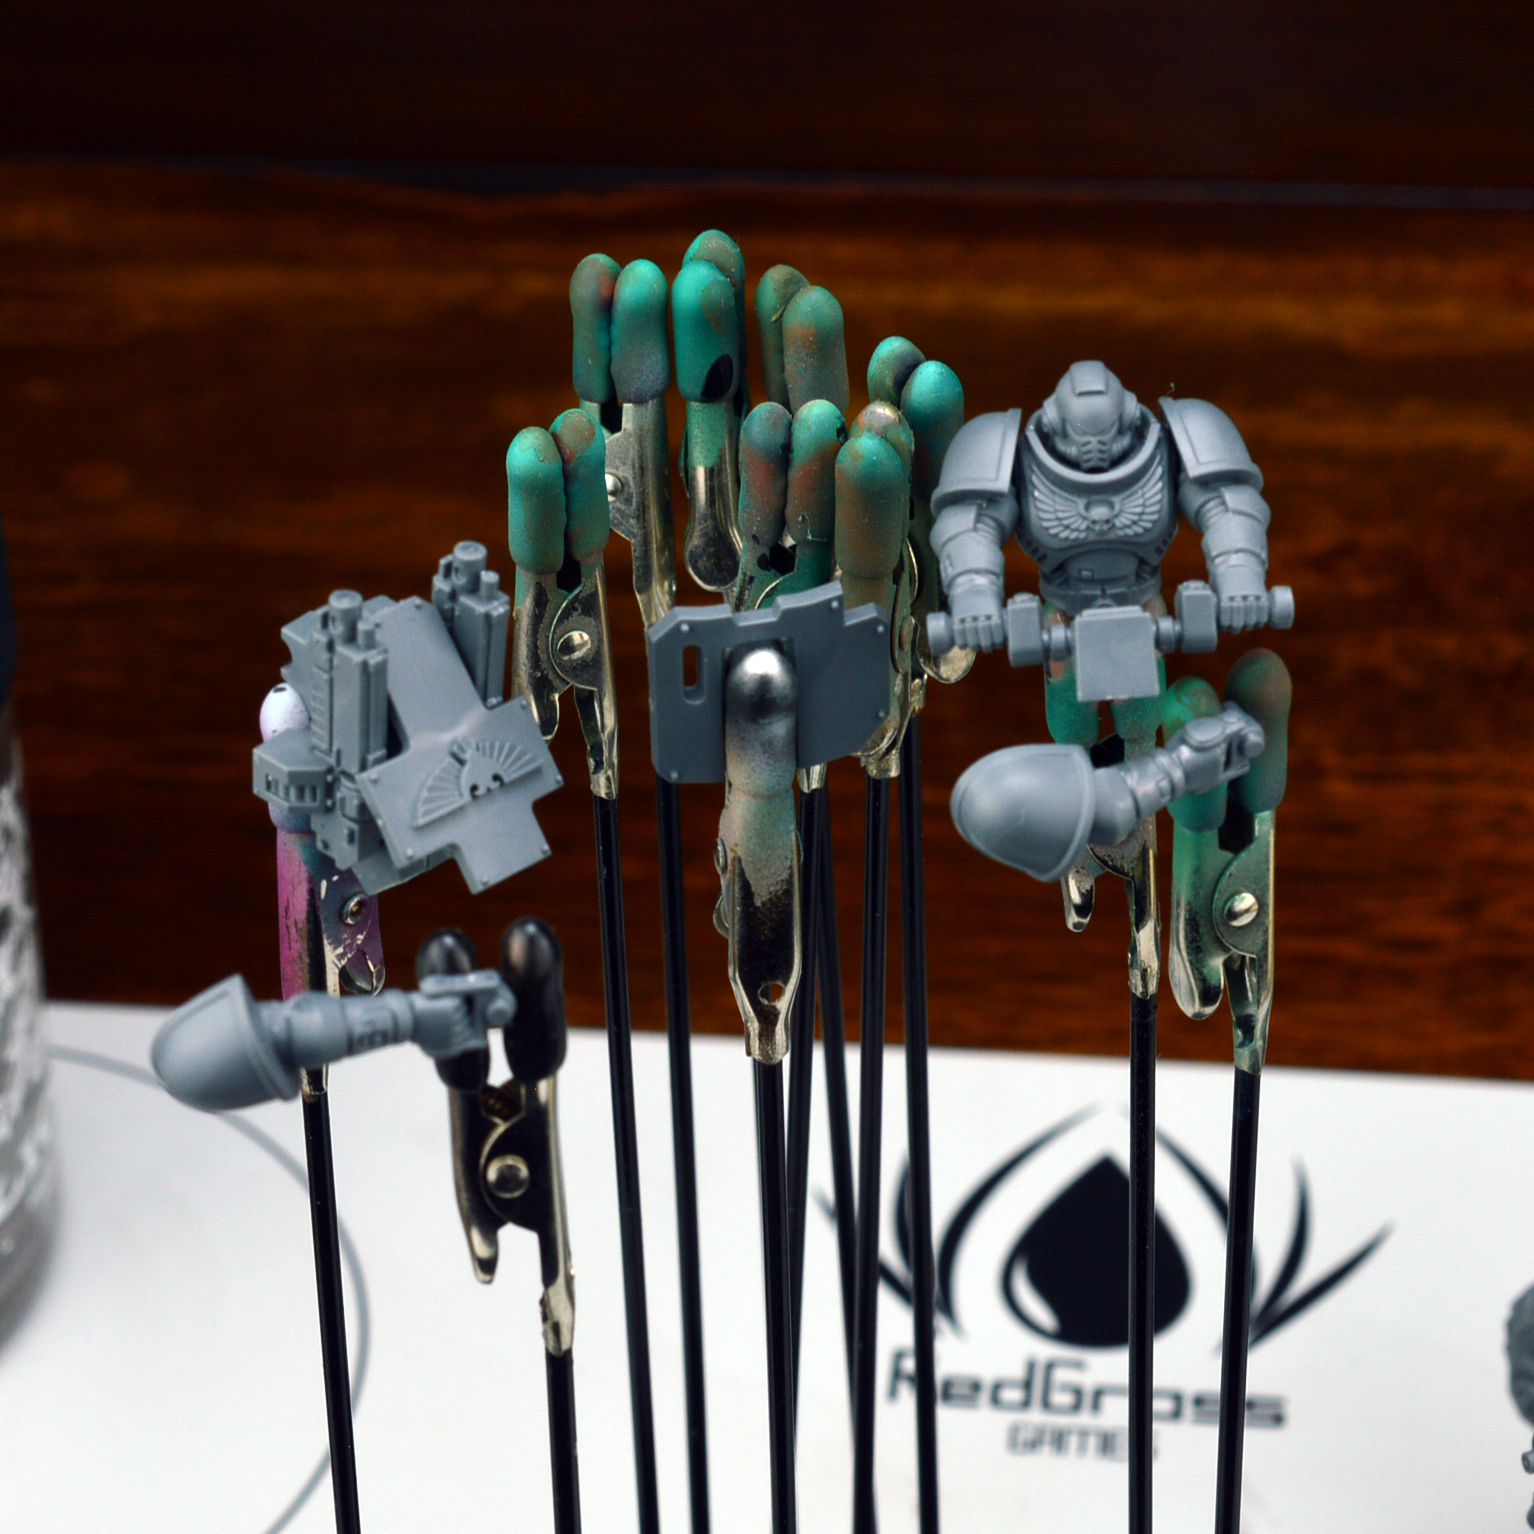
Luckily, most of these components detach, so I broke this sucker down into its component parts to arrange access to the tough-to-reach areas.
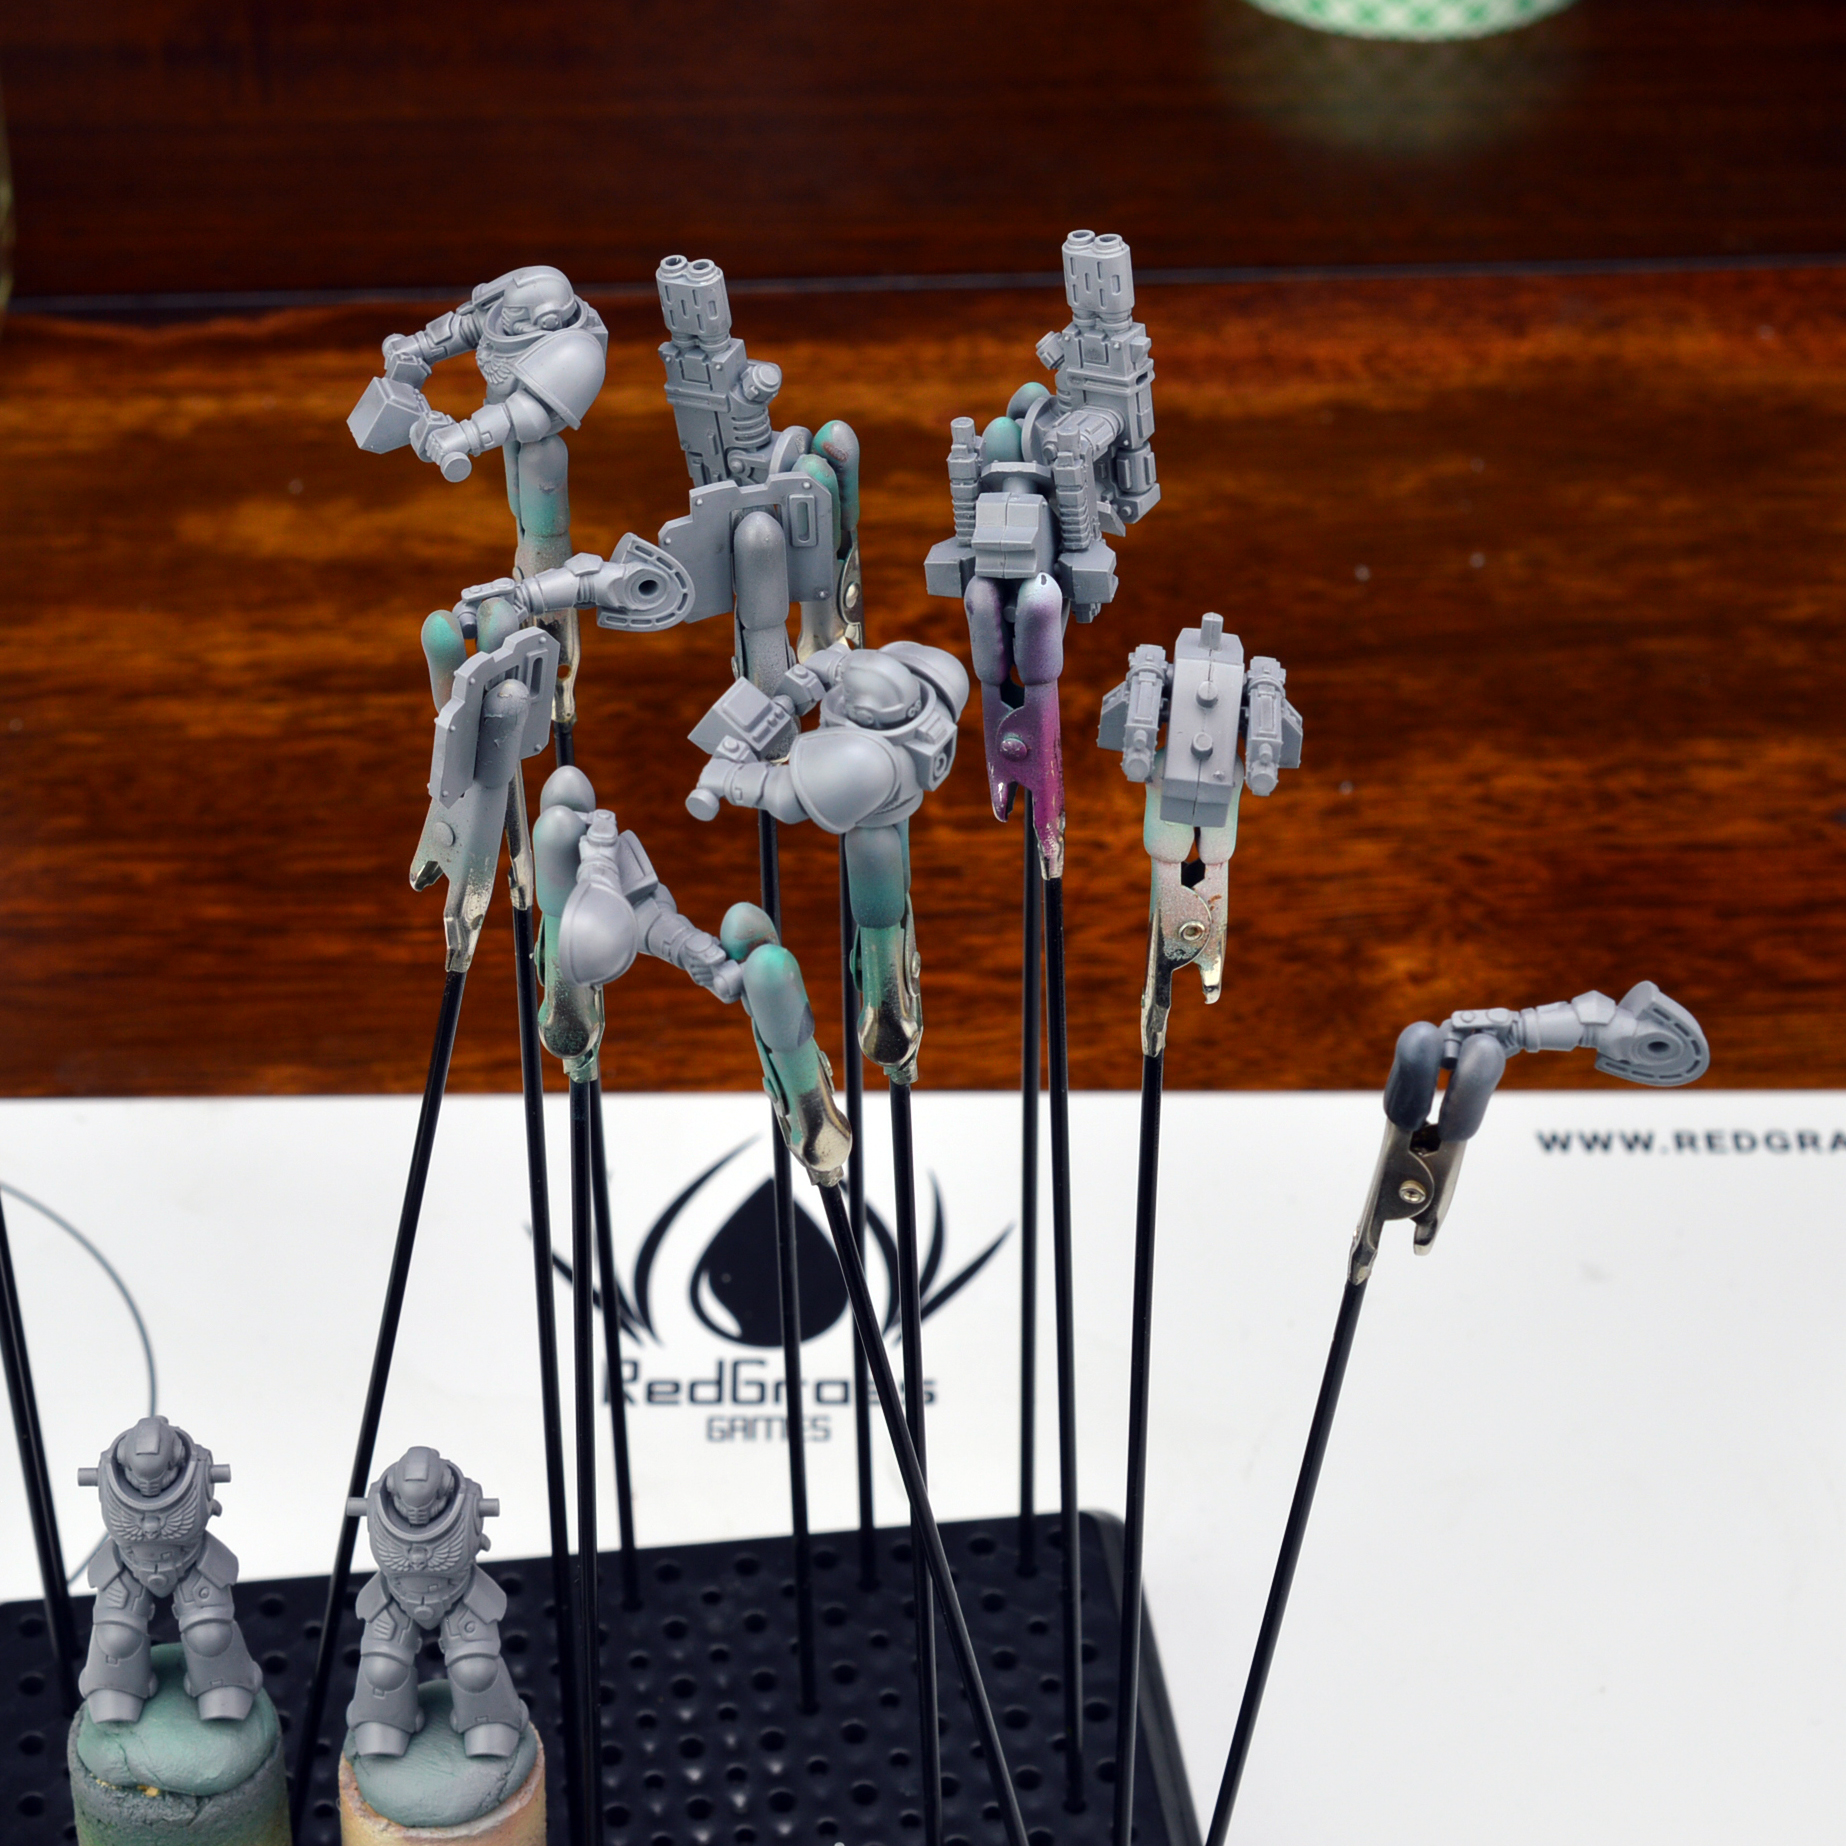
There are a number of items I like to use to assist with painting smaller pieces. There are several products I like to use that are pretty easily purchased via Amazon or even your basic homegoods store. The first is a stand for alligator clips. Most hobby companies offer some variation on this, and there are several cheap options available via Amazon. I also find corks and blue tac to be great options. And some 3M double sided foam tape is great, too.
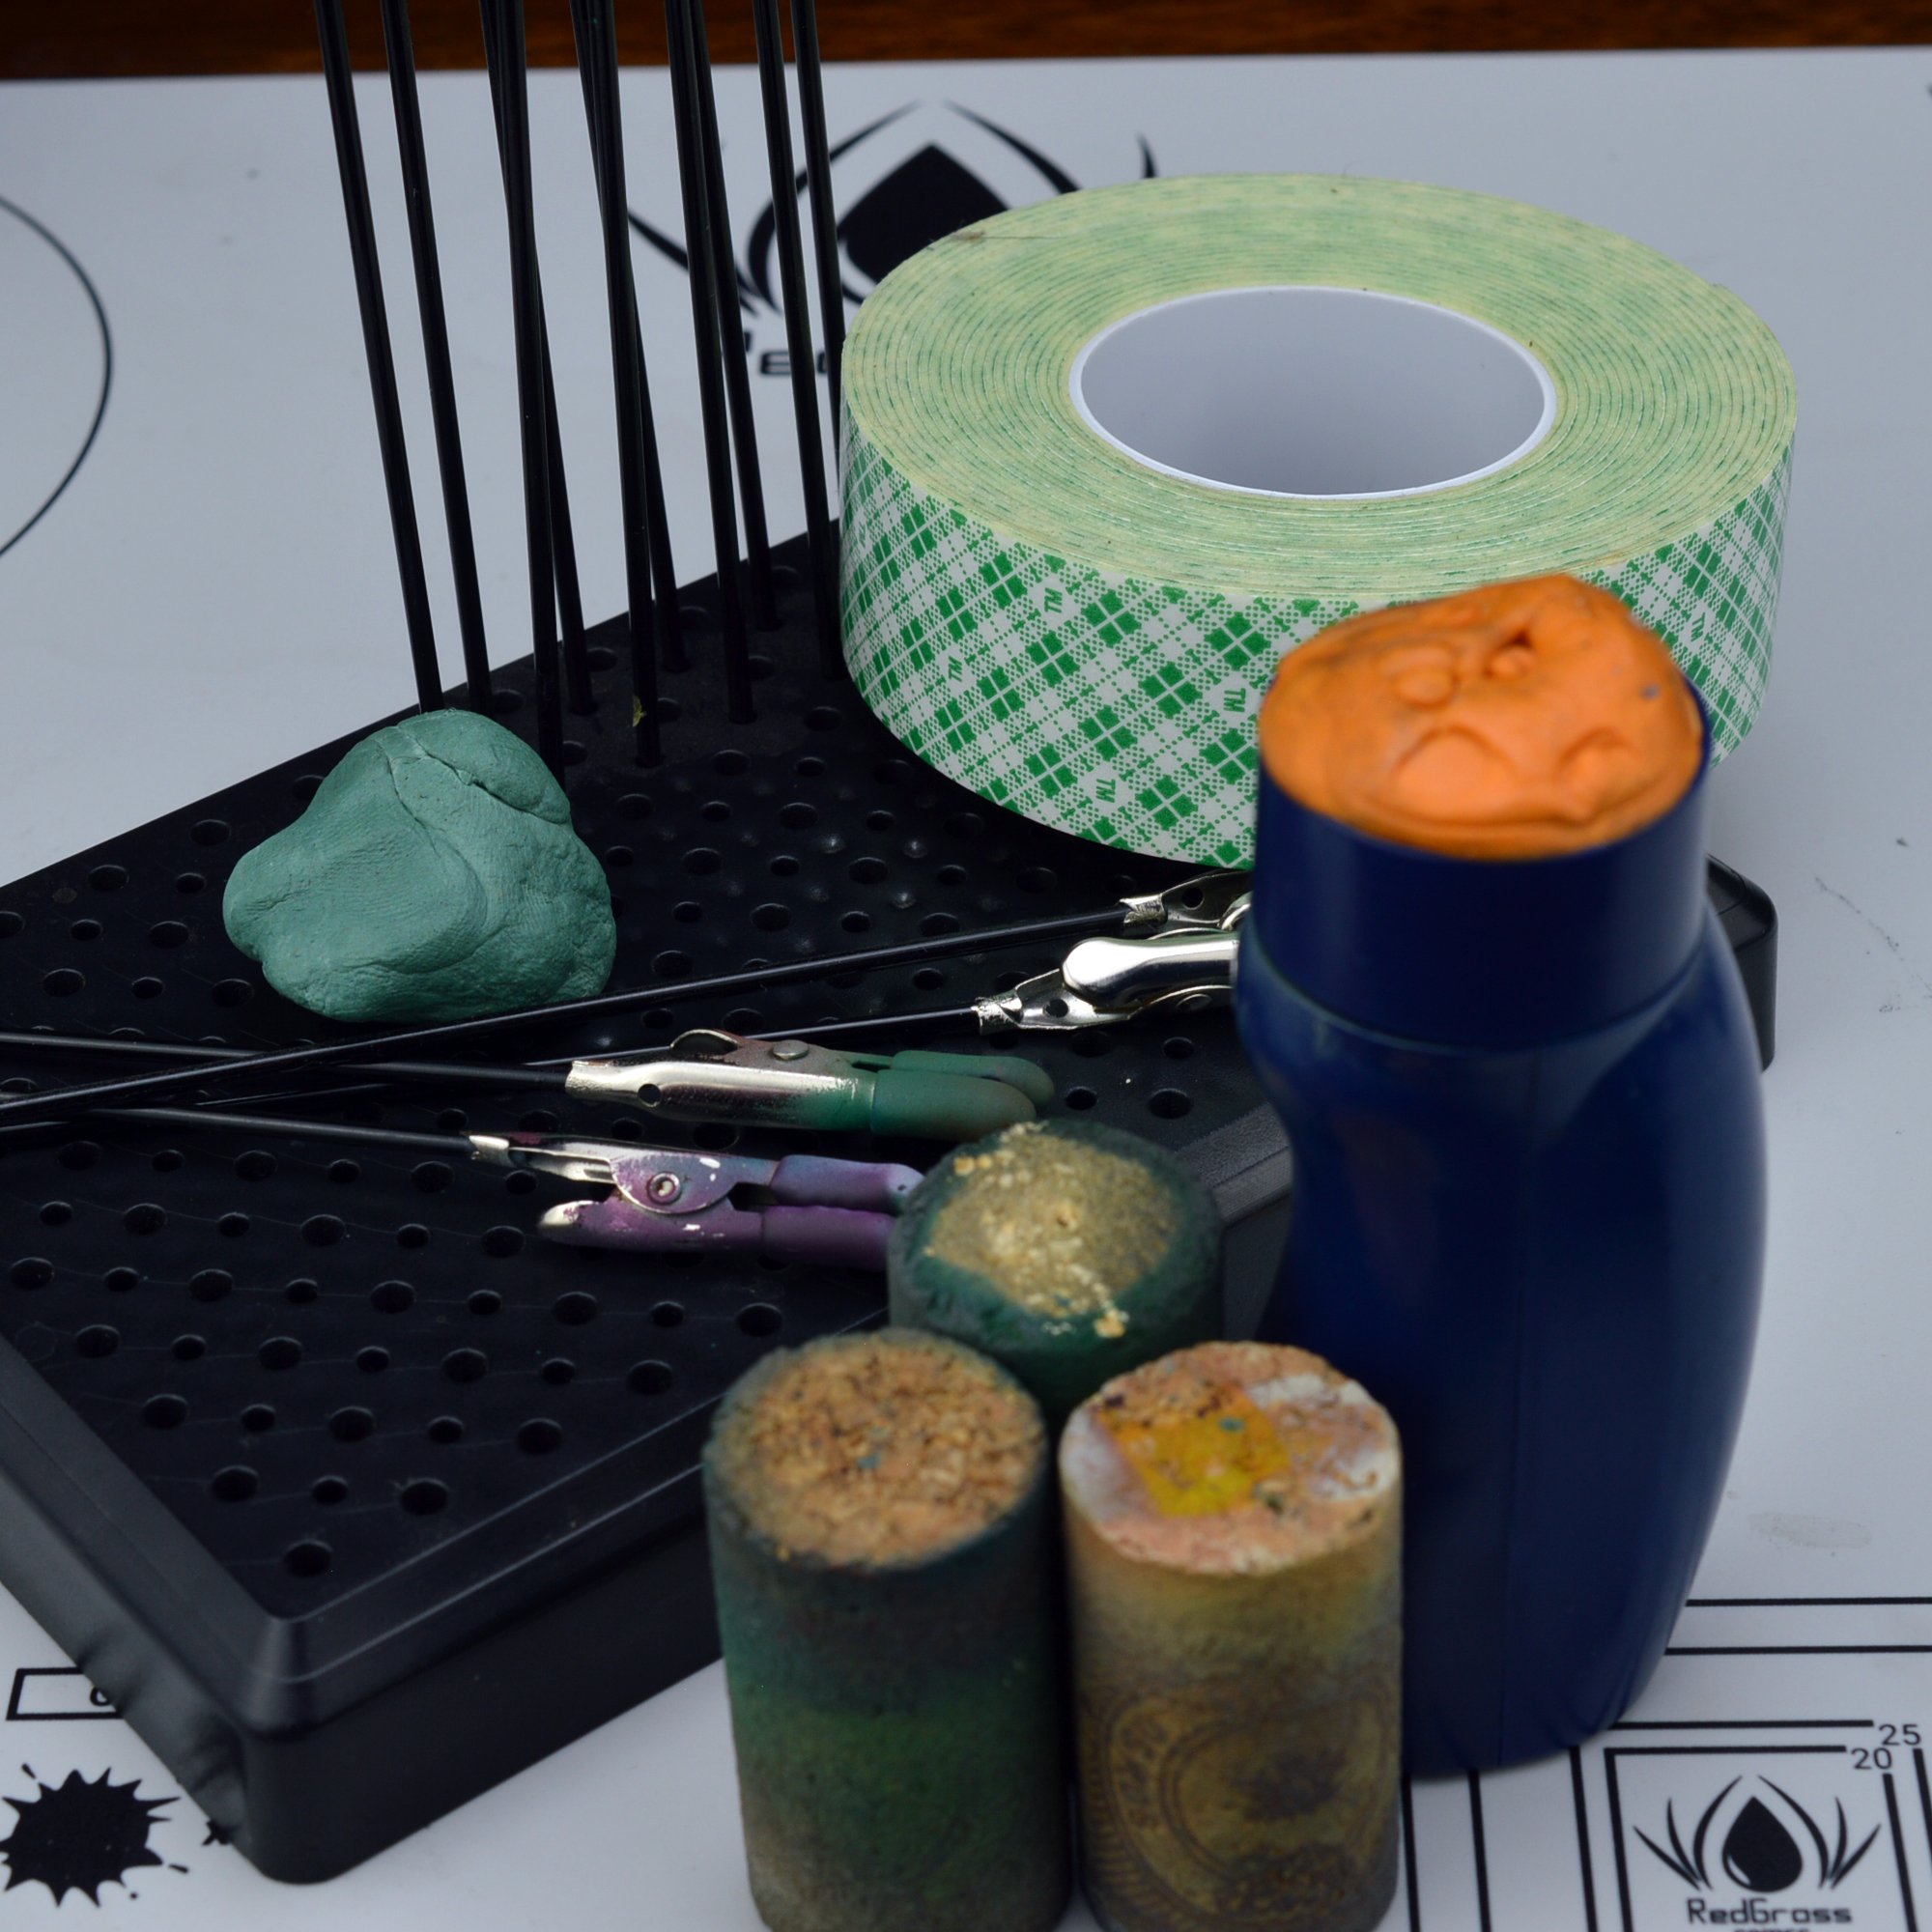
I use the gator clips for all the small bits with easy to grasp pegs. In situations where the model doesn’t have convenient pegs, a little bit of blue tac and toothpicks can create an easy element for the gator clips to grab onto. If you need something a bit firmer, a simple bit of white glue works well in lieu of tac.
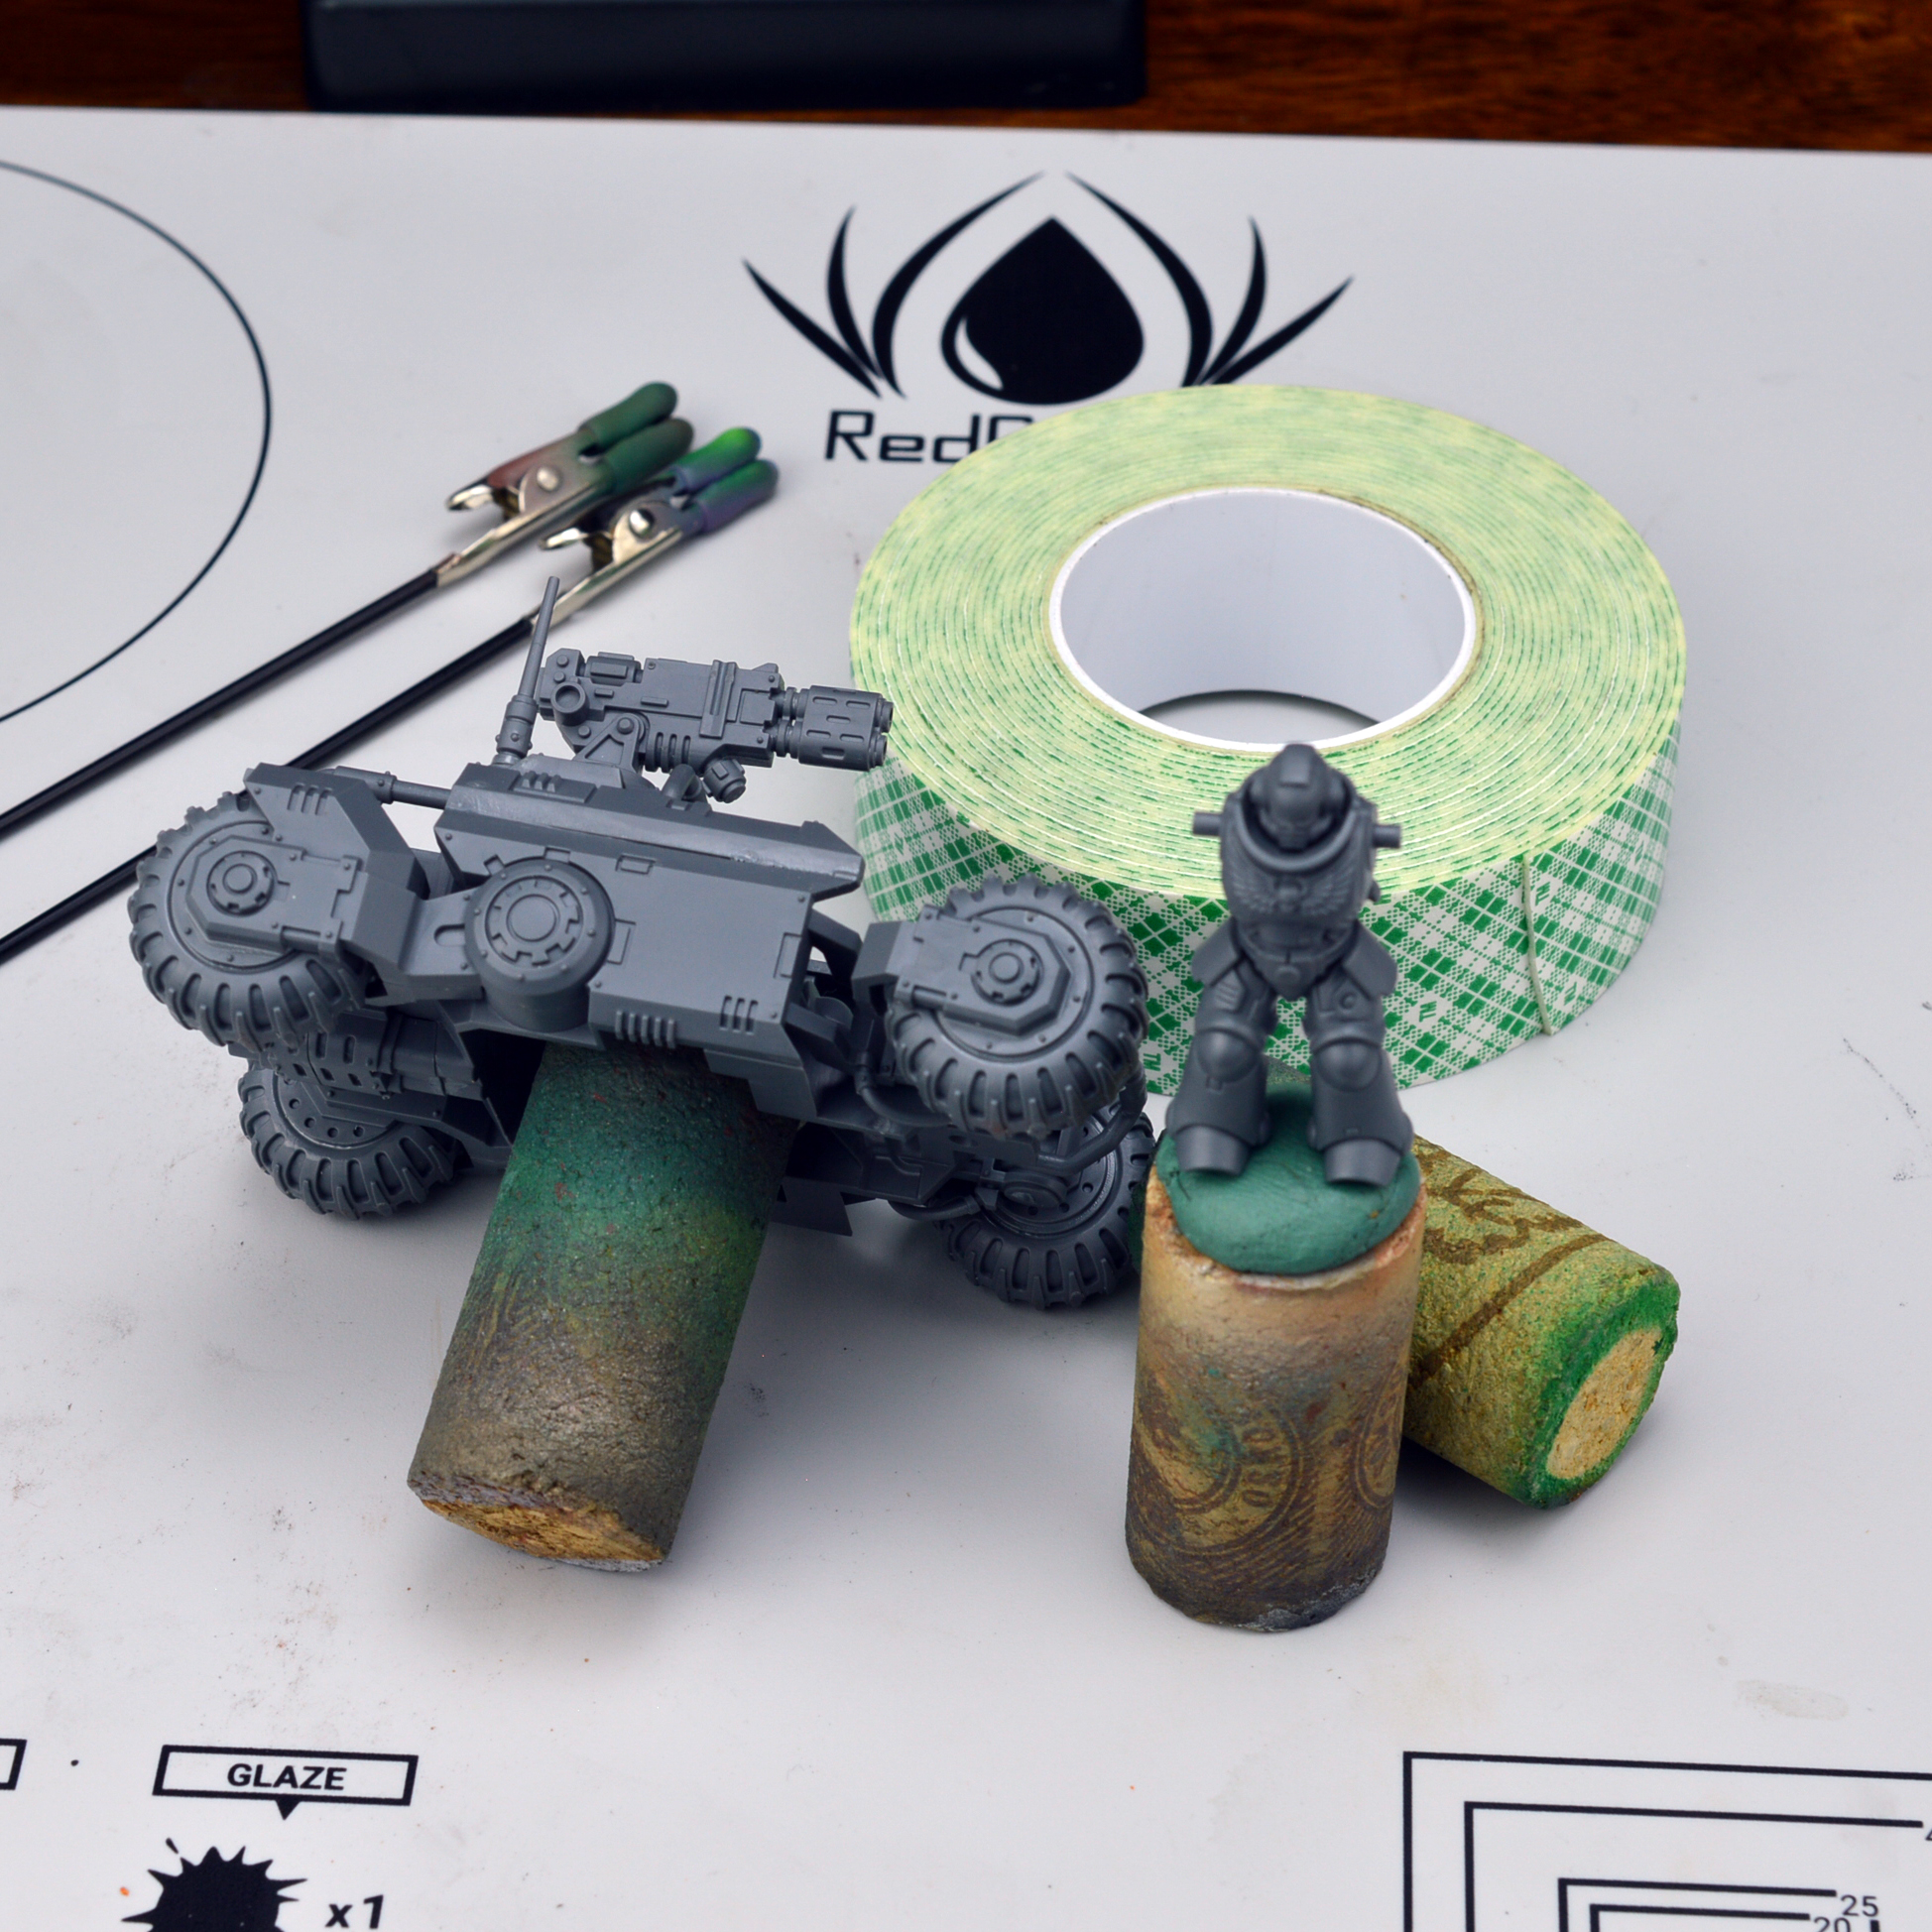
Meanwhile, corks and double sided tape or blue tac work great for the larger pieces of the model. The 3M tape works the best when it has a lot of flat surface to which it can adhere, which is perfect for the Invader’s base.
With everything clipped, corked, taped, etc., it’s time to dive into the actual painting. All told, this really didn’t take all that long, honestly. I would say 10-15 minutes, if that. Like most things, the real-world time investment is significantly less than the mental hurdle would make it seem. I applied a few thin coats of gray primer, and now we’re ready to get to business.
I hope you found this simple guide worthwhile. Sub-assemblies seem daunting, but they’re a really simple way to improve your painting and save some serious headache throughout the process. Some folks go so far as to paint every bit of the model prior to assembly… that’s probably a bit excessive. But by keeping a few key pieces separate, it makes the overall experience a lot more enjoyable and a lot more relaxing.