

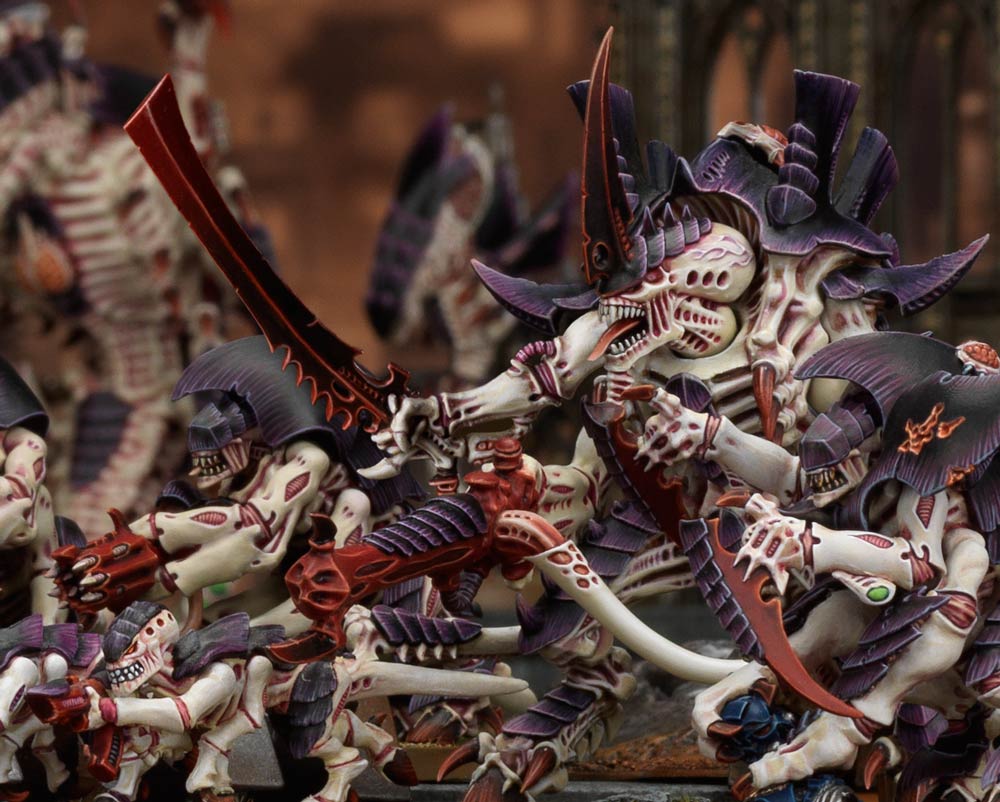
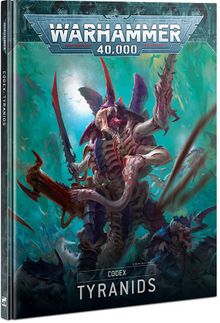
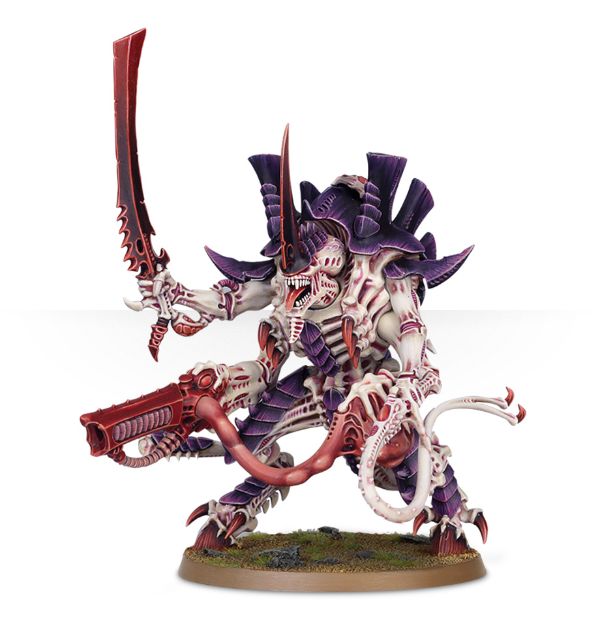
Hey all, Danny from TFG Radio here, and today, we are going to dive deep into yet another aspect of the brand new Tyranid Codex: The generic Warlord Traits and Relics! Do you like big killy bugs that kill? Do you like increasing your synergies? Well, our 9th edition codex certainly can let you do both! As always, be sure to snag the codex, the Parasite, and whatever else you need from Frontline’s Webstore!
See the Tyranid range in our web-cart here!
To be frank, the 8th edition Relics and Warlord Traits were not amazing. There were a few workable ones, but really, once Resonance Barb came out, that was the first Relic that was absolutely a must-have. When Leviathan dropped, there were a few other notables, but overall, this was certainly an area of weakness in the old book. Guess what? Times have changed, and now the Hive Fleets are a bit spoiled for choice. Let’s dive right on in, and in case you’ve missed them, you can read my overall review and my Hive Fleet specific reviews before starting.
Warlord Traits
Alien Cunning –
Warlord gains Objective Secured and counts as 5 models for control of an objective. The Warlord can start to perform an action even if it Advanced or Fell Back this turn.
This is a great Warlord trait that is all about the mission, and there’s nothing wrong with that. Giving a Hive Tyrant Obsec can be both defensive and offense. A Flyrant can go up and immediately start controlling an Objective in No-Man’s Land, and at T7 with a 3+/4++, not the easiest unit to simply remove. This combos especially well with Chameleonic Mutation from Kraken as now that Flyrant is -1 to hit and cannot be rerolled to hit against, so your opponent is going to have to dedicate serious resources to take it out. The Flyrant can sit and blast, perhaps hopping to another Objective if things get hairy, but you can also put this on a melee oriented Flyrant and send it right after Objectives in your opponent’s side of the board, especially in a list designed to get out of reserve charges. Defensively, a Walking Tyrant with a Heavy Venom Cannon can sit and lay down fire, and your opponent will have a hard time using fast moving threats to try and snake the objective away for it. You can also build this directly for psychic actions like Warp Ritual where you can advance forward and start scoring it immediately. While a bit redundant, a Broordlord is great for this as it can already Advance Deploy, so right up in Warp Ritual range, and start performing, and if there is a center objective, it is still Obsec and counts as 5 models.
You can even slap this on say a Flyrant (or Trygon Prime) who comes in from Reserve on Turn 2 or 3, taking an objective and generally being a huge pain to deal with, and if you take Gestation Sac, this can also set up some other big secondary plays.
Overall, this is a solid secondary Warlord trait. I don’t know if I’d take it as my primary one, but for 1 CP, throwing this on another character can really yield results in both the Primary and Secondary game.

Heightened Senses –
The Warlord gains Always Fights First. The Warlord rerolls hit rolls (melee and ranged)
If you want your Warlord (usually a Hive Tyrant but not always) to do work, this is an awesome warlord trait. Always Fights First is never bad as it helps so much in certain matchups where armies hit you with a lot of Always Strikes Last. This is something that you should never forget, but the real juice is just the flat out reroll hits. This is great on a multithreat Warlord like a Venom Cannon/Bonesword Tyrant that wants to shoot and fight or even on a Tervigon (who has a little shooting but mostly to make it a melee powerhouse).
There is not a lot of subtlety here at all: this is just an all out “make one leader bug mean” type of warlord trait, and again, I love that. You can stack this with various relics to make some pretty intense blenders like a Scythes of Tyran Flyrant or a Maw-claws of Thyrax Flyrant with Bonesword who has 6 attacks that reroll to hit, reroll to wound, and can get up to 3 more attacks if it starts munching through Units. If you want to really maximize the reroll aspect, then a Walking Tyrant with Heightened Senses, Heavy Venom Cannon, Bonesword and Lash Whip, and Maw Claws is a lot of threat overall on a T8 2+/4++ package. You could even go a little oddball and use a quad-Bonesword Tyranid Prime with this and Reaper of Obliterax for 6 (or 7 if you spend 1 CP) attacks that reroll to hit at S8 that also do 1 mortal wound for each successful wound. That can be a ton of surprising output for a 90 point model.
Overall, if you want to just make one HQ a bigger threat, this is the choice, and again, as a secondary trait, it is great, but probably not a primary trait unless you are really just building a list for full aggression.
Synaptic Linchpin – Add 3″ to range of the auras and Synaptic Imperative Abilities. Add 3″ to the Warlord’s Command Phase ability.
This is strong choice if your HQs are not so much there to be damage dealers but to supplement the horde. Getting your Warlord up to 9″ for the fearless bubble is a lot more coverage, and this is quite helpful in making sure that you don’t make a huge positioning error. It also affects Shadow in the Warp, getting that up to 21″, which is pretty huge chunk of the board. Also, getting the Synaptic Imperative and Command abilities up to 9″ again helps with positioning, so you can either put this on a smaller HQ that is more forward to help keep the very front of the ranks in full Synaptic Link or on a bigger, backfield HQ like a Tervigon or Walking Tyrant to make sure that you are still covering your home base as your other Synapse forces move forward. This is great if doing a Kronos build as it can help spread Shadow of the Warp.
It doesn’t have the sexy combinations of other Warlord Traits, but in terms of an always reliable, never not useful trait, it is maybe one of the best. If your list is more geared towards stacking buffs on units and sending them in rather than having a big, beatstick sort of HQ, this is a great option, and again, you can always spend CP for this as a backup if you do want that one big HQ punch while also having a solid, dependable backfield HQ to keep things moving.
Direct Guidance –
Select one friendly HIVE FLEET CORE unit within Synaptic Link range. Add 1 to hit rolls for that unit.
Again, this is not about subtlety, and it is not about making the HQ stronger but rather making your army strong. A flat +1 to hit for a CORE unit is great, making Hormies little blenders or making a big volley of Termagants suddenly much more reliable. You can even get a shooty Carnifex to hit on 2s, rerolling, with this and the Tyrant’s Command ability.
This generally works best where the +16% chance of hitting is going to pay larger dividends, namely volume of fire. A full squad of Hormies goes from landing 45 out of 90 to landing 60 out of 90 hits, so a net increase of 15 extra hits. A full squad of Termies or Gargolyles go from landing 15 out of 30 shots to 20, so a net increase of 5. As you can see, the more volume, the more you get out of this, so while it is certainly, certainly good on anything, Hormies in melee get a ton out of it, but don’t sleep on who used to give this out like candy, Warriors. This is a flat +1 to hit in both melee and shooting, so a full 9 unit of Deathspitter/Dual Bonesword Warriors sees an increase of 3 extra hits in their shooting and 5 extra hits of melee, but seeing as how they are hitting with much stronger weaponry in both phases, that’s a total of 8 extra hits of higher quality attacks. Don’t forget, this is just one bonus to stack on a unit, so when you start adding in reroll 1s to hit and wound from Tyrants and Tyranid Primes, and maybe even exploding 6s at range or melee, depending which Imperative is up, you are going to see a huge increase in efficiency. Of course, anything with CORE loves this, so all Troop choices, Tyrant Guard, Venomthropes, Genestealers, Raveners, and Carnifexes of all flavors. The only ones who really don’t are Pyrovores who don’t need to roll to hit.
Again, if you are building a list that is more about souping up threats rather than having one, concentrated badass bug, then this is likely the number one pick for me. If running Swarms, this is the number 1 pick for sure.
Synaptic Tendrils –
In your Command Phase, the Warlord can use its Command Phase specific ability twice.
While not as ultimately, clearly powerful as Direct Guidance, this is still a great secondary trait to put on either a Tyrant or Prime. Giving two units rerolls to 1s helps get some extra mileage, and one thing Tyranids can struggle a bit with is that one unit can get souped up, but only one, so getting another unit with at least a bit more bonus is really gravy. It is really that simple, this way you can give Hormies who are about to go deep into enemy lines reroll 1s to hit and also give a Termie squad or even shooting Carnifex rerolls 1s to hit to help clear a path for said Hormies.
Another fun trick with this is if running the Leviathan mortal wound list, you can give this to a Neurothrope, so it can put up Warp Siphon twice, getting both a Maleceptor and a unit of Zoanthropes the roll an extra d6, drop the lowest for psychic tests. A unit of 4 Zoanthropes with Warp Siphon are going to Super-Smite (d6 Mortal wounds instead of d3) more times than not, and you still have the Maleceptor blasting anything close by with its own power. If not the Maleceptor, giving 2 units of Zoans a consistent Super-Smite is still awesome, and that’s generally Hive Fleet agnostic, so if taking some psychic heat, this can be a great, great Warlord Trait to throw on a Neurothrope.
If you are not running a lot of big HQ choices, so leaning much more into Units, the one-two combination of Direct Guidance and Synaptic Tendrils is solid.
Adaptive Biology –Each time the Warlord loses a wound, a 5+, that wound is not lost. (5+++ Feel No Pain).
Do you like a big bug that just won’t quit? Then give it this warlord trait and watch it live 33% longer. A flat out 5+++ Feel No Pain is great, and if you are investing into a big bug HQ unit like a Tervigon, this can really, really make it hard to shift. One of the most survivable models in the game is a Tervigon with Chameolonic Mutation, Adaptive Biology, and Dermic Symbiosis. 17 T8, 2+/4++/5+++ wounds at -1 to hit with no rerolls against it that also cannot be targeted unless you sweep the little bugs around it first is a nightmare. A Tyrant of any variety is also plenty happy about this as while not as flat out durable thanks to less overall wounds, a Tyrant is also cheaper, easier to hide behind terrain, and can generally be more offensive than a Tervigon (don’t get me wrong, you can make a mean melee Tervigon, but you can’t make a super tank Tervigon that also is just flat out mean in melee).
If you are looking to build an Anvil style HQ choice, so a character designed to just not die easy and take up valuable space, then this is great. Heightened Senses is awesome for sheer damage output, but for creating a durable HQ choice that you can throw in to hold up big threats while mostly being sure of its survival, Adaptive Biology is the way to go.
Overall, each of these Warlord Traits have something to offer, but they each supplement a specific style of list. Adaptive Biology and Enhanced Senses are for making your HQ choices individually tougher, Direct Guidance, Synaptic Tendrils, and Synaptic Linchpin are about making your HQ choices more effective at actually leading your list, and Alien Cunning is about building towards playing the Mission more specifically than anything else.
In short, none of these are bad, but they aren’t one-size fits all, so you need to think about what your list actually needs.
Relics
The Ymgarl Factor:
At start of the Fight Phase, select one of the following to last until the end of the Fight Phase. +2 Strength. +1 Attack. +1 Toughness.
A solid upgrade from the previous codex, namely that you get to choose, and all of them have some room. +2 Strength on a Tyrant or even Prime can be the difference between wounding on 2s versus 3s, and +1 attack is never bad to have. +1 Toughness is more corner case, but if your HQ is fighting something with a lot of S7 or 8, going up to be higher than their Strength can be 16% less wounds, which can be the difference between life and death.
You can make a surprising mean Tyranid Prime with this as with Dual Boneswords, it has 5 attacks, and you can pump it up to S10 with Ymgarl and Adrenal Glands. That’s not at all bad for little point investment. Fitting to the fluff, the Broodlord maybe has the most mileage out of this as its profile generally always needs something to really match specific problems. Going against a lot of bodies? +1 attack is not bad. Fighting a unit with a lot of S5 and S6 attacks?+1 Toughness really helps there. Swinging against T5 or T6? +2 Strength is very helpful. Still, in terms of a relic designed to increase overall combat efficacy, there are superior choices to be found.
For flexibility, this is a good choice, but in terms of raw efficiency and power, it is not quite as workable as other choices.
The Reaper of Obliterax:
Bonesword or Monstrous Bonesword only. Each time an attack is made with this weapon, a successful wound causes 1 Mortal Wound in addition to any other damage. Enemy models cannot use rules that ignore wounds against attacks made by this weapon.
This is an amazing weapon that is limited in who gets it, but it can do quite a bit of work against any target. Having every successful wound turn into a Mortal Wound is bonkers, bonkers good, especially with no cap. There is a soft cap in that there are only three models that can use this (Flyrant, Tyrant, and Tyranid Prime), but still, if you spend 1 CP to boost up an Adrenal Tyrant, you can have up to 8 attacks, so possibly (if you get lucky) 8 Mortal wounds. Of course, Tyranid Monsters can always get hungry for 1CP for reroll to wound, so you are going to convert 80%+ of your wounds against even T8 with a Monstrous Bonesword, Adrenal Tyrant. As I discussed earlier, with Enhanced Senses, you can throw this on a Quad Bonesword (Mini-Swarmy!!) Tyranid Prime for a cheap, cheap HQ missile that throws out 7 (with a CP) attacks at S8 AP-2 D2 that causes a Mortal on every successful wound and ignores both Feel No Pain and rules that keep a model from dying in a single phase like Phoenix Lords or Ghazhkull. Plus, if it dies, you can spend CP to make it fight again for even more bonus mortal wounds.
This is one of my favorite relics to either make a really, really scary melee tyrant or a disposable missile. A Behemoth Flyrant with this pairs exceptionally well with the Yo-Yo Snake of Doom as you have the Flyrant with mortal wounds and the Yo-Yo snake can take Monstrous Hunger (and if getting CP spendy, Monstrous Musculature) for another big out of reserve threat that also pumps out mortal wounds. That can be two big melee threats that can be hard to stop out of reserve coming in and mulching whatever they want.
So yes, big fan of Reaper and probably the best overall damage dealing relic.
The Maw-Claws of Thyrax:
+1 attack, reroll wounds in melee, and each time the bearer destroys an enemy unit in melee, it gains a permanent +1 attack (max 3).
This is just another solid melee relic that is good on just about anything. You can pair this with Enhanced Senses for an all-rerolls, all the time sort of beatstick. It can actually be pretty hilarious on a Tervigon as the +1 attack means either 5 of the big swings or 10 of the little ones, and again, with Adrenals, you can boost this to +d3 attacks for either 6-8 big hits or 12/14/16 sweeps, and those sweeps can definitely hurt. Considering that you can get more attacks, a melee Tervigon with Enhanced Senses and Maw-Claws, walking up the board, safe from shooting thanks to the little buddies near it can become absolute unit, and assuming everything goes perfectly fine, you could get a Tervigon up to 11 attacks at S11 AP-4 D2d3 or 22 S8 AP-3 D2 attacks, that all reroll hits and wounds. That’s one mean Mama Bug if ever there was one. Even on a Broodlord, getting 7 attacks that reroll wounds (helps take the sting out of that S5) is solid, especially since it increases the odds of the big AP spike, and since a Broodlord can Advance Deploy, you can basically make an objective hunter that skirts the main battle to target weaker units camping objectives.
Again, if you want a solid, reliable melee threat, this is a good choice. Unless building the Tervigon of Doom, which I love, I probably wouldn’t take this over Reaper as a melee relic, but if doing a very dedicated melee build with my HQs, it is certainly going to be in there.
Resonance Barb:
Psyker only. +1 to psychic tests and know 1 additional power from Hive Mind.
Oh, old reliable is back, thankfully. This is almost an essential relic for a lot of builds that rely on psychic powers. Getting that +1 to cast means those tasty Warp Charge 7 powers are far more reliable to get off, especially if you are going to CP reroll a fail, and if doing something like the Leviathan psychic bomb or even Behemoth horde, you really do need a Neuro with this.
Yes, a Tyrant can take it to quite good effect, but with the Neuro’s ability to further boost casting to someone, you really are taking this to help keep the psychic train running. Even just getting a clutch smite off helps, but really, there are some big, big powers that Tyranids need to get their combos running, whether that be Behemoth’s power, Leviathan’s power, Onslaught, or even Catalyst. One weakness of Nids is that our codex does often rely on specific powers to really shine, and fluffing the roll sucks, so changing the math just a bit really, really helps.
Again, this has been great since we first got it, and it remains great. This is generally my first choice of relic when building a list that doesn’t focus on having some super killer HQs.
Pathogenesis–
+8″ to all ranged weapons. You get 1 reroll to hit and 1 reroll to wound when shooting.
This is an interesting shooting relic that can do a bit of work, but it is a bit outshined by the other relics. +8″ range isn’t anything to sneeze at, but then none of the weapons that you really want to boost need range that badly. You could throw this on a Trygon Prime to get 20″ shocks, but then, you really aren’t taking a Trygon Prime for the ranged output. The one free reroll to hit and wound is nice, definitely money on a Heavy Venom Cannon as you want to maximize those shots, and if going Leviathan for another free reroll to hit, that can be something for sure.
The issue is that Balethorn and Shardgullet are just better ranged choices, so if you really want a better shooting platform, then those two are likely better choices. If really going into Shooting Hive Tyrants, I could see taking this on a regular Heavy Venom Cannon and then Shardgullet on another, especially in Kronos where you get an additional 4″ (so a 48″ HVC is pretty good long ranged firepower) and an additional AP if within half range, bringing the HVC to AP-5 and Shardgullet to AP-6 (lolz). Again, maybe some work, but there are just more efficient relics to take unless getting CP spendy.
Scythes of Tyran:
2 Monstrous scything Talons only. Relic replaces them with this profile: S+2 AP-4 D3 and gain +2 attacks with this weapon.
So Scythes of Tyran is a great way to get a lot of quality attacks out of a Hive Tyrant. This used to be Behemoth only, and it still works well in Behemoth, but anyone can take it. Getting a Flyrant with Adrenals to S10 AP-4 D3 with 7 attacks (plus 2 little kicks) is not bad at all, especially in any Hive Fleet that can boost melee whether that be Leviathan for AP-5 on the charge, Behemoth for S11, or even Gorgon with Toxin Sacs for auto-wounding on 5+ to hit. With 9 attacks total, if going Behemoth, you can take their Warlord trait for a mortal wound on every 6 to Wound or in any Hive Fleet, take Enhanced Senses for Always Fights First and reroll hits. This becomes a neat little blender of a Hive Tyrant, and with D3, you can generally push through enough damage to take most threats reliably.
I do like this melee relic on a Walking Tyrant with an HVC where you can walk up the board, shoot those big shots, and then when the chopping begins, the Tyrant is still a respectable 7 attacks. Of course, with either combination, with those Adrenal Glands, you can also spend the CP for +d3 attacks, potentially getting 10 attacks with those big talons. If really dedicated to melee Tyrants, a good combination in a Behemoth list is a Flyrant with this combo and Behemoth’s Warlord Trait and another Flyrant with Reaper and Enhanced Senses. This is CP spendy (especially since you’ll need another Detachment for 2 Tyrants), but it gives you two very mean, very fast melee threats that can either drop in on Turn 2 or 3 to do work or even charge up the board alongside the Hormies to keep Synaptic Link up everywhere.
Balethorn Cannon
Stranglethorn Cannon only. Relic replaces it with this profile:Range 36″ Heavy d3+3 S10 AP-3 D3. Blast.
If you want a bit of crowd control that also doubles as an effective light vehicle/heavy infantry killer, Balethorn is a solid choice. With 4-6 shots, that is enough to take a big chunk out of a lighter vehicle or take down a few Terminators. While the Stranglethorn Cannon isn’t really idea compared to the raw power of the Heavy Venom Cannon, if you really want to take one, this is the best that you are going to get. That said, at maximum luck, a Balethorn does do more damage than even Shardgullet, but again, that’s really asking for a lot. Outside of the Tyrannofex’s big gun and the Exocrine, the Balethorn has the highest damage potential of any ranged weapon, and certainly the highest on a Tyrant, so it can do good work, but Shardgullet or even a regular Heavy Venom Cannon is more consistent, big damage.
All that said, if you want a little more dice to roll and the chance for more damage, the Balethorn is a good choice for a ranged Tyrant, especially if trying to really squeeze points, and you just need 5 more.
Shardgullet
Heavy Venom Cannon only. Relic replaces it with this profile:Range 36″ Assault 3. S12 AP-5 D5.
If you wanted big range damage, here is the Shardgullet. This turns a Hive Tyrant into essentially a mini-Tyrannofex with Rupture Cannon, but one that is a bit easier to hide, has better BS, and has a 4++. Tyrants can be pretty capable long-range murder machines thanks to Tyrant Guard, especially if you do the somewhat feels-badzy move of putting the Tyrant Guard out of LoS but still within Body Guard range of the Tyrant, so your opponent can’t actually shoot the Hive Tyrant while it rains death.
At S12, you are wounding most hard targets on 3s and a lot of other targets (like Custode Bikers) on 2s. At AP-5, the target better have an invul save, and a straight damage 5, even with damage reduction, that is still a juicy hit, and you get 3 shots. If taking stock Leviathan, having a free reroll to hit isn’t bad at all here, getting the most out of your 3 precious shots, and if GuideMind is up from a Prime, you may spike and get a few extra hits. Especially in Leviathan where a Tyrant has Perma-Transhuman (only wounded on 4+), a Shardgullet Tyrant can sit in the back, be a crucial Synaptic Link hub, and lay down some heavy shots.
There is not much to say about this gun other than it just flat does work. If you are looking for a heavy shooting HQ, this is the go-to option if you have a relic free.
Gestation Sac
One per battle, the bearer can before the following action: Start of shooting phase, perform this action and completes at end of phase. When completed, set up a new Ripper Swarm unit of d3+1 models within 3″ of this model and not within Engagement Range of any enemy units. This does not cost Reinforcement Points.
This is a very fun, fluffy option that doesn’t really shine outside of lols, but it has a few plays. Getting a free unit of 2-4 Rippers isn’t bad per say, and this can actually have some play in secondaries, namely Behind Enemy Lines. You can spend your relic to pretty much guarantee 4 VPs in one turn by throwing a Flyrant deep into the enemy lines (or coming in from reserves) and then popping out the Ripper unit for 2 units wholly within the enemies’ deployment zone. Since this is not at all restricted to anyone, you could give it to a Broodlord who Advance Deploys 9 away from the enemy Deployment zone, and then they Advance forward (make sure to keep them in Synaptic Link range so the Maleceptor’s Imperative can affect them or give them Alien Cunning), have them pop out the Rippers, and boom, an easy 4 points on Behind Enemy Lines on the first turn.
Another option is to use this on a melee Flyrant who drops (or flaps) into an objective in No-Man’s Land or just lines up a good out of reserve charge, but you still want to leave a unit in that quadrant (or on that objective). The Flyrant can pop out the Rippers and then charge out. Even defensively, you can position a Flyrant (or any HQ really) in some threat, drop out the Rippers to form a shield so they cannot be charged next turn.
Again, not overly powerful, and a little bit more for fun, but there are plays here as generating units, especially units that can score objectives and secondaries (unlike Spores) always has play.
The Dirgeheart of Kharis
Each time the bearer fights, after resolving its attacks, select one enemy unit hit by an attack by the bearer, and until the end of next turn:The enemy unit loses Objective Secured and -1 Leadership.
This is another tek relic that can absolutely ruin your opponent’s plan, in the right scenario, Being able to turn off Obsec, and Tyranids have a lot of Obsec, greatly swings the game into your favor when it comes to the Mission if running a Swarm. This can go on any character, so throwing it on a Broodlord or Prime can mean that they can stay safe behind a swarm, charge in to tag a unit and take away their Obsec, and then your Swarm now controls the objective. This can also work with a heavy Warrior Build like Leviathan where you may not always have the numbers to control an objective, but if you can turn off Obsec on the enemy, well then, problem solved.
The -1 Leadership isn’t really big, but again, being able to just flat out deny a big, objective camping unit their main advantage can’t be understated. If you are looking to control the mission more than just do outright damage (and to be fair, Bugs have plenty of non-relic ways to do big damage), then this is a solid choice, especially on an easier to hide frontline character that isn’t the same investment as say a Tyrant or Tervigon. That said, a Tervigon is always going to roll with some big blocks of Obsec Gants, so there is definitely play here as the Tervigon can come in, sweep up a few models, turn off their Obsec, and let the Gants just take the objective.
A tek piece that can do real work in the mission, but this requires a deft hand.
The Passenger
Adrenal Glands keyword only. +2 to Advance and Charge rolls.
Do you like out of reserve charges? I like out of reserve charges. A flat +2 to Charge is great as on its own, it makes a charge out of reserve statistically more likely to pass than fail. That said, you can combo this to almost guarantee the charge either by taking the +1 to charge Adaptation for a flat +3 or going Behemoth for reroll charges as a 7+ rerollable is now very likely to happen, and if you really want to make this work, you can then plan on using Shard Lure by tagging the target with a ranged attack from a Synapse Creature to get an extra d6, drop the lowest, on the charge. If you want to spend 2 CP instead of 1, you can do all of it with a 6″, roll 3d6, drop the lowest, with a reroll on deck, charge. That’s pretty much gonna happen far more than not.
So if you want a Flyrant coming out of nowhere to take over an objective or hit a big target with a Bonesword or Talons, then here you go. Another way to make Jormungandr a bit more fluffy and yet devastating is to put this on a Tervigon and then spend 1 CP to put it into reserve, so it can drop in and start kicking butt. Especially if you also spend the CP to drop in a 30 strong squad of Gants to help keep it safe, your opponent suddenly has a huge, durable beachhead on their flank. Pricey, but you can also do this with Tyrannocytes or a Tyrannocyte and Trygon and use any Hive Fleet you like. While it may be hard to wrap our heads around, a melee Tervigon is a doable thing, especially with Enhanced Senses as the Warlord Trait.
A great, solid relic if you really want to prioritize getting a big charge off. Maybe that’s not your style, but if it is, here you go!
Searhive
Toxin Sacs keyword only. Each time the bearer makes a melee attack (excluding MONSTER/VEHICLES), all hits automatically wound.
This is an interesting relic that has some possibilities but unfortunately has a very clear downside. The ability to just skip the wound phase really increases the overall likelihood that you’re going to force saves and therefore damage as the math of the game is really based upon the idea of diminishing returns, namely roll to hit, wound, and save, so skipping a step can actually radically increase the amount of expected damage because you are missing a stage in math itself. Since almost any HQ choice can take this relic because Tyrants, Trygon Primes, Tyranid Primes, and Tervigons can all take toxin sacs, this does have some play in terms of just mutability. The most mileage is likely on a Trygon Prime as it has 12 attacks, so you’re going to force a lot of wounds, especially if you can in anyway get a reroll to hit on the on those attacks like say from Enhanced Senses. This isn’t a huge amount of damage output though as Trygons are more designed to kill infantry than anything else, but that doesn’t really matter to the downside of this (not working against Vehicles/Monsters). It really is helpful against what a Trygon wants to attack which is mostly multi wound infantry like Primaris.
On Scything Talon Tyrants, this can do a lot of work as they hit on twos when healthy and because they are Synapse, it can help extend the Synaptic Link range, so they can get reroll ones and so you have a lot of accuracy, so all of a sudden, you’re getting a lot of wounds through.
That said I probably wouldn’t take this upgrade unless I was doing a very specific build just because our HQ choices that can really benefit from it generally don’t need the help to wound, or they just better suited to go after harder targets.
Overall a fun relic but probably tied with Ymgarl for weakest of the bunch.

So those are the generic Warlord Traits and Relics for Tyranids, and man, can you make some fun combos with them. What’s more these relics are all significantly better or improved in previous versions which is always nice to see, as I didn’t necessarily want brand new relics, just for the relics that we’ve all come to know and love to be usable. I think my favorite relic by far is the Reaper of Obliterax just because I love the idea of doing a ton of Mortal Wounds, and you can stack this with a lot of other bonuses to really get some damage going. Of course the Resonance Barb is still amazing as it helps you mitigate bad dice, especially on someone like the Neurothrope. Either way though, there are relics for any play style, whether that’s creating super killy HQs or actually creating a super synergistic leader bug to help guide the swarm to victory.
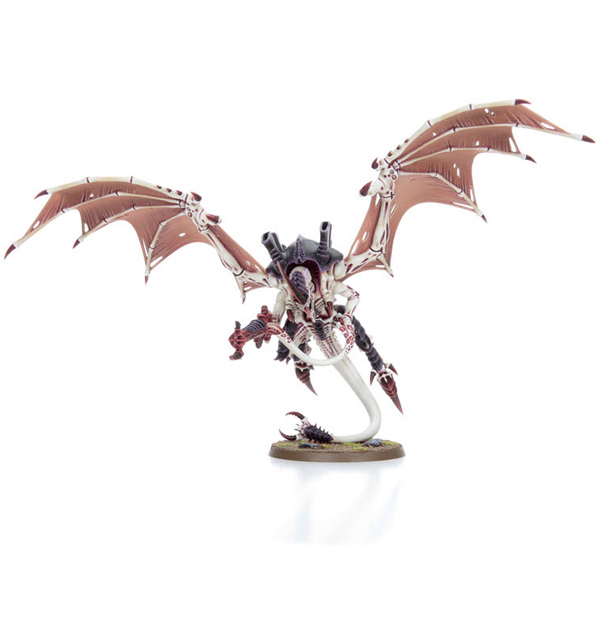
As always, thanks for reading, and next up, I’ll deep dive the stratagems and generic psychic powers for even more combinations and hilarity. I am very excited to see how the new codex does at a large event like BAO, and even locally to me, at Battle For Los Angeles. Also, be sure to tune in to TFG Radio as I’ll be throwing out that spicy new winged boi for someone. Play games and be nice to each other!


