


Hey everyone, Cameron Pineiro here from Art of War to talk to you about Harlequins! Harlequins are hands down my favorite army. I started playing 40k back at the end of 3rd edition with Eldar but was curious as to what happened to the clowns that were present in earlier editions. As 4th rolled out, Harlequins were reintroduced as an elite option for Eldar and eventually Dark Eldar as a Troupe. 7th and 8th came about, both of them bringing a fresh codex for the oft-forgotten Harlequins and expanding the model range. Since the first codex in 7th, I have incorporated Harlequins in almost all of my army lists at events, and I’ve won best Harequin player in the ITC three years in a rown! Suffice to say, I’m here today to talk about my experience with the army in a competitive setting and give y’all some tips and tricks to play with Harlequins.
The goal is to break down some of the main competitive choices, strategies, and options within the codex. I’m not going to go over every single unit, and I am assuming you’re familiar with the eight units available to a Harlequins army.
Play Styles
The first thing to know about Harlequins is that they break most, if not all, of the core rules of the game. Every unit has at least a 4+ invulnerable save, every unit either has a flip belt or the Fly keyword to ignore models and terrain when moving, all non-vehicle units in the army can advance and charge, and all non-vehicle units in the army can fall back and act normally (shooting and charging). On top of this, the slowest moving unit is moving 8” before any advances, making the army as a whole incredibly slippery and speedy. Already, that’s a lot of things most armies need to spend command points on or choose specific army traits to do maybe one of those things.

These benefits are offset by a few things to make the army hit incredibly hard, but not necessarily stand around in a prolonged fight. A low toughness and higher point cost across the board make Harlequins a glass cannon – their units want to engage your opponent on your terms and not be caught in the open or counter charged. Using your speed and creating favorable trades or disruptions to your opponent’s plans are the groundwork in which a Harlequin army excels.
As such, Harlequins have a few traits which exemplify this play style. In 8th edition, armies are defined by their traits – what kind of advantage your army’s trait gets you is just as important as what army or faction you’re playing! Luckily, Harlequins have a few standout traits that shape and refine how the army plays. We have six different Masque Forms to choose from, of which four are seen competitively:
- Frozen Stars – +1 attack when charging.
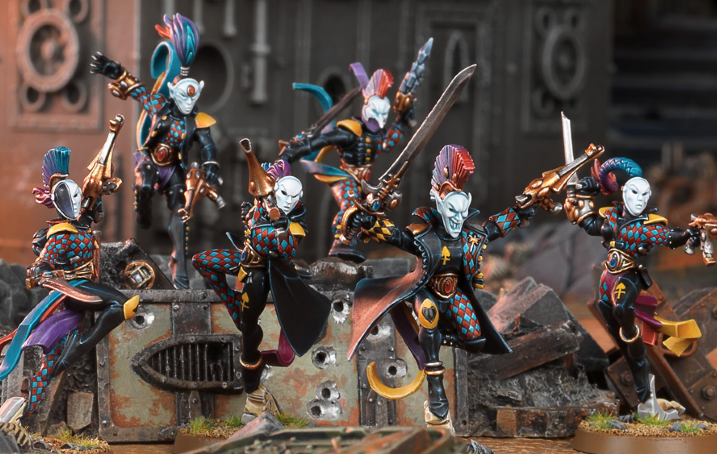
This is the most straightforward of the traits. Each basic troop has four attacks and a variety of good close combat weapons to choose. Five Harlequins with Kisses charging a character will put out 25 weapon skill 3+, strength 4 ap -1 dmg D3 attacks, which is no joke. Their Masque stratagem for 2 cp gives a unit +1 to wound against an enemy Infantry, Biker, or Beast.
- Dreaming Shadow – Max 1 model fleeing from morale. When a model dies, they can shoot or make a single attack on a 4+.
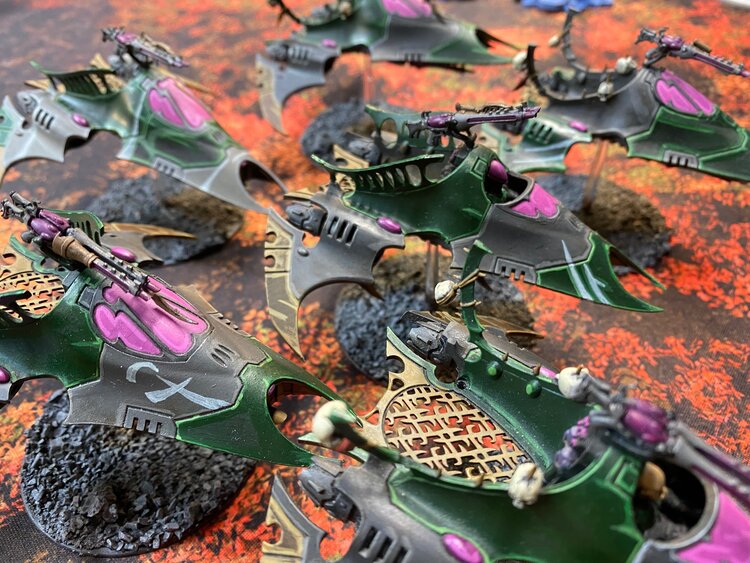
This form was popular early on and might see some more play as vehicles come back into the fold. Harlequins are known for their Skyweaver Jetbikes – these each shoot D6 Haywire shots. Add this trait to them to shoot on death, and it’s no wonder why Knights were terrified of 6D6 shots doing mortal wounds.
- Silent Shroud – 6” aura of -1 leadership to enemy units. Enemies must roll 2d6 and pick the highest when taking morale.
While leadership shenanigans aren’t the most reliable, I personally like this form for a few reasons. Any of your units suddenly have a higher chance of killing a non-fearless unit, usually picking on scouts, rangers, or similar troops on objectives. It also combos nicely with the Hallucinogen Grenades a Shadowseer launches that do mortal wounds based on leadership. Notably, this Masque’s Stratagem will let an entire unit ignore overwatch for 2 cp. Great on a large unit of Skyweavers that want to tie up multiple units in a gunline or get your troupes in safely into a shooting heavy target.
- Soaring Spite – Units with Fly or embarked on a transport with Fly can advance and shoot normally. Pistols become Assault 1 when advancing.
One of the more common playstyles really leverages this trait. Skyweavers being able to move 22” (16” + automatically advancing 6”) and shoot 24” for their Haywire shots with no penalties is great. However, when you have 3+ Starweavers carrying 5 troupe members and a Troupe Master with fusion pistols, you can threaten units from 28” away with 5-6 melta shots reliably. Notably, since your Starweavers Fly and your troupe shoots from the model and not the base of the Starweaver, these fusion boats can punish opponents for being slightly out of position with their characters.
With the Masque traits covered, I find that Harlequin armies will favor either heavy Skyweavers with haywire cannons as harassment units or a mass of troupes, usually with fusion or kisses ideal for characters or hordes if Frozen Stars. I would be remiss not to point out that a lot of players have found success with a mixed detachment due to specific stratagems and relics that are Masque restricted. We’ll review some of those combos later in this article, but suffice to say, Harlequins are surprisingly varied in their competitive options, despite only having eight units.

Stratagems
Beyond their Masque traits, Harlequins truly shine with their Stratagems. As I mentioned at the start of this article, Harlequins already break most of rules of the game, and their strats push this further – most of their command point usage can be incredibly disruptive or tricky in application. Let’s go over the main ones common to all Masques.
- Webway Assault – 1/3 cp. Deepstrike 1 or 2 Harlequin Infantry or Jetbike units.
Harlequins’ deepstrike stratagem, common to all Eldar races (though with a different name, so you can couple it with Webway Strike and Webway Portal for Eldar and Dark Eldar respectively).
- Prismatic Blur – Use on a Harlequins unit after it advances. That unit gains a 3++ invulnerable save until the start of your next turn.
Boosting your save up to a 3++ is fantastic, especially with the “drawback” of the stratagem requiring you to advance. As you can advance and charge (and shoot normally if Soaring Spite), this stratagem has no real downside. The key point on this is that it’s not locked to after advancing in the movement phase, which we’ll get back to later. Final caveat – you can’t advance when falling back, so be careful about that!
- Cegorach’s Jest – Use when an enemy unit falls back. If it’s the last unit to fall back, you can shoot after it finishes moving.
This epitomizes Harlequins all for 1 cp. Very useful on Skyweavers who already love tagging a vehicle in combat. Punish them for falling back from you – with no penalty for shooting either! I love this stratagem as it creates a lose-lose situation for your opponent; the enemy can stay in combat and not shoot you, or they can leave combat and get shot as they do!
- Hundred Swords of Vaul – Use at the start of the first battle round, before the first turn begins. Select one Harlequins unit and redeploy it anywhere in your deployment.
A 1 cp redeployment option. Very strong if you’re playing in a non-ITC format that allows Seize, alternating deployment, or even for baiting your opponent into thinking they are safe on one side if going first in ITC. If you have multiple units going first, split their positions in your deployment zone, your opponent can try to castle up on one side. Punish them with this stratagem. If you have Eldar allies, this couples very nicely with Phantasm to redeploy a large chunk of your army.
- Torments of the Fiery Pit – Use in the fight phase before attacking with a Character that has lost any wounds this Battle Round. Until the end of the phase, +2 attacks and +2 Strength.
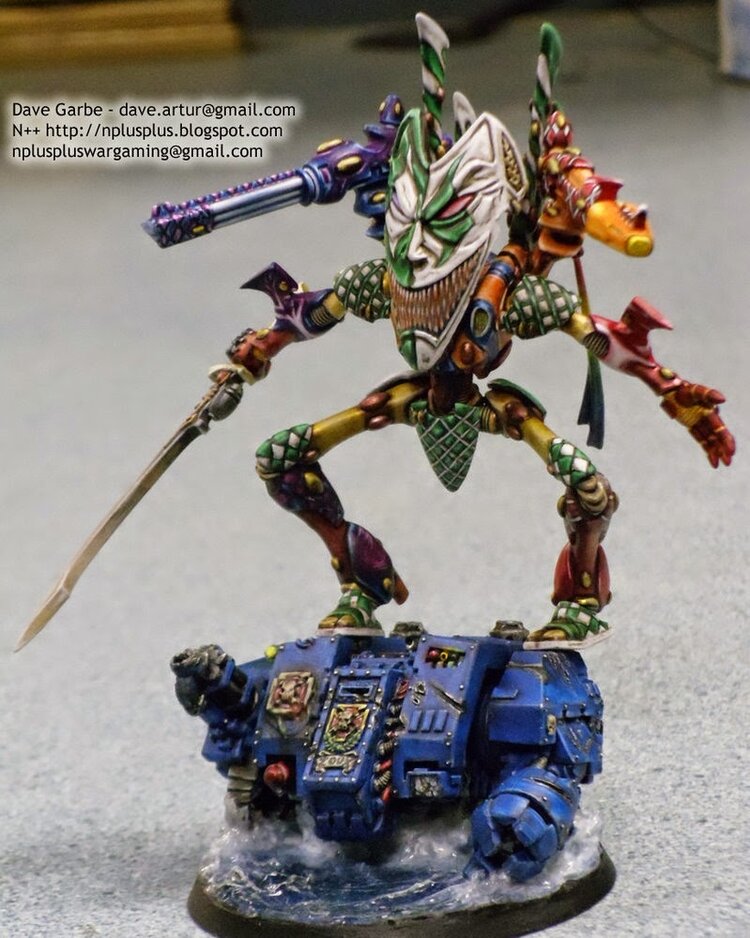
Situational stratagem, but most often used on a Solitaire to boost to 10 or 12 attacks at Strength 6, ap-1, Dmg D3 with his Kiss. It does require you to take a wound, so it’s not one that sees play often. If you are taking overwatch and only have taken 1 hit from your target, I suggest taking your 6+ armor save (instead of your 3++ invulnerable) if you really want to try and safely trigger this strat.
- Fire & Fade – Move 7” after shooting. Can’t charge.
You know and love this if you’ve ever played Dark Reapers. Still solid with Harlequins on Skyweavers. If you are playing Soaring Spite with a fusion unit inside a Starweaver and need to get a few inches closer to a high-value fusion target, consider shooting the Starweaver’s cannons first. Use fire & fade to move 7” closer to your target (Flying over any units in the process!) and unleash fusion hell on what your opponent thought was a safe unit!

- Lightning Fast Reactions – Give a unit -1 to hit in a phase
Same as above, what’s not to love about being an additional -1 to hit? Nothing. It’s always good to have in your back pocket. Skyweavers especially love this with Prismatic blur to be -2, 3++ against shooting.
- War Dancers – At the end of the fight phase, choose a Harlequins unit. It can fight again.
Classic fight twice. Super useful on the melee focused units, Zephyr Glaive Skyweavers, or a Solitaire.
- Dramatic Entrance – A Character can perform a Heroic Intervention of 6” instead of 3”.
For 1 cp, your characters can still jump in the fight. Incredibly useful for those used to playing around a 3” HI aura. Also, this stratagem is super sneaky in that it’s the charge phase, so you can still move over your own models via your Flip Belt. Also really good in ITC if you’ve chosen a Shadowseer to be Born for Greatness, making your HI option much easier.
With those covered, there are a few notable Masque strats to cover that do better in a mixed detachment:
- Midnight Sorrow – Fight on death for a Character. If you use this vs a Chaos unit or on a Solitaire, gain +1 attack and +1 Strength.
Do you like to get the most out of your melee characters? Do you like to potentially fight three times in one phase? Take a Midnight Sorrow Solitaire, and you can.
- Dreaming Shadow – Select a Character. In the shooting phase, each hit counts as 2 hits. Each 6+ counts as 3 hits instead.
Nifty little stratagem that really has only two applications – maybe do extra mortal with a Shadowseer launching grenades or use this with a Death Jester using the Curtainfall Relic to put the hurt on a squad. Not many things like being shot at with 3 Strength 7 ap-2 (ap-4 on a 6 to wound) shots that explode and cause -2 leadership. I don’t like this combo as much – Harlequins have a lot of good Relics, and being locked into both Curtainfall and this stratagem eats up a fair bit of resources.
Overall, Harlequins have a lot of good tricks up their sleeve. Making the most of these Stratagems, however, is a bit tricky. Use them when they will inflict the most damage on your opponent (via actually killing units, making them waste resources, or some other opportunity cost such as a lose-lose choice), and you’ll go far. I will say that learning how and when to use them is one of the hallmarks of a good Harlequin player.
One final note on stratagems – be a good opponent. Not a lot of people have played against Harlequins. Very few know what they do just as an army (breaking the game), and the fact that most of these stratagems are inherently capitalizing on breaking the game further can lead to some confusing or gotcha situations. I always start my games asking my opponent if they’ve played against Harlequins before, if they have any questions, and letting them know some of the things I can do.
Powers

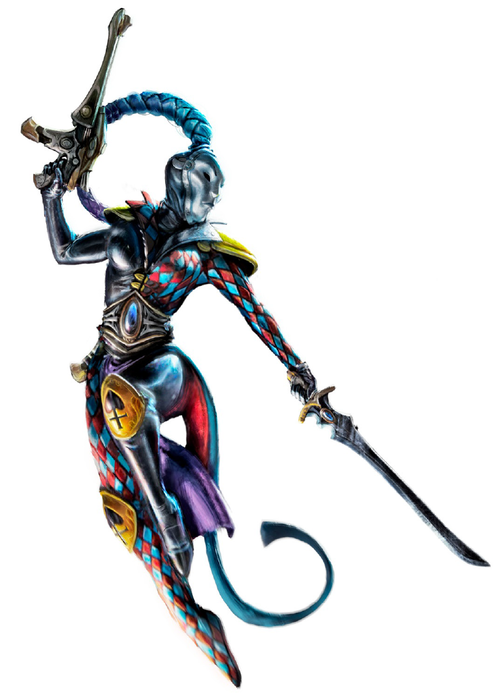
The tricks don’t end at the Stratagems, though. Shadowseers are the Harlequins psychers and probably one of the best units in the army. They have all the normal Harlequin abilities, but come with a 6” aura of -1 to Wound rolls versus <Masque> Infantry. Furthermore, they know two Phantasmancy powers, can cast two powers a turn, and deny one. All in all, an incredibly versatile and surprisingly durable model. Let’s take a look a the six powers they know:
- Twilight Pathways – WC 6. Cast on a unit within 3”. That unit can move again.
It’s Warp Time but for Harlequins. When you have Troupes moving 16” +2d6 advances or Skyweavers that can move 44” and still shoot and charge, it’s single-handedly the best power the Shadowseer can know. Expect to see this in every single Harlequin list running a Shadowseer. The best part of this stratagem, though? You can use Prismatic Blur with it to have two units on a 3++ invulnerable save.
- Fog of Dreams – WC 6. Choose an enemy unit with 18” and make them -1 to hit versus Harlequin Infantry.
- Veil of Tears – WC 7. Choose a Harlequin Infantry unit within 18” and make them -1 to be hit.
Both Fog and Veil make your infantry very durable. Coupled with Lightning Fast Reflexes, you can have an Infantry unit up to -3 to be hit (shooting and combat). Tack on Prismatic Blur and Twilight Pathways, and that unit is flying across that table with a 3++ invulnerable save. Have fun shifting that.
- Webway Dance – WC 7. 6” Aura of 6+ Feel No Pain for Harlequins.
Not bad by any means, especially if you are facing a lot of damage 3 weapons and want to keep your Skyweavers healthy.
- Mirror of the Minds – WC 7. Pick an enemy within 24”. Roll off with your opponent until they roll higher. Each time you equal or beat their roll, the unit suffers a mortal wound.
Cute. Not my favorite, but it helps put some additional damage downfield as it can be against a hidden target. It can do a lot of damage if you roll well, but could also do nothing. I find it has too many points of failure.
- Shards of Light – WC 7. Pick a visible enemy within 18”. D3 mortal wounds and -1 leadership.
This is a second smite with the added benefit of making it easier to do even more mortals with your hallucinogen grenades, conveniently also 18” range. I’ll usually take this with Smite and the Grenades to have my Shadowseer become a 3d3 mortal wounds turret. Shards can also target characters – great to pick off a few wounds and soften a lynchpin character before a charge or finish off a wounded model.
Again, similar to the Stratagems, you have a fair bit of diversity here. Shadowseers can be a very flexible HQ choice and likely also the Warlord in a Harlequins detachment. Aside from Mirror, I can see a case for all of the powers depending on whether you build your list around Troupes or Skyweavers.

Relics
Let’s shift gears a little bit now and talk about Relics and some more esoteric combos in the army. We’ve covered some of the more obvious examples, such as the Dreaming Shadow Stratagem and Relic Curtainfall, but I wanted to highlight a few less obvious choices.
First, a note on Warlord Traits: Harlequins have a nifty trait in Player of the Twilight. It’s a standard regenerate CP trait with a twist – roll a d6 for each stratagem you or your opponent uses. If you roll equal to the CP of the Stratagem that was used, gain that many CP. You can still only gain back CP once per battle round, but it is specifically called out in the FAQ that this trait can generate more than 1 CP in a round. It’s a one in six chance of getting some command points but is generally the best option to take. I’ve had a few games where I’ve rolled a free Lightning Fast Reflexes or fight twice. I’ve even once gotten a free Vect with a Black Heart detachment and Warlord Shadowseer. The other potential trait is Luck of the Laughing God, which lets you reroll 1’s for hits, wounds, and damage. Really, you’d take this with the Dreaming Shadow Death Jester to ensure he gets the most out of his weapon.
Besides the aforementioned Curtainfall, there are 3 major Relics that see play in a Harlequins list: Cegorach’s Rose, Starmist Raiment, and Suit of Hidden Knives. Each of these is useful for good reason – they improve your characters even more so than normal. The Rose is my go-to for almost all of my games on the Solitaire. It’s an upgraded Kiss (Strength +1, Ap-1, Dmg D3) that goes to flat damage 3 against infantry, making it an ideal character killer. However, the more important part of its rule is that you can reroll failed wounds against everything. Suddenly your 8 attack Solitaire is wounding a lot more and flips him into a full-on blender.
The Starmist Raiment grants a 3++ invulnerable save against shooting for the Character. In addition, when they advance, they ignore overwatch. Both of these abilities are amazing – ideal on a Shadowseer to boost his 4++ to a 3++ and give some mid-game, safe charges. I’ve seen it on a Solitaire occasionally, but as he already has a 3++, the only benefit of ignoring overwatch isn’t enough to convince me. Take the Rose on him, make him Silent Shroud, and spend the extra cp to ignore overwatch if you must.
Finally, we have the Suit of Hidden Knives. In melee, roll a d6 for every hit roll of 1 against the wearer. The enemy unit suffers a mortal wound on a 2+. When you add in Lightning Fast Reflexes, Veil of Tears, and Fog of Dreams, opponents will be -3 to hit you and likely suffering mortals for every roll of 4 or less. It does require a lot of investment (two Shadowseer powers and CP for the Relic/Strat), but it can absolutely devastate certain armies. Genestealers and Orks come to mind as you can have a single Character chasing down and annihilating massive units with ease. Couple with Silent Shroud to make the unit -1 leadership and 2d6 for morale to ensure hijinks.
Competitive Ideas

To wrap up this tome of Harlequin knowledge, I wanted to end on a few competitive archetypes. All of these work best as an allied detachment to either Eldar or Dark Eldar. Both appreciate the melee or anti-tank that Harlequins can bring to the table. I find Harlequins to fit in 3 subdivisions in a competitive field:
- Soaring Spite fusion Starweavers
A battalion of 16+ Fusion pistols riding around in 3+ Starweavers being able to touch all corners of the table is scary. Couple it with long-range firepower from an Eldar gunline, and you’ve got a serious contender. Watch out for hordes like Orks or Tyranids though – add in some allies to shore up that weakness.
- Frozen Stars Troupes
This battalion detachment is becoming more popular, especially with Primaris everywhere. One or two large units of Troupes dashing up the field with all of the buffs can be hard to shift. Getting 5 attacks per model on the charge and potentially at +1 to wound will blend most things through sheer weight of dice. D3 damage on it all can help topple vehicles as well.
- Skyweavers
Finally, we have an army of bikes. Usually taken in an Outrider with a Shadowseer warlord and Solitaire elite choice, 10 – 18 Skyweavers round out the list. The Skyweavers make wonderful harassment units against pretty much everything in the game and nuke any vehicle.
In conclusion, Harlequins make an excellent ally to the Eldar super faction. They add in that extra flair, good melee, great anti-tank, and amazing jank that you can pull in a game. Hopefully, this has been insightful for anyone wanting to play Harlequins! Reach out to us at Art of War for more tips and tricks!
Thanks for reading,
Mexico
And remember, Frontline Gaming sells gaming products at a discount, every day in their webcart!


