


Those disks that we plop our models on are pretty important. While we we spend countless hours planning a paint scheme, kit bashing every model, and dutifully highlighting every edge, often the bases are treated as nothing more than afterthoughts or even totally neglected. This is a shame because a beautiful base can not only be practical, but can significantly increase the atheistic awesomeness of your tiny troopers. Best of all, bases can be done easily so that you can have more time spent on conversions, painting, and playing.

First we need to explain why basing a mini is necessary, and this comes down to a few reasons. 1) Having a finished base is a requirement in most events and leads to convention halls packed with beautiful armies as seen at the LVO this year. 2) Bases that are painted coherently can be the most practical way to turn a pile of models in a unified fighting force. 3) Bases are used as a measurement tool and are what are constantly stared at when determining ranges.
So because bases are going to get legit attention from the moment your models hit the table top, here are a few basing basics and things to keep in mind:
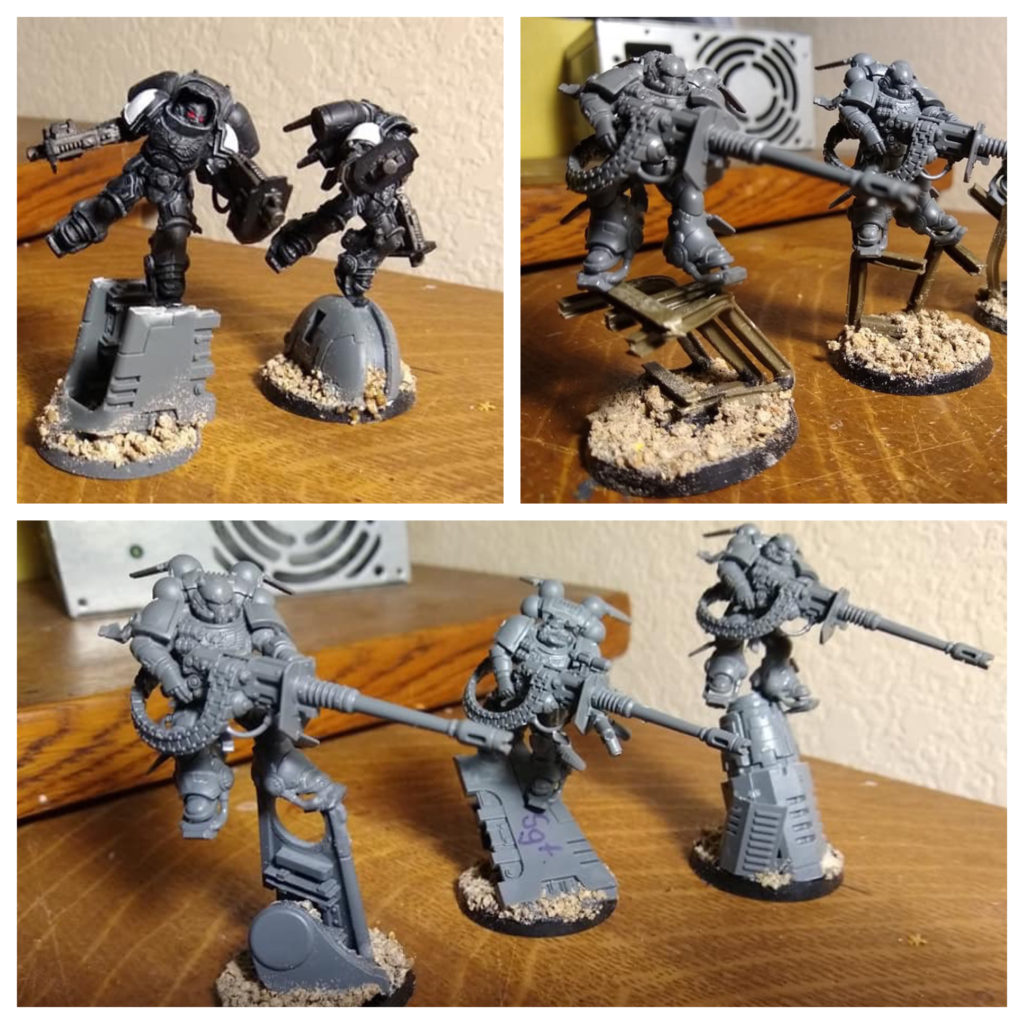
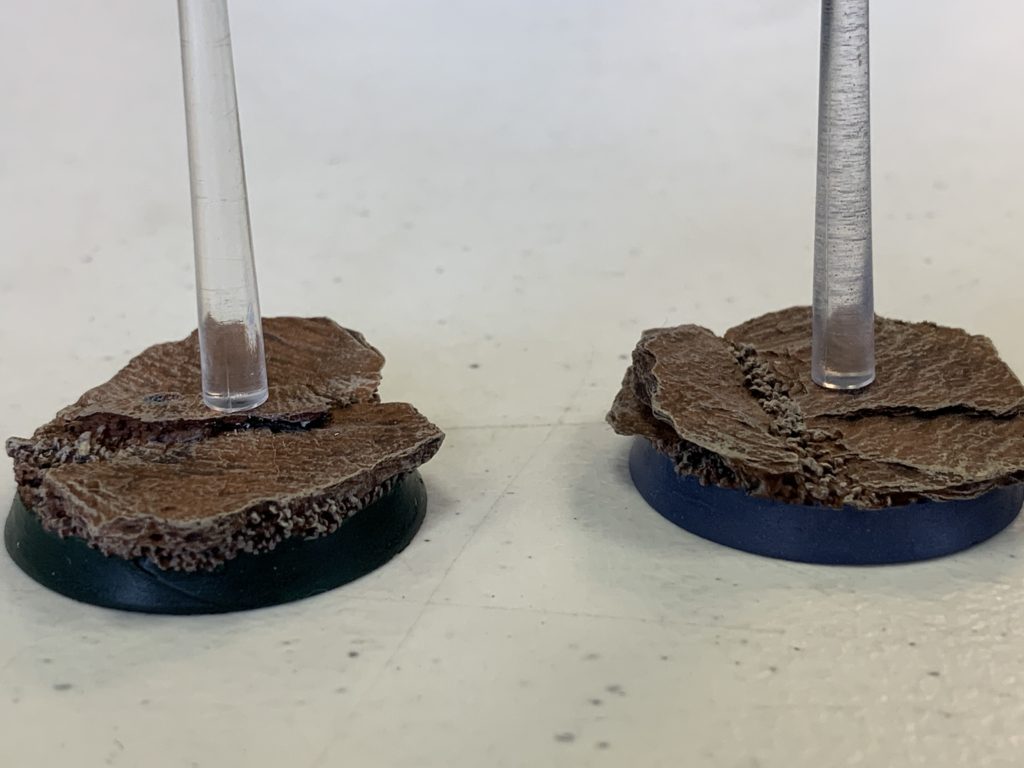
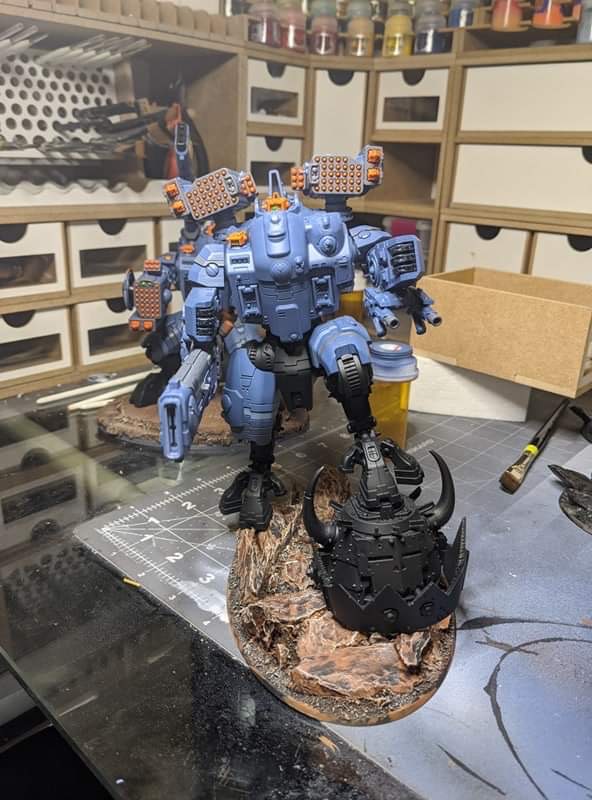
Bases optimized for game use and transportation is a thing. Hate to say it, but no one likes those fragile transparent flying bases that Game Workshop’s jump pack troops come with. The old ones were never good, but the newer ones with the curved design are just terrible and break easier than a bunch guardsmen without a commissar nearby. To make these models a bit more durable, a popular option has been to toss out the clear stem and instead have the model posed on a rock or another piece of terrain that would give it the same height as the original flying stem (and prevent anyone from thinking you are modeling for advantage). Here are a few examples that turned out well.

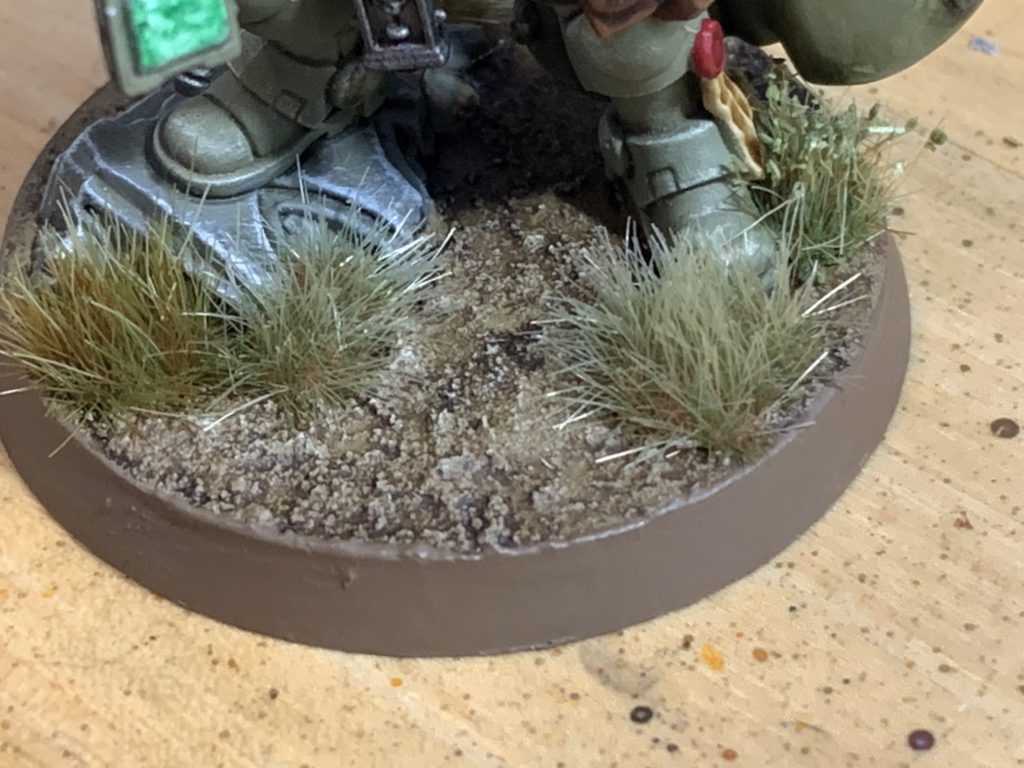
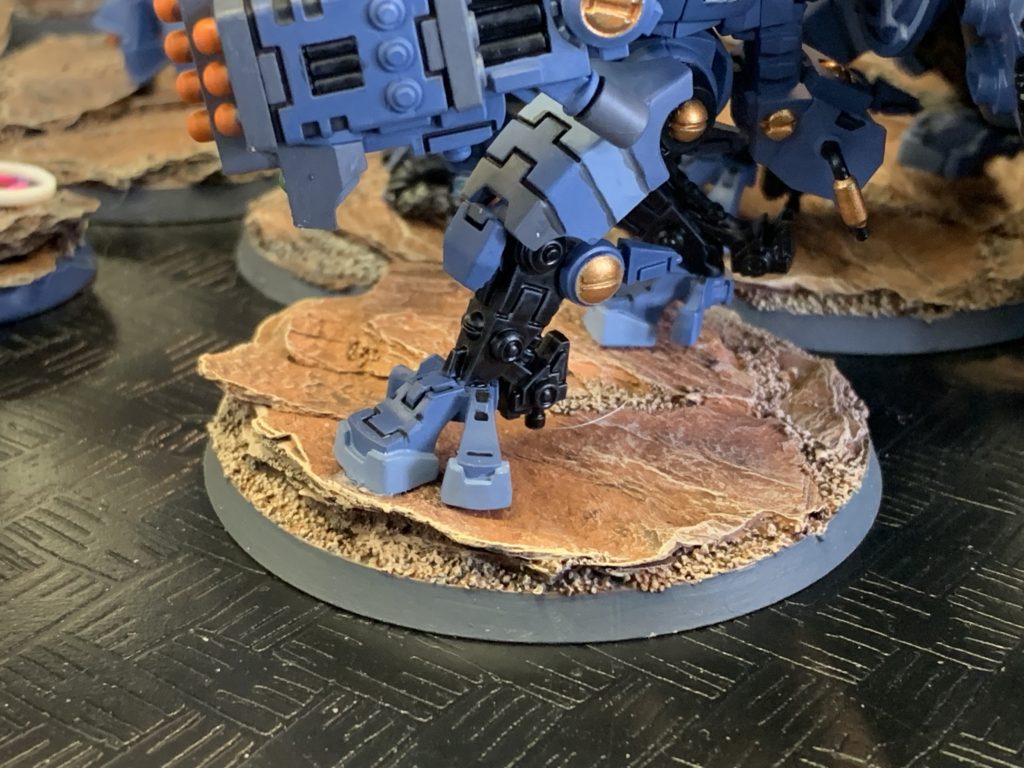
Adding height to the basing can help set a realistic “scene.” Grass tufts of various sizes can easily be added with a bit of glue. Rocks and ruins work here as well. The key is variance. Try to alter the positioning, height, and color/shade of these elements to create realism and avoid something that looks photoshopped. I buy 3 or 4 different sets of tufts for each army I build.

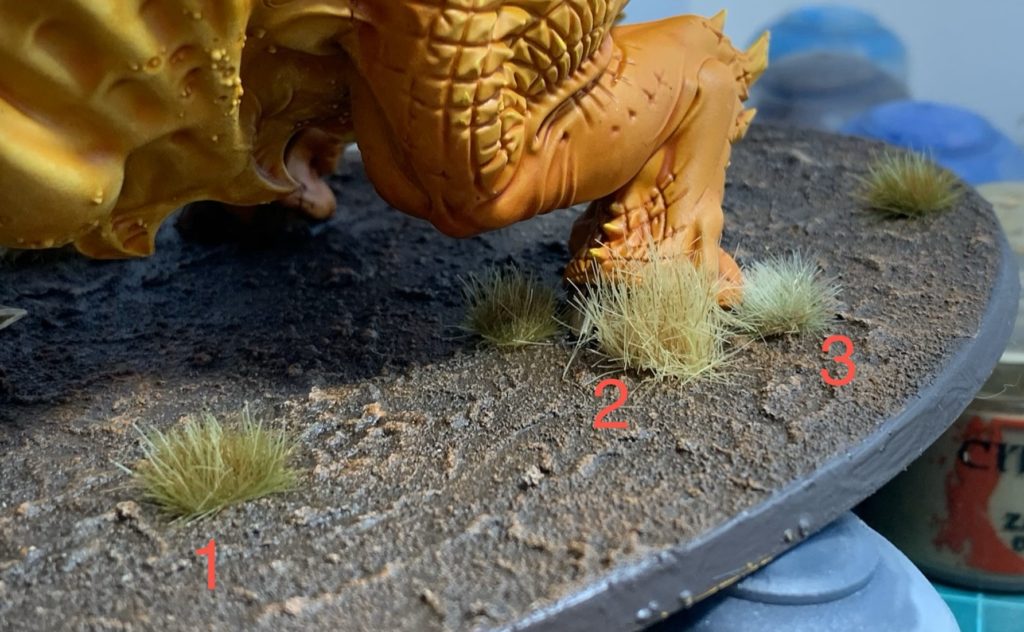
Not only can rocky outcrops can be used to add variance to the bases but they can also allow you to perch an important character on to give them more height so they can easily be identified during a game. While you can take a few pebbles from a park, I find that there are better options to use as “rocks” than actual rocks. Sheets of cork is one a popular option. But I have been successful repurposing random spare bits from kits that have multiple assembly options. You can just paint them up in grays and earth tones, and suddenly you have rocks, a cliff structure, ruins or some sort of battlefield debris. This “rock” is just an Age of Sigmar Seraphon Stegadon head variant that I had as an extra bit from the kit.

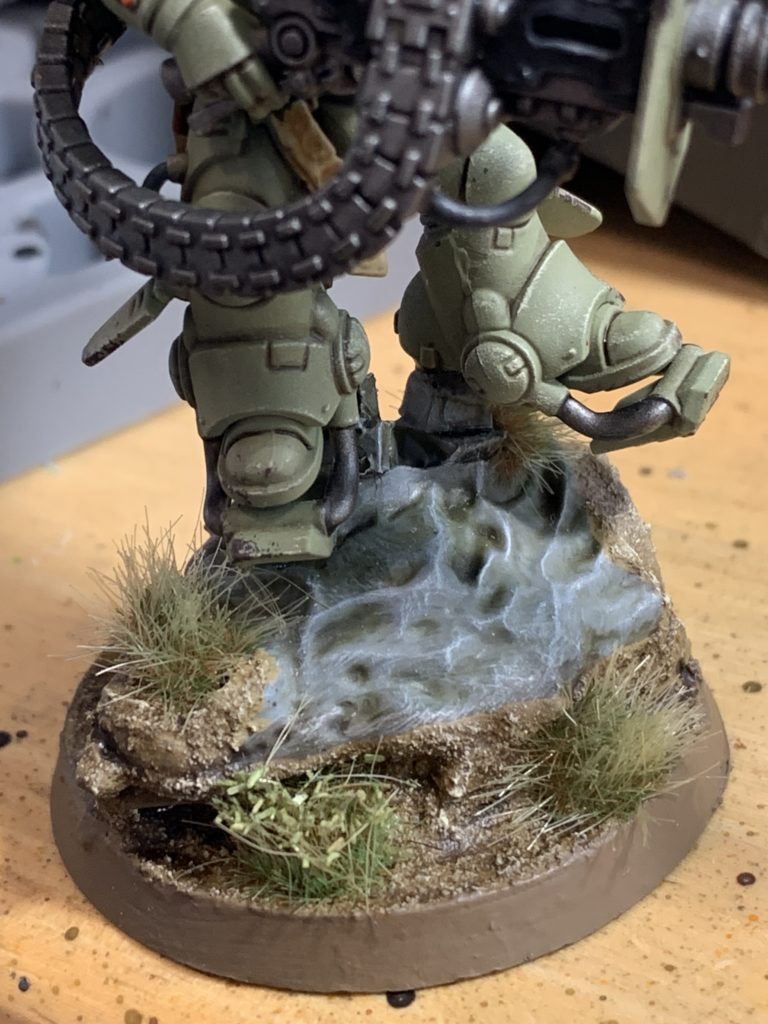
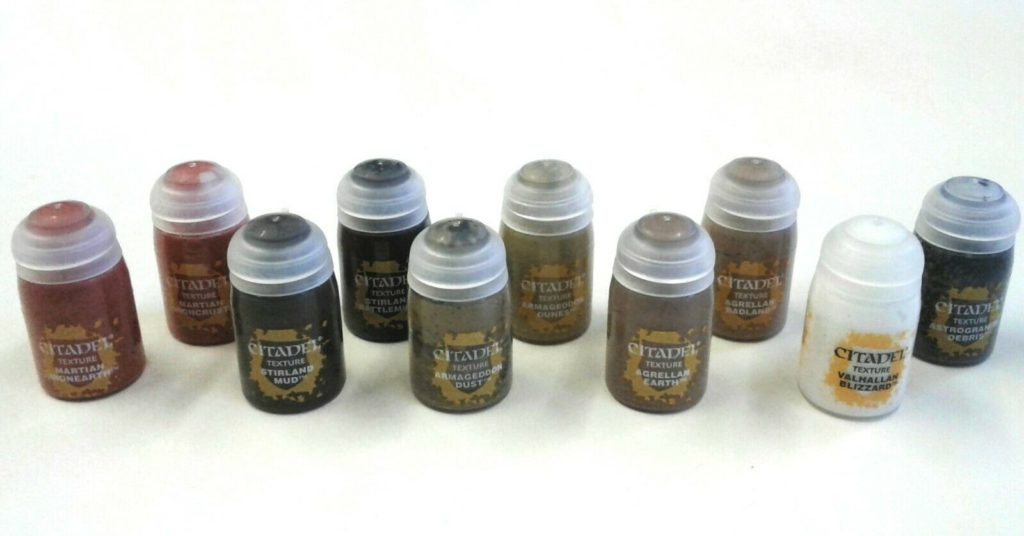
Texture paints are your friend. Games Workshop blessed us with the skill-in-a-bottle that is their full line of texture paint. YES, there are ways to make your own texture paint. And YES, you could save some $. But GW’s texture paint is a quick fix to adding realistic effects. It is also a consistent product, which means that your army will always be able to be based cohesively. Just remember that you should not just splat some GW Texture paint down and call it a day. Spend a few seconds giving it a wash (Agrax Earthshade is usually a safe bet) and a final light dry brush, and the base will look amazing!

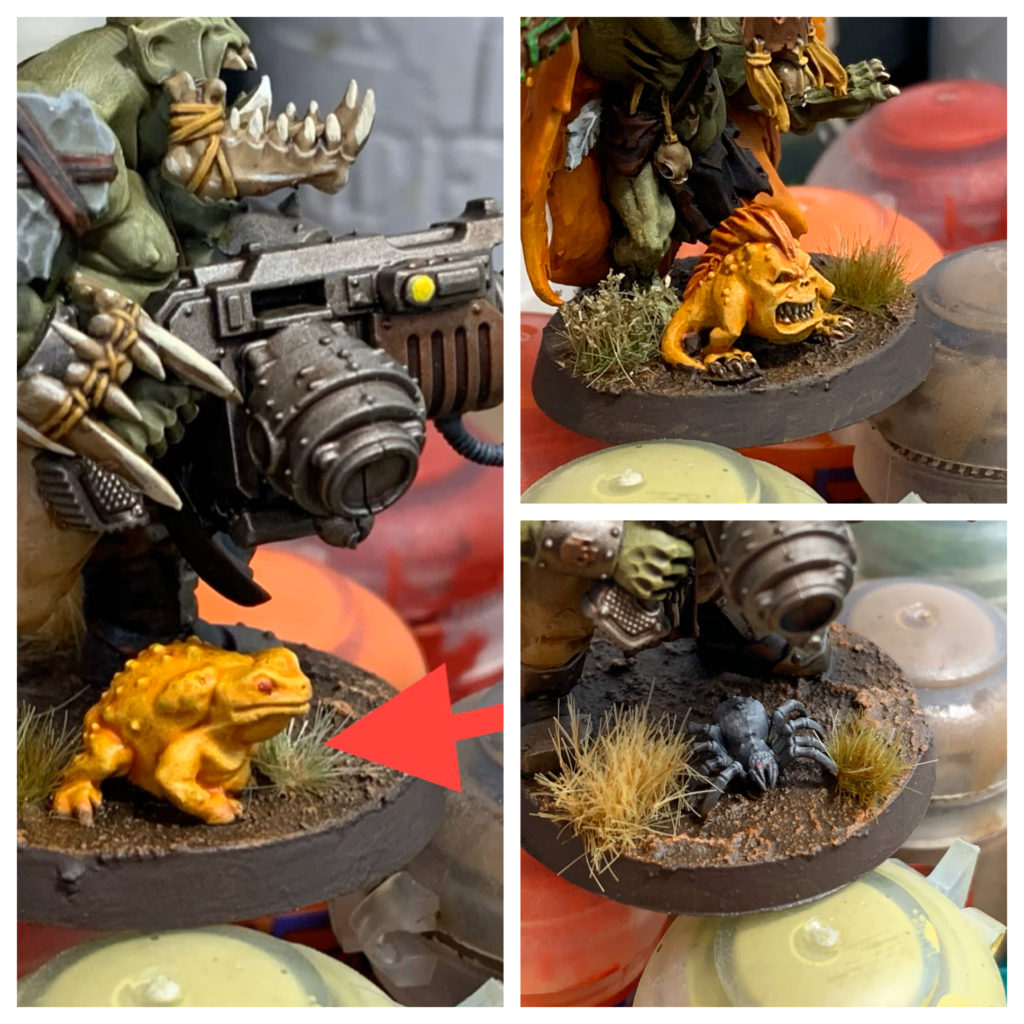
A little creature added to a base not only gives your model a little character, but it can be used to signify which HQ is your warlord or has a special rule attached it to. I like to run a few Shock Attack Guns in my Ork list, and by placing a little spider on the base, I can easily tell which of my models is the warlord and has the relic.
We all know how confusing it can be to tell what is going on when you have a bunch of squads of the same unit on the table within close proximity of each other. Simply coloring the base’s rim of each squad a different color is a very easy way to identify individual squads for both you and your opponent.
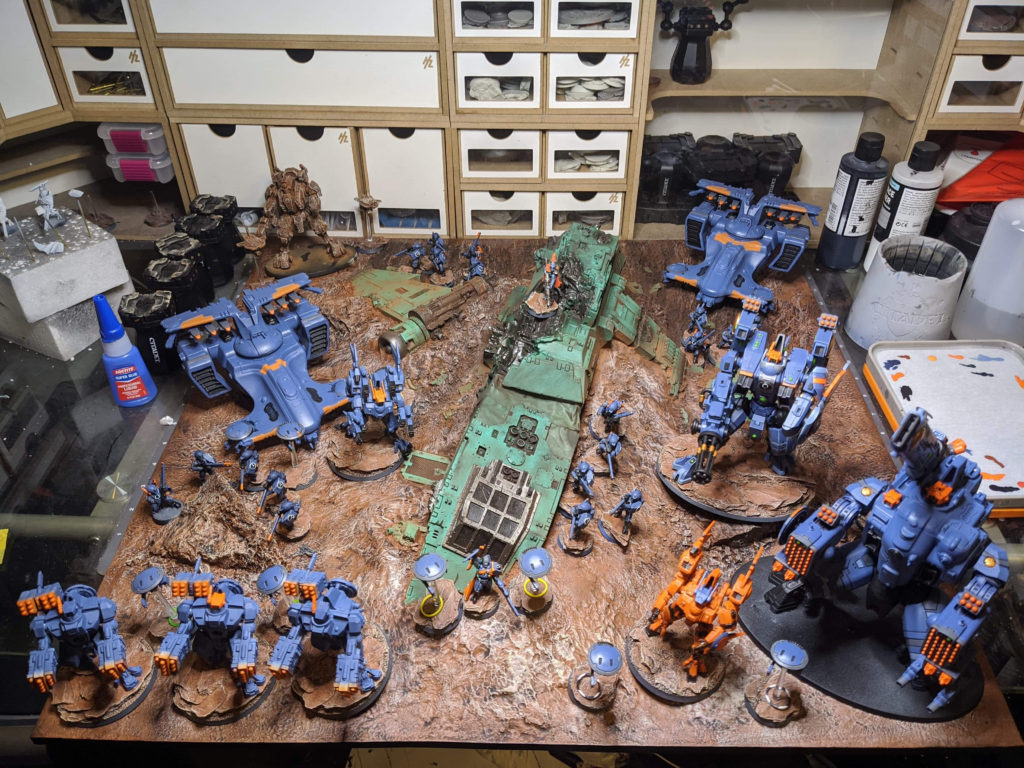
This is a pretty great example of a beautifully based army that a friend of mine is currently working on. Note that all the bases are painted the same, creating a cohesive fighting force. The bases perfectly match the display board, making for a really epic, engaging scene. They have plenty of variance so as to look natural. The texture on each bases adds realism. And some of the bases have height where needed to keep things interesting. A nice little plus is the creative use of an Ork Stopma head. These rocky bases here, are 3rd party bases that simply needed to be textured and painted, which helped to speed this army along and get it battle ready.

Hopefully you now have a few ideas to get started making bases that look a bit better. A few moments spent on this part of the hobby can produce great results!
And remember, Frontline Gaming sells gaming products at a discount, every day in their webcart!


