


Hey everyone, Danny from TFG Radio here, and today, we are going to get into all the new stratagems available to Tyranids thanks to Psychic Awakening III: Blood of Baal. If you want to spend a CP to make one of your shelf-warmers playable, please read on. If you want to learn what other tricks the lesser factions can do, you should be checking Frontline’s Tactics Corner everyday.

Let’s jump right and see what we have to see, and you’ll essentially notice two clear themes develop: Make weaker models better, and increase charge range. There are of course a few outliers, but in general, these stratagems are all about giving us more variety on what models we can bring in a competitive game. Let’s begin!

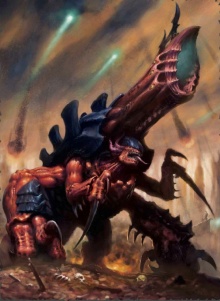
Grasping Tendrils – 1 CP
Use in your opponent’s Movement Phase when a unit without a minimum move is chosen to Fall Back and is within 1″ of a Toxicrene. Roll a D6, gaining +1 if the enemy unit is an INFANTRY unit; on a 3+, that enemy unit cannot Fall Back this turn.
This is all about board control in a way, and big bugs tend to suffer in that area. With this stratagem, you can now control part of your opponent’s movement phase, which is what board control is about when you boil it down. This can be a game-changing stratagem as it allows you to trap a unit in combat, and this does several things. First, it can stop a forward unit from getting deeper into the center of the board, keeping them off critical objectives. Second, it can make sure that a unit that will die to a Toxicrene, just not in one round of combat, will die to it in their combat phase. Third, and likely most important, it creates a zone of safety for your assault elements. Anyone engaged with that unit is now safe from shooting, and if they lack counter-assault elements, they just lost a valuable turn of damage to whatever is being hugged to death by the Toxicrene. This is mostly a defensive stratagem, but defense is critical to winning a game.
Toxicrenes are not slouches either, and for 125 points, you get a fast bug that pumps out respectable melee that is good at killing elite infantry and medium vehicles. You can easily use several of our combos to get a Toxicrene into your opponent’s lines on Turn 1. If Kraken, Opportunistic Advance plus Onslaught makes a Toxicrene as fast as a Genestealer. You can go with good old Swarmlord for the extra move. You can also try to combo off a Synapse Hive Crone for a 3d6, drop the lowest, charge thanks to Hive Instinct or if you are really building for it, Hunter’s Drive as well. However you try to get there, you can absolutely ruin an opponent’s day by hugging a unit and keeping your forces safe or simply delaying your opponent’s forward progress. This is also one of the best ways to really make use of our new Distraction Carnifex stratagem.
If you were on the fence about getting (or owning) a Toxicrene, this with the upgrades in BoB and the points reduction in CA19, there really isn’t a reason to at least own one (or two or three).

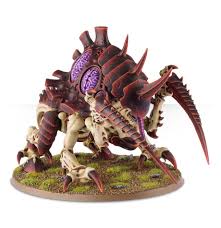
Symbiotic Devastation – 1 CP
Use at the start of your Shooting phase. Select one Exocrine; until the end of the phase, treat the model as stationary.
This is all about making Exocrines even more effective killers, and really, it solves one of their structural issues: they are relatively short ranged for artillery, so they often need to move to adjust position. This lets you do such without suffering any issues whatsoever, and really, the Exocrine is built around shooting twice with +1 to hit, and if you can’t do that, this helps fix it. You can certainly do an Exocrine in a Tyrannocyte now as for 1 CP, you get optimal efficiency and total protection on Turn 1 as you aren’t on the board to be shot to death. This can easily catch your opponent off guard as many a savvy opponent can counter-deploy your Exocrine, but if you can choose where it lands and what fire-lanes it can take and still shoot at maximum effect, well, that’s a win. If only it also worked on Tyrannofexes.
There isn’t much to say here other than this is a great way to re-position an Exocrine or do some really interesting tek by using a Tyrannocyte. There is some confusion about whether or not this would allow you to advance and still shoot or Fall Back and still shoot. I am sure GW will answer that soon, and from my end, I’d say probably No as while you are treated as stationary, this does not explicitly remove the part of advance that says you cannot shoot or charge and the same with Fall Back. I tend to err on the side of caution, but we shall see. If it does work with advance or better yet, Falling Back, this really does answer a big weakness of the Exocrine, namely getting tagged and having to Fall Back and waste a turn. We shall see.

Surprise Ambush – 1 CP
Use this stratagem in your charge phase. Select a Lictor that either came in from reserve this turn using Hidden Hunter or is entirely on/within Terrain. It cannot be targeted by Overwatch and gains +1 to charge for the phase.
It is hard to overstate just how about important denying Overwatch is for Tyranids. There are plenty of units that are just brutal to charge, and prior to this, we really had no way to avoid the Overwatch outside of being able to charge out of Line of Sight. With this, you know have some plays. A Behemoth Lictor has an 8″ rerollable charge, which gets it to about 2/3s of the time successful, and once the Lictor is in, you can send in your other threats to hit the unit. While a Lictor doesn’t do much on its own, as a way to shut down Overwatch for the rest of your assault elements, this is big.
What is nice is that you have two paths here: have a Lictor in terrain or have a Lictor come in from reserve. This can mean that on a later turn, you can have a Lictor make an easy charge if they scurried up the board through a ruin or some such, or if you drop in from reserve. Either way, this gives you some play on how to set up your charges so you can deny a critical Overwatch.
If you are running an infantry based melee army, a Behemoth Vanguard with a Neuro or Prime and 3 Lictors is a good way ensure that you can set up the Lictors to help your other assault elements get to where they need to go. Lictors aren’t all that expensive, so yes, you are spending points on units that don’t do much, but remember, turning off Overwatch can be what makes a Genestealer charge brutal or kinda sad when you lose half of them or more. If you are running a Brigade, Lictors become a great Elite slot filler that can help you turn off Overwatch, snipe weak units hiding in the corner, or even just get you Behind Enemy Lines.

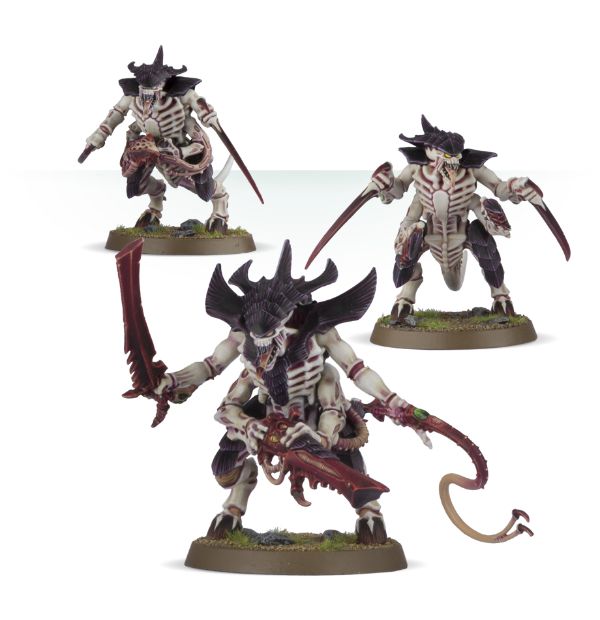
Feral Instincts- 1 CP
Use this stratagem in the Fight Phase. Select one Hormagaunt unit. Until the end of the phase, improve their AP by 1.
This is more about making Hormagaunts actually threatening on the table top than anything else, and since this is Hive Fleet neutral, you can use it anytime. The most obvious combination is with Bio-Metal Cysts and Pack Hunters to make your Hormagaunt swarm AP-3. That’s pretty scary as so many units will get no armor save or only a 6+. To put it into perspective, a normal unit of 30 Hormagaunts (assuming all survived Overwatch and all made it into combat) kills 2 Primaris Marines, but the Super-Hormie kills 5, doing 11.34 wounds on average. That is more than double the kill, all without any price increase (just the use of 1 CP). That’s a lot of extra value in terms of pure offense.
Even if you don’t want to go the Super-Hormie route, Behemoth Hormagaunts with -1AP and +1 to wound is pretty good and gets you so more fun times, and mathematically, this build is close to the Super Hormie, doing 10.2 wounds on average, so still 5 dead Primaris. I also like this with Hydra and Death Shriek/Caustic Blood as you can charge in the Hormies, do some killing, and then on the attack back, have a chance to do 2 mortal wounds per dead Hormie. Again, for 1 CP, this really is helpful, and it makes Hormagaunts a much greater offensive threat than before. I wouldn’t go too crazy though and overload them with Adrenal Glands and Toxin Sacs as you are suddenly spending 8 points a model that is just T3 with a 6+ save.


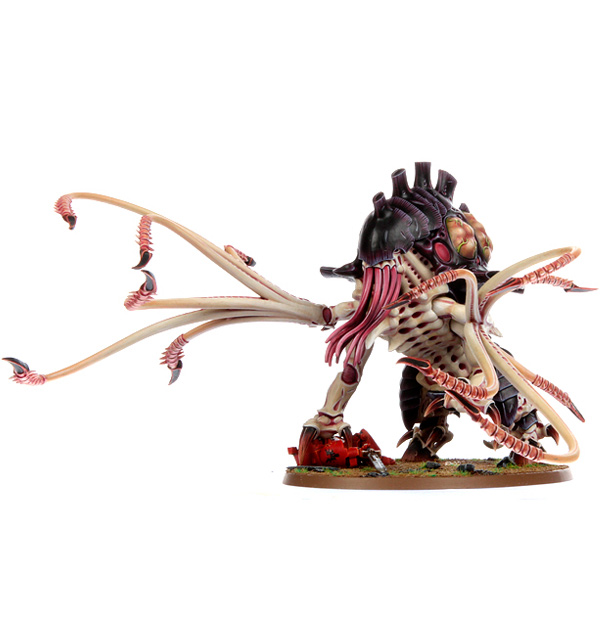
Feeding the Hunger – 1 CP
Use this stratagem in the Fight phase. Select a Haruspex unit; it can reroll its hit rolls until the end of the phase.
Between Chapter Approved 2019 and Blood of Baal, the Haruspex is a changed bug, having found true faith and utility in the light of the Hive Mind. For 150 points, you are getting a T8 13W monster that has 4d3 attacks and potentially up to 12 S14 attacks (that’ll never happen, but a man can dream), and well, as I’ve said before, many times, what made a Haruspex a bad call was that it was WS 4+. Hitting 50% of the time sucks when it has variable attacks or only 4 guaranteed big swings, but for 1 CP, getting that up to 75% hit rate is damn good, and when you also throw in that you can get it to WS 3+ if you take Prey Sight, and now, you have a bug that can hit almost 90% of the time. That’s insane, and again, for 150 points, this is just a brutal amount of melee threat that is great at killing units and killing hard targets.
The Haruspex is a beautiful model and again, one of our hardest hitting units that does work against infantry and hard targets, and now with the ability to actually be accurate, this stratagem really does make a Haruspex a must-look unit if you want to run Monster-Mash or just want a few monsters to splash in for aesthetics or as fire-magnents. Because this stratagem is only going to affect 1 per fight phase, you probably don’t need to triple up here, but having 2 is good as you can send them in waves, and ya know, one is likely die in shooting anyway at some point. Still, this stratagem is amazing, and having run the Haruspex with Prey Sight, I can tell you that it does work now, lots of work.

Unexpected Incursion 1 CP
Use this stratagem in your movement phase when setting up a Mawloc model using Terror from the Deep. When determining the number of mortal wounds an enemy suffers, add 2 to the roll.
This is another stratagem that is all about taking a long-shelved model and getting it back on the table. Mawlocs saw a huge over-correction from 7th edition to 8th, and this is a start to getting it back to where it can see play. An interesting question is if the rule of one applies here where a roll of 1 always fails, but this isn’t an attack roll or wound roll, so some clarity for GW would be nice, but RAW, this does make your Mawloc guaranteed to do damage. Taking the lowest level of variance out helps, and the Mawloc will do d3 mortals 33% of the time, and 3 mortals 50% of the time. That is damn sweet. That really changes the math on it, and now you are can bank on getting 2-3 mortal wounds on whatever happens to be within 2″ of the Mawloc when it pops up. Tyranids are pretty good at mortal wounds, so you can stack this with Biovores or Smites or Meotic Spores to do some good damage to hard targets, and as a bonus, you get a relatively scary (to infantry) threat that your opponent now has to deal with.
The other obvious combination is to go for Psychic Barrage where you get your Zoans to blast a wide radius after your Mawloc has put some heat down already, and well, that can easily carve out the center of a castle. This can be devastating if played right. It really only works against a castle, and it also depends on Turn 2 and how they position, but it potentially allow you to pop characters and even vehicles.
Again, as the stratagem can only be used once per phase (in Matched Play), you want maybe 2 Mawlocs for this: one for turn 2, and one for turn 3. If they survive to burrow again, bonus, but this is a great way to add instant damage and instant threat to your opponent’s backline, and especially with Bio-Metallic Cysts, a Mawloc is not a bad infantry chewer if your opponents choose to ignore it.

Buried Threats 1 CP
Use this Stratagem in your Movement phase when a Rippers unit arrives via their Burrowers ability. For as long as that unit remains stationary, they are -1 to be hit in shooting.
This is an odd stratagem that seems relatively useless until you realize it essentially rewards Nid players for doing what we tend to do anyway, sending a Ripper Squad to camp a faraway corner or hold an objective. The -1 to hit at range is great, and trust me, I have won and lost games entirely upon whether or not Rippers died to shooting. This -1 lasts until you move, so as long as the Rips are happy where they are, they get a little extra protection. This does stack with a Malanthrope/Venomthrope aura, so you get -2 to hit Rippers who are sitting on an objective, happy to be there and winning you the game.
Will this come up every game? Maybe, maybe not, but it is a nice back-pocket trick to remember as again, especially in the late game, every little bit helps. Depending on your build and how flush you are with CPs, this may not matter, but again, I can think of plenty of games where this could have made a huge difference.
Savage Distraction- 1 CP
Use this stratagem in the Fight Phase, when an enemy unit is destroyed by a HIVE FLEET model. In your opponent’s next shooting phase, subtract 1 from enemy hit rolls if they are within 6″ of that HIVE FLEET unit and their attacks do not target that Hive Fleet Unit.
The Distraction Carnifex will live forever! This is a funny stratagem that really is far more than just fan service as it has some big plays. The ability to essentially create an aura of -1 to hit is cool, and well, it does stack with our other auras. Really, I love this with the Toxicrene and its stratagem as you can hit a small unit, kill it, consolidate into a new one, pop this strat and then pop Grasping Tendrils, and boom, you’ve locked down one unit, and anyone with 6″ of that big ol base is -1 to shoot as they cannot shoot the Toxicrene in combat. You can also do this with tri-points and Genestealers/Hormagaunts as this is actually the easiest way to spread the aura as 20 Genestealers or 30 Hormagaunts can really cover a lot of ground. The trick is that you have to kill something, so Genestealers are probably best at this as they can kill more things than Hormies can, and this is where it can be hard to pull off. Still, this combos insanely well with Adrenal Web/Shrewd Predator Genestealers who can snipe a small unit and then get a 2d6″ consolidate in any direction, tagging units in the aura and hopefully tri-pointing something else so your opponent cannot shoot them at all, and a lot of their army is now -2 to hit other targets at range.
This is a tricky, tricky little stratagem, and if you plan it well and execute, it can actually horribly trip up your opponent. This is another one of those low, low floors but high, high ceilings when it comes to skill, but if you’ve learned to master the Charge and Fight phase, this stratagem can neuter a shooting counter-attack.

Hive Instinct -1 CP
Use this Stratagem in the charge phase. Select an enemy unit within 1″ of a HIVE FLEET Synapse unit. Until end of phase, any HIVE FLEET units charging the targeted unit roll an additional d6 when charging and drop the lowest. The first model moved must get within 1″ of the targeted enemy unit.
Here we go, a way to get charges off and look cool doing it. This is one step in a series of combinations that Tyranids now have to radically up our charge distances and eliminate that pesky variance. The most obvious choices here are Flyrants and Trygon Primes. This is because they can take the Arachnacyte Gland for their own 3d6, drop the lowest, charge, so out of reserve, they can hit a unit, and trigger Hive Instinct for any other units to come in. This actually makes the pure shooty Flyrant a bit more viable as it is terrible in combat, but if you can get in another big melee threat with it, well, that’s money. If Kraken, the Flyrant can fall back next turn and do it all over again, or even if not, it can still Fall Back and shoot to help trigger another stratagem. You also don’t need to build around this in terms of reserves. A Broodlord or even a Tyranid Prime can use its movement and infantry shenanigans to get a blind charge out of LoS and then trigger Hive Instinct to bring in more friends.
A fun trick is also to use Adaptive Physiology to give Synapse to a Hive Crone/Harpy and use their 30″ movement to get up the board, hit a target, and then pop this for the extra speed for the real killers. As written about before and all over the place, an extra die helps you tame the probability curve where you can avoid rolling really low all while increasing the odds that you roll high. Seeing as how it is certainly possible to combo this with another stratagem for a 4d6 charge against a unit, that’s some good odds-fixing. You can also use this in close range to help rocket into threats passed the target of Hive Instinct as you only need the first model to make it, after that, you can start to spread out and hit other targets, so long as you maintain coherency. This is tricksy, but it can really help you get around a unit blocking the path to sweeter meats.
Hunter’s Drive- 1 CP
Use this stratagem in the charge phase. Select a Hive Fleet unit from your army. When it charges, it rolls an additional d6 and drops the lowest when charging an enemy unit that lost models due to shooting attacks from a friendly Hive Fleet synapse model. The first model moved must get within 1″ of the targeted enemy unit.
This is yet another way to add a dice to the charge roll, and if relies on you having shooty elements that are also Synapse. The main choices here are Hive Tyrants and Warriors although against weak units, a Trygon Prime can do a bit of work. The wrinkle with this stratagem is that it effects your unit, so you can’t use it like Hive Instinct to get multiple units boosted, but this works for getting that one big unit where it needs to go. This is definitely a way to get a Flyrant with shooting and melee into a target without the need for the Arachnocyte Gland as the Flyrant can drop down, kill a model (with 12 shots at BS 3+, that is doable for the most part, but match up dependent) and then charge 3d6, drop the lowest. You could also combo this with the Arachncyte gland for a 4d6, drop the lowest charge. That’s pretty intense. If you really want to do the Reaper Tyrant build, this is a good way to get it into combat against a unit, but the Reaper Tyrant really does prefer to hit hard targets where that potential damage 9 is really something to behold.
Another interesting way to do this is to use Adaptive Physiology to give an Exocrine Synapse, and against a unit, an Exocrine is going to get kills. Since it can split fire with its 2 volleys, you can tag two units and give whoever is getting Hunter’s Drive some choices on who to hit. Again, you also don’t have to plan around reserves. Just having threats on the board means that you can trigger this to help get a unit of infantry or a melee monster like a Haruspex into combat much sooner. This is a good way to increase your likelihood of charges, but you need to build for it a bit more as you need a source of Synapse shooting, and it is match up dependent as it is not going to let you hit vehicles or single model targets, and if you kill them in shooting, what’s the point of the charge? While not as useful as all-purpose as Hive Instinct, this is still a great stratagem to remember to help get those charges.
Unyielding Chitin- 1 CP
Use this in your Opponent’s shooting phase or your own charge phase when a Tyranid Prime or Tyranid Warrior unit is targeted by a ranged weapon. Until the end of the phase, ranged weapons are -1 damage, to a minimum of 1.
Here we go, back to stratagems designed to help models. As Iron Hands and even Wave Serpents have proven, -1 damage is good, real good. Warriors are not T8 and don’t have 3+ saves, but they are 3 wounds each, and they are cheap, and if suddenly Damage 2 weapons are just damage 1 against them, it now takes 3 failed saves to down 1 rather than 2, or if being hit by damage 3 weapons, it now takes 2 rather than 1. This is a big increase in overall survivability, especially against variable damage weapons that are say d3 where now they are really D1 67% of the time and D2 33% of the time. While you can only use this on one squad a turn, it makes a big block of Warriors really annoying to kill as your opponent has to rely on weight of fire much more than quality, and if you throw in Adaptive Physiology for maybe ignore AP -1/-2 or +2 cover save, that Warrior squad is not going to be easy to shift at all. You set up sort of a Sophie’s choice for your opponent: dedicate a lot of high rate, low strength firepower to try and blast the Warriors to death that way and not have anything else for your other threats, or put in high quality attacks that are not getting as much mileage as they could be against other targets. Warriors can be pretty resilient to small arms, so your opponent has to either lose efficiency by using small arms against a resilient unit or quality weapons against a unit that lowers the overall impact of those quality weapons and isn’t the preferred target of those weapons.
This definitely makes at least one big squad of Warriors worth it, and as detailed in different places, there are some viable Warrior builds now whether a Kronos firebase or a Pack Hunters/Bio-metalic Cysts melee threat. If you want to run Warriors, here’s a way to do it, even just a smaller unit camping an objective.

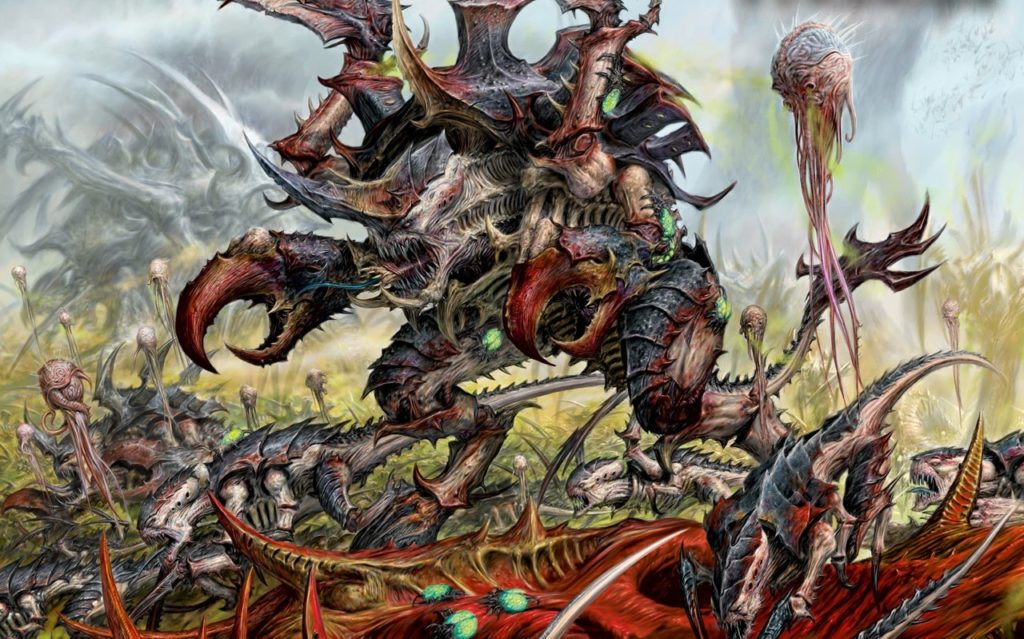
Encephalic Diffusion- 2 CP
Use at the start of the turn. Select a Maleceptor. Until the end of that turn, when resolving an attack made with a ranged weapon against a friendly unit within 6″ of the Maleceptor, lower the strength of the attack by 1, to a minimum of 1.
This is so money, and it on its own makes the Maleceptor very much a worthy consideration. A 6″ aura of -1 Strength on shooting attacks is just so much defense, it is hard to not squeal in delight. 16% less wounds may not seem like a lot, but it absolutely is, especially when you consider this works in multiple directions. Big Bugs love it as we can easily stack the board with T7 and T8, and suddenly, Lascannons are wounding on 4s and Meltas on 5s against our hardest targets, but also, Heavy bolters are wounding on 6s or bolters are wounding Toxicrenes or Carnifexes on 6s. This is just all quality, and because it affects units, not models, you can protect a big block of little bugs. Genestealers wounded on 5s, not 4s from bolters? Seems good. Termgaunts and Hormagaunts wounded on 4s? Awesome. Again, there is so much defense here that it is hard to not include a Maleceptor in just about any list.
You can also stack this with our other defensive buffs like Savage Distraction and/or Malathropes for negative to hit penalties and now a negative strength penalty. It even makes some of our bio-titans look a little more attractive, but really, having a Maleceptor and Malanthrope escort a few Haruspexes and Toxicrenes up the board is a hard as hell testudo that is not easy to take down at range, and if they want to try and kill the Maleceptor, it is still T7 with 12 wounds and a 4++, so it is not an easy bug to kill, especially with a -1. Your opponent may throw a lot of resources into killing the Maleceptor, and thanks to its defensive buffs, they may either spend an entire turn killing a support piece or better yet, do that and fail to kill it. The one downside here is cost. A Maleceptor is 160 points, so that’s a lot for a support model, and you are spending 2 CP a turn, maybe even 4 if you are expecting a nasty Overwatch. You really need to budget for this, and that means getting as many CPs as possible, which could impede your ability to include killy units to actually be supported.

Aggressive Adaptation – 1CP
Use this stratagem in the Fight Phase when an enemy unit is destroyed by a friendly Hive Fleet unit. Until the end of battle, that unit gains +1 AP to their melee weapons. You can only use this stratagem on a unit once per game.
This is a cool way to buff just about any melee threat that you have, and it can start a fun snowball effect where your opponent now has to prioritize killing the buffed unit, which could mean other threats go ignored and you start it all again. Whether it is getting Hormagaunts up to AP -4 or Genestealers to AP-2 (or even -3 if running a custom Hive Fleet), you can make a unit far more impressive, especially for just eating some chaff.
The big caveat here is that you have to kill something, but unless you are playing against a pure Knight list, there is going to be chaff to trigger this early on and get a unit to up its kill. This can be really fun on big bugs like Toxicrenes (getting those tendrils up to AP-3 really helps) or getting the biggest hits like Trygons/Haruspexes up to AP-4. In terms of pure volume of attacks, this has the most value on a unit as again, getting Genestealers, Warriors, or Raveners an extra AP makes them far more dangerous, and since this is Hive Fleet neutral, you can stack this with just about anything you desire. This of course is a great boost to Behemoth has with a +1 to wound power, you can take even the lowly Hormagaunt and get it to AP-2 and +1 to wound without much trouble, if they get to mulch a small squad first. With the new points drops to Warriors in a Build-A-Bug fleet, getting an 18ppm unit up to AP-3 with 4 attacks at WS 3+ is pretty good all told.
This is an easy stratagem to overlook in the heat of the battle, but again, it gives a nice boost in killiness for a pretty low investment, and it also again baits your opponent as they have to decide if they spend the resources to kill the enhanced unit and then hopefully have enough to stop the next wave or try to kill the second/third wave and just deal with the enhanced unit, knowing it can’t be enhanced again. Either way, you are forcing your opponent to make a quick decision, and that often leads to player error.

Synaptic Channeling – 1 CP
Use in your psychic phase. Select one Hive Fleet psyker, and until the end of the phase it counts as knowing all the powers of every other Hive Fleet psyker on the battlefield.
This is a fun one that seems built to help answer the Resonance Barb Neurothrope problem of having 3 casts but only knowing 2 powers. I tend to run psychic heavy as well as Neurothropes are cheap battalion leaders that are also useful, and Broodlords are great, mobile little blenders, and well, sometimes I screw up and I leave one of my characters who knows Catalyst or Onslaught away from the unit that needs that buff. This helps solve that problem by allowing you to give a caster all the variety it needs in the situation, and again, for a Barbed Neurothrope, it makes sure you get the most out of your casting potential. There’s also just the math of it, namely that a Barbed Neurothrope is the best caster we have between the +1 to cast and reroll 1s, so having your critical buff spells go through it means that you are likely to get the powers activated.
Really, for me, I have used this mostly to help audible out of bad positioning or reacting to a new threat, and it immensely helpful. It is another stratagem that is easy to overlook, but if you are relying on Onslaught or Catalyst (or maybe the new Hive Fleet powers) as part of your game plan, this helps spread those abilities around as outside of Hive Tyrants, most of our psykers are pretty restricted in powers, and well, this is a nice solution.


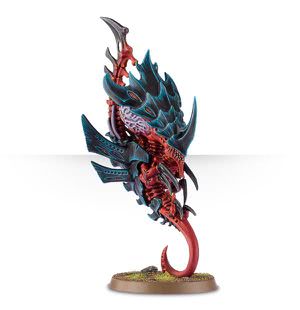
Skywarm Fusillade – 1 CP
Use this Stratagem in your shooting Phase. Select a Gargoyle unit. Their fleshborers count as Pistol 1 for the phase.
This is a fun stratagem that is again built around making Gargoyles playable. It is easy to forget the lowly Fleshborer, but as a standard gun, it isn’t that bad as it is S4. Gargoyles get a bonus to shooting if there are more than 20 of them, so you get some extra value there. Let’s not forget that they are now 5 ppm, and you can easily build them as having a 6++ and -1 to be hit in melee. This makes them an excellent screen, and screens tend to get charged, so having the survivors be able to put some shots in whatever they are locking down helps increase their overall damage output, especially since you can also pop Scorchbugs for a +1 to wound there.
While I want this to work, and it’s a nice idea, the reality is that even with a 6++, -1 to hit, and even a 5+++ Feel No Pain, a unit of Gargoyles is likely not going to survive being hit with enough numbers to make this stratagem worth it. Besides that, chances are they want to Fall Back and clear the way so the real threats can get into the enemy. Most of the time, I don’t want my screen to sit there in combat as I either want to shoot the enemy unit or maximize my charge against them with my assault elements, and having some gargoyles in the middle of that makes it a bit hard. If you are really dedicated to gargoyles, this can do some work, but it is probably not going to be a stratagem that you need to factor in towards your CP budget.
Psychic Fissure – 2CP
Use this stratagem at the start of your opponent’s psychic phase. Until the end of that phase, when a psychic test is failed within 12″ of any Hive Fleet Synapse units, the enemy unit suffers d3 mortal wounds.
This can be devastating if played right, but it does require careful positioning and the right units. The obvious combo here is to pair this with Kronos’ custom Stratagem, the Deepest Shadow, where one enemy power is only cast with a single d6, so between that and Shadow in the Warp, a lot of spells are going to fail (or are impossible to pass). This gets you d3 mortals on a target, but if you also manage to catch them in Kronos’ Warlord Trait aura, that’s 2d3 mortal wounds. If you can get your Warlord into position for this, that can be a major threat to most psykers. Even just the threat of this can force your opponent to keep back with their psykers, denying effective smites or keeping them from buffing/debuffing the front-line scrum. There’s also just the chance that your opponent has terrible dice, and a few failed casts can really add up, or if they roll double 1s, hilarity indeed.
The problem with this stratagem is that you have to prepared to exploit it, and you need the units to do so. You need fast moving synapse that can get within 12 of the enemy psyker, and that’s not easy. You really have Hive Tyrants dropping in or perhaps some tunneling Trygon Primes, but that’s investing a lot of points into something likely to die, as well, you are within 12. It seems tempting to try and combo this, but I think that’s riskier than you need to be, and really, I see this power being most useful in the mid-to-late game where there are specific scrums in different parts of the board, and after several turns, things are much closer together, so it is a lot easier to catch a psyker within 12 of a Synapse unit.
If you have a lot of Synapse, either because you are running a lot of psykers or Warriors, this can get you play, but it really does depend on you positioning yourself to catch psykers in range, which can overextend you pretty easily if you aren’t careful. Again, this is one of those stratagems that I probably would not budget specifically for in terms CP budget, but there are some match ups or games where it could be clutch as hell.


Well, that’s it, that’s all of our new stratagems, and while some shine brighter than others, there is still workable tek here, mostly to boost models that just don’t see play that much pre BoB. I hope you’ve enjoyed, and of course, let me know what combos I missed, since yah, there are so many possibilities, it’s impossible to catch them all. Next time, I am going to do some list deep-dives, sharing what I’ve tested to see how bugs can adapt to this wild world of 8th edition. Thanks as always for reading, and be sure to get those bugs ready for LVO.
And remember, Frontline Gaming sells gaming products at a discount, every day in their webcart!


