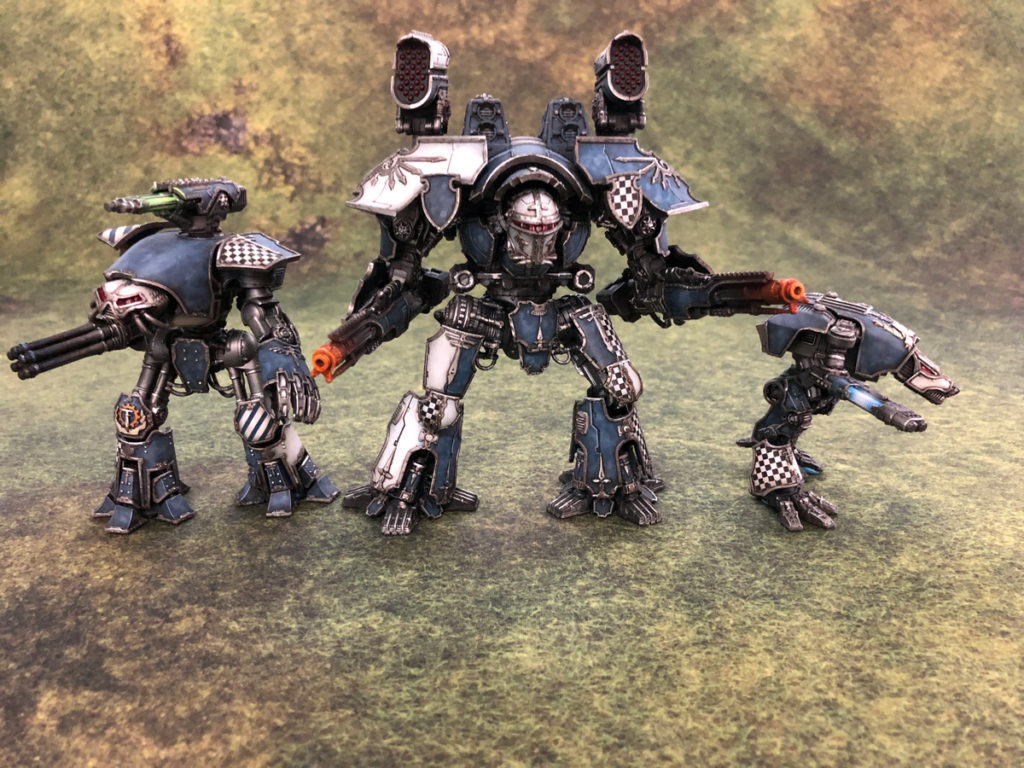
Imperial Heraldry Part 1: painting stripes with tape masks & putty masks.

Have you ever wanted to give your models that extra punch of detail in the form of stripes and patterns, but thought it was too complicated? Ever wanted to give your custom Space Marine chapter or Imperial Knight House the perfect decals they deserve? Fear not! I’m here to share some quick techniques that anyone can use to emblazon your favorite miniatures with some spiffy looking detail work and custom heraldry.
The technique of Masking can be a shortcut to producing excellent looking stripes and color changes on your model. Although I use an airbrush below, it’s not required – these techniques can all be used with conventional brushes as well. While I’ll be demonstrating these techniques here on a series of Adeptus Titanicus war engines, the methods are universally applicable across the hobby on any models in your collection. Hopefully, you’ll find some of these tips useful to save time and money on your way to making better-looking miniatures in a shorter amount of time!
Tape Masks
Selecting the Right Tape
The most common type of masking is the tape mask. However, unlike what the name suggests, I do not recommend using typical Masking Tape for fine detail miniature work. In fact, I would also not recommend using “Artist’s tape”, a specialized (and expensive) form of masking tape. Neither of these are ideal for small details on uneven miniature surfaces; they will both allow some bleeding of paint underneath, tear easily, and removing them afterward may pull up your painted layers underneath!
Instead, the best tape I’ve found is the ultra-thin blue painter’s tape, pictured below. Make sure to get the orange label tape, as this is specially designed to have a weaker adhesive that will not pull up any finished paint layers underneath. You’ll still want to allow the painted layers to dry completely before applying this tape – trust me, there’s no worse outcome than pulling up your tape after you’re finished with it, only to see it’s also peeling off what it was supposed to protect. However, I’ve never had an issue with the orange label tape.
Stripes
Tape masks are ideal for areas on your model that have a hard edge. One of the most straightforward applications for this is striping. In the 40k world, yellow and black hazard striping is an iconic pattern found everywhere. The heraldry of Imperial Knights and Adeptus Titanicus war engines also regularly features striped and hard-edge patterns on their plates of armor and banners.
The first step to any successful masking effort is planning your color layers. For a single two-color striped area, as shown below, you’ll want to paint the base color in its entirety. Depending on the combination of primer colors and layer colors you’ll be using on your model, you may choose to do your colors in any order you find most efficient. For striping of three or more colors, just plan accordingly – you’ll typically want to paint light layers first.
Roll out a length of tape onto a flat cutting surface. Estimate the thickness of the stripes you’ll want to cut, and use a straight edge to cut several equal-width stripes. For larger striped areas, you’ll want to make horizontal cuts along the length of the tape. Depending on the size and curvature of the area you’ll be striping on the model, you can save some time by quickly eyeballing the cut widths here rather than measuring out each cut exactly, if you prefer. Especially on uneven/curved surfaces of the model, the distance between the stripes may vary a bit upon application anyway.
I will usually start applying the stripes on one of the edges of the section. This gives me a good gauge of which angle looks best to prevent the pattern from ending up with “half-width” stripes on both sides. Try your best to lay out the stripes equidistant from each other while following the curvature of the model. After placement, use your fingernail to firmly press down the edges to create a seal so that paint won’t bleed underneath – especially take care of raised edges or depressions, where the use of a tool or the backside of your knife can come in handy.
Straight Edges
Similar to stripes, use the tape’s natural straight edge to separate large color areas on your model. Tear off a length of tape, and line it up on your model where appropriate. Again, make sure to firmly press down the tape edge with your fingernail, or with a tool in irregular areas. If taping for airbrush, make sure to mask off the surrounding areas to protect against overspray.
If painting with a conventional brush, stroke away from the masked edge around any irregular surface – start on the tape and paint onto the open section, not into the masked edge. This will reduce the chance for paint bleeding.
Removing the Tape
You’ll want to remove the tape mask as soon as you are done painting the section. Don’t let the paint fully dry on the section, as this can lead to paint peeling and irregular line edges. When pulling off the tape, pull slowly and at a low angle. A high angle (90 degrees) will increase the risk of pulling up the painted layers underneath the mask.
Putty Masks
Tape is great for straight lines and other precise pattern cuts, but what about irregular edges? Silly putty is great for quickly masking off general areas that do not need too much edge precision. This is especially useful for masking for airbrush – for speed and overspray protection, I consider silly putty an essential tool in my airbrushing process.
There are similar products out there, and this putty may go by other names in other places, such as artist’s putty or modeling putty, but the (relatively) cheap silly putty children’s toy works great. You can order a six-pack of “eggs” from your favorite online retail behemoth for under $10, and it lasts forever with no cleanup necessary. However, there are seemingly similar products you should avoid. While Blue Tac is useful in our hobby, DO NOT use it for paint masking – the adhesive strength is too strong. It only takes one disaster experience for the Blue Tac to remove the paint you were trying to protect for you to never touch the stuff again; it’s not worth the risk.
Simply break off a small glob of putty and gently mold it into place (it will warm up in your hand and become very pliable). Cover any area you don’t want to paint, or that might be hit by overspray. After you’re finished, simply roll the painted putty around in your hand a few times, and it’s good as new.
Cutout Masks / Stencils
Tape and putty aren’t the only quick masking pattern techniques available. There are other techniques available that can be more complicated and more time consuming (liquid masks or adhesive-backed vinyl for example), and some companies sell ready-to-use pattern masks. However, another simple and fast method to creating a pattern at home is the cutout mask.
While easier to use on a flat model surface and with an airbrush, you can use a cutout mask as a stencil to repeat a design over any surface on your model. Using a thick paintable paper or other solid material, cut out a shape or pattern you want to use. Hold the cutout mask over the area you while you paint, then move it to another area and repeat.
It’s always best to use a sample board to test out any of your patterns or masks before applying them to your models. Not only to practice applying the size and shape of the pattern but also to test how your colors look against one another. The appearance of the final product will depend greatly on how the colors you use complement each other both in value and contrast.
For example, the Legio Tempestus titans feature a blue and grey ‘dazzle’ camouflage scheme. I did a few tests on my sample board, using various cutout mask shapes repeated with 3 different colors. My preference ended up being the camouflage scheme that didn’t use a mask, just softly airbrushed lines & splotches, as I felt this was more muted and had a less jarring appearance than some brightly contrasting straight-edged dazzle camo patterns I’ve seen out there. However, your preferences may vary, and using this technique on other models is quick and can save you a lot of trouble for a great look.
Next, check out Part 2: creating custom transfer decals and final results!
And remember, Frontline Gaming sells gaming products at a discount, every day in their webcart!

