
Charlie here from 40kDiceRolls, here this time to talk about nothing related to tactics! If you’d like to read about tactics, check out the Tactics Corner!
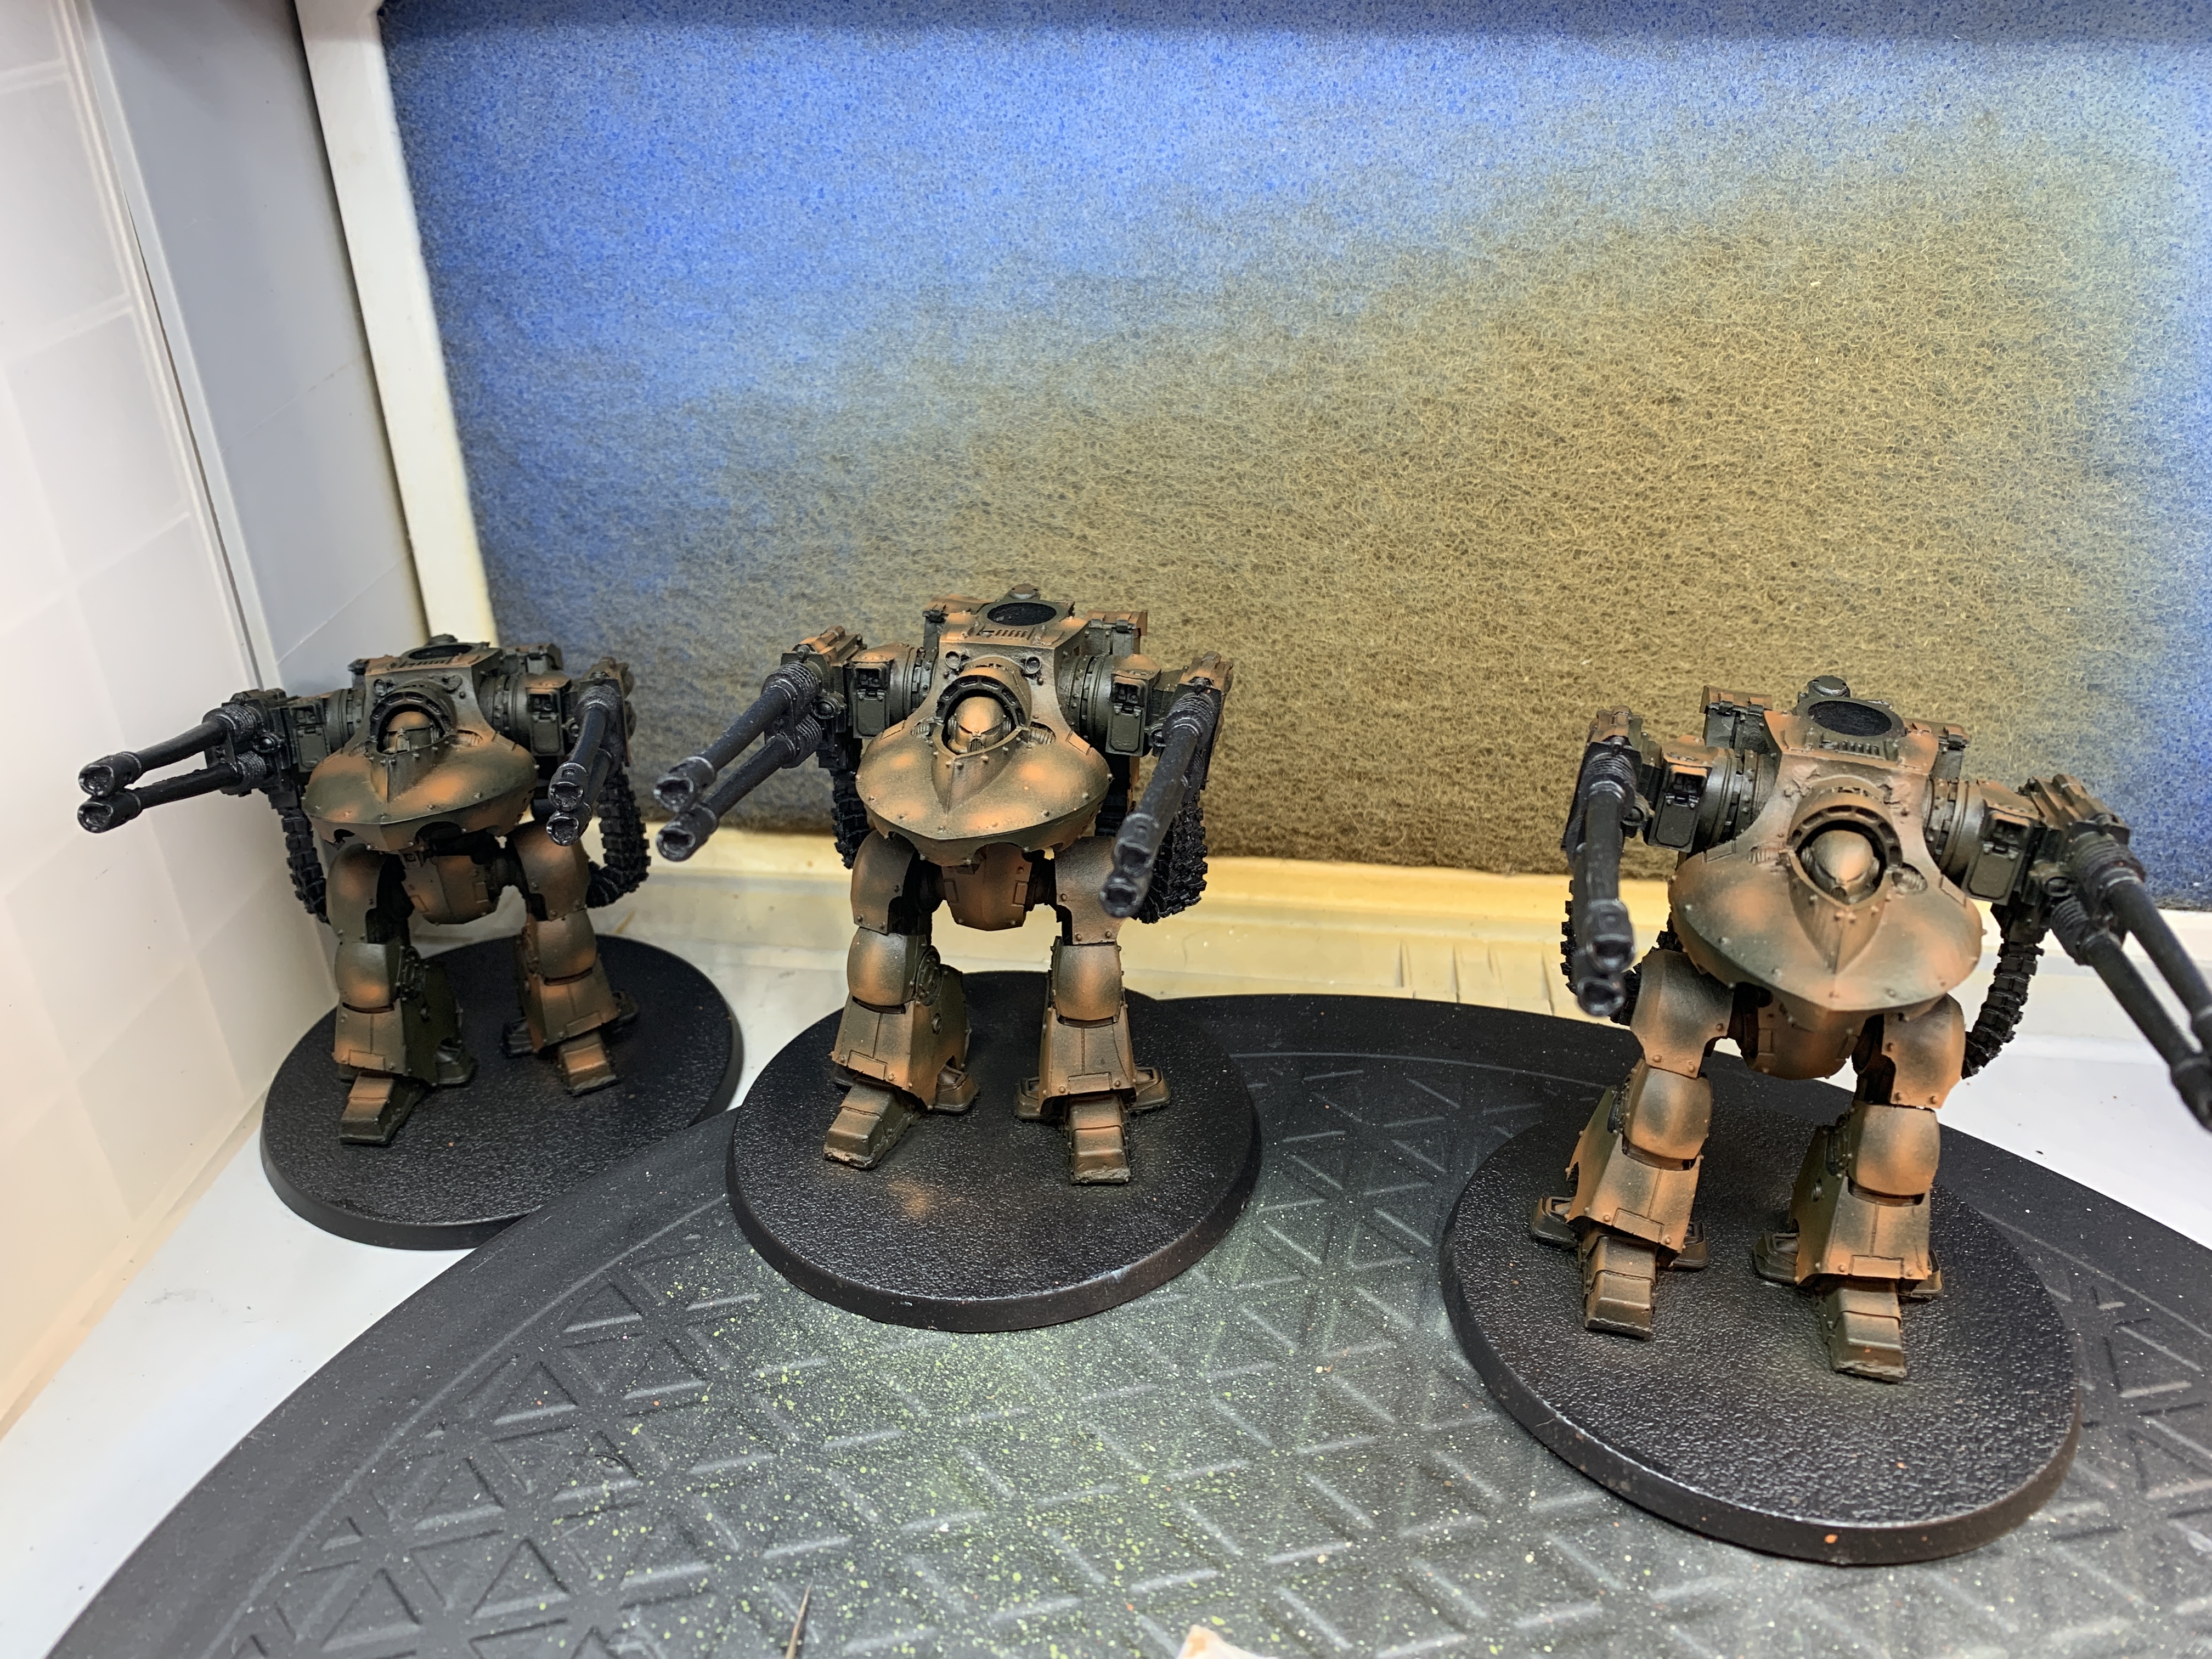
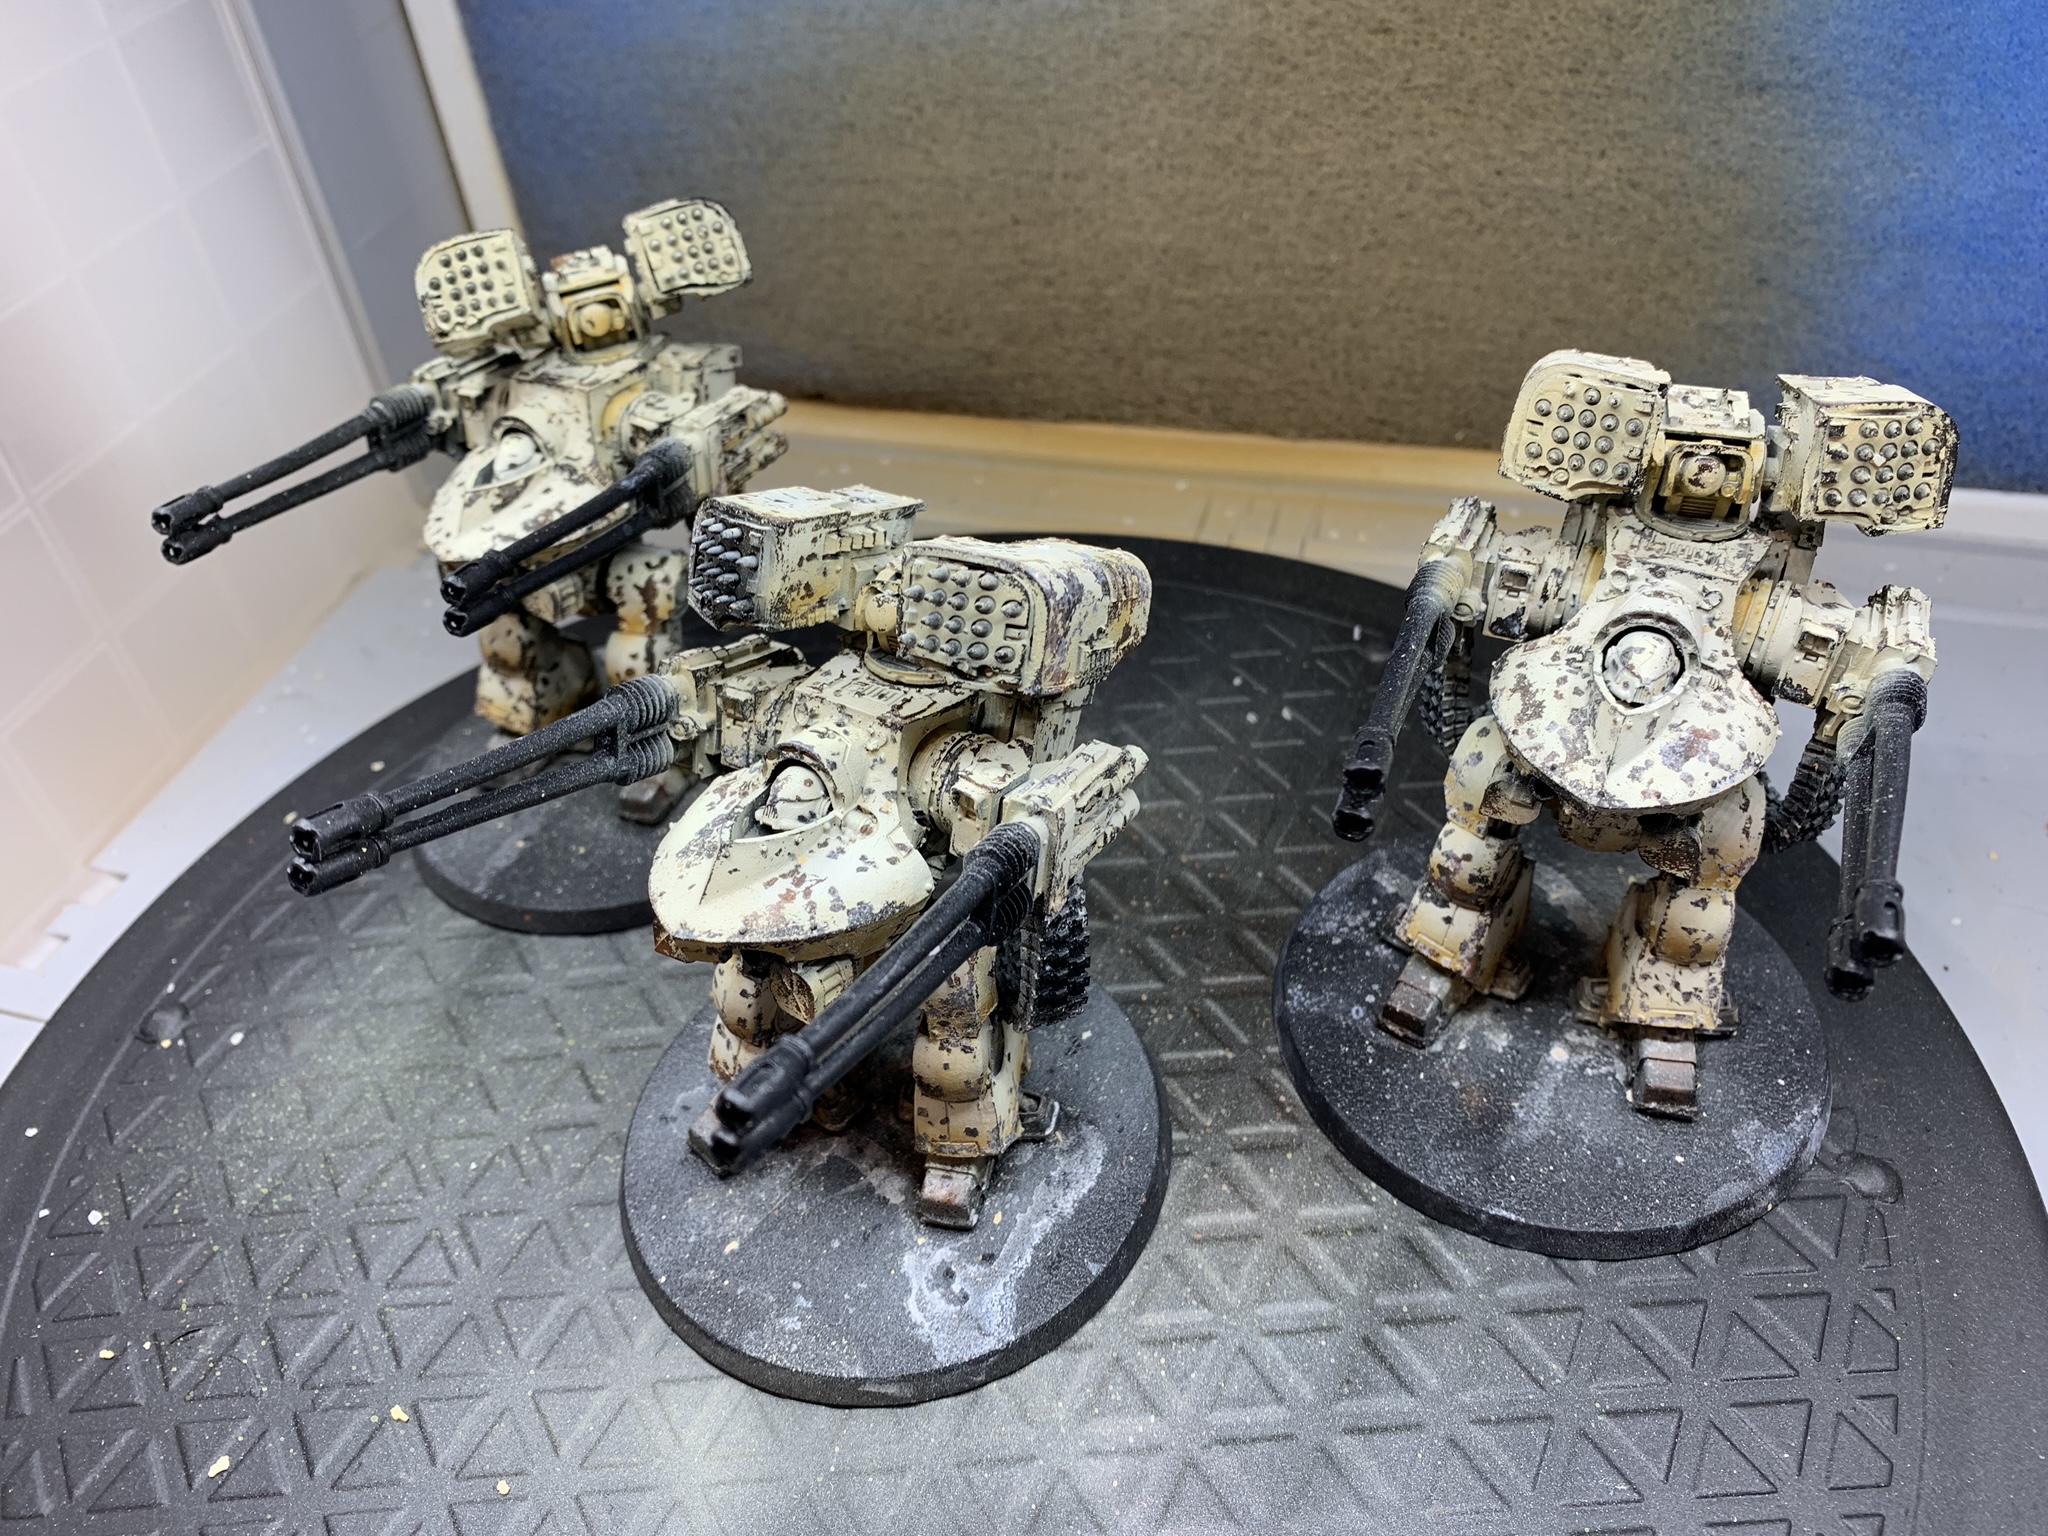
I’ve been on a pretty big Chaos-kick recently, largely moving away from T’au. For me, I enjoy the increased flexibility of list-making, choices, and ability to play in every phase of the game. No self-respecting Chaos player nowadays isn’t at least considering running Deredeo’s and I (like most of you, probably) am running three in my current list. They’re all Death Guard so that they can move and fire Heavy weapons (every weapon they’re loaded out with is a Heavy weapon so this is nice) because they have the <Hellbrute> keyword. Hitting on 2’s, wounding most things on 2’s or 3’s, and having above-average indirect firing, Deredeos are my current must-take.
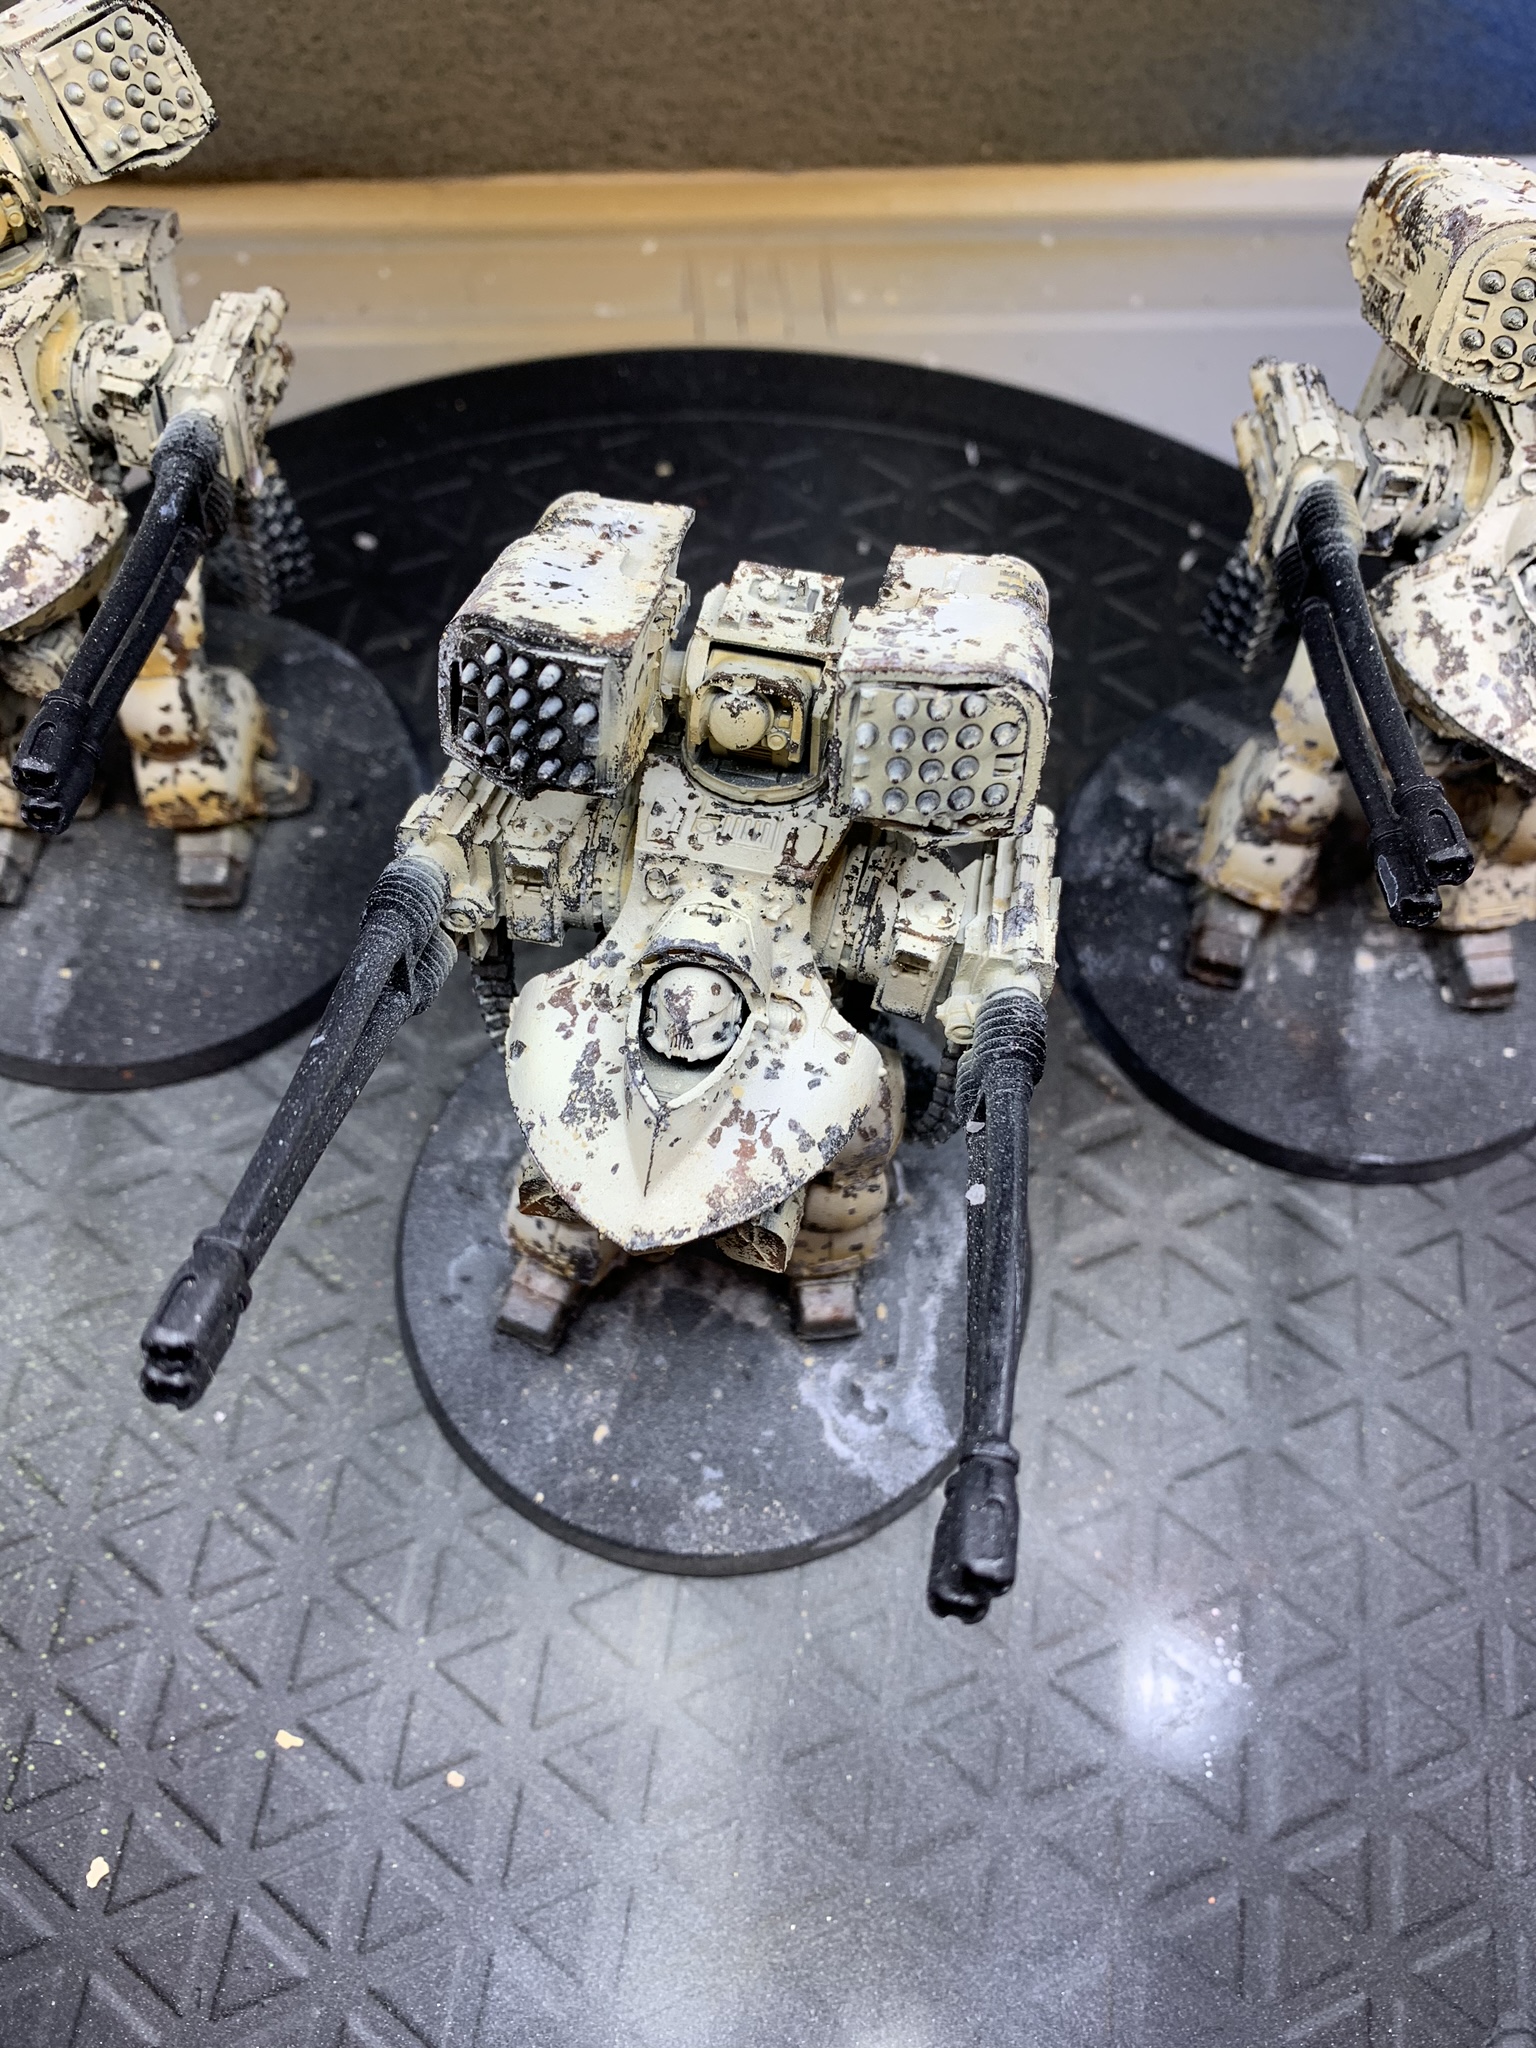
But circling back around to the fact that they’re Death Guard, I wanted them to look worn, dirty, and in general disrepair. They’re not technically daemons, though they do take Chaos marks, so I didn’t want to push the Nurgle Daemon angle with too many buboes and slime. Essentially, I wanted something incredibly worn and dirty and thought that the most obvious way to make them look dirty was to use the off-white 30k colors because it’s easier to make something very close to white look dark and dirty, versus making something darker (40k DG green or even darker) look grimy. At least, that was my train of thought. Lastly, my goal here wasn’t to paint some Crystal Brush-winning model. I wanted to use easy-to-learn, fast-to-apply techniques that, when used appropriately and in conjunction with each other, resulting in a model that, from across the table, makes your opponent go “wow! That’s a cool looking model!” We’ve all seen models that look amazing from 6″ away with staggering detail but I wanted something that looked good from 3′ away. That’s what I set out to do and was my overall goal. Here’s how I did it.
I started by doing a ton of research. YouTube is excellent for this. You don’t have to look far to find information about almost literally anything. Ultimately, this video is what most heavily influenced what I ended up doing and if you like the results I show, I’d encourage you to give it a watch. The basic premise is that I used water-soluble hairspray to very quickly create a chipping and rust effect. The nitty-gritty details follow.

I started off by priming black. This is my preference and it lends itself to the technique. You can substitute any of the colors I mention with whatever you have on hand that’s close. The exact color isn’t important. Next, while using an airbrush, I used Model Air Burnt Umber to cover the entire model. This is a great base for the following browns but it’s kind of hard to see over my Rustoleum Black primer so it can be a bit tricky to not flood the model with too much paint. As is almost always the case with an airbrush, you want multiple thin coats. Next, I starting picking out spots where I imagined water and rust to accumulate – the feet and bottoms of panels, in cracks, etc. In these spots, I used Mournfang brown to build up a lighter brown before using Skrag brown, which is getting on the verge of dark orange, to make these areas varied and brighter. You can see below what I ended up with. You want varied, non-uniform coloration.
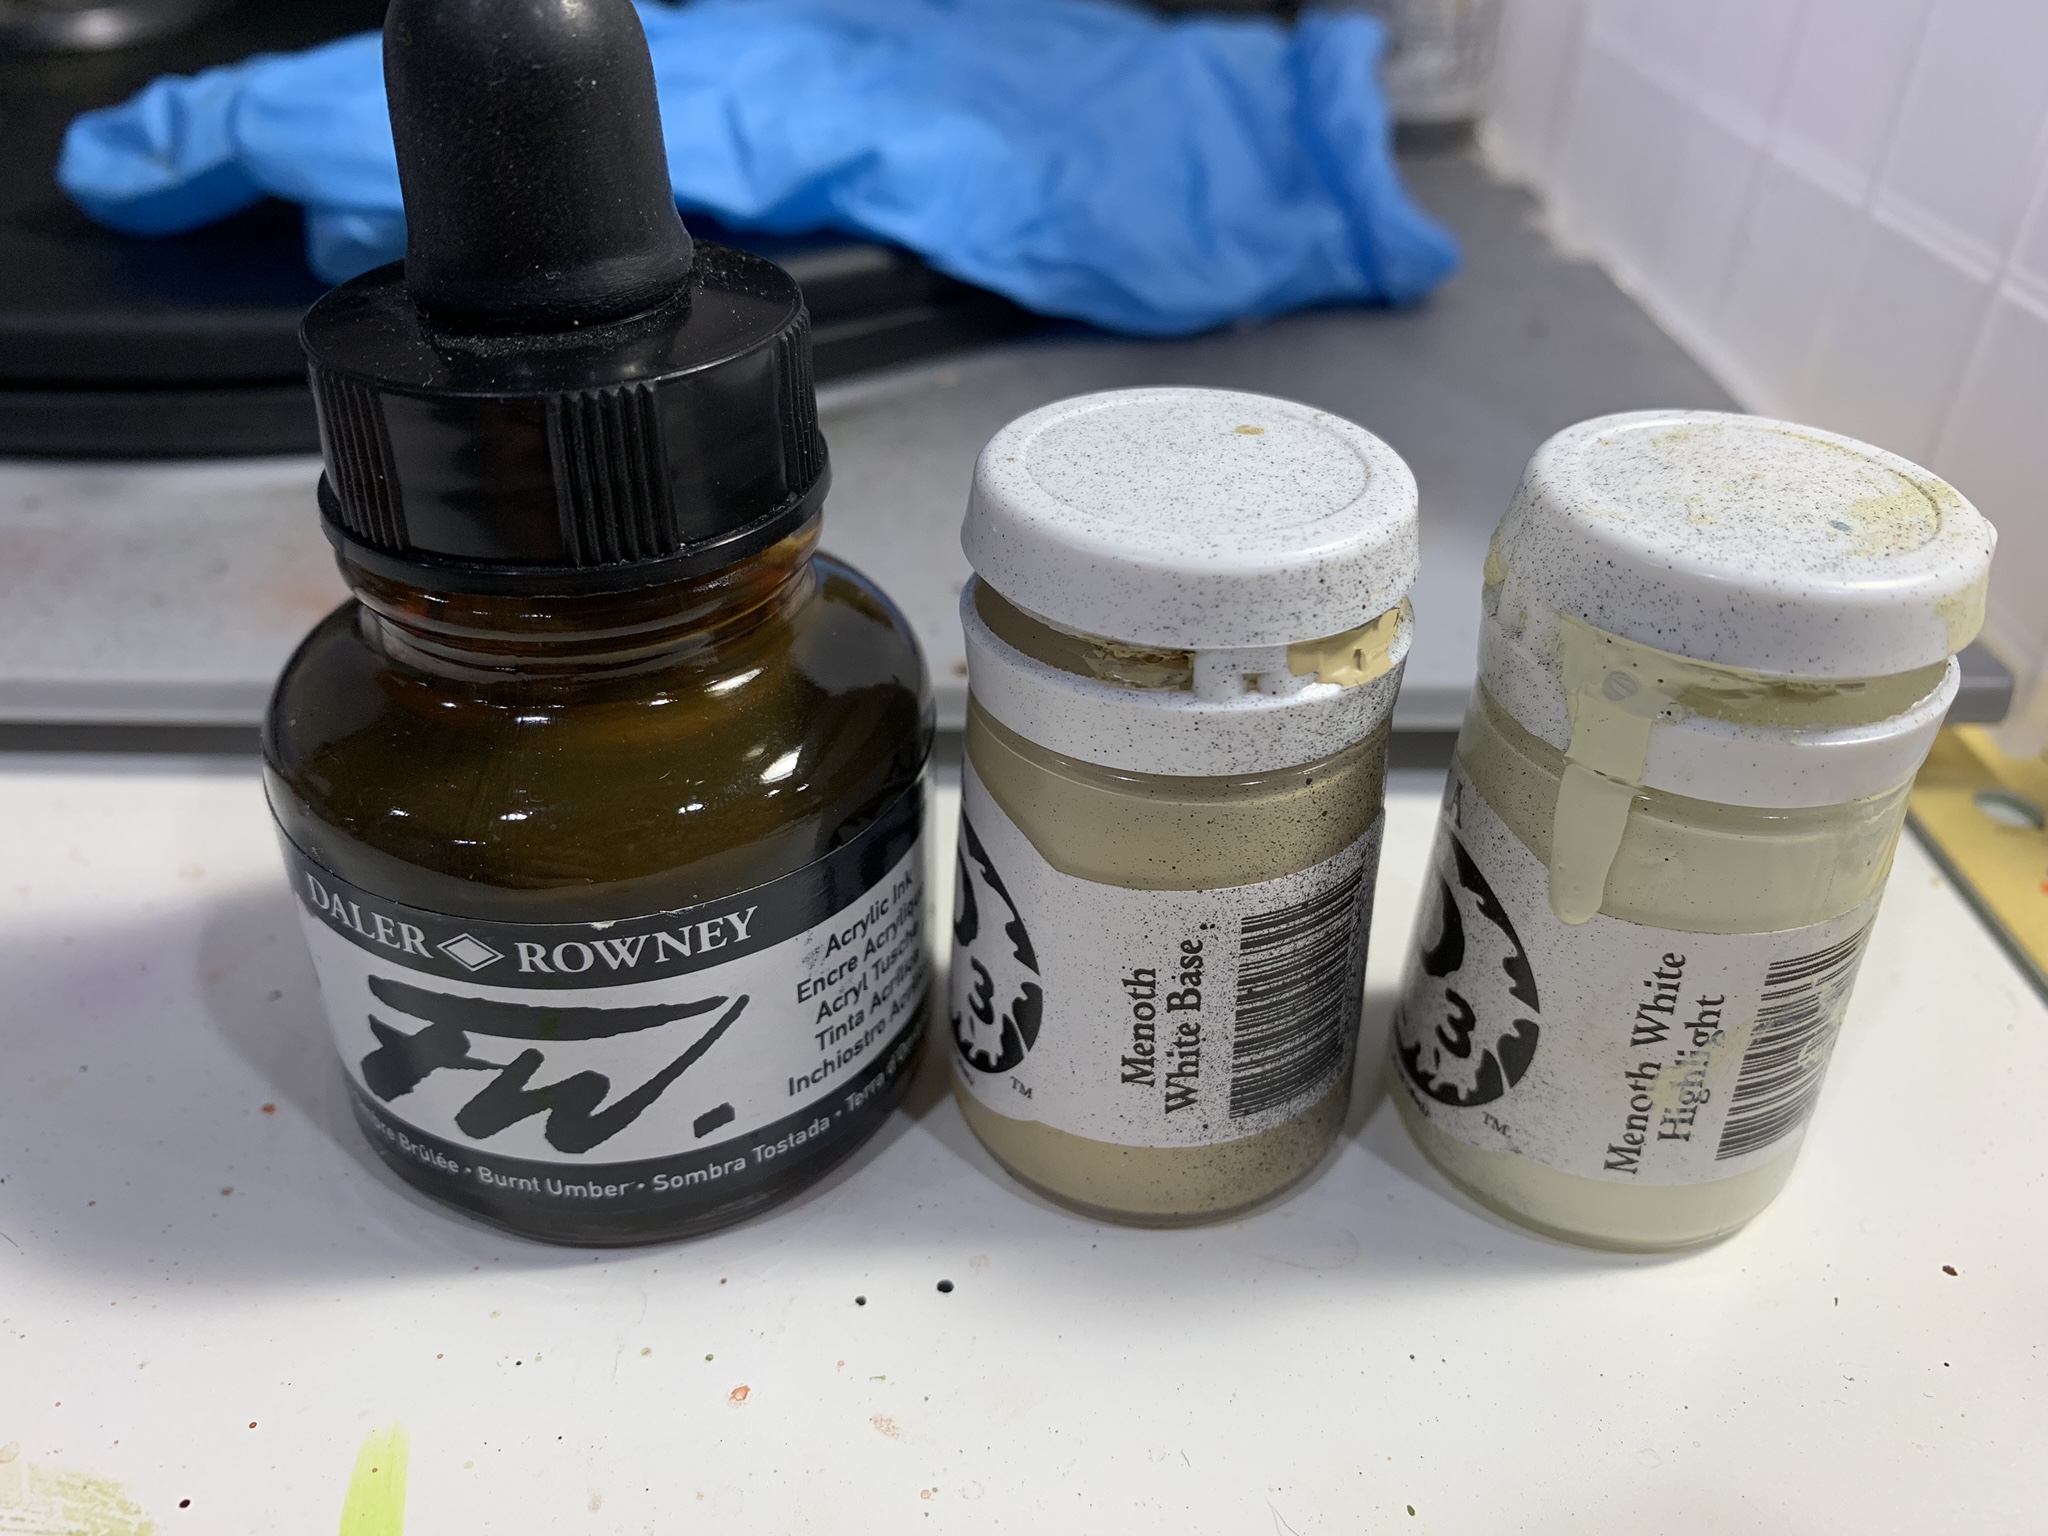
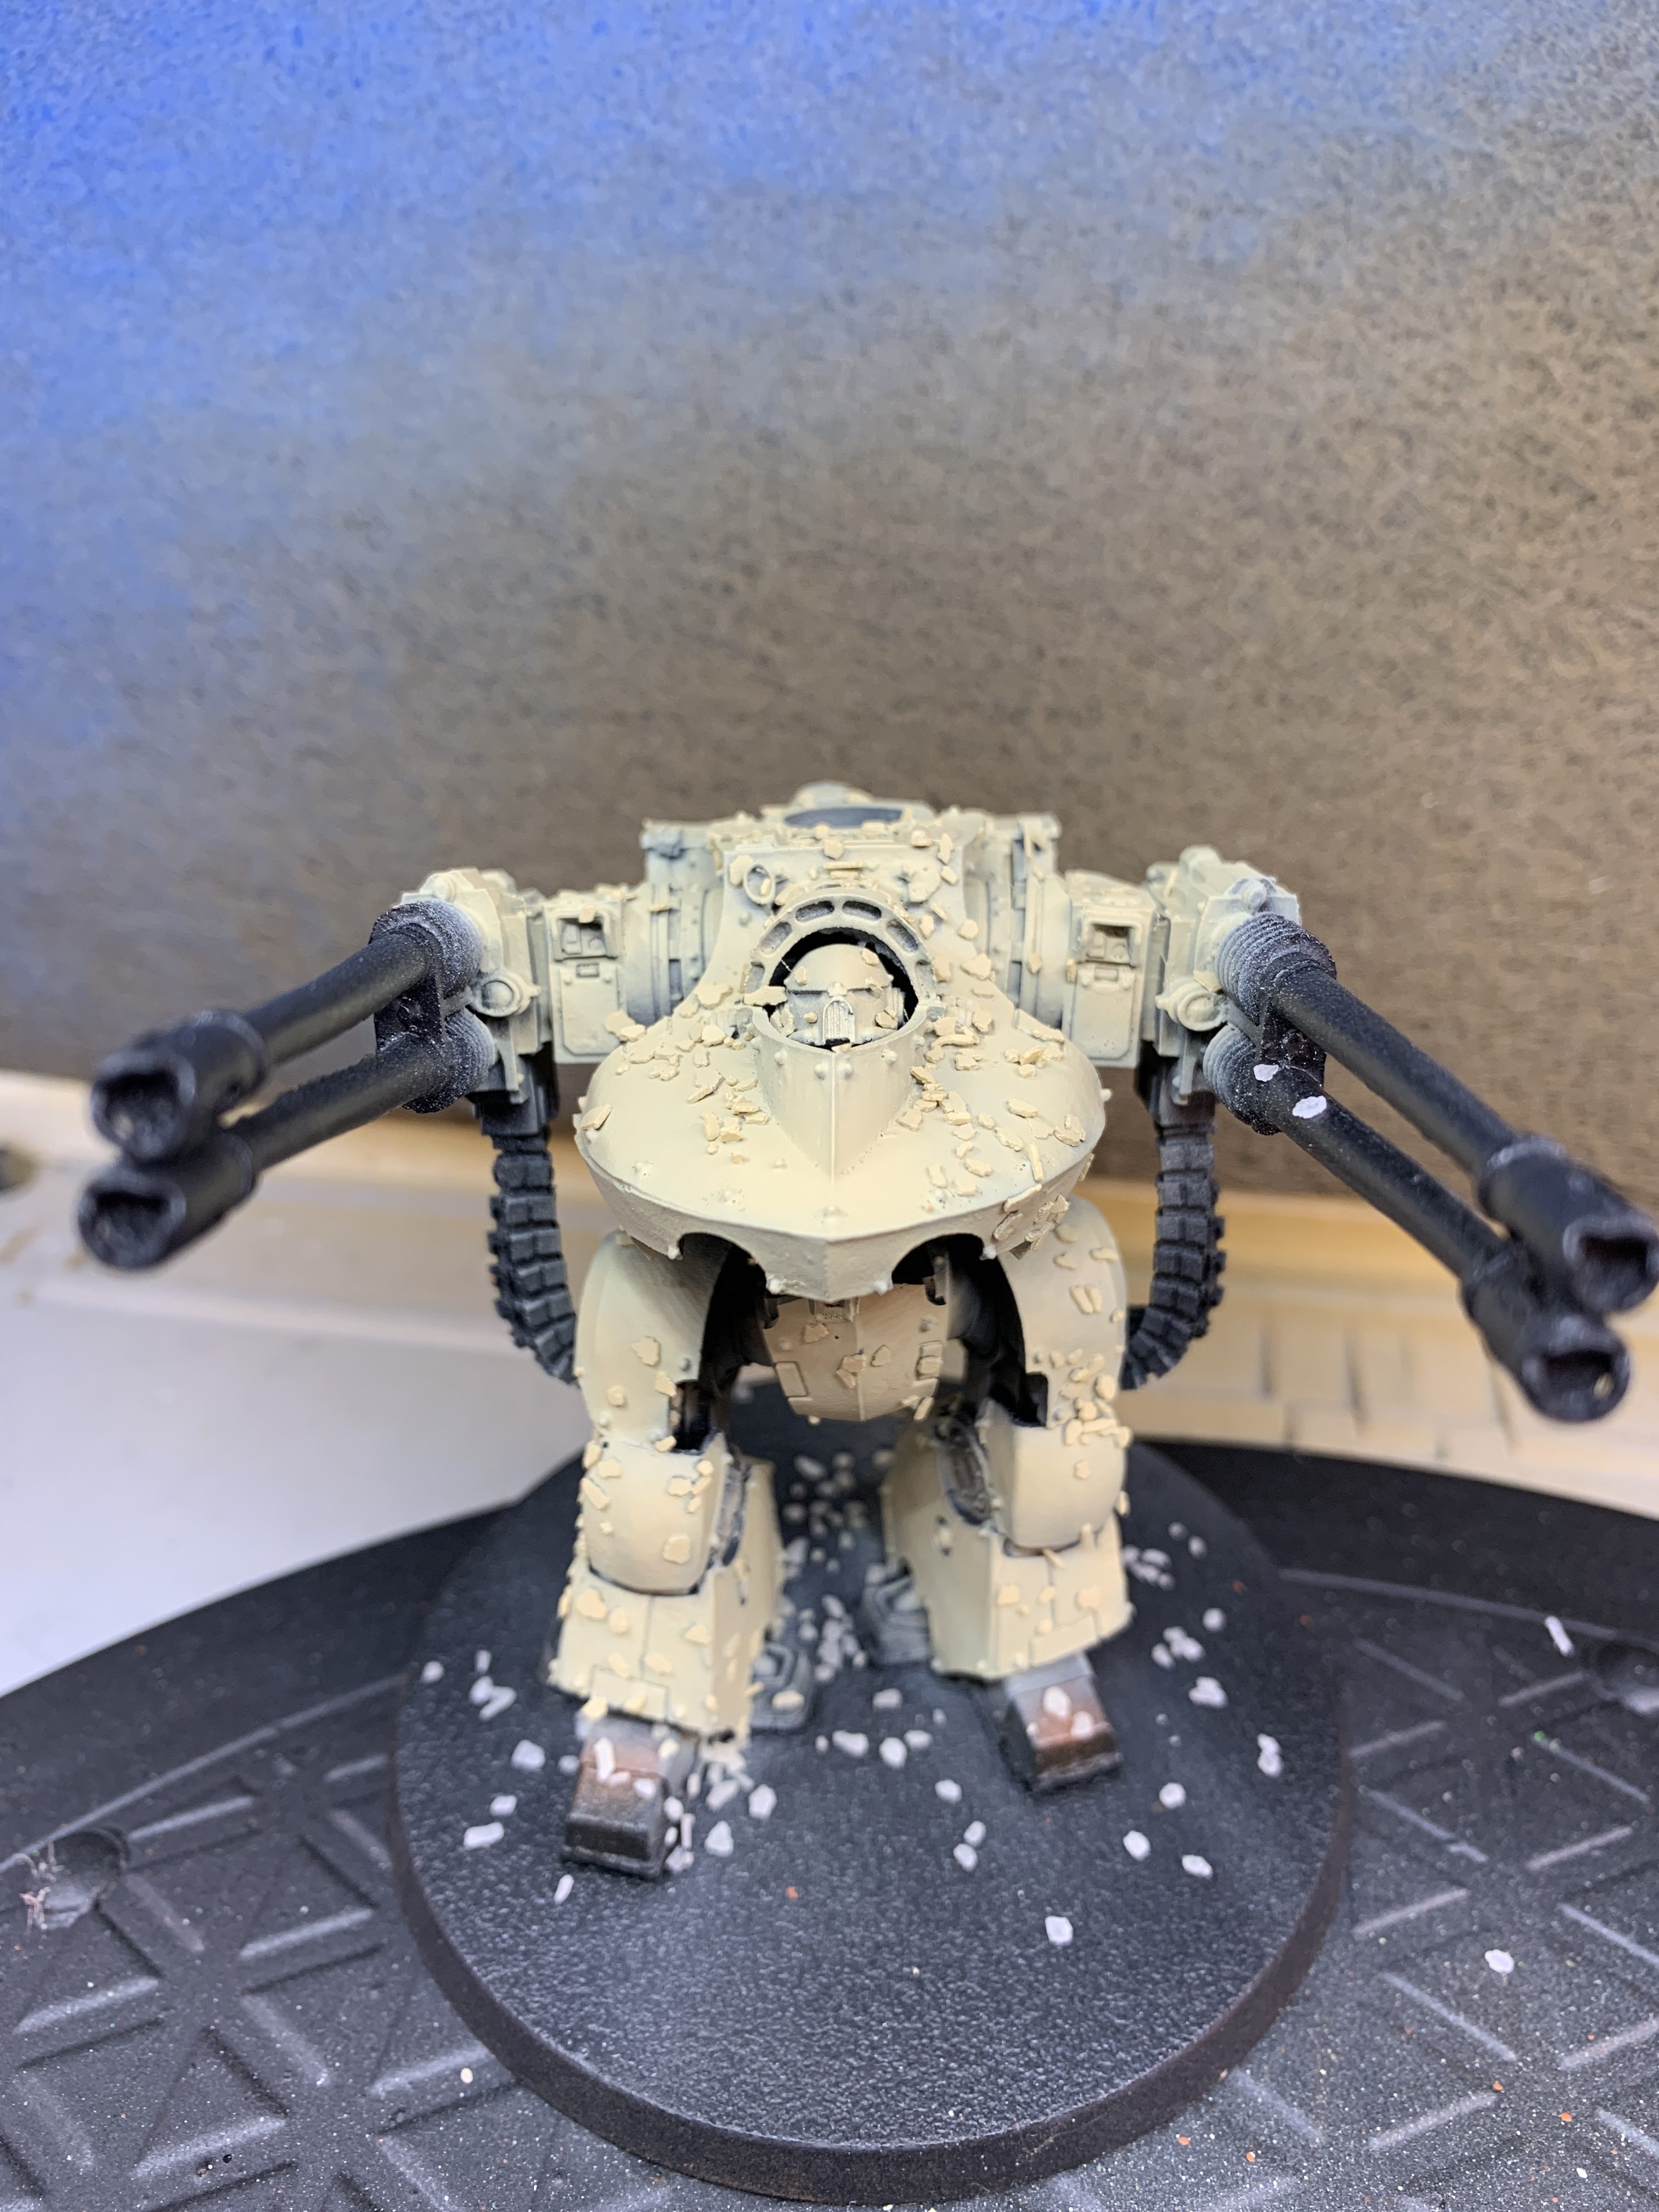
At this point, I used Testors matt varnish to seal the paint. Two light coats of varnish are preferred here because we want to protect our work for our next step. At this point, after your varnish is completely dried/cured, you want to spray the entire model with cheap hairspray – the cheaper the better. Cheap hairspray is usually more water-soluble and that’s the key attribute we need to achieve the chipping effect. At the same time that you’re spraying the hair spray, take some coarse sea salt and sprinkle the salt over the model. Because the hairspray is still very wet, the salt should stick to the model. These will give us some larger chips and create some interesting variation. Once you’ve sprayed the hairspray and added the salt, you’re ready to paint the miniature the actual color of the armor, which because I was going for the 30k scheme, is a warm off-white. I really like the Menoth white base and highlight from P3 for a lot of my warm off-white or bone-colored parts. We’ll get to the DR ink in a second.
Using a horizontal spray angle, I based the armor in the base, then applied the highlight from a downward angle. I didn’t do the highlight from a purely zenithal angle, it was more of a zenithal (0) to 15-20 degrees. Here’s what I had thus far. Notice the large quantity of salt.
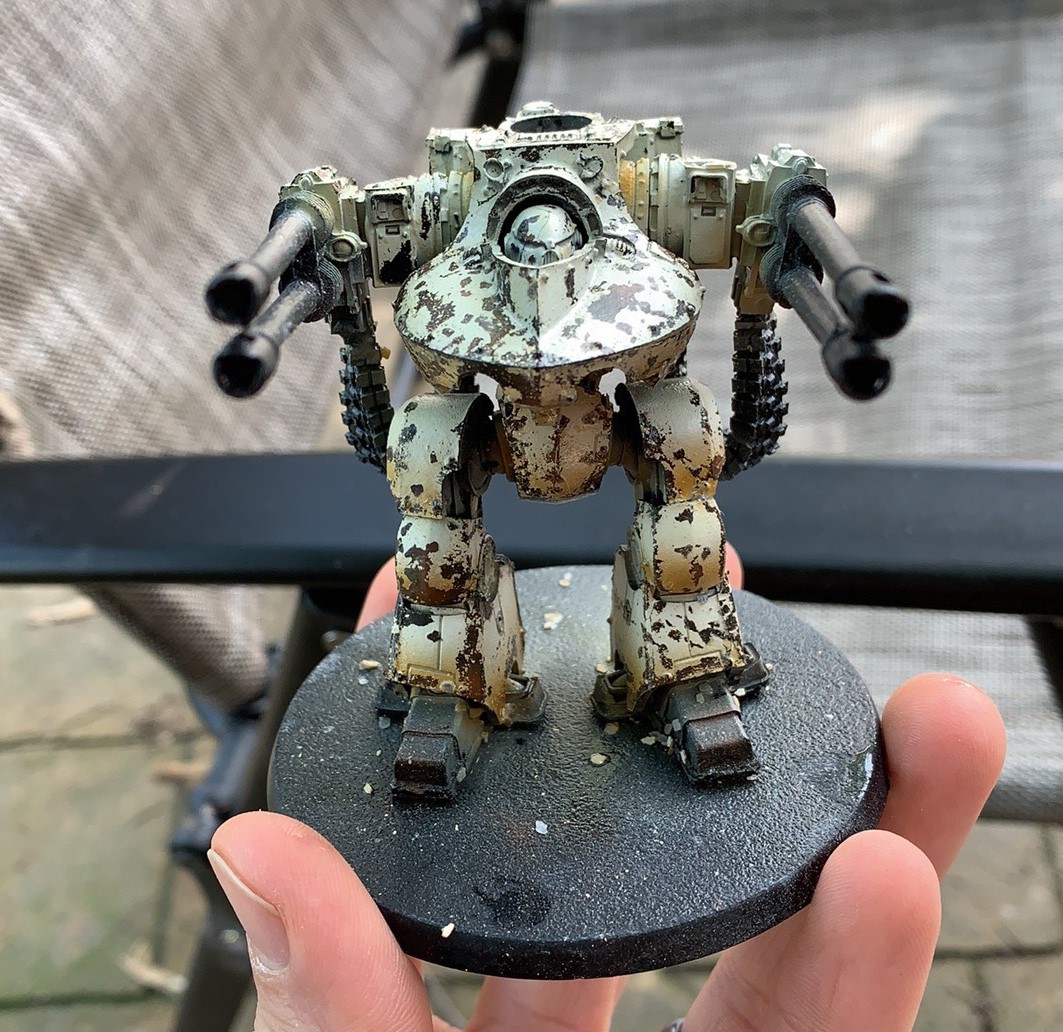
The gradient wasn’t very apparent so at this point I used the DR ink (burnt umber) to spray upwards, hitting the bottom and underneath of many panels, even into some of the crevices. This is basically the opposite of highlighting – you’re adding in shadows and gave it just the 3-dimensionality that I wanted. Now that everything regarding the armor panels was the general color I wanted, I took a clean, soft brush and wetted (with clean water) a panel or section at a time, then used a set of soft wire brushes used to clean out airbrushes (they come on a ring, you can buy them at Harbor Freight for a couple of dollars) and gently started rubbing away the paint in certain interesting areas I thought would get banged or scratched. This was an awesome break from painting and very zen, just to be able to let the brush and undercoats do all the work. There’s zero skill in this, it just takes a little time to work your way across the model, applying chips and damage as you go. In hindsight, I probably applied too much salt, because trying to get all the salt off took a while and the next time I do this technique, I won’t use as much. Still, it’s a relatively fast way to get this effect and I think it stands out from across the table.
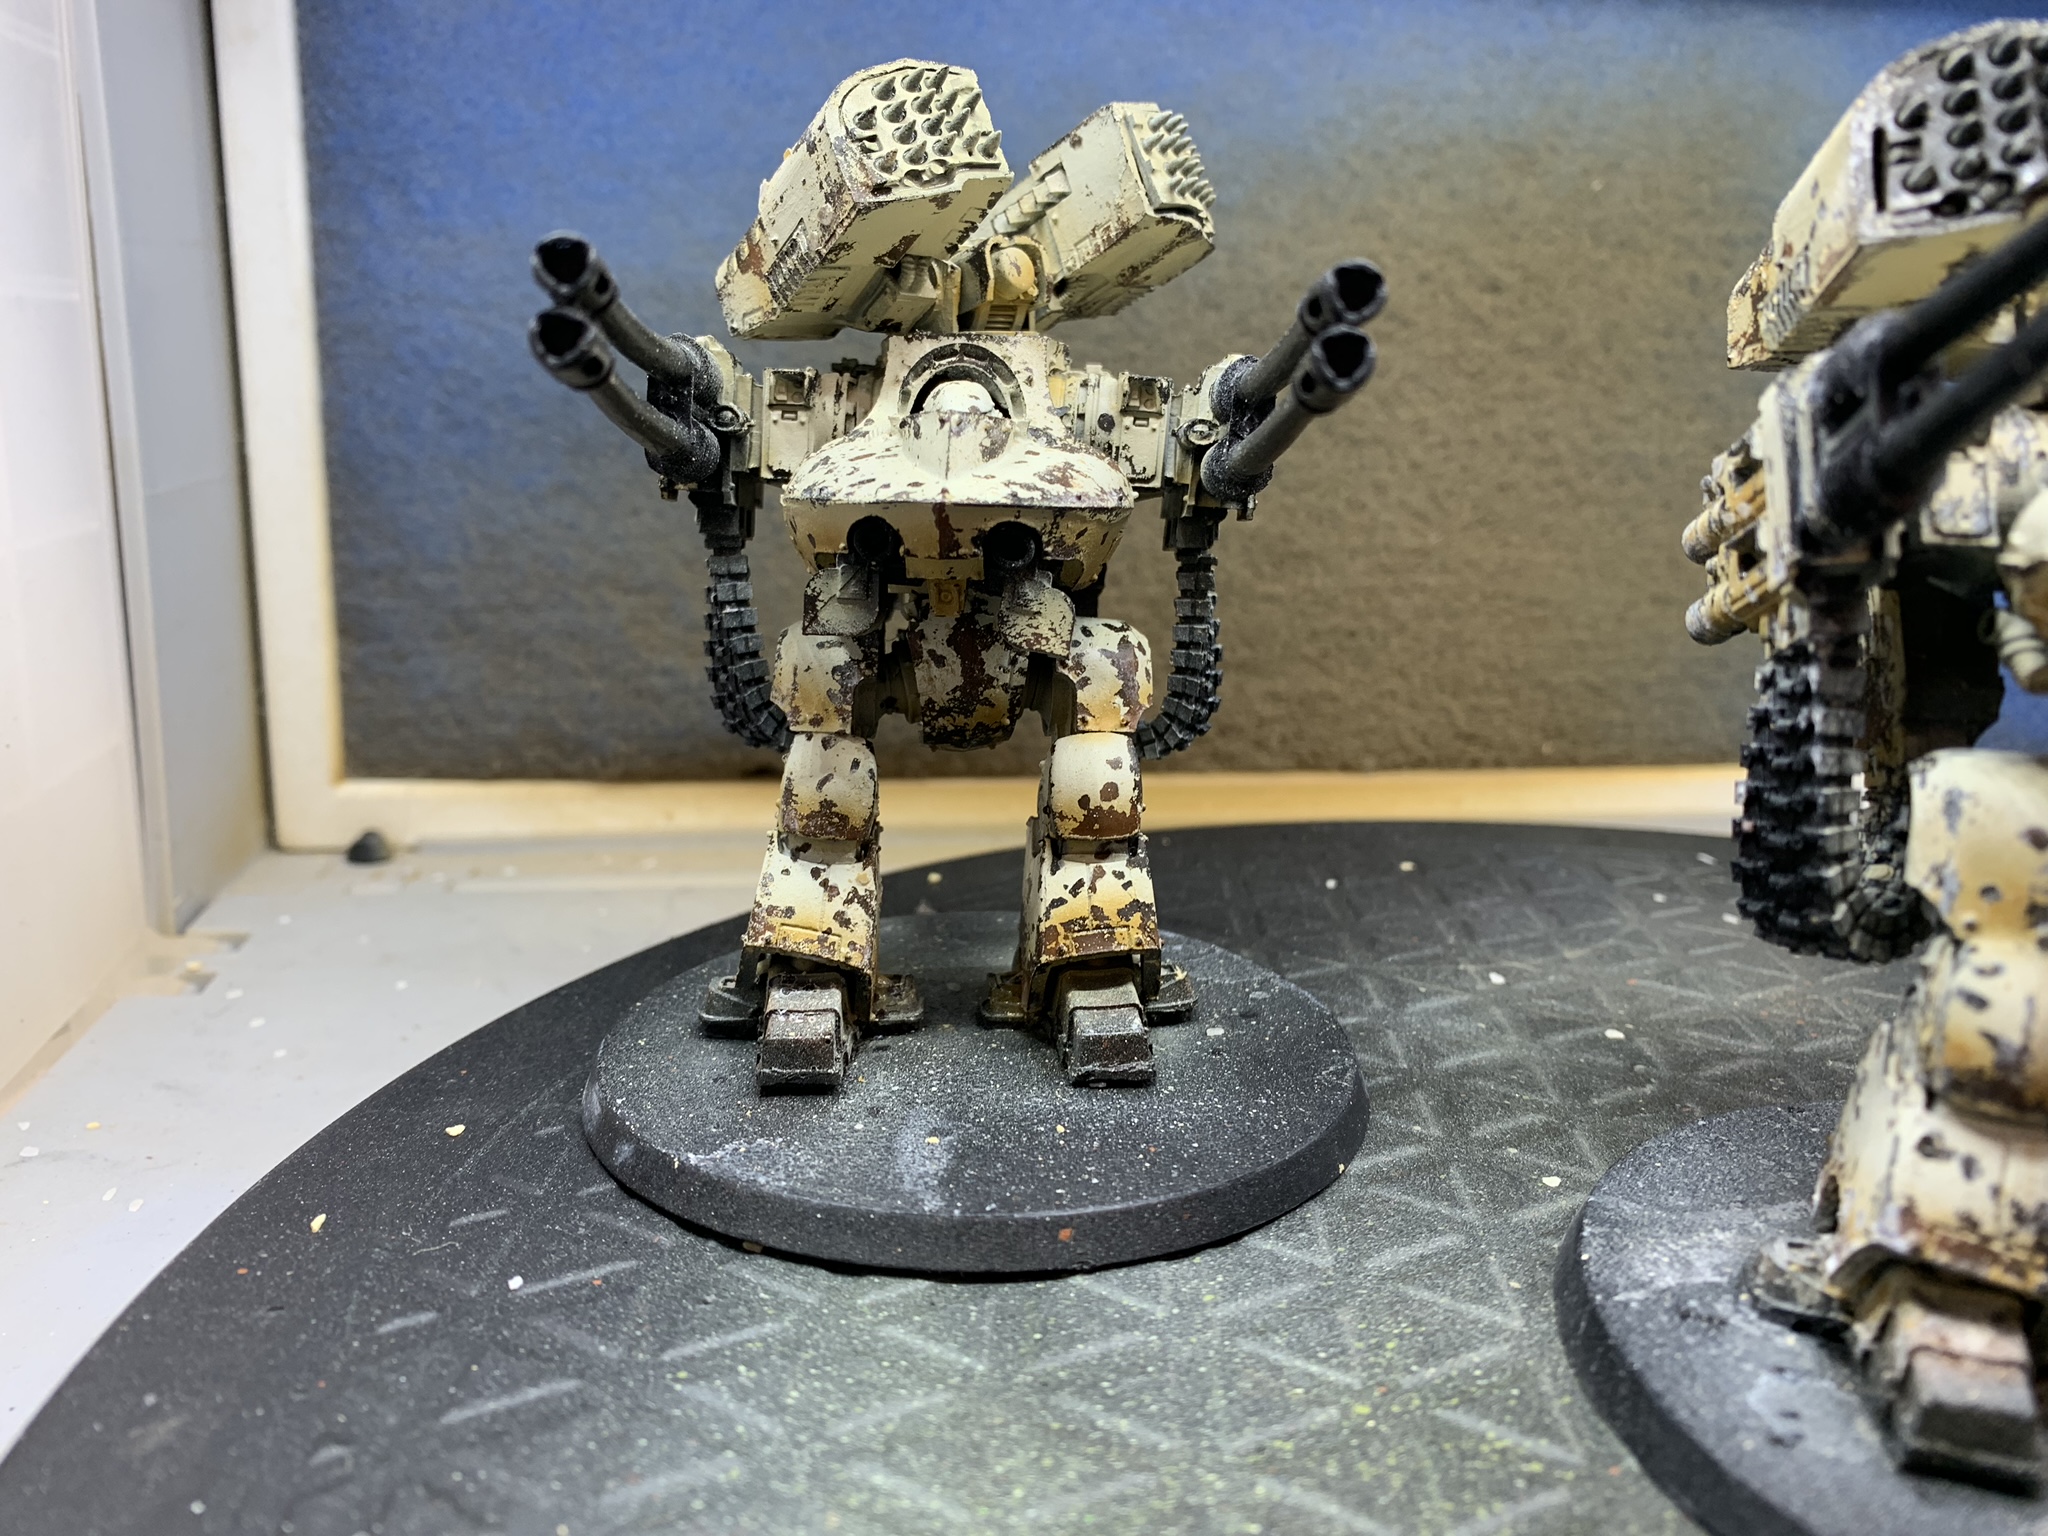
At this point, I was happy with the way things were going, but still had a ways to go. They were worn, but not yet dirty. This is where an oil wash came in very handy. But that’s a topic for another post!
While this chipping effect works great for Death Guard, it could also work well for any vehicle or model that you wanted to look worn. I’ve been trying to talk my buddy that plays Guard into trying out a tank in this style because I think it would look awesome. If you have an airbrush and are interested, this is an awesome technique to try. It’s all technique and no skill. Don’t be afraid to give it a shot!
What’s your favorite technique for weathering and damage?
And remember, Frontline Gaming sells gaming products at a discount, every day in their webcart!


