


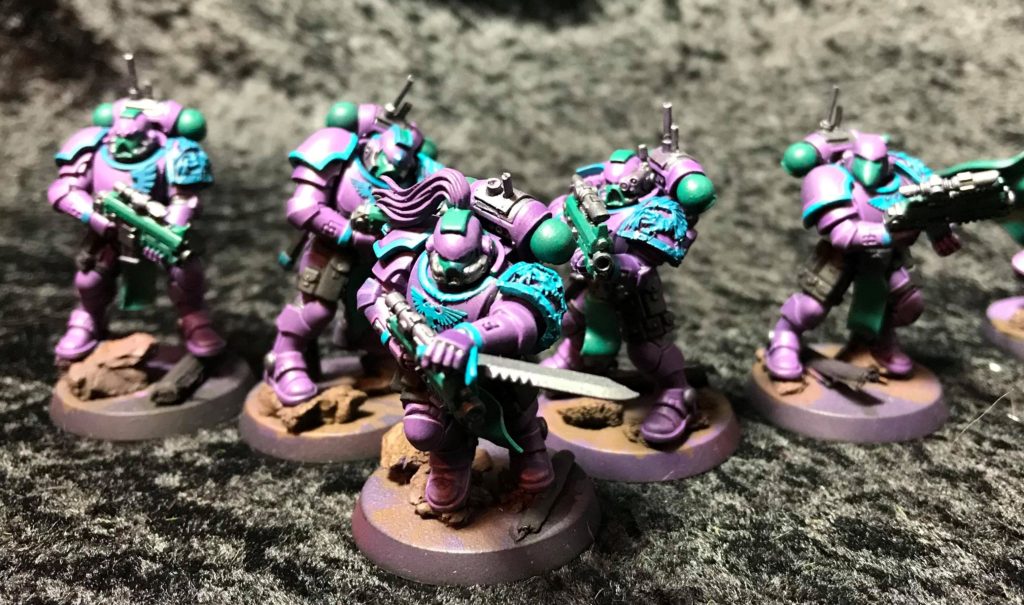
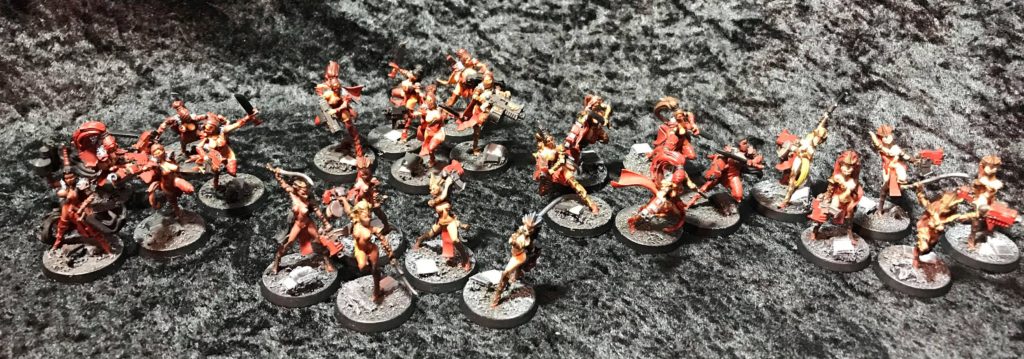
Thomas is back with the game 4 report from his impressive 5-0 performance at the Boise Cup GT with pure Blood Angels.

Thomas Hegstrom Oakley – Boise Cup
- Detachment Battalion 5CP (Blood Angels) [34pl, 547pts]
- Chapter tactics: Blood Angels
+HQ+
Sanginor [150pts, 9pl] x1
Chaplain with jump pack [99pts, 6pl] x1 powerfist
Librarian with jump pack [127pts, 7pl] x1 force sword, inferno pistol
+Troops+
Scouts [57pts, 4pl] x5 stormbolter on sergeant, combat knives, bolt pistols
Scouts [57pts, 4pl] x5 stormbolter on sergeant, combat knives, bolt pistols
Scouts [57pts, 4pl] x5 stormbolter on sergeant, combat knives, bolt pistols
- Detachment Battalion 5CP (Blood Angels) [24pl, 434pts]
- Chapter tactics:Blood Angels
+HQ+
Sanginuary Priest with jump pack index [86pts, 5pl] x1 chainsword, chainsword
Captain with jump pack [124pts, 6pl] x1 thunderhammer, stormshield
+Troops+
Scouts [57pts, 4pl] x5 stormbolter on sergeant, combat knives, bolt pistols
Scouts [57pts, 4pl] x5 stormbolter on sergeant, combat knives, bolt pistols
Infiltrators [110pts, 5pl] x5 bolt carbines
- Detachment Vanguard 1CP (Blood Angels) [56pl, 918pts]
- Chapter tactics:Blood Angels
+HQ+
Librarian in Phobos armour [111pts, 6pl] x1 force sword, camo cloak
+Elites+
Sanguinary Ancient [83pts, 6pl] x1 encarmine sword, inferno pistol, standard of sacrifice
Death Company [380pts, 27pl] x15 5 thunderhammers, 10 chainsword, 10 bolters
Sanguinary Guard [344pts, 20pl] x10 8 encarmine swords, 2 powerfists, 10 angelus boltguns
- Operative Requisition Sanctioned -2 CP [5 pl, 85 pts]
- TOTALS: 12 CP, 16 drops [119pl, 1984pts]
Game 4 (ITC Champions mission 4):
My opponent turned out to be another player from Utah, Nick. Nick and I have played before and it’s always a great game. Being that this was the first game of day 2, I had had all night to study and honestly fret over Nick’s list and what I’d do against it. I will say that I was more confident coming off my surprise victory against Justin and his rapier style Orks than I was going into the game with Justin. In studying Nick’s army I formulated some plans. I knew that his main killers were his two giant units of Khorne Bloodletters. While he also had a cadre of characters that could add to the hurt, they would be somewhat stymied by a Vindicare, terrain depending of course. Nick also had two large blobs of Plaguebearers with the correct characters to support them and buff them up. So I knew he’d be able to castle up in the middle of the board taking secondaries like recon and maybe ground control while controlling any central objectives with hard to destroy units. I had to chew up his Bloodletters before I ended up mired in with the Plaguebearers. Or at least force them onto the table where I could maneuver around them.
For secondaries I chose, Reaper, Headhunter, and Engineers. He took Headhunter, Recon, and Engineers.
Deployment
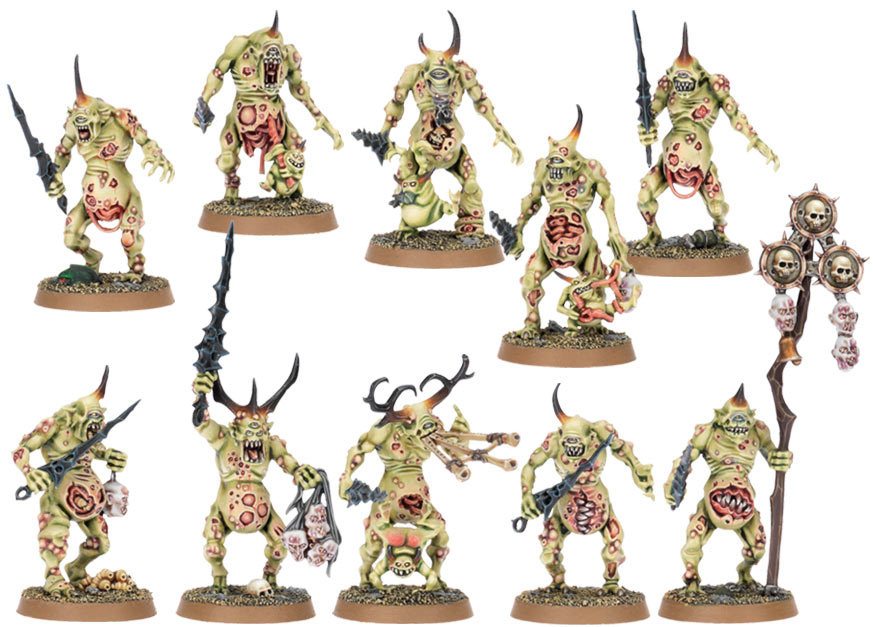
We rolled for deployment and Nick won the roll. He rolled vanguard strike and chose the deployment zone with the only fully enclose ruin on the table. This wasn’t a huge issue for either of us, because neither army had much in the way of shooting. Mission 4 calls for five objectives. One placed in the center and then starting with the player who did not choose their deployment zone, each player places one objective anywhere on the table, then each player places one objective in their opponent’s deployment zone. We each placed our ‘anywhere’ objective as far from each other as possible in the corner of our own deployment zones. I placed the required objective in his deployment zone about 30” in from the left table edge, about where the edge of the vanguard strike deployment allows the objective to be more than 6” from the back edge of table. He placed the one he was required to set in my deployment zone just over 12” from the center. Being that it was an even numbered mission I was opted to have Nick deploy first, which gave him the first turn. I knew that his army was slow moving enough that I didn’t have to worry about any alpha strikes and his Bloodletter bombs couldn’t come in until turn 2. I also needed them to come down first, so I could counter-strike with my own deep-strikers if I so desired. He deployed Most of his army centrally, hiding many of the characters in his ruin, along with two of the three cultist units. He paid for a Bloodletter banner upgrade for each of the two units (gives them a one time 3D6″ charge) and placed one in deep-strike reserve. Finally he placed his one unit of Nurglings in a ruin enclosed on three sides in the neutral zone on my left. I assume he meant these to help keep me from deep-striking near the objective I’d placed in his deployment zone.

I deployed most of my army on my left flank, in and around a crater in-between the ‘L’ shape dominating the back of my deployment zone, and the three sided ruins in which his nurglings were deployed. I was fairly certain that he wouldn’t get a kill on the first turn and I knew I could pick up those nurglings for free. I placed both units of Engineers in the back of my deployment zone behind the large ‘L’ shape , near my objective and spaced to screen. I also placed two other units of scouts behind the same ‘L’ shape so I could move out and screen during my first turn. On the right I placed my smash Captain at the extreme end of my deployment zone and screened him with one unit of Scouts. Finally I placed my Vindicare at the top of the ‘L’ shape with as good lines of sight as I could give her. With the central ‘L’ shape on the board, Nick would unfortunately be able to get his characters to within half a dozen inches of the central objective and stay out of my line of sight, but I’d rather have line of sight blocking terrain than not.
Nick’s turn 1:
He advanced both units of Plaguebearers up the board of course. With his Scriviner and instruments in the units his Plaguebearers could move 7” and get +1 on their advance roll. For a unit that is as tough as they can become, they could still move quite a bit. He used them to screen his single Bloodletter unit on the table, hold the center objective, get into my table quarter for Recon, and stretch back to my bonus objective near his board edge. He advanced his characters up to hide behind the central ruin from my Vindicare. On the right he advanced one of his Foul Blightspawn (nasty flamer guy) to try and give my Captain and Scouts something to fear on that side, while making sure to stay out of charge range of my Captain. During his psychic phase he gave his closest Plaguebearer unit an addition -1 to hit. He scored hold, and a Recon.

My turn 1:
I moved my characters, Infiltrators, and Death Company up the left flank planning out my assault on his poor Nurglings inhabiting the three sided ruin on the left. Specifically I set my librarians where they could begin casting on his nearest Plaguebearer squad, but out of range of his denial characters. I pushed out my Scout screens near my ‘L’ shape, so that if he came in with the Bloodletter bomb they’d only eat the aforementioned Scouts. On the right I advanced up toward his third unit of cultists he’d set out to screen, taking care to keep both units hidden behind a handy ‘L’ shape in that corner. The last thing I wanted to do was feed them to his Foul Blightspawn. During psychic I gave +1 attack to the Death Company, Smited Nick’s closest Plaguebearers only killing one after his Disgusting Resilience, used Tenebrous Curse on them successfully, and finally Smited again for no effect again after his feel no pains. During shooting I believe I killed a single Plaguebearer and took some wounds off a Nurgling base. In assault some of my characters (including the Librarians), Death Company, and Infiltrators charged the Nurglings. Now obviously I wasn’t worried about destroying them, but I wanted to use the extra movement to re-screen against the Bloodletter bomb and hide the Librarians who’d exposed themselves to cast from any retribution. This is why I love the new Infiltrators so much. With their ability to keep any deep-strikers more than 12” away I could screen behind me to the edge of the board and know that his Bloodletters couldn’t come in on anything I needed to keep alive. I in fact wanted him to come in on my screening Scouts and allow me to destroy them in return. I easily picked up the Nurglings scoring a kill. I got Kill, Kill More, and Hold. To his Hold, and Hold more. 3-2 me at the end of round 1.

Nick’s turn 2:
I had obviously done my best to limit his options. He closest Plaguebearer unit was moving at half speed and couldn’t possibly get close enough to complete a charge. He could bring in his Bloodletters, but they would just hit some Scouts and die in return. He chose to move conservatively. Stretching his Plaguebearers out a bit more, inching his characters forward while keeping them out of line of sight from the Vindicare still. He advanced his second Plaguebearer unit forward and captured the objective he’d placed in my deployment zone 12” from the center. On the right he baited up his Foul Blightspawn, throwing it in a crater there to make my Captain’s possible charge long. Finally he chose to keep the Bloodletter bomb in reserve. Again he cast the additional -1 to hit on his nearest Plaguebearer unit for psychic phase. With no valid shooting targets or charge targets he called his turn. But he did bonus for holding both objectives he’d placed, get another Recon, and his first Engineers point.

My turn 2:
I re-centered my Death Company, Sanguinary Guard, and characters along my left flank screening back to my board edge and in front of them with the Infiltrators, and Scout units. On the right my Captain and Scouts moved up for a charge on his screening Cultists. My two Librarians set up for powers against the closer Plaguebearer unit again. For psychic phase I pealed a few more Plaguebearers off the unit and cursed them again for half movment. Shooting I knocked another Plaguebearer or two off, my goal being to eventually knock him below 20 so his natural –1 to hit would go away. Also during shooting I was able to draw line of sight to the Foul Blightspawn he’d baited out with my Vindicare. She shot and peeled three of his four wounds. For charges I sent my Captain into the Cultists on the right, losing a single wound in overwatch. I had placed him in such a way that hopefully after he and the Scouts knocked out the Cultists he could consolidate into the Foul Blightspawn and keep it from shooting its awful flamer. Honestly I was trying to be too fancy. While the Captain made the charge the Scouts flubbed a 5” charge even with a re-roll. I used a CP to give the Captain an extra D3 attacks in an attempt to kill enough that Nick would almost certainly fail his morale. I did roll well and killed six of the Cultists, but not only did he pull models so that I couldn’t move into the Foul Blightspawn, but he also paid 2 CP to keep the 4 Cultists remaining around. What seemed like a good looking turn turned into a disaster! The round ended 1-3 in his favor. I did earn a single Engineer point.

Nick’s turn 3:
At this point I was a little worried because I had forgotten the potential for him to earn extra points by securing the bonus each turn and I’d failed to get a kill, and tie up his Foul Blightspawn. Had that stuff worked out I could have dropped my Sanguinary Guard in on the right and started cleaning up the Cultists and his two casters over there. Anyway he was also in a bit of a bind as well because he had to drop his Bloodletter bomb in this turn no matter what. He hemmed and hawed over whether to bring his Plaguebearers in closer, but finally decided on staying within 3” of the objective he placed in my deployment zone, but keeping them out of close combat with my screening Scouts. On the right he moved up his jump pack Sorcerer and fell back from my Captain with his Cultists. Lastly he dropped the Bloodletters down more than 9” from the two screening Scouts near the objective he’d placed in my deployment zone, opting to go for it and hope his saves would keep him around. During the Psychic phase he again made the closer Plaguebearers an additional -1 to hit, but he was also able to cast Death Hex on my Captain negating his invulnerable save entirely. He tried to use a targeted power that would cause mortal wounds but failed. In shooting his only target was my Captain with his Foul Blightspawn, which he easily picked up with its AP -3, damage 3 flamer. In charges he crossed the distance to both of his target units of Scouts (using his once a game 3D6 banner) and annihilated them with the nasty AP -3 swords the Bloodletters carry. He scored another Recon, and a second Engineers, as well as bonusing again.

My turn 3:
Well the main thrust of the plan had survived. His Bloodletters had come down and expended themselves on disposable units of mine. My Death Company, characters, and Sanguinary Guard were positioned to knock them out and start rolling up the field. I moved to accomplish this, the only mistake I made was in making sure I moved my Engineer Scouts off my back objective to ‘help make sure’! On the right I moved my Scouts up to deal with the remaining Cultists. I still wanted to clear them away so I could redeploy the Sanguinary Guard or Death Company and knock out his backfield. During the Psychic phase I made sure to slow his closest unit again, while also trying to trim it down a bit more, I also gave the Death Company +1 attack again. They were going to be my main thrust into the Bloodletters. My shooting went about as well as it could, and between the Death Company, Scouts, Sanguinary Guard, and grenades from characters, I pulled perhaps half the Bloodletters off the table. I then charged in with the two remaining Scout squads (both my Engineer units), the Death Company and some of the characters. I was also able to finish off the Foul Blightspawn that Nick had failed to move out of the line of sight of my Vindicare. On the right I lost a Scout to overwatch and fortunately made my 5” charge into the remaining Cultists. I easily picked them up with the standard Blood Angel Scout close combat profile. Hitting on ‘3’s and wounding on ‘2’s with two attacks per model and three on the sergeant is pretty good. I consolidated closer to him, again trying to keep his models back so that when I redeployed they could make some charges. On the left the Death Company easily dealt with the remaining Bloodletters and I used the pile-ins and consolidates of the other chargers to set up for either another offense the following turn or his counter punch with Plaguebearers. Unfortunately round 3 ended with kill even so it was a 2-4 score to him.

Round 4:
Nick was smart in sticking to his plan and trying to just go slow and steady. He was trusting in his Plaguebearers being able to soak my onslaught for the bottom half of the game and ride out the advantage in points he’d accrued so far. He moved up the Plaguebearers close enough to take his bonus objective again, and situated his second Bloodletters unit so that he could possibly use them to counter charge once I came in on the Plaguebearers. On the right his Sorcerer moved up toward my Scouts and another unit of Cultists came out of his fully enclosed ruin to help protect the Sorcerer and possibly shoot or even charge my Scouts. This turned out to not be needed as his Sorcerer easily aced my four remaining Scouts in the Psychic phase. On the left he again buffed his closer unit of Plaguebearers to a -2 to hit. Even though I had succeeded at getting the Tenebrous Curse off he was able to charge a bit of his stretched out Plaguebearer unit into my Infiltrators, whom had stayed near the three sided ruin in the left flank corner. He didn’t do much of anything and I pulled maybe one or two Plaguebearers for it, but it did mean I couldn’t advance or fall back and shoot with them, and I wouldn’t be able to shoot the Plaguebearers if I didn’t fall back. Otherwise he decided to sit, having gained another bonus point, his final Recon, and third Engineers.

My turn 4:
I rectified my mistake with my Engineers, moving one unit of them back to the objective, but knowing I’d miss two turns and couldn’t get max Engineer points now. I redeployed my Sanguinary Guard to the right now, placing them 9” from the Cultists, and the Sorcerer hidden a bit behind them. On the left my Death Company spearheaded the general movement of everything else I had left toward his Plaguebearer units. I knew it was now or never. I wasn’t sure how long it would take for my Death Company to take out the Plaguebearers, and I still had his second unit of Bloodletters, and characters to deal with. I needed to keep him from getting hold more anymore, and especially needed to keep him from bonusing. I decided to fall back with the Infiltrators after all, moving them up and around in an attempt to get closer to my bonus objective, which I had placed at the edge of his deployment zone, and he’d been holding the whole game with stretched out Plaguebearers. For the Psychic phase I gave my Death Company the +1 attack again, hit his Bloodletters with the Tenebrous Curse for a change, and Smited into the closer Plaguebearers again. In shooting I decided to throw everything I could at the Bloodletters, not wanting to give Nick the opportunity to pull the closest Plaguebearer models to my chargers. He spent 2 CP to give the Bloodletters a +1 invulnerable save and rolled well, though I killed enough to pull them below 20 models (the +1 to hit threshold), but it could have been a lot worse for him.

The Plaguebearer unit I’d been attacking all game were at 22 models I believe, when I charged in. I decided to try and go big and went after both units, most of my characters on the original, and most of the Death Company on the undamaged, but only -1 to hit unit. On the right I tried and failed to charge the Cultists, and Sorcerer even having spent 2 CP for the 3D6 charge, and another CP re-rolling a die. To add insult to the injury his overwatch wounded a Sanguinary Guard model (womp-womp). Back on the left the Death Company carefully piled in and swung. I did enough damage on the original unit to bring it below 20 even with the –2 to hit, and then swung the meat of my unit into the unscathed unit. He opted to again spend 2 CP and give these Plaguebearers a +1 invulnerable. This was a great move because it meant I killed maybe half what I would have. Still the Death Company being what they are in my army it was a lot of wounds to deal with. From both units he pulled mostly the closest models as casualties, depriving some of my characters the opportunity to swing at all. I consolidated the Death Company in as close as possible. If I recall correctly only the Sanguinor and Chaplain were able to swing into the original Plaguebearer unit, and they both pulled more Plaguebearers. Nick swung back, killing a lone Death Company I believe. At the end of the assault phase I took stock. I had severely wounded the original unit and done some damage to the newer one (though they were still above 20 models barely) I had Tenebrous Curse up on the Bloodletters, so it was possible they’d fail a charge against me, but not likely, and I hadn’t cleared enough of his models to keep him from continuing to hold more. So I opted to spend 3 CP to have the Death Company swing again. With another pile-in I got a few into the original unit and again most on the now 4+ invulnerable Plaguebearer unit. I pulled all but four of the original unit and a staggering amount from the other unit as well, killing all but three of the other unit as well. It meant the Bloodletters couldn’t fail their charge and my Death Company were must likely dead, but he’d be throwing away his Bloodletters in the exchange and I was confident my characters could win out over his characters. Most importantly when I consolidated (staying an inch away from the Bloodletters) I kept one of his three remaining Plaguebearers in combat with me. He opted to save the newer unit with a 2 CP expenditure and rolled for the original unit, hoping for the ‘one’ that would give him D6 models back, it didn’t even with a CP re-roll. At the end of the round this netted him hold more, so we had a 3-4 round in his favor.

Round 5:
Nick was getting critically low on time on his chess clock at this point. His army had so many models to move around, careful auras that needed to be negotiated and multiple layers of saves, that he had nearly ran out of time. He moved up the Bloodletters that weren’t already an inch away from my Death Company. He also flew his Demon Prince up planning on adding him to the fight. The rest of his characters in the middle retreated even the two remaining Foul Blightspawn because when he removed his casualties he was unable to fall back a keep coherence with his three remaining Plaguebearers. This meant that even though I had not surrounded them, they had to stay in combat with my Death Company being unable to move. Which in turn protected the Death Company from any potential shooting and gave me a solid screen that his Bloodletters couldn’t charge through to get to my characters behind. On the right he moved his Cultists to surround his Sorcerer so that I couldn’t charge the Sorcerer without first killing Cultists. He also moved up his warlord Tzeentch caster, who had been hanging in the back casting the re-roll one die per turn psychic power. This time that caster and the Sorcerer laid into my Sanguinary guard pulling off 4 of them! In shooting his Cultists performed above and beyond wounding the Sanguinary guard six times! And then I failed another three saves (on ‘1’s) taking my unit that had started with 10 models to 4 (Sanguinary Guard being two wounds each). Alas! All because of a failed charge. Back on the left he charged in with his Demon Prince and Bloodletters. Here was a spot where he made a possibly critical mistake. He could have declared on some of my characters behind the Death Company with the Demon Prince. I had no over-watch and the Sanguinor was about 9” away. It would have cost him nothing, and if he’d rolled low, oh well he got the Death Company instead. He unfortunately didn’t declare it, and rolled an ‘11’. He almost immediately verbally lamented his mistake, and truthfully it may have been the game winning error for me. Between them, the Bloodletters and Demon Prince easily aced my heroic Death Company. He scored his final Engineers.


My turn 5:
I moved my Infilitrators up to hold my bonus objective in his deployment zone, all my other characters, and one of my units of Engineer Scouts moved up the middle intent on finishing the Bloodletters, three remaining Plaguebearers, Demon Prince and a lone Foul Blightspawn hiding behind the central ruin. On the right, my four remaining Sanguinary Guard moved up, hopping over his Sorcerer and Cultists so that I had the option to charge them or his warlord come charge phase. In the Psychic phase I gave +1 attack to the Sanguinor, and Smited the Bloodletters as much as possible. I targeted the Bloodletters in shooting, taking as many out as possible, and even managed to throw a wound on the Demon Prince. The Infiltrators shot at the Plaguebearers and Nick opted to lose the one holding the back objective, since I was there anyway holding it with more models. On the right my Sanguinary Guard shot out four or five of the Cultists, breaking the circle around the Sorcerer. In the Assault phase I charged the Sanguinor into the Demon Prince and my other characters and Scouts (stretching from still holding his bonus objective 12” from the center) charged everything else. On the right the Sanguinary Guard charged all three units, finally breaking the trend of losing wounds to over-watch on the right flank and rolled well, meaning they could hop back over the Cultist screen and attack the Sorcerer directly. In the fight phase three of them easily killed the Sorcerer and the remaining Guard pulled a couple Cultists. Nick didn’t have any CP left at this point, having spent his last one on the previous turn in the forlorn chance of getting D6 Plaguebearers back instead of losing them, so he couldn’t interrupt. With my characters and Scouts I finished off the Plaguebearers, Bloodletters, and slew the Foul Blightspawn.

At this point I finished my fight phase with the Sanguinor trying to end the Demon Prince. I was fairly confident. I was in my auras with seven attacks! That’s hitting on ‘2’s re-rolling, wounding on ‘2’s re-rolling! I wounded him seven times and he saved two of them. The Demon Prince only had a total of seven wounds left! I was doing D3 damage per wound. Any average roll would kill him…and I rolled six total damage! I was flabbergasted. I immediately re-rolled using my last CP and rolled one damage again. The Sanguinor had failed to kill the Demon Prince! The odds!!! Anyway at this point Nick had to make an incredibly fast decision. He was down to 30 seconds on his clock because of all the saves I’d been making him take. He could skip the Demon Prince and have a bit of time on his turn 6 or go for it and swing back at the Sanguinor. He went all in and swung at the Sanguinor! He was buffed to 6-7 attacks of his own, hitting on ‘2’s re-rolling ‘1’s and wounding me on ‘2’s as well. To boot his relic axe gave him AP 4, D6 damage. To add injury to insult in this case he wounded me five times and I failed four of the 4++ invulnerable saves the Sanguinor has. Haha!! Anyhow Nick’s Prince easily plastered the Sanguinor through the 5+ feel no pains from the nearby Standard of Sacrifice, doing something like 18 damage before I rolled. Unfortunately this was all his time. So I was able to have a turn 6 and he wasn’t. Even with the loss of the Sanguinor I was holding more, killed more, and bonused for the first time. I also received my second Engineer point finally. Round 5 ended 5-2 in my favor.


My Turn 6:
On my turn 6 I was able to pick up the remaining Cultists on the right, kill the Demon Prince to max my headhunter, bonus, hold more, kill more, and get my third Engineer point. Round 6 ended 5-1 me. The total score was incredibly close though. I won 27-25.
In the end my plan worked, but it came very close to unraveling. Everything that could go wrong on the right side of the table did, and my Vindicare was only able to kill a single enemy character. She was useful because she’d limited what he could do with characters, but with only a couple of changes, or faster movement phases, Nick would have taken the game. I think if I had it to do again I’d have waited another turn on the right with the Captain and Scouts I deployed over there, and never actually redeploy the Sanguinary Guard at all, there had been a real chance I would have needed them in the center and not had them.
Read the final game report, here!
And remember, Frontline Gaming sells gaming products at a discount, every day in their webcart!


