


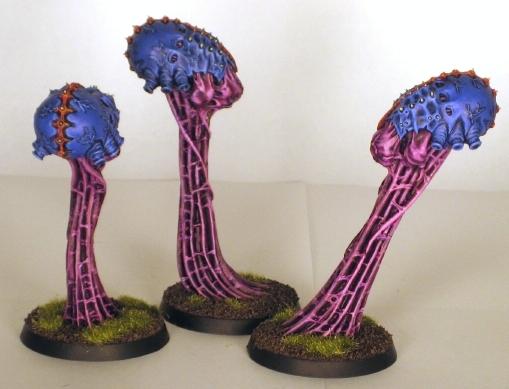
Hey everyone, Danny from TFG Radio here, and today, we talk about the other flavor of sweet, sweet, bomb-balloons, the mighty Meiotic Spores! If you want to know why advance deploy is such a clutch ability, you should also read up at Frontline’s ever-expanding Tactics Corner!
Equipment and Biomorphs:
None. They don’t need any special talons or toys.
Special Rules:
Instinctive Behavior: If this model is not within 24″ of a friendly HIVE FLEET Synapse creature, it suffers -1 to Hit in any shooting attacks that do not target the closest enemy units, and it suffers -2 to charge rolls that do not target the closest enemy unit.
Floating Death: Meiotic Spores explode when it is within 3″ of any enemy unit at the end of any Charge Phase. Each time a Meiotic Spore explodes, roll a D6. On a 1, nothing, on a 2-5, it inflicts D3 mortal wounds to the nearest enemy unit, and on a 6, it inflicts D6 mortal wounds. The Spore is then destroyed.
Living Bombs: Spores automatically pass all morale tests. They are also ignored for the purposes of any victory conditions (no victory points, do not count as being destroyed, cannot hold objectives, do not count as models on the table).
Outriders of the Swarm: (This has been FAQ’d, so this does not match the Forgeworld Index entry), When you set up this unit during deployment, it can be set up anywhere on the table more than 9″ from an enemy unit or the enemy deployment zone.
The Meotic Spore is one of those units that if they work, oh sweet baby hive fleets, they work wonders. While they are not impressive in terms of stats as just about anything will pick them apart, they are all about getting the first punch in the game. Each one is a potential D6 mortal wounds although it is best to just use averages and assume each one is just shy of 1.5 mortal wounds, so a full unit of 9 on average does: 14.22 mortal wounds. That’s just about half a Knight gone or a big chunk out of a screen. That’s the secret sauce here is that Meiotic Spores get to be such a large unit size with the D3 explosion that they can spike and do an insane number of mortal wounds, enough to either really cripple a Knight or obliterate a screen for your Genestealers to later exploit. While it may not seem all that sweet to kill 14 or so models out of a swarm, it can be enough to ensure that your assault elements or shooty elements can take care of it. You only get one shot though, so you need to pick that shot carefully. That is the thing about Meoitic spores: they are not plug and play. You need to think about how to use them because oh boy, are they tricksy little bomb balloons of xenos flesh.
Thanks to Chapter Approved and later FAQs, Meiotic Spores deploy in the deployment phase, but they get that special anywhere they want more than 9 from an opponent’s models or their deployment zone, so you get to land pretty close to enemy lines. This is the first step in the slightly convoluted plans that you can do. Depending on terrain, you can hide them behind a building or somewhere out of sight to keep them safe. If you know you are going first in certain deployments, you can be braver if you wish. Once deployed, remember the numerous movement tricks that Tyranids have. You can go with Metabolic Override in the Movement phase for another move, which with advancing gives you 6+D6 inches of movement, which can be enough to get right into your opponent’s deployment zone. You may lose a spore in the process, but as they are 2 wounds each, you’d have to roll 4 1s out of max 9 dice to lose more than one, and those are safe odds. Don’t forget that you can then also Swarmlord them forward again for another 3+D6 inches of movement. They cannot charge if you Metabolic Override them, but then if they get within 3 of their target, who cares? Plus, you don’t want things to Overwatch them if you can help it. You really want to avoid charging anything that can actually put out a decent number of shots as again, these balloons are squishy as hell. Still, if you are sure that you are going first or are just going with the big gamble, putting them down 9 inches away from the enemy means that with just Metabolic Override, they are likely going to be within range to explode anything that you opponent deploys on the line.
Of course, you can also use them defensively. If you have to go second, they are essentially an aura of “don’t come here”. Your opponent is either going to have to stay away from them, dictating their movement, or they have to spend precious shooting to get rid of them. As they deploy so far forward, they are going to eat smites for you too, which isn’t bad at all, especially if those smites were meant for harder targets. They are a bit too expensive to deploy them back and try to section off a piece of the board with them, but if you are going against a Reserve heavy army or Flyer heavy, that can be useful as well. Remember, they do fly, so if need be, they can charge Flyers and get that extra movement. Another thing to remember is that you want to deploy these balloons first if you get the chance to drop down first and your opponent has units that can do the same, so you can claim the center of the board and force your opponent to drop their advance scouts on the flanks. Hell, if nothing else, if you are running an infantry horde where you may struggle to get a kill on the first turn, Meiotic spores can help you there as just sending them against a small chaff unit can be worth it in some cases.
Hive Fleet is money here, and there really is one superior hive fleet: Kraken. Rolling 3d6 and taking the best for advance rolls really ensures that these spores get to where they want to go. If you roll a 5 or 6, with Metabolic Overdrive, you don’t even need to Swarmlord them forward most of the time. The only other Hive Fleet that may matter is good old Kronos. As the Spores deploy forward, they are going to catch pesky enemy psykers in the Deepest Shadow range, which means that against Psychic Heavy armies that rely on that one power like Warp Time, you can shut it down pretty definitively. This is a great way to screw up armies like Chaos that rely on psychic shenanigans.
What are the downsides here? Well, they are not durable. At only T2 with 2 wounds, any shots are going to hurt them. This means that they are very, very reliant on going first or having a board with good terrain to hide them. They are very much an alpha strike weapon, but if that gets denied, you just dropped a good deal of points for nothing. Granted, they don’t give up any mission objectives, but still, it sucks to waste points on something that does nothing unless they are absorbing some really high value firepower. That really is there only downside is that they require you to be very canny with how you place, where you place them, and knowing what is worth killing. As you only get 1 shot with them, if you waste it on a unit that doesn’t matter much, you are really getting little out of your investment, especially if you Swarmlord’d them over there. You have to really study the table and study your opponent’s possible deployment to get them out there, especially if they also have Scouts who can take up valuable real estate in the center of the board.
85/100. This is a solid unit that can do a ton of work for you, if you are smart with them. They are definitely a finesse weapon, but don’t let that scare you. Thanks as always for reading, and well, LVO is sold out of all things, but hopefully I’ll see some of you there repping the Hive Fleets. Oh, and if you need a ticket to LVO and maybe a High Roller package, you should come win The Hammer of Wrath GT in August. Just saying.
And remember, Frontline Gaming sells gaming products at a discount, every day in their webcart!


