Hey guys Cavalier, commission painter for Frontline Gaming and co-host of Splintermind the Dark Eldar Podcast, back with another painting tutorial, this time on tinting the glass on your Eldar canopies!
You dont need to be the best painter in the world to make your models look really good. Many times its just about those finishing touches. When it comes to Eldar vehicles, tinting your windows is one of my favorite finishing touches just to put the model over the top.
I’ve been asked countless times how I did this, asking me “Did you use the floor varnish method?” “The Airbrush method?” etc. etc. People are usually shocked when I tell them how easy it is. So I figured I write this tutorial and from now on I can just send a link to them for easy reference.
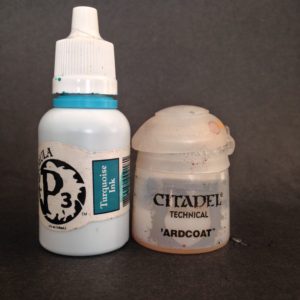
So what do you need to tint your Eldar canopies? Two paints and a brush is all you need. Here they are
All you need is CW ‘Ard Coat which is a gloss paint on varnish and any color of ink. Make sure you use Ink and not “wash” as the wash will be dull and cloudy, while ink will look glossy and reflective like real glass. Like I mentioned this works with any color Ink. If you want to make it go just a little quicker (and this is a super quick process as-is) you can spray your canopy with Testors Gloss Coat just to get a little grip for the paint to hold on to, but it is not necessary at all, nor did I use it in on the canopy in this tutorial .
Step 1
Just clip your canopy off the sprue and clean off any flash. Make sure this baby is gonna lay down smooth and do a couple of dry fits as its easy to scrap the paint off with your finger nail once you get going.
Step 2
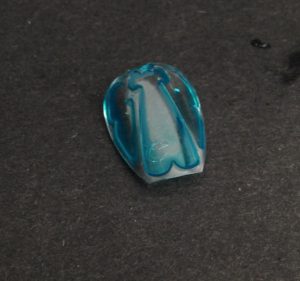
Mix your Ink and Ard Coat at a 2-1, 3-1 ration of ink to varnish. This is NOT an exact science and extremely forgiving. Just get a medium sized brush mix it and paint it straight on. Try to really work it into the recesses. You can just dab away any excess with your brush. Dont worry about getting a super deep color on the first go, it takes 2 layers to get a finished product.
Step 3
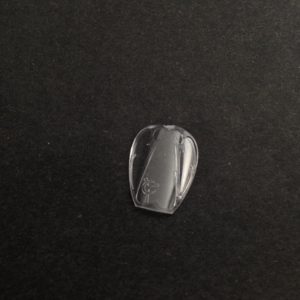
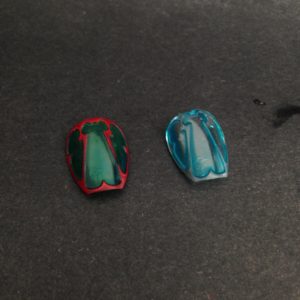
Let it dry and repeat the process and make sure there isnt any areas on the recesses near the frame of the canopy. Its those recessed areas where the ink will pool and really give you a rich tint on the canopy. In the above you can see there is quite a difference between one of my finished canopies and the unfinished.
Step 4
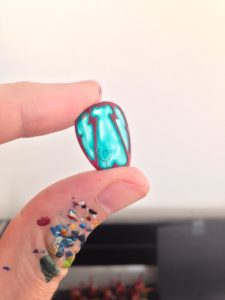
Now check to make sure that you’ve got some coverage on the raised areas of the canopy. After doing the first coat of ink + varnish you should have enough varnish on the thing for the paint to “grip” those raised areas. When you hold up to the light it’ll look like crap but dont worry it’ll look ace when you put it on the model. Then carefully paint the frame of the canopy with a small layer brush. If you mess up dont, worry its super easy to scrap the paint off with your fingernail and re-apply the varnish/ink mix.
Step 5
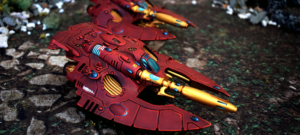
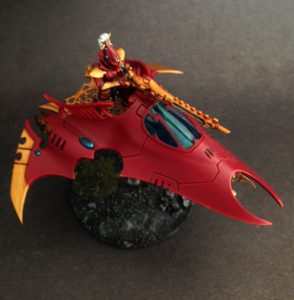
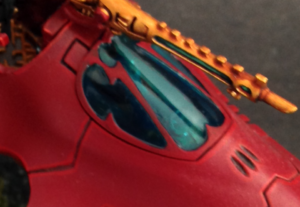
Pop the canopy on the vehicle and make sure it looks nice, smooth and even. Like I mentioned it’ll look like crap if you hold up to the light, but once its on the model it’ll look awesome from any perspective and at any level of scrutiny because of the solid backdrop of vehicle interior.
Check out the super zoomed in picture to see for yourself!
Conclusion
And there you go! Its shocking how crappy it looks when you take the glass off and look at it up to the light, but when you put it on the model it looks smooth and even as can be. Whats cool is if you ever want to change the color of the canopy, you can strip it in Simple Green and the stuff comes off super easy. I’m changing my canopies from green to turquoise and it couldnt be easier. Also you can get away with a super minimal paint job on the vehicle interior but because the tint is so rich no one will ever know you did just the basic color blocking (and maybe a little radar pattern on the dashboard).
If you are interested in Aeldari discussion check out our podcast: Splintermind for exclusive Drukharii and all things Aeldari news and discussion. If you are interested in following my painting exploits check me out on Instagram! Thanks for reading and stay tuned!
And remember, Frontline Gaming sells gaming products at a discount, every day in their webcart!



Cave taught me this trick a year or so ago. I was amazed at how easy and effective it was!
Hey bud long time no see. Thanks for stopping by man. Glad it worked for you. Its a quick way to get a really cool look. Thanks man!
I’ve usually screwed up when trying to mess around with effects like this, so I usually just prime the canopy bits along with the rest of it, and then do it in gloss, so it just looks like there’s too much glare to see inside at all.
If you’ve tried other techniques and struggled, I really think you should give this a shot. It is so easy. I’ve done it on a dozen plus vehicles and never had a problem with it. You can literally dunk the thing in water and wash it off half-way through and it comes off super easy. I’ve only done that when I didnt like the color of the ink.
Seriously give it a shot on a spare canopy and I think you’ll see its almost impossible to mess up.
This isn’t the part I screw up. I always end up splodging a bunch of some other paint all over it when I’m trying to do the framing around the transparent parts.
Also, this way I end up with more cool control panel bits and stuff to use for scratchbuilding scenery.