


Charlie here again with more T’au tactics, this time focusing on units and their weaponry. Check the Tactics Corner for more great content.
This article has been updated since its initial publication to reflect Chapter Approved 2018 changes.
Last time we covered the best laser pointers in the 41st millennium – if you haven’t read that, make sure to go check that out. This time, we will continue in that vein by talking about what weapons and units you’re likely to see against a T’au opponent (and what weapons and units are good for a T’au player to take!). If you’re new to T’au or new to facing them, this is a great place to start. The T’au Empire saw several important point drops in Chapter Approved 2018. While I think the units I originally listed here still mainly deserve to be noted, I have also added Broadsides and Shadowsun to the list as their point reductions have put them in a much better place post-CA2018.

T’au Units
I tried to keep this a short list and failed pretty early on. You’ve heard me say before that T’au is all about adding up the little things, finding synergy here and there to add up to something great. I feel like this article will really help drive that point home further. T’au is generally not an army where you have one outstanding unit and you take as many models of that as you can. The T’au codex (and Forgeworld Index) contains many good options, few great options, and few bad options. Because of that, I’ve listed some of the most commonly seen units, in my opinion, and my meta. It’s not an exhaustive list and there may units you feel should have been included – we will get down into the nitty-gritty of each and every T’au unit when we do the full army review.
Great Options
I’ve categorized something as “great” if it needs very little or nothing at all to help it be great – if it can work independently of the rest of your forces to do what it was designed to do.
Enforcer Commander
The Enforcer Commander is a force to be reckoned with. Able to deep strike via the “Manta Strike” or start on the table, this Commander can be equipped and deployed to do just about anything you need it to. For the uninitiated, the Commander has four slots that can be equipped with any combination of support systems and weapons. Notable support systems include the Advanced Targeting System (ATS) that grants weapons an additional point of AP, a Shield Generator (4++), and Drone Controller (which gives nearby <Drones> a +1 to hit), though there are also support systems that can let the Commander reroll all failed overwatch shots, or add 1 to To-Hit rolls if the target has <Fly>, or fire at a unit that was set up within 12″ of the Commander as if it was the Shooting phase, but must subtract 1 from To-Hit rolls, etc. Notable weapons include the Burst Cannon (a cheap 18″ Assault 4 S5 AP0 D1 weapon), Fusion Blaster (18″ Assault 1 S8 AP-4 D[D6], rerolling damage if within half range), and Cyclic Ion Blaster (CIB) (18″ Assault 3 S7 AP-1 D1 but with an optional profile at 18″ Assault 3 S8 AP-1 D[D3] that “gets hot”). The Enforcer saw no point reductions in CA2018 but then again it didn’t really need them as it was already a strong contender in any list. Several of its weapons and support systems (ATS, Flamer, Fusion Blaser, Missile Pod, and Plasma Rifle) did see a point reduction though that result in a fully loaded Enforcer a bit cheaper, which is great.
With all of these options, it’s easy to get overwhelmed and fail to glean what this all means, so let’s look at a few common loadouts, all of which got cheaper in CA2018:
- 4x Fusion Blasters
- 4x CIB’s
- 3x Burst Cannons with ATS
Since Commanders are BS2+ and it’s so easy to reroll 1’s To-Hit as T’au, it’s easy to see how the above loadouts are able to bring the pain. With our first loadout, assuming you have a single markerlight on the target, you’re hitting about 97% of the time, so realistically you’re hitting with all four shots. You’re wounding infantry on 2’s, most vehicles and tanks on 3’s, and knights on 4’s. Thanks to the 18″ range, it’s easier to get into melta range and roll 2D6 picking the highest for damage. If you need something with high toughness and/or multi-wounds gone and gone quickly – this is your answer.
The second loadout is a lot more versatile and is probably what you’ll see nearly on all Enforcer Commanders for reasons that will become clearer when we discuss the Coldstar Commander below. The gist is that it’s the best chassis for one of the T’au’s best weapons. The ability to effectively wound most infantry and high toughness targets mean that this loadout is flexible enough to adapt to the unknowns of a competitive event where most/all bases should be covered.
When cost is a concern, 3 Burst Cannons and ATS for the AP-1 is your budget choice. Really only comparable to the 4 CIB Commander when shooting at things like Guardsmen and Marines, this loadout is not nearly as versatile. Where you make up for it is in points, with it being about 30% cheaper than the 4 CIB build. You get what you pay for.
Coldstar Commander
The Coldstar Commander is in many ways similar to the Enforcer but with two key distinctions: available weapon loadout and movement. The Coldstar Commander cannot take the CIB, trading out this option to gain access to a High-output Burst Cannons (Assault 8 S5 AP0 D1) and Missile Pod (Assault 3 S7 AP0 D[D3]) Both of these selections saw point reductions in CA2018. However, it has a base movement of 20″, and can auto-advance another 20″. Yep, you heard me right – the Coldstar Commander can move up to 40″ a turn and still fire all its Assault weapons, hitting on at least 3’s (potentially still on 2’s and rerolling 1’s if the target has 3 markerlight tokens on it).
9 times out of 10, a competitive Coldstar will be equipped with four Fusion Blasters, now cheaper and therefore better thanks to CA2018. There are very few instances where you could not position a Coldstar within 9″ of its target in order to allow it to roll 2D6 and choose the highest for each successful wound. This will probably result in the Coldstar dying the following turn, but with four S8 AP-4 D[D6] shots, it’s usually possible to kill something worth the Commander’s points in that initial turn. The 40″ movement is also helpful for securing an unclaimed or minimally defended backfield objective. It virtually eliminates the need to deep strike and can even first-turn-nuke or in some cases charge poorly placed Leman Russes. With the recent cap on Commanders being 1 per detachment, it’s very likely most of the Commanders you see will be four Fusion Blaster Coldstar Commanders.
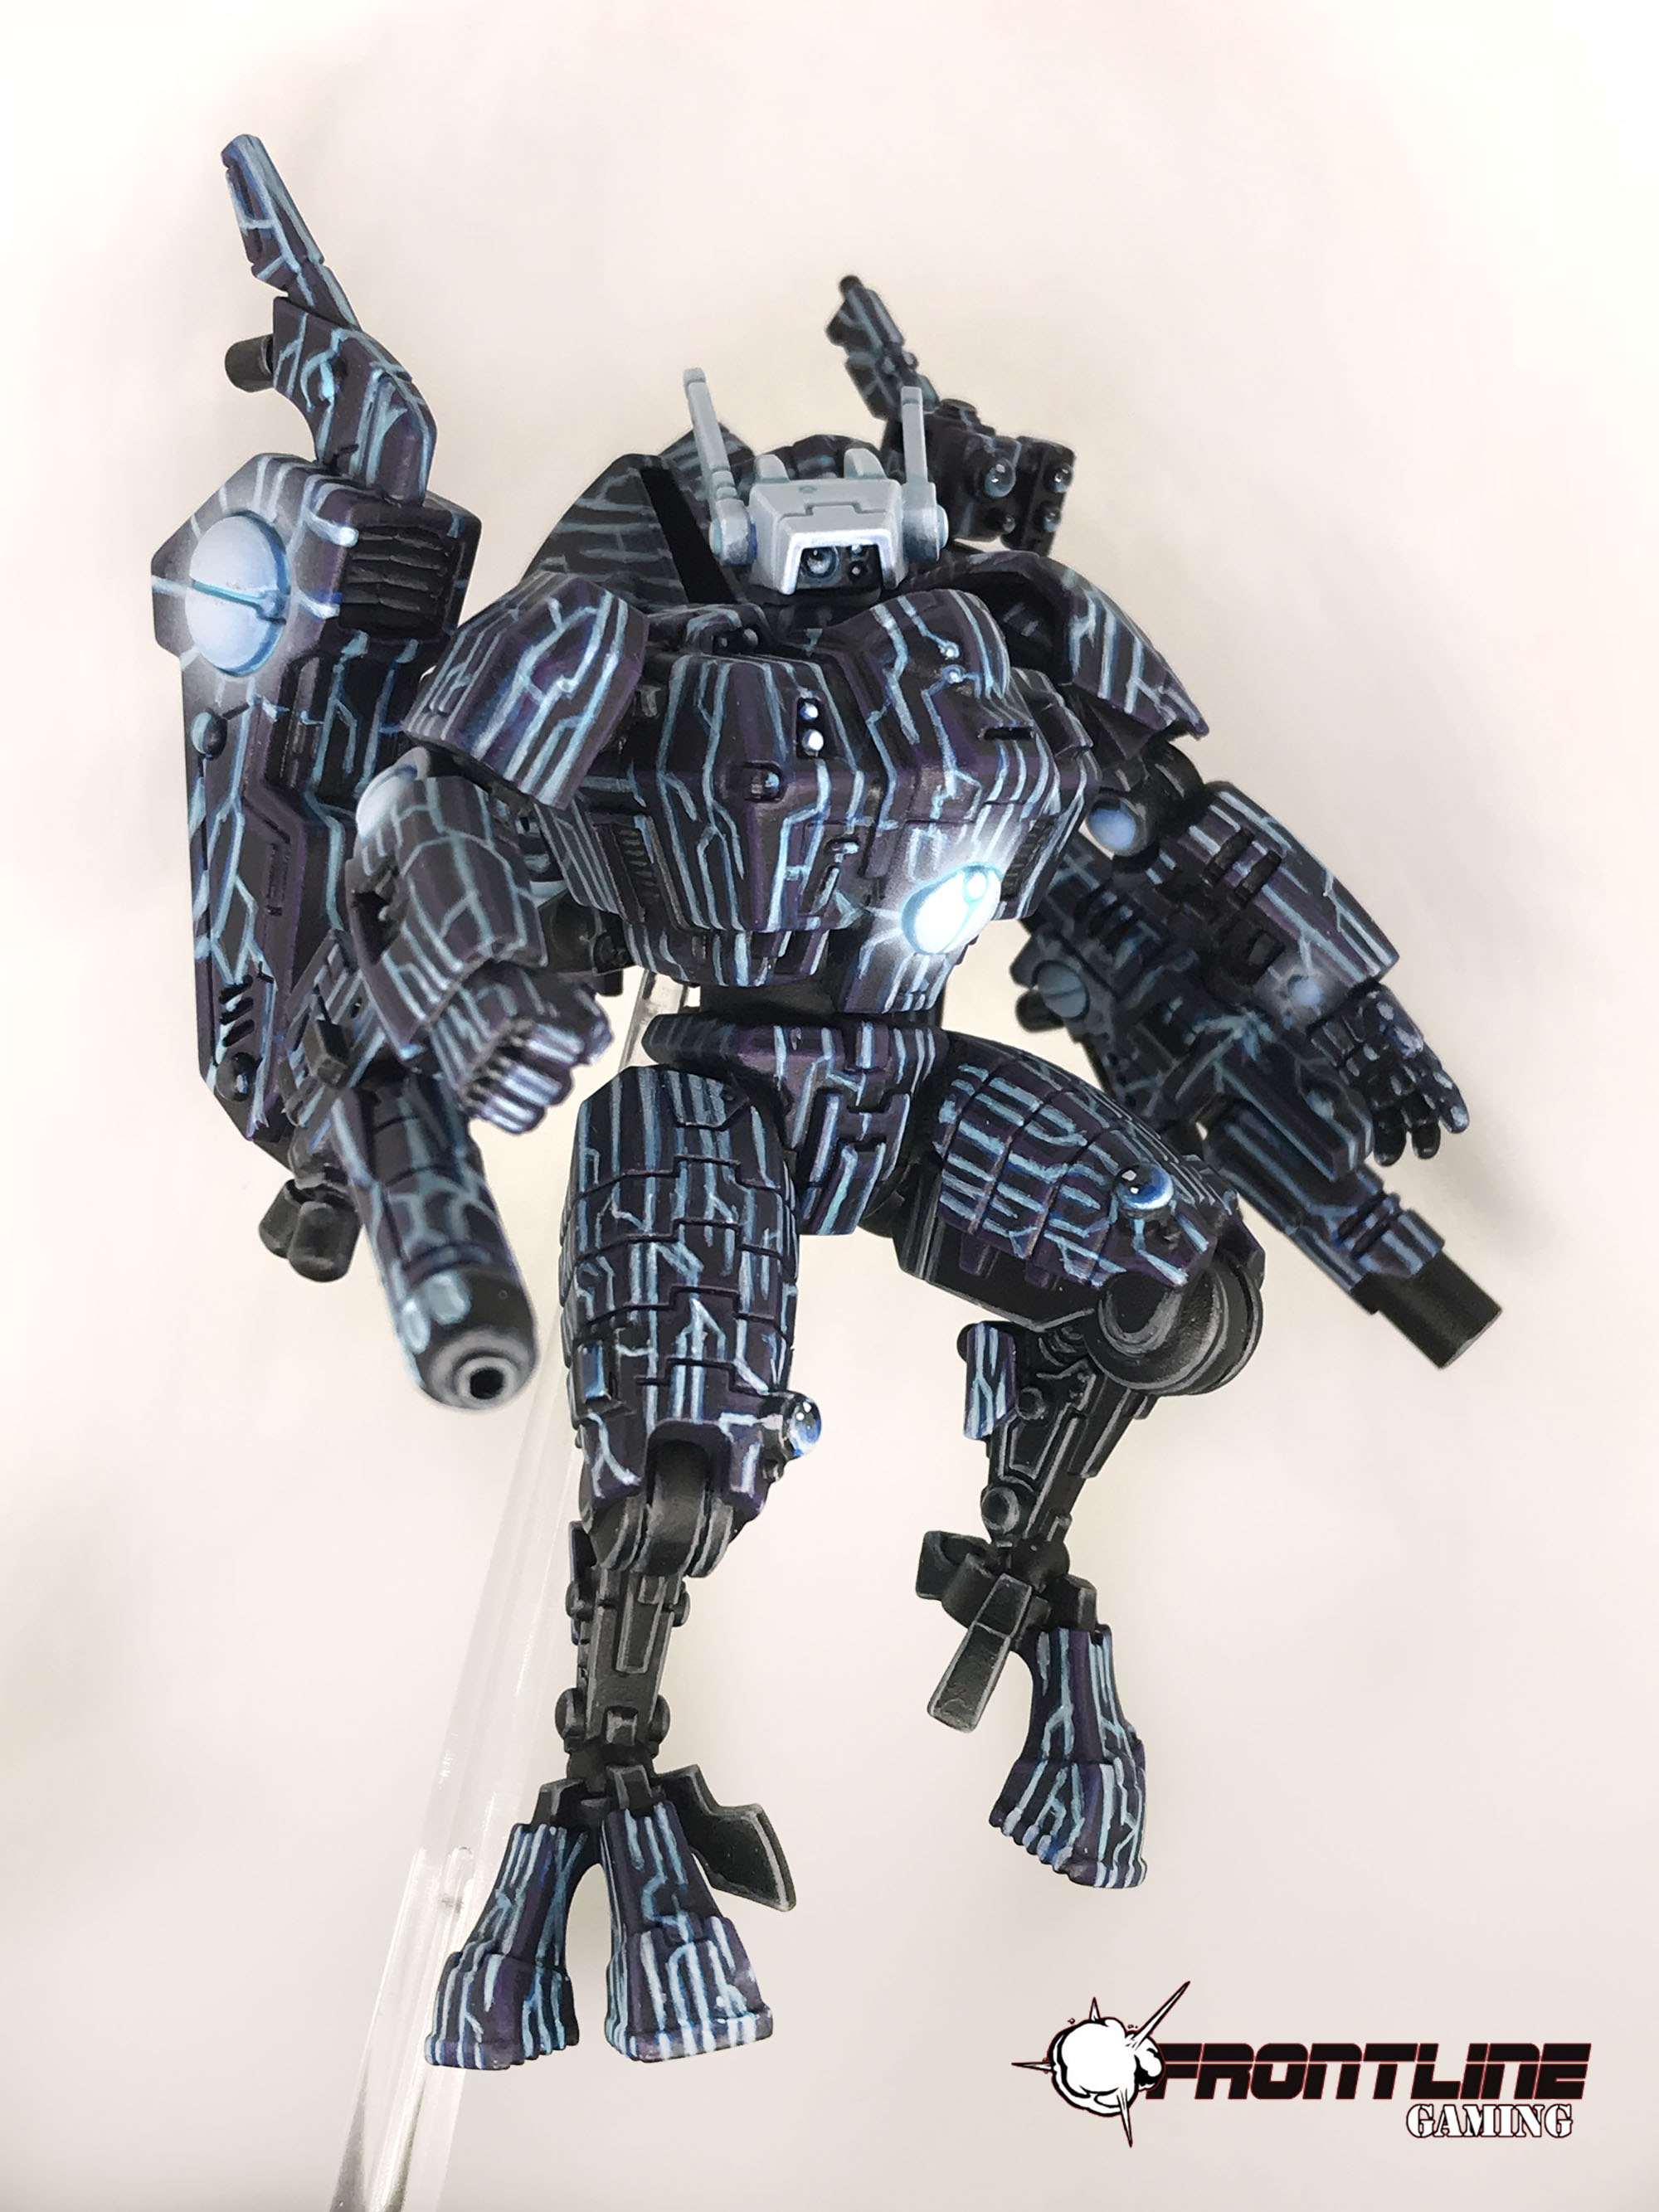
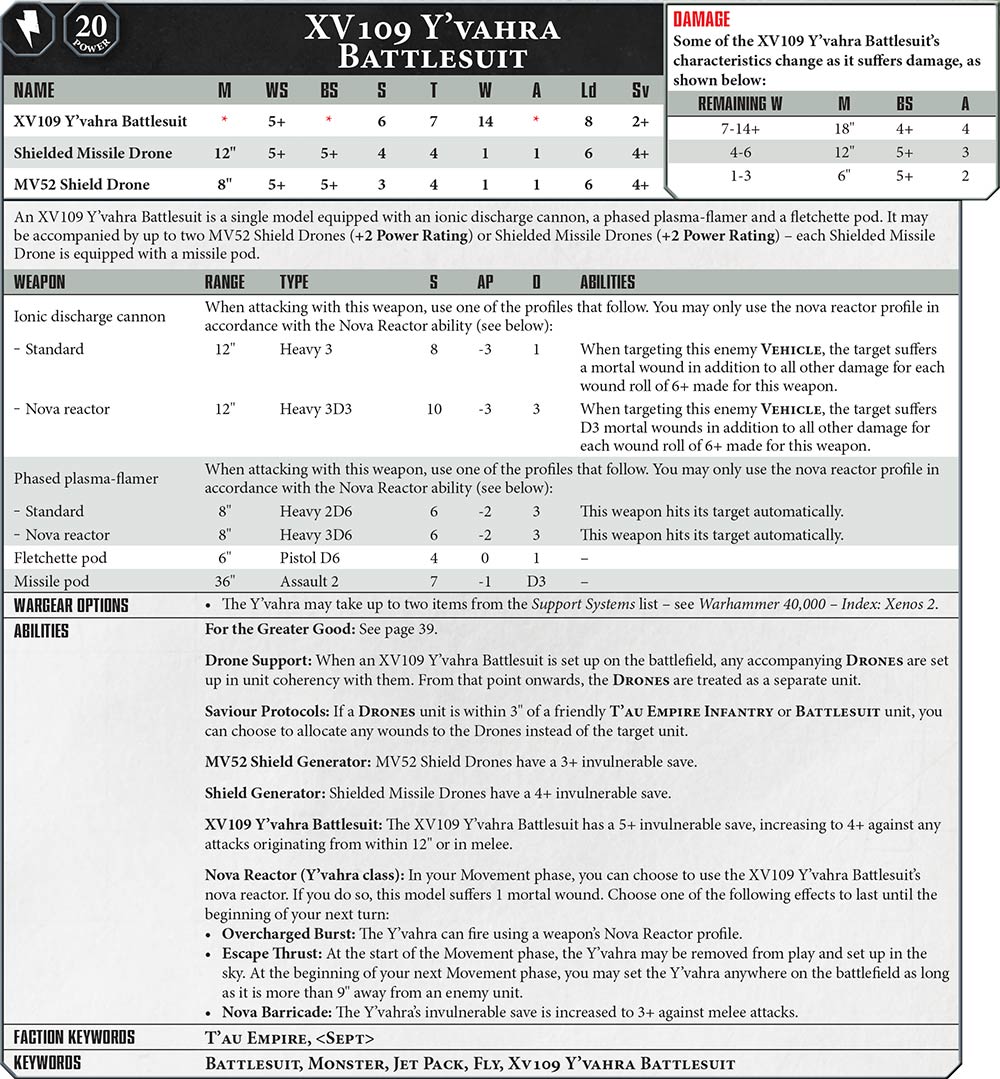
Y’vahra
The Y’vahra was a “delete” button prior to CA2018 and still is. However, now that so many other things saw a point reduction while it didn’t, I can’t help but think that it is too expensive and therefore too much of a liability compared to some of the other tools at the T’au Empire’s disposal. So while the below information still stands, I’m not convinced it will see as much play post-CA2018 as it did pre-CA2018 (which wasn’t a lot, to be honest).
A Forgeworld unit and a variant of the Riptide chassis, the Y’vahra is known for it’s Heavy 2D6 auto-hit S6 AP-2 D3 damage flamer, which can become Heavy 3D6 shots through use of a Nova Reactor. The ability to auto hit at S6 AP-2 and a flat 3 damage is what can give even the toughest of targets pause. It only takes a few failed saves for the damage to start piling up quickly. The Y’vahra also has an Ionic Cannon which, though relies on it’s BS4+, still has an impressive state line of Heavy 3 S8 AP-3 D1 with 6’s to wound causing mortal wounds against <Vehicles> which, through the Nova Charge, changes to Heavy 3D3 S10 AP-3 D3 with 6’s to wound cause additional D3 mortal wounds against <Vehicles>. The Y’vahra is a very potent armament with a resilient chassis that benefits from Savior Protocols.
Understanding the Nova Charge ability is vital to understanding the full potential of the Y’vahra. In the movement phase, the Y’vahra can choose to take a mortal wound in exchange for one of three benefits: better weapon profiles, boosting it’s invulnerable save to 3++ against melee attacks, or being removed from play to be set back up anywhere on the battlefield more than 9″ away from an enemy unit. Two of the three benefits are pretty situational, with the usual “go-to” benefit being the better weapon profiles. Taking a single mortal wound in exchange for this is most of the time a no-brainer. To further compound this, the Y’vahra can be taken in the Bork’an sept, which grants an additional 6″ to all Rapid-Fire and Heavy weapons, meaning that the flamer has a range of 14″. This ensures that anything that charges the Y’vahra will be in range of its flamer, PLUS it would also be in range when it returns to the battlefield as a result of its third Nova Charge choice – dropping in anywhere greater than 9″ away of an enemy unit but still within range of the flamer is pretty amazing. Without help from other units, the Y’vahra is able to threaten just about anything on the board. With help, it’s a nightmare.
Marksmen
We have previously discussed the Marksman here, which is all still relevant. The Marksman is inexpensive and good at what it does which is why it’s on this list. It’s a good source of reliable markerlights at BS3+, even more so if it’s in the Sa’cea sept and it’s protected from most shooting attacks thanks to it being a <Character>. For the few snipers you do encounter, it benefits from a +2 to its save while in cover, instead of the usual +1, so it’ll be passing save rolls fairly consistently. To combat the mortal wounds on 6’s on To-Wound rolls that most snipers have, it thankfully has 3 wounds to help keep it on the board for longer. All in all, a great unit. No point reduction from CA2018, but it didn’t really need it and you’ll still take them regardless.
Good Options
I’ve categorized something as “good” even if it has the potential to be great, but requires the support of other units, stratagems, etc. I can already foretell the level of salt incoming for putting the Riptide in this category.

Cadre Fireblade
While discussed here regarding its markerlight capabilities, we didn’t discuss it much further than that. The Cadre Fireblade is an affordable HQ choice for the T’au that brings several good things to the table: a reliable markerlight platform, a buff to nearby Strike Teams, and a decent chassis for T’au relics. Units within 6″ of a Cadre Fireblade shooting with specific “Pulse” weapons (Pulse Carbines, Pulse Rifles, and Pulse Pistols) gain an additional shot when shooting at half of the range. This means that a standard Fire Warrior Strike Team, which has a 30″ Rapid-Fire 1 Pulse Rifle, will get 3 shots per model while both within 6″ of a Cadre Fireblade and shooting at a target within 15″. Because Strike Teams are good (more on that below), the Cadre Fireblade is a multi-purpose force multiplier that you’d be remiss to pass by. Because it should primarily be hanging back, buffing your other units, it makes for a decent candidate for holding a T’au relic, like the Puretide Engram Chip which grants a CP each time a 6 is rolled after the use of either your or your opponent’s stratagem. The Cadre Fireblade did not see any point reduction in CA2018, but it’s still just as dependable as a markerlight source and is still well-recommended.
Strike Team
The Strike Team is a fairly cheap infantry unit that forms the foundation for many T’au forces due to its efficiency and potential synergies with other T’au units. Normally armed with a Rapid-Fire 30″ S5 AP0 D1 Pulse Rifle, it can be useful near the max range by providing support fire from afar as well as by closing the distance and bringing multiple shots at close range. Instead of the normal 2 shots at 15″ and less, Strike Teams can be combined with Cadre Fireblades to bring that to 3 shots at 15″. This means that anything that charges the Strike Team (or something within 6″ of the Strike Team due to the “For the Greater Good” rule), will be targeted by 3 shots a piece from each model. Since they can be taken in up to units of 12 models, that’s potentially 36 shots on overwatch, hitting potentially on 5’s due to the T’au sept benefit, which is nothing to sneeze at. To help further mitigate one of T’au biggest weaknesses, close combat, the Strike Team could throw a Photon Grenade (D6 Grenade) in overwatch that if it hits, confers a -1 to hit for the remainder of the turn if the target is <Infantry>. All of this results in several small things to help keep your Strike Team out of Combat and/or alive after it, though against a dedicated assault unit (read: “Custodes“) Strike Teams will of course struggle.
Another valid synergy is through the use of some of the Pathfinder’s special drones, which can further increase the range of nearby pulse weapons by 6″. This, along with the Bork’an sept can result in the Rapid-Fire range of Strike Teams being increased to 21″, which if everything goes according to plan, can mean that each Strike Team model can get 3 shots on turn one. Another, but far more situational, Pathfinder drone can reduce the charge range by D3 for a charging unit within 12″ of drone, which can certainly help keep something away from your Strike Team. The biggest challenge in getting these and other special drones to work effectively is that they are easily targetable by the enemy so a deft opponent will just kill them off first. Strike Teams are also not terrible resilient at only T3 and Sv4+ so with any effort at all, your opponent can fairly easily remove them from the board. Strike Teams saw no point change in CA2018.
Breachers
Breachers are a variant of Firewarriors with the same unit profile, but a different main weapon. Their Pulse Blaster has three different profiles depending on what range you’re at, each Assault 2:
| Profile | Range | S | AP | D |
| Long | 15″ | 4 | 0 | 1 |
| Medium | 10″ | 5 | -1 | 1 |
| Short | 5″ | 6 | -2 | 1 |
Their range is nearly prohibitively short, but when they can close the gap, they bring the pain for a sub-10 point model. The most common way to utilize them is by loading up a Devilfish (T’au transport) with either two units of 6 or one unit of 10 to help deposit them within their medium or short range. However, I’ve heard rumors of people finding success with Vior’la sept Breachers (who can advance with Assault weapons without penalty) and starting them on the board, though I remain skeptical. The obvious synergy that will benefit Breachers is with Darkstrider, a T’au sept named character who can grant a +1 to wound to a nearby <Infantry unit> against one visible enemy unit. With this buff and at their closest range profile, you will be wounding Marines on 2’s with AP-2. Breachers also have Photon Grenades to help mitigate against the ensuing and inevitable charge if they’re close enough to use their shortest weapon profile, but realistically, these units will never make it home. Breachers are also not terrible resilient at only T3 and Sv4+ so with any effort at all, your opponent can fairly easily remove them from the board, no matter how near or far they are. Breachers saw no point change in CA2018.
Riptides
The XV104 Riptide is very strong, don’t get me wrong. But as good as it is on its own, it’s absolutely beastly with a little help. It comes stock with a Heavy Burst Cannon (Heavy 12 S6 AP-1 D2) and two Smart Missile Systems (each Heavy 4 S5 AP0 D1 and doesn’t require line of sight) which, in my opinion, is its best and most flexible loadout. Alternatively, it can be equipped with an Ion Accelerator (Heavy D6 S8 AP-3 D[D3] that can be overcharged to Heavy D6 S9 AP-3 D3) and can choose to sub out the Smart Missile Systems for Plasma Rifles (24″ Rapid-Fire 1 S6 AP-3 D1). Because of the point reduction in the Ion Accelerator from CA2018, this is now a more stomachable selection, though it still remains far from versatile and even with the reduced cost, I think the HBC will see more play. Through the use of the Nova Charge ability, it can upgrade the Heavy Burst Cannon to Heavy 18 S6 AP-1 D2 or the Ion Accelerator to Heavy 6 shots with the same standard and overcharged profiles. The other two Nova Charge choices include buffing its regularly 5++ invulnerable save to 3++ (against all attacks, not just melee attacks like the Y’vahra’s Nova Charge buff) or moving 2D6 inches in the Charge phase, even if it doesn’t charge.
These Nova Charge options are a bit more well-rounded than the Y’vahra’s with imaginable situations existing where you might want each one. Thankfully for the Branched Nova Charge stratagem, you don’t always have to pick just one benefit. By using this one CP stratagem, you can select two benefits instead of just one. Should you decide to upgrade your main weapon as well as increase your invulnerable save to 3++, you will end up with a lot of firepower that nigh-impossible to kill, if properly surrounded by drones for Savior Protocols.

Despite having all those shots, The Riptide still only has a BS4+, which can put quite the damper on things if not supported properly by things like markerlights, Master of War: Kauyon, stratagems, and proper selection of support systems. The Riptide has two slots for support systems and there are several good options. In competitive lists I’ve seen four recurrent support systems: Advanced Targeting System (granting an addition point of AP), Target Lock (ability to move and fire without suffering the penalty for moving and firing with a Heavy weapon), Velocity Tracker (+1 to Hit against targets that have <Fly>), and Counterfire Defense Systems (reroll failed overwatch shots). It’s easy to see how changing the Heavy Burst Cannon to Heavy 18 S6 AP-2 D2 would absolutely eat most targets, so Advanced Targeting System is obvious as to why it’s often taken. Often, but depending on the mission and matchup, a Riptide will not be able to sit still the entire game and as such, if it had to move and then hope to hit with a -1 To-Hit, it’s hard to believe it would be quite effective. Many large and potent targets also have the <Fly> keyword so planning for that in a competitive setting will sometime make sense. Lastly, the Riptide represents such a threat that if you’re playing against an army that will plan on doing any sort of assaulting, charging the Riptide probably crosses your opponent’s mind. With the Counterfire Defense Systems and the T’au sept, you’re getting a free shooting turn in overwatch each time either the Riptide is charged or a unit within 6″ of it is charged, thanks to “For the Greater Good.” Understanding what you’re up against and what you want to be able to do with your Riptide is important when deciding what support systems to take on it.
Further support that the Riptide will appreciate includes the Command and Control stratagem. This makes the Heavy Burst Cannon’s strength 6 much more threatening to higher-toughness targets by allowing the Riptide (specifically a <Battlesuit> unit) to reroll failed To-Wound rolls. The “catch” is that a commander needs to be near the Riptide and forgo its own shooting in order to use the 1 CP stratagem. This won’t make sense in every scenario but is useful to keep in mind. All in all, the Riptide is very good on its own, but truly becomes amazing with a little support from other units. The main reason for a “Good” designation instead of a “Great” designation is that they have diminishing returns. Much of what makes them great is connected to the stratagems which are all once per turn. This means that you can buff one Riptide up considerably but leaves the other potential two with only selective buffs.
Stealth Suits
Last on my list of good units, the Stealth Suit is good for different reasons than just pure lethality. While each Stealth Suit can take a single Burst Cannon (18″ Assault 4 S5 AP0 D1) or one in three can take a single Fusion Blaster (18″ Assault 1 S8 AP-4 D[D6]), they have the typical T’au BS4+, meaning that without markerlights, they’re only hitting half of the time. For their points, they don’t do enough damage to be in the same league as, say, a Riptide, Strike Team, or Commander. Instead, they bring several other beneficial things to the table, primarily a consistent -1 to hit, the ability to be deployed outside of your deployment zone, and the <Fly> keyword.
Stealth Suits are always -1 To-Hit both via shooting attacks and via close combats attacks. This is great since, due to their deployment rules, you’ll probably deploy them forward, trying to contest any midfield objectives first turn. Now that deepstriking has to be inside your deployment zone until turn two, having reliable units able to contest these objectives, and those that are tough to remove is a very good thing. In cover, these <Infantry> models will be saving on 2’s at -1 To-Hit. Further, they have two wounds a piece so non-insignificant resources will have to be dedicated to removing this unit from the table. When/if your opponent does assault them, should the Stealth Suits live, they are able to fall back and still shoot, which is certainly nice.
Because they are <Infantry> and <Battlesuits>, Stealth Suits benefit from several key things like Darkstrider’s Structural Analyzer (the +1 To-Wound we discussed earlier), easy access to cover saves, and the Ethereal’s chants (for example, a 6+++ “feel no pain” save or rerolling 1’s for remaining stationary). Stealth Suits bring a lot of utility to mission scoring, as well as can be a wrench in your opponent’s plans. They can be anything from a speed bump to a scalpel, depending on what exactly you need. The fusion blaster saw a small point decrease in CA2018, which is occasionally nice for Stealth Suits.
Broadsides
Now with a whopping point reduction from CA2018, I think these have a place in certain gun line lists. While the rail variant is still just as random as it was in terms of damage, a Sa’cea sept railside will hit enough at its current 100 point cost to deserve some consideration. Having a very long range anti-tank/knight platform to supplement some of your other anti-tank/knight firepower, while still benefitting from a Sv2+ and Savior Protocols is nice. These are also much smaller of a target than some things like Riptides and can thus be tucked away much easier. In terms of damage though, you’ll want to high-yield missile pod variant, i.e. missileside. These will much more reliably do more damage to a wider range of targets and synergize well with Command an Control Node and Through Strength, Devastation. A unit of three missilesides is now costed to be a worthy addition to your firebase and very resilient through Savior Protocols. They still require support from markerlights and Commanders though, hence their “good” rating.
Shadowsun
Much cheaper from CA2018, she brings a lot to the table for less cost – she’s more efficient and deserving of consideration for any T’au sept detachment. Able to allow all units within 6″ of her to reroll all failed To-Hit rolls at the cost of moving, twice, is the main reason for taking her. As such you’ll want to keep her at the heart of your firebase and not take advantage of her infiltrate special rule, though it is there. A native, constant, -1 To-Hit is very nice and especially helpful should you come up against any snipers, though this is slightly counterbalanced by her Sv3+ and her T4. Like all stealth suits, she is <Infantry> as well as <Battlesuit> so she gets the benefit of both (Savior Protocols, easy cover, etc.). Her dual fusion blasters are nice to have, especially at BS2+, but this will most likely supplement your current firepower or in some cases go unused as she is a prime Commander candidate for Command and Control node (since you’d only be missing out of firing two weapons instead of an unnamed Commander’s potential four weapons). I was taking her at her original price and finding value in her, now as a reduced price she’s REALLY hard to pass up. She gets a “good” rating here because she brings synergy to your forces – i.e. she makes other units better, she isn’t necessarily a powerhouse on her own.
In Closing
This list should have given you the gist of several common T’au units, enough to know what to expect from each of them. It makes sense that the units that don’t need much, if any, support in order to shine (Commanders, Y’vahra, and Marksmen, for example) are often seen on the tabletop in competitive and friendly games alike, while the units that need some help to realize their full potential (Riptide, Firewarriors, Stealth Suits,Cadre Fireblades, Broadsides, and Shadowsun) are still often seen, potentially not “auto-takes” however. Chapter Approved brought a few other units into the Good category and I think the T’au Codex as a whole is pretty strong. There are several other good choices for T’au that we will go into in depth when we review each of the Codex entries in detail, along with diving deeper into these. Next time we will be back with the last article in the series, going over the T’au sept benefits, relics, and warlord traits. Stay tuned!
Which unit do you think is absolutely vital to a strong T’au force?
And remember, Frontline Gaming sells gaming products at a discount, every day in their webcart!


