
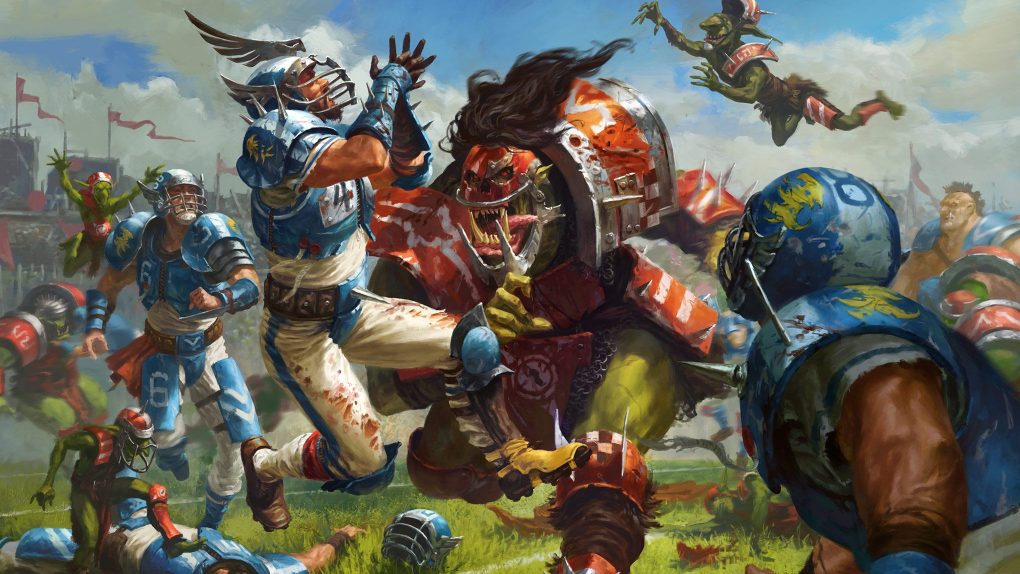
Hello folks. Dolch here, your correspondent on all things Blood Bowl. This is for those who are Blood Bowl curious. The book that comes with the boxed game is split into ‘General Rules’ and ‘Optional Rules’… which makes it great for learning the game. In this article, we will cover the basic mechanics of the game in a way that hopefully makes it more useful as a reference.. (I LOVE THIS GAME!)
A note on definitions. Blood Bowl was first released in 1986 (way before the Internet and Wikipedia) by a group of Brits, based on their understanding of the game of American Football and adjusting things to make it a board game that doesn’t take 12 hours to play. The terms defined in the game are not the same as the terms that are in American Football. It would be similar to me (US Midwesterner, who occasionally eats and an Indian restaurant whose owner is obsessed with Cricket and always has it on) deciding to make a game about the sport. I’m pretty sure a ‘sticky wicket’ is a thing… I’m also pretty sure it doesn’t involve an Ewok eating honey.


The Pitch
Blood Bowl is played on a grid of squares. Overall, the pitch is 26 squares by 15 squares. It is divided into end-zones that are one square deep on each end. It is also divided into half, which help coaches position players. Finally, the outermost four squares on each side are the ‘wide’ sections which have special rules only for setting up your team during the kick-off.
On the standard pitch, the squares are about 34mm on a side, so there is some wiggle room for most players. However, Big Guys bases (and a lot of arms, legs, cloaks, etc from even normal players) don’t fit completely within the square. Only one player can be in a square at at time, and players have a tackle zone that extends one square from their location in all directions. More on this later.
Aside from the pitch itself, you need a mechanism to keep track of which turn it is, how many rerolls you have remaining, and the condition of any models not on the pitch. This is usually done on a separate ‘Dugout’ tile (remember that comment about terms up above? Yeah.) The Dugout has a spot for Reserves, Knocked Out players, and a spot for those who are casualties or otherwise out of the game (Dead & Injured). Players in the Knocked Out box have a chance to return to reserves on a 4+. This is rolled for after each drive is completed but before the next kickoff. It also has a tracker that you can use to keep track of rerolls and turns. The plastic GW kits come with markers specially made for this use.
Actions
Players can choose from a series of actions… some of which include moving. Some may only done by a single player on that team this turn.
- Moving… each player has a move stat. They are allowed to move up to that stat without penalty (see dodging below!).
- Blocking… Each player may attempt to block a player in their tackle zone. You will roll a number of block dice determined by the players’ relative strengths (and any modifiers). If one player is stronger than the other, two dice are used. If one player is twice the strength or more, three dice are used. The player who has the higher strength chooses which of the dice results to use. If the strengths are equal, you roll one dice and use that result. That is the basics, but there is a lot of strategy and detail in blocking. Some teams win almost completely by blocking (so called ‘Bashy Teams’).
- Blitz… In Blood Bowl, a Blitz is the combination of a Move and Block Action. The Block can happen anywhere along the normal movement and is resolved before any further movement happens. For example, a player can Blitz three spaces, and make a block. If they get Knocked Down as a result of the block, they wouldn’t get to move anymore. You only get a single Blitz each turn, and it does take one square of movement.
- Pass… Players may move up to their MA and then attempt to throw the ball into any square on the board (even empty ones). The accuracy of the Pass is determined by the player’s agility score as well as the distance that the pass travels. You only get a single Pass each turn.
- Hand-Off – a Hand-off is a pass between players in each other’s tackle zone. There isn’t a roll for the thrower, but there is a roll for the player attempting to catch the ball. You can only do one Hand-Off each turn.
- Foul – A player can attack an opponent who has been Knocked Down (though this is strictly against the rules… which means that it happens so much that it is also strictly regulated.) There is a chance that a referee will get involved and punish the violator. You may only Foul once per turn.
- Go For It – at the end of any action (except a Block) a player can try to move up to two additional squares. For each square, you have a 1/6th chance become Knocked Down.
Rerolls
Rerolls allow you to reroll all of the dice that produced a single result (reroll ALL the block dice, or both of the Injury dice… not only one). Yet note, you can’t reroll a reroll.
There are Team Re-rolls. You can use them on any roll that isn’t a scatter, distance, direction, armour, injury of casualty roll. You are limited to the ones on your roster unless events in the game give you more. The refresh each half, and you can only use one each turn.
There are also player Re-rolls. These rerolls are usually from skills, and can only be used on the player who has the skill. You can use as many player-rerolls as you need, but some skills limit the number of times that skill can be used on any action. You can’t use a player re-roll and a team re-roll on the same result.
Turnovers
Another term that doesn’t completely match with the American Football equivalent. In Blood Bowl, a turnover means that your turn is over… not necessarily that you’ve lost possession of the football (saying it that way, I can see the source of confusion). Here’s the list of things that cause turnovers.
- You’ve all the actions that you’ve chosen to do for the turn or all of your players have completed actions.
- You are using timed turns and that time has expired.
- Your player is Knocked Down, due to a bad Block or failed Go For It.
- You fail to pick up the ball when it is on the pitch.
- A pass or handoff that is not caught by a player on your team.
- A player is ejected after a Foul.
Status
Besides the status of models off the pitch, there is some traditions for handling the status of models while they are on the pitch.
- Models that have yet to activate this turn are traditionally faced towards your scoring endzone.
- After a model performs its action for the turn, the tradition is to move it so that it faces your opponents scoring endzone.
- When a model is Knocked Down, it is placed on its side face-up. Face-up models may stand up as their action. Models that are Knocked Down occupy their space, but do not have Tackle Zones. There is a chance that this model may be injured, and so an Injury roll would be made. More on this later.
- When a model is Stunned, it is placed on its side face-down. All face down players are tuned face-up at the end of their teams next turn. Similarly with Knocked Down, Stunned models do not have Tackle Zones but do occupy their space.


Blocking
Blocking is primarily about controlling the movement of your opponent. Only three sides of the Block Dice result in your opponent getting Knocked down (Defender Down, Both Down, and Dodge Star), while four of the sides of the Block Dice result in you moving your opponent (Defender Down, Dodge Star, and two Push arrows).
As mentioned above, the number of dice you roll for a block is determined by the difference in strength between the players. Players who are in the tackle zone of the model getting blocked can help with the attack, and those in the tackle zone of the model blocking can help defend. This is how you can get extra Block dice on an attack even though the models might be the same strength.
Most results will Blocks will push a player back one square. This allows you to move that model so that holes form in your opponents defense or even additional blocks can be made. The model that Blocked can ‘Follow Up’. That is, they can move to the square formerly occupied by the model they Blocked. This is free, and doesn’t require any Dodge rolls.
There are many skills that modify some aspect of the Blocking. We will get to that in another article.
Dodging
Dodging is a very useful skill that allows you to move out of an opponent’s tackle zone. High agility is very helpful when making Dodges, as there are several things that negatively affect your ability to dodge.
The dodge roll is based on your player’s agility, so it uses the agility table. (You remember the old t0-hit table from 40k? Same table here!) The target is 7-agility score, but there is a modifier for even attempting the dodge, as well as the number of tackle zones that it is moving to.
Some examples are required here.
An Human Lineman is attempting to dodge out and into a square that isn’t in a tackle zone. He has an agility of 3, and so must roll 4+ with a +1 bonus (total is a 3+).
If instead, he is dodging from one tackle zone into another the needs a 4+ to succeed.
If you fail a dodge, then that player is Knocked Down in the square that you were dodging to and may suffer an Injury.
Injury Rolls
When a player is Knocked Down, the opposing player rolls 2d6 in an attempt to break the player’s armor (assists and strength do not apply at this time). If this beats the Armor Value, they you can roll on the injury table. This is also a 2d6 table, and anything 7 or less stuns the player. Anything 10 and up is a casualty, and the player is placed in the Casualty and Dead box (a further roll is made in league play to see what kind of injury is suffered… up to and including death!). An 8 or 9 places the player in the K.O. box, with a chance to come back later in the game (see above).
There are a few skills that do make modifications to one or more of these rolls. Such skills are rare and when GW make changes to them it can be quite controversial. In the end, no one likes losing a key player but it is the main tactic of several bloodbowl teams.
Passing.
Don’t. Just don’t. Seriously… it has one of the lowest chances of success in the game.


Ok… alright, here is the sequence for passing the ball.
Declare you are making a pass. The player passing can move up to their MA before throwing (dodges must be passed or you suffer a Turnover before you get the ball out).
Measure the distance between the passer and the intended target.
Make an Agility roll for the passer and apply the modifier for the range and any opposing players in your Tackle zone.
If you succeed, great! You have just thrown an accurate pass! If not, the ball Scatters.
If the ball lands in a square occupied by a standing player, that player may attempt to catch it. Make an agility roll, modified by opposing players in your Tackle Zone and a +1 if the pass was accurate. If you succeed, you’ve caught the pass! If you haven’t taken an action with this player yet, they can perform other actions.


Until next time,
Best Blitzes
Dolch
And remember, Frontline Gaming sells gaming products at a discount, every day in their webcart!

