
Hi everyone, Michael here with another look at a Kill Team you can employ in your Deathwatch army, the Stalker Bolter Kill Team. For more reviews and analyses, check out the Tactics Corner.
Overview:
The Deathwatch Veteran Squad has a huge amount of variety in the Deathwatch codex, able to take a range of Wargear options and mixed build units thanks to the Kill Team rules. In the first part of my review, I took a look at a general overview of the Deathwatch Veteran squad and how they perform on the tabletop. With these Kill Team reviews, I am going to break down what I think will be popular builds for the Kill Teams and what tactics might be effective for them. The format of these reviews will be a little different, without a list of wargear options and abilities at the start. To get an idea of these, check out the Deathwatch Veterans Review. This review will assume you are familiar with many of these rules.
![]()
If there are any specific Kill Team builds you would like to see analysed, please comment below.
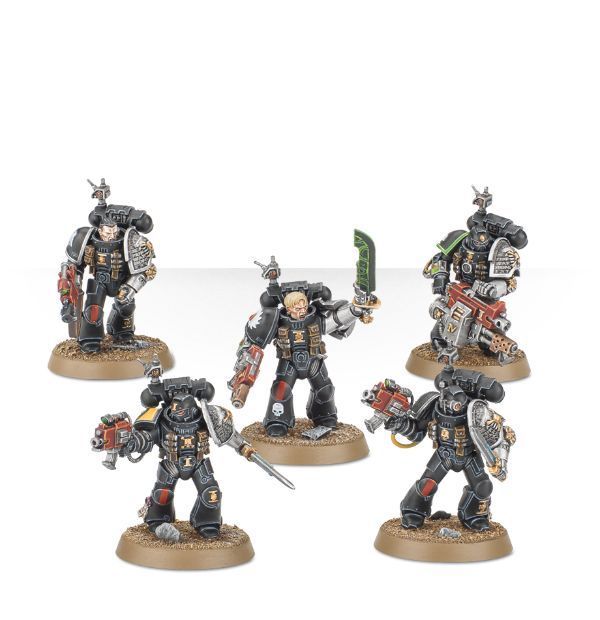
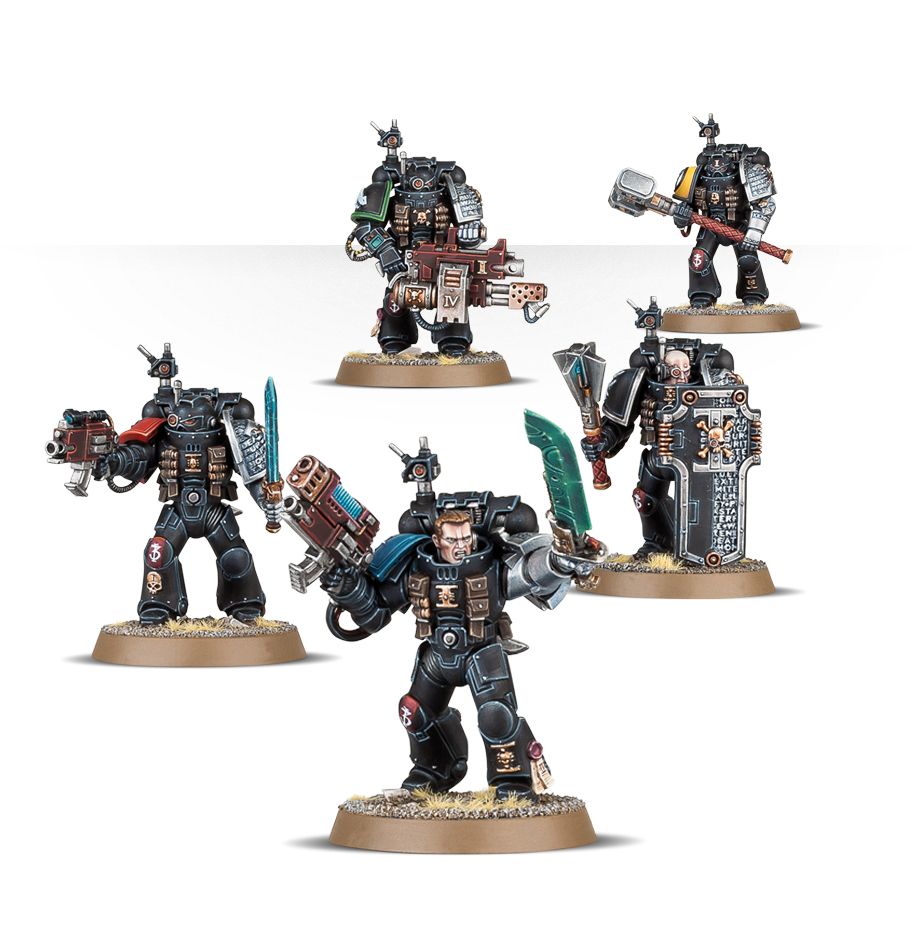
The Kill Team up for review today is the Stalker Bolter Kill Team. This is essentially a unit of 5 Deathwatch Veterans, all armed with Stalker Pattern Bolters (though you can add a couple of other weapon options to help the squad out). The basic squad is 5 Veterans armed with Stalker Boltguns and Chainswords, and will cost you 100 pts.
This unit excels at backline objective holding. The Stalker Bolters give them some long-ranged fire options and can put out a decent volume of shots at range, as they are Heavy 2 each. The addition of Special Issue Ammunition gives them some great additional uses on the battlefield and can help to boost their damage output.
I would give this squad a rating between Efficient and Competitive. They are a great unit for sitting in your deployment zone, while also being able to contribute to the game, thanks to their long range firepower and keeping up a decent rate of fire. They are a nuisance to the enemy army, but not so much that they need to be dealt with right away. I find the unit tends to survive to the end of the game, as there are simply bigger threats in the Deathwatch army to deal with first.
Wargear:
- Stalker Bolter- 30″ range, Heavy, S4, AP-1, 1 damage

Tactics:
At first glance, the Stalker Bolter doesn’t seem that impressive. It gets longer range on a standard Boltgun, meaning you will generally be able to fire it from turn 1 in most deployment types if you deploy near the edge of your zone. It is also Heavy 2, meaning you will get two shots regardless of range, so can pepper the enemy unit with shots from a distance without having to worry about getting into rapid fire range. The additional AP-1 is great for mitigating the effects of cover or getting extra wounds on an enemy unit.
However, when combined with Special Issue Ammunition, the Stalker Bolter gets a lot better.
With Kraken Bolts, your humble Bolter goes up to 36″ range and AP-2. This gives the squad a huge threat range, allowing them to sit at the back of your deployment zone and still have an influence on the game. The AP-2 is also great for taking out more heavily armoured foes with your firepower.
With Vengeance Bolts, your Stalker Bolter goes from solid weapon to armour-shredding menace. Your range drops to 24″, but you still get 2 shots with each Veteran, even at long range. Even more importantly, your Bolter now goes up to AP -3. This will give even the most heavily-armoured opponents pause, as they advance on your unit. Your Stalker Bolters should be able to get at least a couple of turns firing on a standard infantry unit moving up on their position, so could cause considerable damage before the enemy unit gets to them.
With Hellfire Bolts, the unit becomes a big threat to any Monsters or tough units in the enemy army. A 30″ range weapon that wounds almost every unit on a 2+, with an additional -1AP is a great bonus against almost any army. I have used the Hellfire Bolts to good effect against big Tyranid Monsters, giving them good range to threaten even backfield units, such as the Exocrine.
I also find the Dragonfire Bolts to be of use with the Stalker Pattern Boltgun. These Bolts give you +1 to hit against an enemy unit in cover. With the additional -1AP of the Stalker Pattern Boltgun, you can mitigate the effects of cover, while also getting +1 to hit against an enemy target. This can be useful for those armies that give a -1 to hit penalty for shooting at long range.
Let’s look at the casualty numbers for various units with the Stalker Pattern Bolter. In the table below, we are going to assume 5 Veterans firing 10 shots, hitting on a 3+. For the average number of unsaved wounds, we get:
|
Aeldari Guardian (T3, 5+ save) |
Chaos Space Marine
(T4, 3+ save) |
T’au Fire Warrior
(T3, 4+ save) |
Ork Boy
(T4, 6+ save) |
Vehicle/Monster
(T7, 3+ save) |
|
|
Hellfire |
4.7 | 2.8 | 3.7 | 5.6 |
2.8 |
| Kraken | 4.5 | 2.2 | 3.7 | 3.4 |
1.5 |
| Vengeance | 4.5 | 2.8 | 4.5 | 3.4 |
1.9 |
As you can see, in almost all situations, it is best to use the Vengeance Bolts if you are in range to do so. The -3AP of these Bolts when combined with the Stalker Pattern Boltgun has a big influence on your opponent’s ability to block wounds. This bonus is only less effective against weakly armoured units such as Orks or Guardians, where the additional AP is useless, or against Monsters where the Hellfire Bolts, with their improved chance to wound, are more effective.
The damage output for the squad is not incredible. You are not going to be eliminating entire units, but you should be able to finish off an already damaged squad or put a few wounds on an enemy tank to cause it some problems.
This is one of the benefits of the unit in a way. They are not huge damage dealers, so are unlikely to be a prime target for the enemy guns, unless they have nothing else to shoot at. This makes them great for sitting and holding objectives or securing your backline against enemy reserves. Sit them in cover and they should do well to survive a couple of turns of enemy fire. You can even give them a Storm Shield to protect them for longer if you have the points to spare.

This Kill Team also makes a great partner unit for a different 5-man unit build. For example, if you want to take the Biker/Vanguard Veteran Kill Team I have reviewed previously, you need at least 5 Veterans to access the Kill Team. The Stalker Bolter Kill Team is a great choice to add to your force. You can combat squad the full unit to give a fast-moving, mobile objective-grabbing unit and a backfield, objective-holding unit with some good long-range firepower.
Unit Options
There are a few equipment options you can add to the squad to boost their output in the game.
As mentioned above, a Storm Shield can be a nice addition to the squad to help their durability against high AP weaponry. It is a cheap option if you have the points to spare, but not always necessary, as this unit is not often the target of such overkill firepower.
A Heavy Bolter is also a nice choice for this unit. Taking this gives you access to the Hellfire Shells stratagem, allowing you to deal mortal wounds to the enemy army. As this unit is unlikely to be moving much when deployed, you can get more accurate fire from the Heavy Bolter or when using the stratagem. If targeting an enemy vehicle, you can also double up with the Tempest Shells stratagem to deal 2D3 mortal wounds on an enemy vehicle if both shots hit.
A Missile Launcher is also a good boost for the Stalker Pattern Bolter squad. This gives you some access to long-range anti-tank firepower. The extra range of the Stalker Bolters also allows you to deploy the unit further back to help protect them (and the Missile Launcher) from the enemy guns. I will frequently run two squads of Veterans with two Missile Launchers and three Stalker Pattern Bolters in each squad. This gives me two solid backfield units with the range to threaten much of the enemy army.
Stratagems
You are probably not going to waste command points too often on this unit, but there are some useful stratagems that can come up every once in a while for their use.
Keep in mind Auspex Scan for this unit. As they are going to be sitting in your deployment zone, you might find enemy reserves landing nearby. You might be able to take a few casualties from an enemy unit when they arrive to make them less effective for their intended role. For example, this unit should be able to severely deplete or even destroy a unit of Militarum Tempestus Scions or Command Squad from reserve.
Also, keep in mind the Intercepting Volley when playing against Aeldari units, especially in a Ynnari force that has access to Agents of Vect. I’ve had a game where a key enemy unit has been brought in from reserve next to my Deathwatch. Auspex Scan was negated by Agents of Vect, but there was nothing to stop me using Intercepting Volley on the unit. If your opponent cannot block Auspex Scan, it also allows you to double up on your firepower against a unit with the Fly keyword.
As mentioned above, the Tempest Shells stratagem can be useful for this unit to use. The stratagem does not say that the firing weapon does not get the benefits of special issue ammunition when using the stratagem, so a single model will be able to deal mortal wounds to an enemy vehicle up to 36″ away if the rest of the unit is using Kraken Bolts.
This unit can also make great use of Synaptic Severence. Their extended range and 2 shots at full range can be effective for taking on those Tyranid characters at long range that have less than 10 wounds. A quick volley or two from this unit can take out that pesky Malanthrope and make the rest of your shooting a bit more accurate against the Tyranid ranks.
Unit Synergy
This squad can obviously be boosted by a nearby Watch Master or Watch Captain. Giving the unit re-rolls to hit will boost their damage output, especially if using the right Mission Tactics.
However, much of the time, you will be putting these assets in more valuable positions to give greater bonuses to the rest of your army or your units arriving from the teleportarium.
In a few game, I have been using a Captain with the Tome of Ectoclades supporting two units of Veterans, each armed with two Missile Launchers and three Stalker Pattern Bolters. The Captain gives the unit re-rolls of 1 to hit and the Tome allows the unit to choose the optimal Mission Tactics each turn for their target. This is great for dealing with enemy vehicles with the Missile Launchers and doing some additional wounds to weaker enemy units with the Stalker Pattern Bolters.

Overall:
As stated above, this Kill Team makes a great support unit for your Deathwatch army. Their key purpose is to sit on an objective in your backfield or securing your backfield. From there, they can use their long range firepower to still have an influence on the game. Even on the move, the unit can still put out a good level of firepower, as they are now only -1 to hit when moving and firing.
I don’t think you will be disappointed with this unit. They are not going to win you games too often, but they are solid performers that can be relied upon in your list.
And remember, Frontline Gaming sells gaming products at a discount, every day in their webcart!


