


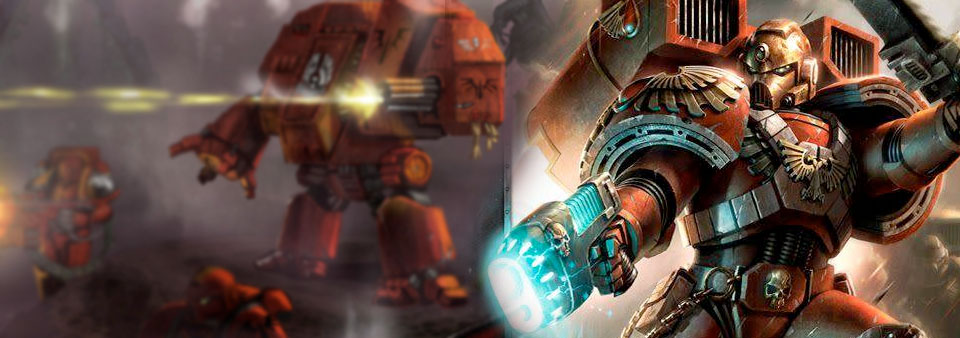
Reecius here to give an example Blood Angels list and explain how to use it, too. As always, check the Tactics Corner for more great articles and ideas.
So first of all, you may want to check out the Codex review I wrote to understand some of what I am talking about. Follow the links for Part 1 and Part 2 of that article series.
That out of the way, here’s the basic concept: a list that can hit very hard in melee, is mobile, can counter enemy tricks and can win missions. Now, this is also what works for me. I am not saying it is the greatest list in the world or the “best” way to play Blood Angels or anything like that, but that in my games it was effective and fun to play, too. So without further ado, here’s the list:
| Unit | Force Org | Cost | # | Total | Weapons | Cost | # | Total | Total |
| Brigade | Command Points | 9 | |||||||
| Captain with J.Pack | HQ | 93 | 1 | 93 | Thunder Hammer | 21 | 1 | 21 | |
| 0 | Inferno Pistol | 9 | 1 | 9 | |||||
| Lemartes | HQ | 129 | 1 | 129 | 0 | ||||
| Sanguinor | HQ | 170 | 1 | 170 | 0 | ||||
| Scouts | Troops | 11 | 5 | 55 | 0 | ||||
| Scouts | Troops | 11 | 5 | 55 | 0 | ||||
| Scouts | Troops | 11 | 5 | 55 | 0 | ||||
| Scouts | Troops | 11 | 5 | 55 | 0 | ||||
| Scouts | Troops | 11 | 5 | 55 | 0 | ||||
| Scouts | Troops | 11 | 5 | 55 | 0 | ||||
| Death Company with Jump Packs | Elites | 20 | 15 | 300 | Power Sword | 4 | 5 | 20 | |
| Sanguinary Ancient | Elites | 84 | 1 | 84 | Encarmine Sword | 12 | 1 | 12 | |
| 0 | Angelus Boltgun | 3 | 1 | 3 | |||||
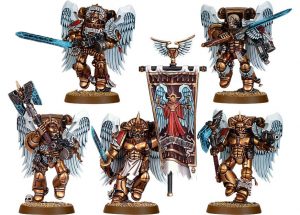
| Sanguinary Guard | Elites | 20 | 10 | 200 | Encarmine Sword | 12 | 10 | 120 | |
| 0 | Angelus Boltgun | 3 | 10 | 30 | |||||
| Scout Bikers | Fast | 23 | 3 | 69 | Storm Bolter | 2 | 4 | 8 | |
| Scout Bikers | Fast | 23 | 3 | 69 | Storm Bolter | 2 | 4 | 8 | |
| Scout Bikers | Fast | 23 | 3 | 69 | Storm Bolter | 2 | 4 | 8 | |
| Devastator Squad | Heavy | 13 | 5 | 65 | Heavy Bolter | 10 | 1 | 10 | |
| Devastator Squad | Heavy | 13 | 5 | 65 | Heavy Bolter | 10 | 1 | 10 | |
| Devastator Squad | Heavy | 13 | 5 | 65 | Heavy Bolter | 10 | 1 | 10 | |
| Totals | 83 | 1708 | 269 | 1977 | |||||
| Command Points: | 12 | Detachments: | 3 |

So, a Brigade which is my favorite way to play but also a great way to play Blood Angels. The reason being that they really want a lot of CP to do their tricks. You will burn through most of them on the first two turns, much like with a hard hitting Chaos list. In order to do that, you need to fill out the troops, fast and heavy slots. For me, the best (and cheapest) option are Scouts and Scout Bikers as they are so gosh dang useful. The Scouts give you incredible utility and board control and with Red Thirst can hit pretty hard in melee, too. Scout Bikers have absurd damage output for their points, are crazy fast and have a fun stratagem, too. These are two of my favorite units in 8th ed 40k right now.
The Devastator Squads are there to fill the heavy slots cheaply, block out your backfield and hold objectives. Three units of five 32mm based models like Devs, can fairly effectively block out nearly all of your deployment zone from enemy outflankers and deep-strikers if you spread them out. Plus, in cover camping an objective, they’re pretty tough to take out. I do this same thing with my Tactical Squads all the time, and the Heavy Bolter is there to put some pitter-patter shots downrange at targets of opportunity at BS 2+ thanks to the Signum. These guys aren’t there to really kill anything, they are there for board control and defense, freeing up your aggressive units to concentrate on doing their thing.

The HQ selections are there for a very specific purpose. It’s a tough call with Blood Angels as they have so many awesome choices, but for me I want maximum force multiplication for the least points, or utility. To that end I go with the Sanguinor first as he hits very hard, has good defense and his incredible +1 attack buff cannot be stopped via Deny the Witch, etc. Plus, if you make him your Warlord, he has a fearless aura and triggers the Heirs of Azkaellon rule on the Sanguinary Guard, giving them a full re-roll on shooting and melee. The Fearless aura is actually quite good for them as the Death Company take heavy casualties and it saves you from burning 2 CP to keep them from losing models to morale. I also take Lemartes to give the re-roll charges and attacks aura to the Death Company to increase the odds of making that all important charge from out of reserves. He’s also a bad ass in melee, too!

Lastly, my main man: Captain Smashface! So you all have heard me sing his praises in a Space Marines army where he is often my MVP and the same basic principles apply here except that in Blood Angels he’s pure offense whereas the Space Marines version is about durability and damage output. By giving him the Death Visions of Sanguinius strat and all of the multitude of ways to increase their attacks, he hits like a Mack truck. Also, the sneaky part is that he can use the Forlorn Fury stratagem to move up the field before the game begins. This puts him in position to assault with the units coming in from reserves and cause all kinds of disruption. He can take out a Super Heavy Tank by himself in one fight phase if you pump enough resources into him! Also, he can take a variety of relics on the fly such as the Hammer of Baal or the Angel’s Wings as you need them to help counter what your opponent has. The Angel’s Wings especially are great when you need to get the Death Company into a unit that has very powerful overwatch as he can go in first and stop them from shooting. It also helps loads when taking out things like Fire Raptors or Storm Ravens (which is absolutely wrecks, by the way). If you opt for him to be the Warlord he opens up a lot of options with the opportunity to get an increased FnP save through Gift of Foresight, more damage with Artisan of War, or the Fearless aura if you need it, too. If he is your Warlord though, you want to try to keep him near the Sanguinary Guard if possible but often he ends up going off on his own. You always have Lemartes to give them re-rolls in melee, too, if needs be. In all, this single model can do so much for you, and adapt on the fly, he is too good to pass up on. Just don’t expect him to last too long if your opponent really wants him dead. If you play smart with him he can cause massive disruption but if your opponent can get a bead on him, he goes down pretty quick.

The Sanguinary Ancient fills the last Elites slot but also gives you +1 to your leadership which is great with the larger units in this army as well as the awesome re-rolls of 1 to wound in melee aura that will really increase your damage output. It also gives you the opportunity to take the Standard of Sacrifice, which helps a ton to protect your squishy assault force with a 5+ FnP style save. Lastly, he is no slouch in combat and as he is one of the only Banner Bearers with a Jump Pack, he fits in with the rest of the force extremely well as he keeps up and can Deep-Strike with his buddies.

Death Company are there to plow the road. They are your first wave of attack and will typically drop down and go in with the Descent of Angels strat+Lemartes. They go for maximum damage! You want to use their Bolters to clear a gap behind your opponents first screen if at all possible, and then assault over the first screen and into any gaps behind them that you can exploit and engage as many enemy units as you safely can, calculating how much overwatch and counter attack you can endure with enough of your Death Company to hit again with. It is also important to make sure to stay in the Ancient, Sanguinor and Lemartes’ auras for maximum bloodshed! Your objective is to clear the road as much as is possible and you will almost certainly be using the Honour the Chapter stratagem to go at it, again. You are going to take a lot of damage in the process and it is a rare game the Death Company survive. However, if they die dropping your opponent’s ability to stop the rest of your attack and then draw a boatload of fire in their turn while dying, then they did their job. It is good to note that the Scout Bikers are also excellent at clearing chaff and if you need them to assist the Death Company in their job, they will do so with flying colors. Pro Tip: you don’t always have to deep strike. It is important to know when to use that and when to use Forlorn Fury to move up the field and when to just start on the table. It will depend on what you opponent has but if they don’t have a lot of ranged firepower you are worried about, just start on the table and save the CP.

Wave 2, and equally as deadly (if not more so) are the Sanguinary Guard. If they make it in to combat turn 1? Great. But don’t count on it. They can drop down next to the Ancient for the 5+ FnP aura, or sometimes better, you drop them down turn 2 after the Death Company have done their thing and then use Descent of Angels again to come in with another wave of Blood Angels assault power into hopefully the guts of your opponent’s army as the Death Company dropped their defenses. The Sanguinary Guard are better for attacking vehicles, monsters, characters, etc. as they deal staggering damage. The Sanguinor is their buddy and again, they want to be near the Warlord who will buff them to high heaven.

While all of this is going on, your Scouts and Scout Bikers are grabbing objectives, blocking enemy movement, applying pressure and controlling the board. They can jump in where needed to combat, etc. and generally focus on winning the mission while your assault force smashes face (and often dies in the process). By the time your opponent can recover, you’ve probably already won the game. And the Devs quietly hold the backfield and occasionally go pew-pew with their Heavy Bolters and if they get really lucky, might pop off a Hellfire stratagem to do some Mortal Wounds. Yay!
You could also mix quite a few things up, like taking Meph instead of the Captain, or a jump Sanguinary Priest, etc. The great thing about Blood Angels is they have so many dang options. What would you change in this list?
So there you go! This is a Blood Angels army that has worked for me and is a lot of fun and is comically good at chopping Flyers out of the sky in melee, which always puts a big smile on my face. Hopefully it helps give you some ideas and helps you on your way to kicking butt with Blood Angels. If you have any questions, let me know in the comments section!
And remember, Frontline Gaming sells gaming products at a discount, every day in their webcart!


