
Thomas Hegstrom-Oakey brings us his Hammer of Wrath GT report. Thomas is currently the top ranked Space Marine player in the ITC!
So I attended the Hammer of Wrath GT in Pasadena California last weekend. I went last year and had a great time so I convinced a couple buddies to spend 10 hours (one way) in the car with me and head down from Utah to the tournament this time around. If you ever have the opportunity you should try and make it to Hammer of Wrath or just check out the Game Empire. Its a great store and tournament. This year with the new enthusiasm for 8th edition we had 52 players on day one! Man just shy of that Major!
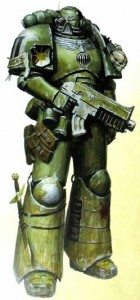
I decided to bring a list created from the brand new Adeptus Astartes codex. Being a Space Marine enthusiast I was excited to see what the codex had in store for the game and space marine players. I also had been brainstorming based on the rumors and leaks from Games Workshop ahead of time so as most who paid attention I had a general feel for what was coming. I settled on list using Ravenguard Chapter Tactics but really pivoting around the phenomenally powerful Forge World character Lias Issodon. If you’ve never heard of him, here’s a quick rundown: he’s the chapter master of the Raptors Space Marine chapter a successor chapter of the Ravenguard. He first appears in the Badab War fighting on the side of the Imperium against Luft Huron. In game he’s always been more of tactician than a straight up badass (as is his backstory), and this edition he’s bringing more of the same, though he got better himself as well. In game terms he’s a chapter master (reroll aura), has a second aura which allows raptor infantry around him to move, advance, and charge +1 inches. He also has a personal +2 to his save in cover on top of a 2+ save to start, and comes with a really brutal 30” assault 3, strength 5, armor piercing -4, D3 damage bolter. But the real reason you bring this guy is his ability to put himself and 3 other raptor space marine infantry (no terminators, primaris, or centurions) units into reserve and then have all of them appear more than 9” from their enemy at the end of any of your turns. Holy crap! So I built the following list based around using him and the ravenguard’s powerful Chapter Tactics.

Matched play 2k list:
Brigade detachment Raptors space marines (using Ravenguard chapter tactics)(+9 cp):
- (Hq) Lias Issodon 195
- (Hq) Captain with jump pack, Teeth of Terra, and stormshield (+15) 108
- (Hq) Librarian with jump pack, force axe (+16), and storm bolter (+2) 134
- (E) Company ancient with power sword (+4) and Banner of the emperor ascendant (-1 cp) 67
- (E) Apothecary 55
- (E) Apothecary 55
- (T) 5 Marine scout squad with camo cloaks (+15), heavy bolter (+10), chainsword, and stormbolter (+2) on sergeant 82
- (T) 5 Marine scout squad with camo cloaks (+15), heavy bolter (+10), chainsword, and stormbolter (+2) on sergeant 82
- (T) 5 Marine scout squad with camo cloaks (+15), heavy bolter (+10), chainsword, and stormbolter (+2) on sergeant 82
- (T) 5 Marine scout squad with camo cloaks (+15), heavy bolter (+10), chainsword, and stormbolter (+2) on sergeant 82
- (T) 5 Marine scout squad with camo cloaks (+15), heavy bolter (+10), chainsword, and stormbolter (+2) on sergeant 82
- (T) 5 Marine scout squad with camo cloaks (+15), sniper rifles x5 (+20) chainsword on sergeant 90
- (H) 8 Marine devastator squad with armorium cherub (+5), power axe (+5) and storm bolter (+2) on sergeant, lascannons x4 (+100) 216
- (H) 8 Marine devastator squad with armorium cherub (+5), power axe (+5) and storm bolter (+2) on sergeant, missile launchers x4 (+100) 216
- (H) 8 Marine devastator squad with armorium cherub (+5), power axe (+5) and storm bolter (+2) on sergeant, grav-cannon x4 (+112) 228
- (F) Attack bike with heavy bolter (+10), and twin bolter (+2) 47
- (F) Attack bike with heavy bolter (+10), and twin bolter (+2) 47
- (F) Attack bike with heavy bolter (+10), and twin bolter (+2) 47
- Auxiliary support detachment (-1 cp):
- Culexus assassin 85
- Total: 2000
- Command points: 10


After I wrote a draft list and played a couple games I saw Reece throw down with his version of this list on the live stream and made a few tweaks. Really I wanted to be sure that I was playing the rules and abilities in the codex right. I opted not to go with stern guard or a drop pod for characters like he does. I think his record reflects how good those options are, but going into the tournament I was more interested in being able to keep further away from my opponents. Also of note, I still wasn’t sure until I arrived at the tournament that I could not use the Ravenguard specific stratagem to put a unit in reserve and have them arrive turn one (NOTE: You CAN use the Chapter specific Stratagems of the parent chapter if the successor chapter has none of their own. So, Raptors can use the Ravenguard Stratagem to infiltrate a unit). Alas I could not because I was running as Raptors (to bring Issodon of course) only a lowly successor chapter. This limited the utility I could get out of my banner, or at least limited the placement I could make with my devastator bomb if I wanted it to take advantage of the banner, and my apothecaries also. But more about what I would change later.
The strategy of the list and its build allows for a massive beta strike. With so much appearing from reserves and scouts to be area denial I was simultaneously able to avoid alpha strikes, limit my opponents own reserves placement, control much of the board (at least initially), and protect portions of the board for my own future reserve placement. A list like this lends itself to going second and being able to get the last shot in and last move onto objectives. So based on that my strategy was in fact to go second in most cases (remember me typing this later 😛 ). On the other hand if my opponent was cagey and wanted to force me to go first I still could provide a nasty alpha strike to deter them. I included a librarian for his ability to null zone if needed or at least buff a character or two. I think the utility of a single psycker has gone way up from last edition. Also along the same lines I brought a culexus assassin. Both the libby and a the assassin are very useful for anti-psychic protection and negation. Also the assassin is very hard to kill and good at taking back field objectives from small enemy units and getting line breaker or denying maelstroms in the enemies turf. I needed another HQ and I have long been in love with the Space Marine relic the Teeth of Terra. Its iteration this edition is better than ever because you don’t have to pay points for it and it packs quite a wallop against light to medium infantry. So onto a captain with jump pack and storm shield it went. This guy always gets work done for me. I love this combo and suggest space marine (or chaos space marine) players try it out. Finally I included 3 single attack bikes, largely because I had to, to fill slots for the brigade. I was hoping they would be useful as extra shooting with their heavy bolters, and a fast moving choice that could zip off and get objectives or line breaker as needed.

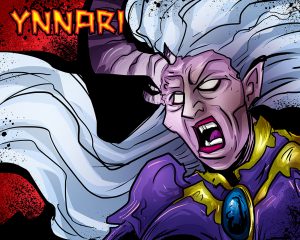
Game 1: The mission was the ITC retrieval mission which has dawn of war deployment. My opponent whose name I’ve embarrassingly forgotten was a really chill fellow running a Ynnari list with four flyers three of which were forge world, two night wings, and one phoenix and one hemlock The Yncarne, three harlequin troupes in three star weavers and various characters: troupe masters, and a solitaire. The terrain was pretty good considering 8th edition really requires more terrain (especially line of sight blocking terrain) than ever before. The table had 5 12” by 12” ruins one near each table corner and one in the center as well as some craters, and a forest elsewhere). Unfortunately the ruins weren’t as LoS blocking as I believe is really needed, but it was better than some of the tables I played on later in the tournament. My observations about terrain are not a negative reflection on the Game Empire by any means, every tournament and store are in need of better more LoS blocking terrain for this edition of the game.
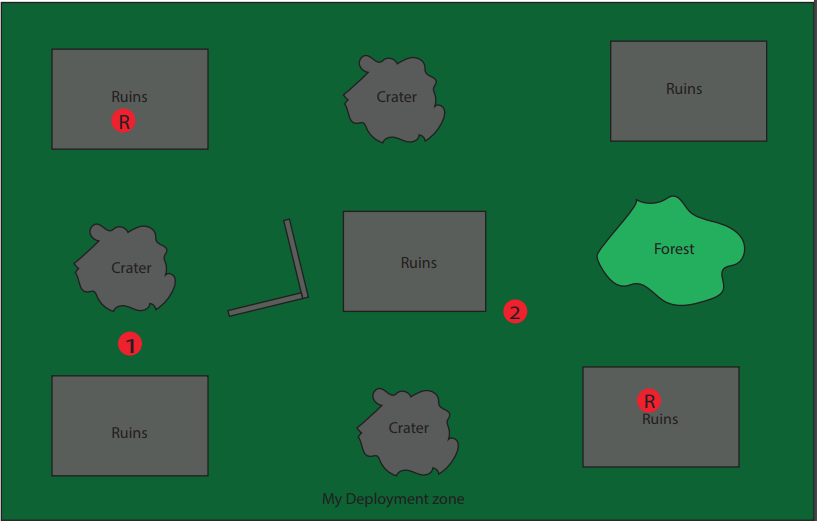

We each ended with our retrieval objectives in a ruin in opposite corners from one another and the two maelstrom/retrieval objectives in the middle number 2 near my left hand ruin and number near the middle ruin. As my list had 19 drops I wasn’t going to get the +1 to the die roll (that’s a theme for this tournament). Despite that I think he rolled a 1 or 2 and I rolled a 6. Being that there was no first blood/strike in the mission I opted to go second. I deployed Lias, my devastators, my captain, the culexus and my librarian in reserve. My scouts, I split two into each of the ruins in my deployment zone and two into the central ruin trying as best I could to hide them. I put my company ancient, one apothecary and two attack bikes into my right ruin (where my retrieval objective was) and one attack bike and apothecary into the left ruin. My opponent deployed all his harlequins into their transports, two troupes, characters in their star weavers into his right hand ruin and one hidden behind his left hand ruin. His flyers were deployed across his zone, his Yncarne in reserve of course, and his 5 man dark eldar warrior squad on his retrieval objective in his right hand ruin.

My opponents turn one: His maelstroms were to kill an enemy unit and have a unit in my deployment zone I believe. He moved up with his flyers toward my left flank ruin where I had placed a couple units of my scouts an attack bike and an apothecary. His harlequin troupes moved up in their transports to positions where they could harass later with one troupe moving toward my 2 scout units I infiltrated into the center ruin and one onto the #2 maelstrom objective. During his shooting he killed attack bike deployed on my left flank, which he then used to bring down the yncarne and kill a couple models from each scout unit. He also opted to cast conceal on his hemlock. Finally he shot and killed another one of my attack bikes semi hidden at the back of my right hand ruin.

My turn one: My maelstroms were the same as his I believe, to kill an enemy unit and get a model in his deployment zone. I moved my apothecary and wounded scout units on my left flank forward in a nearly impossible gambit to surround and destroy his star weaver full of harlequins. My scouts in the center moved toward his star weaver near them to try and do the same. I brought down my culexus in his backfield to try and harass his Dark Eldar warriors and maybe take the objective back there as well as force him to maybe bring some things back to face her. My Captain with jump pack I put 9” away from the star weaver in the middle in an effort to both buff my scouts there and maybe get a long charge on it. My main forces dropped into the ruin in my deployment zone where I had placed my company ancient and retrieval objective. I put a couple wounds on the star weaver in the center with my librarian’s smite. With my devastators shooting I was able to destroy one of his night wings, and heavily damage the other. The culexus killed a couple warriors but failed her charge. The scouts and apothecary on my left flank not only failed to put any wounds on the star weaver they were going after in shooting, but when they charged it they failed to do anything as well. My scouts in the center and a lucky long charge from my captain allowed me to destroy the star weaver in the center, but my forgetting that harlequins have flip belts and moving too close meant they just got out surrounding me instead 🙁 .
My opponent’s turn two: His maelstroms were objective 2 and 3 of his units and none of mine in his deployment zone. He moved his hemlock and a star weaver back to try and deal with my culexus in his backfield after dropping that star weaver’s harlequins out and moving them to support his dismounted troupe in the center. His remaining night wing and phoenix moved toward the center to try and take on my scouts there and the Yncarne and a couple of harlequin characters jumped out to deal with my scouts and apothecary that had been surrounding his star weaver (which moved away of course) on the left flank. His hemlock again concealed itself since its only viable smite target was the culexus which can’t be effected by psychic powers. His hemlock shot at my culexus and luckily only did 2 wounds, but another wound went on her via a charge from a star weaver. On my left flank, between shooting, the Yncarne’s psychic powers and close combat my scouts and apothecary came to an ignoramus end. in the center his shooting went really poorly with both the phoenix and harlequin troupe mostly missing leaving one scout unit and my captain alive, though one full unit of scouts fell to shooting. He then charged his troupe master, and both harlequin units into the captain and remaining scouts. He opted to go first with his troupe master and try and kill my captain. He put up maybe 3 wounds even with reroll to wound and I made my 3+ invuns. I then interrupted with my captain and killed 4 out 5 of one of his troupes due to bad invun saves on his part. between the remaining one harlequin and his full unit he wiped out my other scouts easily and consolidated into my captain.

My turn two: My maelstroms were to kill an enemy unit and have 3 of mine and none of his units in my deployment zone. I disengaged with my culexus in the backfield in an effort to get out of line of site of the hemlock (the only thing back there I was worried about, because his flamer shots hit automatically, ignoring the 6+ to hit her ability causes) having succeeded at living to both give me a maelstrom point and block him from one of his. My captain disengaged in the middle and i shuffled some of my forces in my ruin though the heavy weapons remained still. My librarian got a lucky 11 on his smite against the harlequin troupe in the middle, wiping them out and my shooting failed to killed the troupe master but put a lot damage on the phoenix as it was the only thing left I could see.
My opponents turn three: I believe he had kill two enemy units. He moved the Yncarne toward his own back field to try and help deal with my culexus. His hemlock flew along my left table edge and concealed itself yet again. his remaining star weaver with a troupe and solitaire in it flew behind the central ruins to hopefully go for a turn 4 charge on my ruin full of devastators and characters as did his remaining troupe master. His phoenix and remaining night wing, both of which were heavily damaged tried to move forward so he could put some damage on my devastator units without the -1 penalty to hit caused by my chapter tactics. He also left a harlequin character out on my left flank where it could claim objective two if needed. between shooting and another charge from his star weaver he managed to finally finish off my culexus. His phoenix and night wing did some damage to my lascannon unit of devastators but I did some damage in return with the company ancient’s banner effect.
My turn three: I again rolled kill and an enemy unit and 3 of my units and none of his in my zone, blah. I moved my captain and remaining attack bike toward his deployment zone and his ruin one my right. I wanted to ensure line breaker and also needed a unit in or near his deployment zone in case of I rolled a line breaker maelstrom of my own. I could only see 4 units at this point which were his night wing, phoenix, hemlock (which was out of range) and the lone character sitting and holding objective 2. I managed to knock down both the phoenix and nightwing with my lascannon unit to spare. At this point my opponent, worried, both about time and positioning decided to drop his Yncarne in where the flyers had been. I was surprised to say the least, especially since I had 2 or 3 lascannons to shooting at him. He made a good decision though, because it protected his lone character next to objective two and I failed to kill the Yncarne only cause 5 of his 9 wounds.
My opponent’s turn four: He moved up one of the remaining star weavers, his troupe master, his solitaire, his last harlequin troupe and the Yncarne all toward my devastators, characters, and remaining two scout squads. His hemlock flew across the board to also engage. his remaining harlequin character (another troupe master I think) went and hid in the left hand ruin to get linebreaker, while his other star weaver flew to hold objective two and his warriors remained faithfully holding his retrieval objective in his deployment zone. He made charges in on my army with everything but the Yncarne, who failed rolling double ones! He then set about fighting and of course being Ynnari it meant every time a unit died on either side he got to take another action. I can’t remember all the details, but by the end of his turn his troupe master died, as did my librarian and missile launcher devastator squad. His Yncarne had also been able to join the fight because of the troupe master falling. I was starting to sweat bullets thinking that this long gambit had worked out really well for him and might give him the game.

My turn four: Most of my army was engaged at this point, but I had done quite a lot of damage to his Yncarne in overwatch and I believe even with a wound or two coming back because of dying harlequins I had him down to a wound or two left. I rolled fairly well and shot the Yncarne with bolt pistols from the still full grav-cannon devastator squad (he had consolidated into) and he failed his last remaining saves! the Yncarne went down, meaning the solitaire swung again killing a bunch of scouts I think. My other close combat fighting saw the end of the solitaire and his remaining star weaver, leaving only the troupe I believe. I had opted to bring back my attack bike, but flew my captain into the ruin in his deployment zone I had been headed for wanting to secure line breaker and also having rolled a line breaker maelstrom.
My opponent’s turn five: Time was running out and the game pivoted on a couple of things. He had to keep me from getting to objective one which would tie up the retrieval mission and he also needed to kill my captain in his deployment zone to eliminate me getting linebreaker. Knowing we weren’t going to get a turn 6 the maelstrom had ended up a tie. Unfortunately the death of the Yncarne and the poor performance overall of this harlequins meant he didn’t have enough stuff to keep me from getting to objective one. He tried for a last gambit of his harlequins shooting and then charging my warlord to try and get slay the warlord, but alas it was too little and poor dice hurt as well with his only harlequin with a fusion pistol rolling a one to wound! We had both exhausted our command points the previous turn. He tried to use his hemlock to kill my captain, but my always faithful captain made his invuns and survived. We called it that point being that there was nothing else to be done. We tied both the eternal war and maelstrom missions, but I got all 3 tertiary points, and he got only 1. game ended 11-9. My opponent was great and a nice guy. We had an amiable game, being able to talk everything out easily. I’m embarrassed to say I forgot his first name! If I had the game to do again I think I would have waited to drop the culexus in his back field for a later turn so his other stuff wouldn’t have been around to respond. I may also have done the same with my captain with the ruin on my left flank and objective two, but that said he did a lot of work in the center of the table and then clutching line breaker for me in the end.
Game two and three in the next article! Please check out the tactics corner for more tactics, articles and Frontline Gaming for all your hobby needs at an everyday discount!
And remember, Frontline Gaming sells gaming products at a discount, every day in their webcart!


