

Hey everyone, Reecius here with another Age of Sigmar tournament battle report! This time the Free Peoples went off to the At Ease Carnage event.
I changed my list up upon learning that the old Battalion that I was using, the State Troop Detachment, was no longer legal. So, I opted to go with some advice from the this here blog’s comment section and took Louen Leoncoeur to bolster my army’s low Bravery.
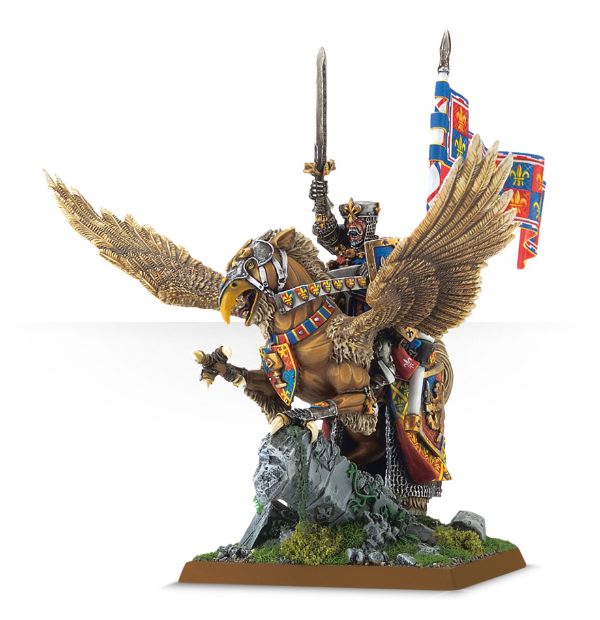

For those that don’t know, he is the top dog of the Brettonians (who also have the Free Peoples key word) and gives all Free Peoples in your army immunity to Battleshock. That’s pretty damn good, lol. It’s like army wide Fearless in 40k.
The only issue is that he is 400pts, and while he’s tough, he’s not that tough. In AoS, things die. It’s one of the coolest things about the game but you do have to be very careful with an expensive model like him that doesn’t have that many wounds. His damage output looks pretty impressive on paper as you can see, here. But in practice, I found him to actually not hit that hard for how much he cost. As he was so important to the overall army strategy, and was not too hard to kill, you have to play him very conservatively. You really take him for his Bravery buff. I am not saying he’s bad by any means, only that he’s a bit pricey for what you get.
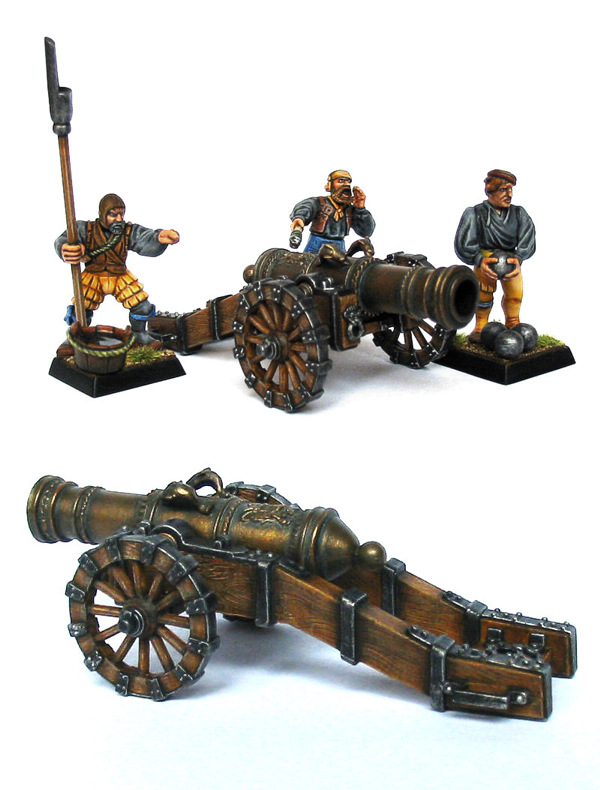

Other than that change, my army was largely the same, which you can see here. Still lots of shooting but with a big block of Halberdiers and an Empire Cannon which seems to still be legal to us, but correct me if I’m wrong. I say this because–as I’ve learned–if the name of the unit is unique and it has points in the General’s Handbook, then it has not been outdated or replaced. So, it appears to me to be good to go. The only reason this is relevant is because it has longer range than the Dwarf Cannon and the Grapeshot option which inflicts a mortal wound for each model in the target unit for each 6 you roll. Pretty brutal on big units, particularly if you pair it with a Celestial Hurricanum (or more than one, sheesh) buffing it to a 5+ or better (I sincerely hope they do not allow multiple iterations of the same buff to stack in the General’s Handbook 2). Edit: I misread the rule for the Hurricanum, it does not stack at present due to its specific wording. Sorry for the confusion!
Also, I think in one game I accidentally fired the Grapeshot at full range, which I apologize to my opponent if I did (Can’t remember which game but pretty sure I did goof). It has a very short range. If you read this, sorry for that!
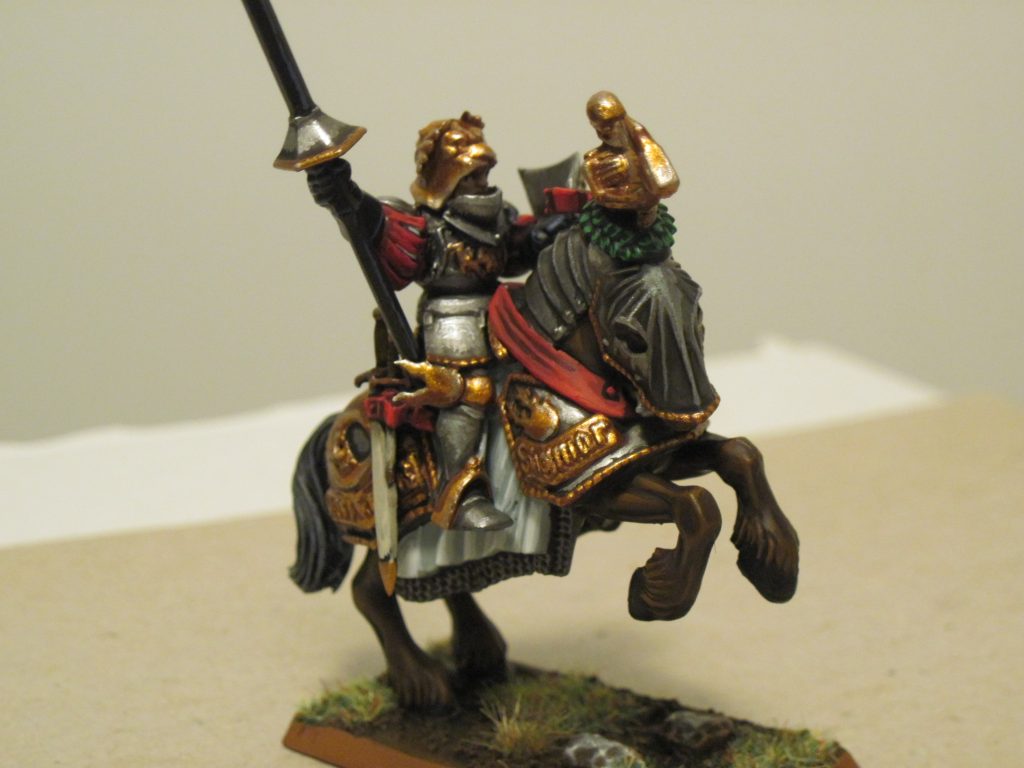

Lastly, as I had Leoncoeur, I opted to have my Empire General equipped to punch things–just to try it out–and I was surprisingly pleased with his performance. With the Relic Blade Artefact, he did 4 damage per attack with his Imperial Lance on the charge! His Shield also gave him a 3+. Yikes! For 100pts, that is not bad. Lastly I opted for a big unit of 30 Crossbowmen I had just put together to try them out as in ideal circumstances their damage output was crazy.
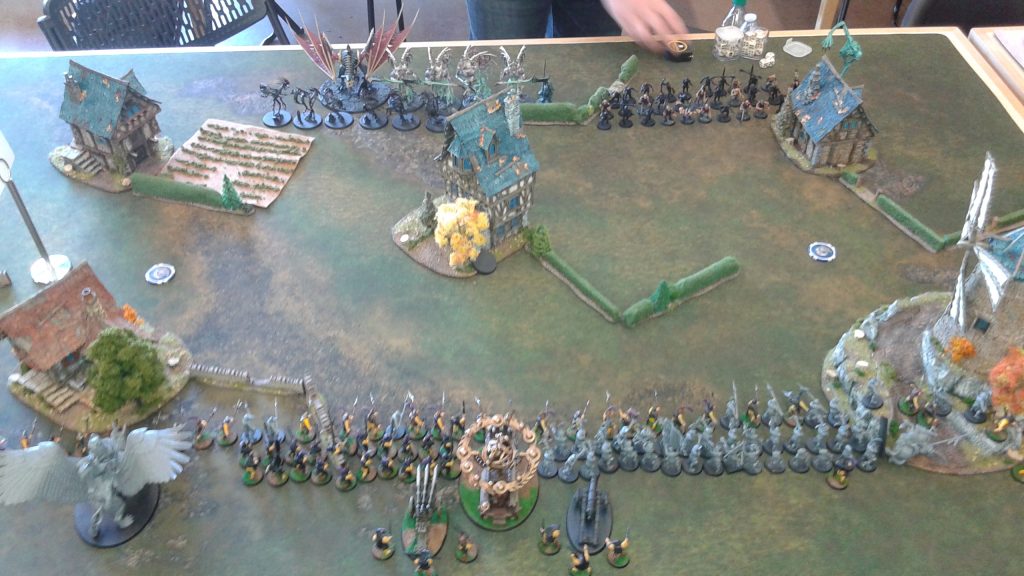

Round 1
- Mission: 3 Places of power: only Heroes can score objectives, Secondary and Tertiary Objectives
- Opponent: Death
- List from memory:
- Vampire on Zombie Dragon
- Necromancer
- Wight King
- Mournghoul
- Spirit Hosts x 6
- Morghast Archai x 4
- Zombies x 30
3 Places of Power is usually my worst mission as my army has weaker heroes and doesn’t want to send them out to battle. However, I now found myself with 3 Heroes, 2 of which were not so shabby.
Death is pretty one dimensional in how it plays right now: it runs at you. They have very little shooting so it is pretty clear what their strategy is going to be. I planned accordingly and lined up in my normal formation: melee unit bravely standing in the front, shooting units behind them, ready to blast enemy that got too close, artillery in the rear to rain down death. I had my Heroes behind the infantry screen to be patient waiting for the right time to advance.
I gave my opponent first turn, he advanced on to objectives. I moved into position to attack vulnerable Heroes first, as they are what win the mission in this Scenario. I Blasted the Wight King turn 1, then the Necromancer Turn 2. My Halberdier screen held back the Morghasts and Spirit Hosts while the Crossbowmen–who are holy crap good–and Handgunners blasted things from behind the screen. Once the coast was clear, my General and Hurricanum advanced on to objectives to start earning points. I sent Leoncoeur to take on the much wounded Zombie Dragon in a duel over an objective and he got summarily punked, lol. However, I was able to shoot the Zombie Dragon to death the old fashioned way but not such a hot impression of the King of the Brettonians on his initial outing.
Result: Major Victory for the Free Peoples.

Round 2
- Mission: 4 Objectives, hold all 4 on any turn after 2 and win, Secondary and Tertiary objectives.
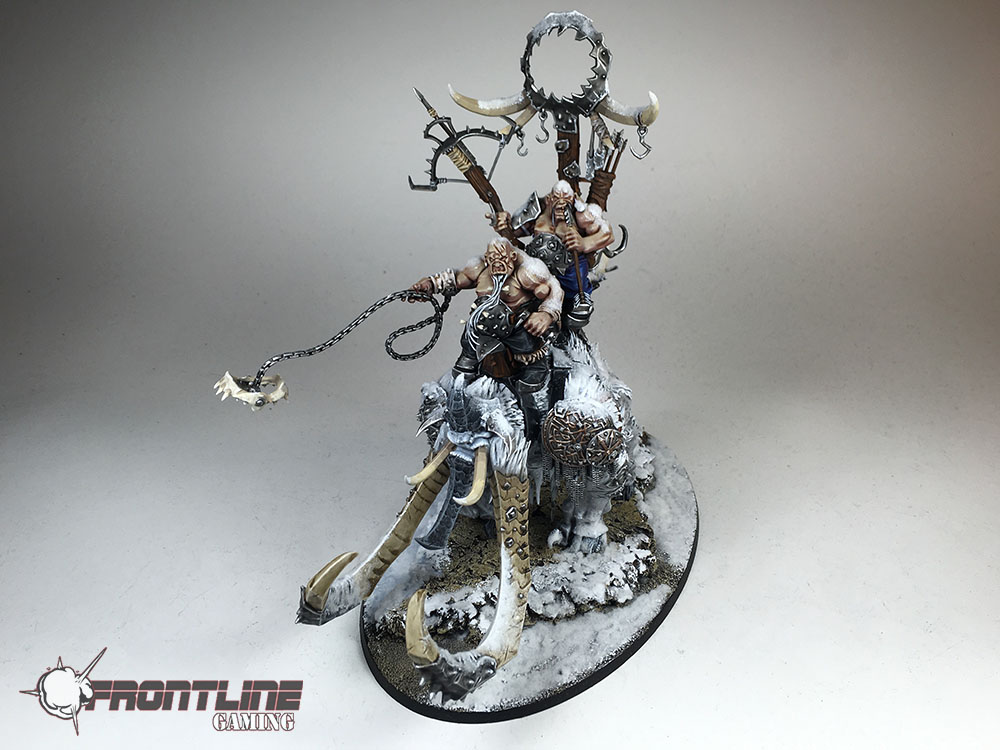
- Opponent: Beastclaw Raiders + Moonclan Grots
- List from memory:
- Stonehorn
- Stonehorn
- Thundertusk
- Moonclan Grots x 40
- Moonclan Grots x 40
- Moonclan Grots x 20
- Moonclan Shaman
- Fanatic
- Fanatic
A very popular list in the meta at present. Also, very good! Stoenhorns are just savage, with blazing speed and halving damage taken then are easily one of the most powerful units in the game. Thundertusks–while much easier to kill–can heal themselves or the Stonehorns and have an absolutely savage 6 mortal wound shooting attack at 18″ and another mortal wound dealing attack on top of that! Brutal. Moonclan Grots are weak individually but cheap and great in large amounts, plus Fanatics are one of the best units in the game. This was a no bullshit army.
However, this mission was great for me and I felt very confident. I knew if I could just hold one objective and weather the storm of his Beastclaw Raiders, then move to take objectives, I’d win. So, I turtled up on one objective, game my opponent first turn and waited for the hammer to fall.
Turn 1 was quiet, with both of us jockeying for position and mostly being out of range to do anything. Turn 2, the heat went up to 11 with his Stonehorns came in and killed 37 of the 40 Halberdiers in one turn! Holy $#!*!! However, in my turn 2, I murdered both of them, even with one having a 2+ save and both halving damage…wow! Such a brutal exchange.

I had the advantage here though, and quickly killed his Thundertusk, too. I had the game in my control at this point and began moving to take objectives. I had moved Leoncoeure to go after his rear objective, but he’d been blocked from butchering some Grots by a pesky Fanatic (good lawd they’re good!). However, my opponent was very savvy and kept his composure. He knew with his army’s speed he could snatch victory from the jaws of defeat if he got some luck….which he did, lol!
He won the initiative every dang turn, but when it really mattered was turns 4 and 5. He had me go first turn 4, knowing if he went balls to the wall and got the double turn on 5, he could win the game due to the scenario rules. Unfortunately for me, all of these things hapenned as he ran his remaining Grots onto my objectives on the top of 5, ending the game due to the mission before I could retaliate which would have resulted in a tabeling or near tabeling for him. Gah! So frustrating. Losing initiative all 4 rolls in AoS is only a 6.25% chance of occurring. Had I won any of those I most likely win a crushing victory. But, alas, I did not. Have to tip my hat to my opponent who stayed focused when many would have given up.
If only I had won a single dang initiative roll, lol. Oh well. In retrospect if I had simply ran my last 3 Halberdiers up to move block his Grots on turn 4, it would have stopped him from jumping on to my objective and I win. But, alas, I did not. them there is the breaks. Lesson learned though, that will never happen, again.
Result: Major Loss for the Free Peoples.
Round 3
- Mission: Escalation: 3 Objectives along the diagonal line of the board, Secondary and Tertiary objectives.
- Opponent: Disciples of Tzeentch
- List from memory:
- Gaunt Summoner
- Blue Scribes
- Herald of Tzeentch
- Lord of Change with melee weapon
- Lord of Change with Shooting Staff
- Flaming Charriot
- Multiple units of Pink Horrors
- 20 Blue Horrors
- 20 Brimstone Horrors
- Balewind Vortex
- Changehost
Yowzer, savage list! Pumps out so many mortal wounds, it’s crazy. The real kicker though is that gawd-danged Balewind Vortex….holy shite that thing is stupid, lol. You summon it in to being, a Wizard jumps on to it, you CANNOT hit them in melee (which means some armies actually cannot hurt the dude on top) and the Wizard gets +1 to cast and doubles the range of their spells. Bananas. The Gaunt Summoner gets an utterly brutal spell, which on a 4+ for each model in a unit deals a mortal wound. Essentially it erases half a unit of 1 wound models. So savage. At 18″ range, you can work around it, but at 36″ range due to the Vortex…not so much.
Now normally, you cannot move this stupid thing, lol, so it gets locked in place. But in the Changehost Battalion–which allows you to swap locations of units–you can, apparently. So, the damned thing can warp around the table making it almost impossible to avoid it. I see why many events ban this stupid piece of scenery, haha. Do you sense my salt?! Although, in retrospect, does the Changehost let you move the Vortex? I would think it moves units in the Battalion and is the Vortex considered to be the same model as the Wizard on top of it? Might have to look in to that one, further.

At any rate, I knew I had to play defense as my opponent only had 2 drops (thanks to his Battalion) and would be determining who went first or second. Now, knowing this, I assumed he’d give me first turn as I deployed out of range of his attacks, which he did. I then nudged my big guns into range of the only unit of Pink Horrors that could threaten me by swapping places with the Vortex and fired five D6 damage shots at them, hitting on 3’s, all of which ignored their armor. Should be overkill, right?!?!
4 out of 5 shots miss….son of a %$#*&!! As I had moved my two melee Heroes over to that flank in anticipation of taking that objective and then hitting the enemy flank, I was now overexposed. Shite.
So then, of course, in comes the Vortex which zapped me with some mortal wounds. However, most of his army was out of range to do too much but he did move on to objectives. He won initiative and almost, almost took the double turn which would have given me the opportunity for a vicious counter strike but he wisely let me take the turn. Danmit! Haha.

This allowed him to weather a round of half assed shooting and re-positioning on my part, and then hit my again with his spells. I did manage to shoot that dang Herald off of the Vortex–thank Sigmar– but by now my opponent was racking up points on objectives and I was out of position. However, there was still hope. My two melee Heroes had secured an objective and were earning points. Leoncoeure had died to Lord of Change mortal wound magic but the Lord of Change had died in return to my General who had also murdered some Pinks (4 damage an attack is savage!). The key battle was going to be over the central objective.
My plucky Halberdiers had flubbed a run roll turn 1 (1″, gah!) which I knew would come back to hurt me as I had deployed them so deep into my territory. However, my opponent had over-committed his Burning Chariot, leaving it in a vulnerable position. My Halberdiers must have been stuck in the mud as after running only an inch, then failed a 6″ charge to hit the Chariot and slingshot them onto the central objective. Then, in the next turn, advancing and then going for the critical 4″ charge to get me back in the game by stealing the central objective, they rolled a 3″……AHHHHHH! Lol, random charges can go straight to hell, lol!
That sealed the game, unfortunately. My opponent earned another point for the objective I failed to grab, putting him mathematically out of reach for me to win, so playing further was pointless. Had I made that charge, I would have taken the objective and then all I needed was for that unit of 40 Halberdiers to survive two turns to win the game by 1 point. You never know what would have hapenned, but as my opponent had lost a lot of his firepower by that point, I think it was very possible, plus I had 30 Crossbowmen coming in behind them to reinforce the Objective if they did get wiped. But it didn’t matter as they never got there, haha.
Well. Damn. Lol.
Result: Major loss for the Free Peoples.


While losing always sucks, I learned a lot. Again, my army felt solid. It wasn’t optimized but it was fun! I lost because of luck and lack of experience, not because my army couldn’t compete. The Free Peoples can hang in AoS. Unless I am missing something huge, I have yet to face an army I honestly don’t think I could beat.
That’s the awesome thing about this game. You always feel like you have a chance. When you lose, it isn’t to some bullshit, invincible Deathstar, but because of one little thing you usually could have avoided by playing better. I had a great time despite only going 1-2.
I am taking some advice from Francis (always a risky proposition!), and dropping Leoncoeure to try and see if I can compete without Battleshock mitigation. Looking at my new list, it certainly packs insane firepower…but it has its weaknesses for sure. I will be curious to see how it performs at the Broadside Bash, coming up at the end of the month (which I hope to see you all at!).
Thanks for reading!