


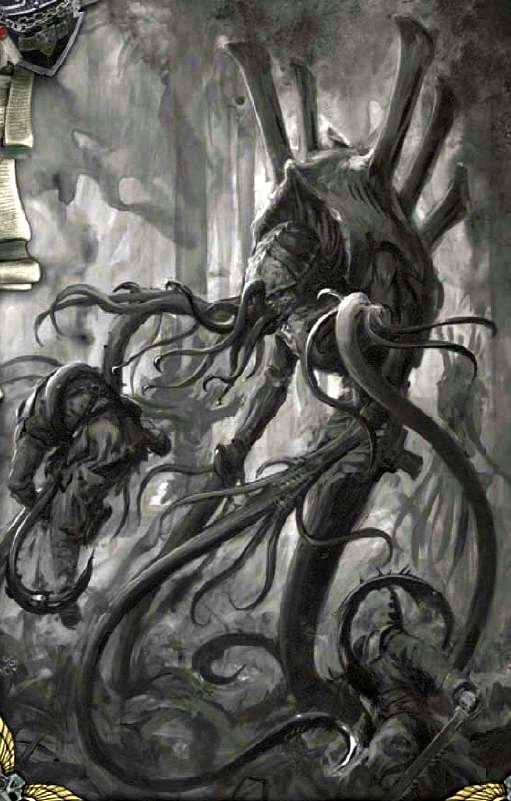
Hello everybody, Danny from TFG Radio here to take a look at the perfect predator, the great commander of the Hive-Fleets, the Swarmlord! Of course, you can check out plenty of great articles about all sorts of biomass to be consumed over at Frontline’s Tactics Corner.
So every Codex has at least one renowned, super-awesome character to lead its forces to victory, and the Great Devourer is no different, and today we will look at the premiere general of the Hive Fleets, an immortal killing machine that can never truly die, the creme-de-la-creme-de-la-biomass-slurry. So, let’s just get into it and see what we can see:
The Swarmlord is both a force multiplier and a melee powerhouse, and it will form the center of your line. Its Synapse and special rules make sure that all the little bugs stay in line and stay in the fight, and any unit that attempts to engage in fisticuffs with Swarmy is going to realize too late how dangerous it really is. The downside here is that Swarmy is a bit slow, doesn’t really shoot, and doesn’t have the best ranged defense.
Wargear:
Two Pairs of Bone Sabres
So Swarmy, despite having four arms, packs light and only carries with him four smaller blades, but they pack a punch. They give the Swarmlord a 4+ invulnerable save in melee (the best Tyranids can get except for a Zoanthrope), and its attacks are all Instant Death. Not too shabby at all, especially since Swarmy is WS9, S6, I6, and comes with 5 attacks. The lack of any kind of grenades hurts though.
Special Rules:
Alien Cunning: Whilst alive, you must add 1 to your Reserve Rolls
Psyker (Mastery Level 3): The best psyker Tyranids can get!
Shadow in the Warp: All enemy psykers suffer -3 Leadership when within 12.
Swarm Leader: At the start of each of your turns, choose either Swarmlord and its unit or any other friendly Tyranid unit to receive one of the following special rules: Furious Charge, Monster Hunter, or Preferred Enemy: This lasts until the end of the turn.
Synapse Creature: All friendly Tyranid units within 12 are Fearless and ignore Instinctive Behavior tests.
Warlord Trait: Synaptic Lynchpin – Add 6 inches to the Swarmlord’s Synapse Range
Ok, so it is easy to see how the Swarmlord really is a force multiplier and a battlefield general. Let’s jump into all the ways to make use of the Hive Tyrant of all Hive Tyrants.
First off, the Swarmlord is all about making other Tyranid units better. With an 18 inch Synapse range, you can really cover the bulk of your own line with Synapse as you have a 36 inch bubble around him of Fearless. Swarm Leader is great for making a horde of Termagaunts or Hormagaunts suddenly much more of a threat with Furious Charge, and as a bonus, it saves you points on Hormies as you don’t need to buy Adrenal Glands for them. You can easily catch an opponent off guard when suddenly that large blob of Termagaunts can pop Rhinos or any other non-walker vehicle with Rear Armor 10. Preferred Enemy can be useful on a shooting unit like a Flying Hive-Tyrant or a unit of Hive-Guard as well, giving you some extra reliability out of their shots. Rerolling 1s to wound can really ensure that a double-devourer Flyrant or Carnfiex mop up most T4 squads.
The bonus to reserve rolls also really helps a null deploy style of Tyranids work although with a hit to flexibility. You can’t choose to delay units, and sometimes, that really helps, especially if going against another Reserve heavy army where you want their units to land first, so you can react to them. In many cases though, having the bonus to reserves really helps as you can rely on Mawlocs to come in starting on turn 2. You could definitely build a Lictorshame style list with lots of Mawlocs using the Swarmlord to make sure they start to pop up on Turn 2.
With ML 3, the Swarmlord is going to know at least one of the decent Tyranid powers, and half of all games, it will get the much needed Catalyst to ensure Feel No Pain. This is key as Swarmy is so expensive, you absolutely need to put as much defense on it as possible. With the Primaris power, Swarmy can have a 24 inch Synapse range, which is pretty damn nice. The Swarmlord is still only BS4 like other Tyrants, so Warp Blast isn’t too reliable with it sadly. Still, having a level 3 psyker is not a bad thing although you can’t rely on Psychic Scream the same way as a 6 inch nova is not too strong on a walking Tyrant.
Let us not overlook that the Swarmlord is also a melee beast that has Instant Death base on all of its attacks, and at WS 9 and I6, it hits before most other characters, hits on 3s, and is AP2 base, so you can easily cut the head off a character before they get a chance to swing. The 4++ save is also critical as Tyranids lack a lot of invulnerable saves, so having such an expensive character that has the chance to shrug off just about any hit is crucial, and it makes its extra wound over other Hive Tyrants go even farther. While Swarmy is not going to solo a Thunderwolf Star, it is still capable of putting the beat down on most other characters, including Greater Daemons.
The problem with the Swarmlord is keeping it alive via shooting. With only a 3+ armor save and no invulnerable outside of close combat, scatbikes, grav, or Tau are going to easily pick it up in the first turn or two. If you take Swarmlord, you really need to spend the extra 150 points and buy 3 Hive Guard to protect it for an additional 6 wounds to shunt off the big hits. You will also want to invest into either Venomthropes or Malanthropes to help protect it as well although cover saves are not as reliable as they once were sadly. This makes Swarmlord even more expensive as outside of his almost 300 point cost, you need to invest in Hive Guard as well as other support elements, so you are spending close to 600-700 points already. Venomthropes and Malanthropes are great for its style of army anyway, but still, it is a significant investment. A funny trick if you are taking other Hive Tyrants is to purchase Hive Guard for them as well, and the Swarmlord can jump to a new unit of Hive Guard after one unit dies. You don’t have to start attached to the Hive Guard, so you can purchase them to act as reserves for Swarmy. This can help you stretch out the ablative wounds. This is key as the Swarmlord just walks, and while he will generally run each turn since he has no shooting attacks, he still isn’t going very far, very fast.
The other tactic is to take Swarmlord in a Tyrannocyte and drop it into your opponent. While you forgo any protection for it, if your placement is on point, and your opponent doesn’t have the tools to deal with it in their backfield, the Swarmlord can put in work. The problem here is that if your opponent does have the tools, then you just spent 350ish points for not a lot of return.
In general, with the Swarmlord, his name says it is all: It is best utilized with a swarm army build that brings lots of little bugs to the table. Giving the little bugs Furious Charge greatly increases their damage output, and being able to more consistently brings in reserves makes Mawlocs more reliable. If you bring Swarmy, be sure to have plenty of defense around it, and be very wary of model placement when going against heavy shooting armies. You need to hug LoS blocking terrain because as awesome as the Swarmlord is, it is not nearly as tanky as it might seem.
Is the Swarmlord competitive? Probably not as a Flying Hive-Tyrant is still the most point-efficient machine of death in the Tyranid codex, but in a friendly game or even a Dark-Horse army build, the Swarmlord has some moves.
That’s it for today, Termies and Hormies, but check back as I continue to go through the codex, and of course, check out TFG Radio for all our misadventures, and be sure to say Hi to us at LVO.
And as always, Frontline Gaming sells Games Workshop product at up to 25% off of retail, every day!
Frontline Gaming will buy your used models for cash or store credit!

