

Like seeing plastic spacemans fight? Videos and flashy computer noises make Oog angry? Then click to read on, because today we have an old-school battle report between T0C’s AbusePuppy and Mr.MoreTanks.
My good friend Ben Schimmoller and I often practice against each other; it’s nice to have another tough player to try out different lists with, bounce ideas off, and just generally talk the talk about the game and add another head to your own when it comes to tournaments. So, with all the shakeup of the 2016 ITC season both of us were making some significant changes to our armies and wanting to get in some test games with the new Maelstrom and other things.
The Armies
My list:
BARONIAL COURT (+1 to Ion saves on the front, can fire overwatch, warlord rerolls misses in challenge)
1 Knight Warden (Warlord)
1 Knight Crusader (Rapid Fire Battle Cannon)
1 Knight Crusader (Rapid Fire Battle Cannon)
ELDAR COMBINED ARMS
1 Autarch (Skyrunner, Laser Lance, Banshee Mask)
3 Windriders (Scatter Lasers)
3 Windriders (Scatter Lasers)
3 Windriders (Scatter Lasers)
3 Windriders (Scatter Lasers)
1 Hornet (2 Pulse Lasers)
1 Hornet (2 Pulse Lasers)
1 Shadow Weaver
My thoughts: I feel pretty good about this going into things. Ben has a lot of Grav weapons, which don’t really scare Knights very much (though they can hurt them.) Similarly, his Ignores Cover is a lot less dangerous to me thanks to my invuln saves, so I should be able to weather most of his firepower and his him back pretty hard with assaults, which he has very few solutions to. My biggest danger is the turn he drops down, since I don’t really have enough bodies to hedge him out of my Void Shield completely and his Meltaguns can get lucky and just absolutely devastate me. Even with the changes to Maelstrom I still think he has the edge on me there, but it’s definitely not a complete blowout the way it used to be and the primary mission favors me heavily, since Ben has so many Fast Attack units for me to kill in order to tip things in my favor. Ben has a LOT of units and most of them are ObSec, so I’m gonna need to really hit him hard and maximize my firepower if I want to clear out enough units before the game ends in order to be able to win things.
Ben’s List:
GLADIUS STRIKE FORCE (free transports, doctrines)
1 Kosorroh Khan
1 Chaplain (Hunter’s Eye)
5 Tactical Marines (Meltagun, Combimelta, Drop Pod)
5 Tactical Marines (Meltagun, Combimelta, Drop Pod)
5 Tactical Marines (Meltagun, Combimelta, Drop Pod)
5 Tactical Marines (Grav Cannon, Rhino)
5 Tactical Marines (Grav Cannon, Rhino)
5 Tactical Marines (Grav Cannon, Rhino)
5 Assault Marines (2 Flamers, Drop Pod)
5 Assault Marines (2 Flamers, Drop Pod)
5 Devastators (2 Grav Cannons, Rhino)
3 Centurion Devastators (Grav Cannons, Omniscope)
10TH COMPANY STRIKE FORCE
5 Scouts
5 Scouts
5 Scouts
COMPANY OF THE GREAT WOLF
1 Wolf Guard Battle Leader (Combi-Melta)
1 Servitor
1 Servitor
1 Drop Pod
1 Drop Pod
1 Drop Pod
INQUISITORIAL
1 Inquisitor (3 Servo-Skulls)
1 Psyker + 3 Warrior Acolytes (Meltaguns)
1 Psyker + 3 Warrior Acolytes (Meltaguns)
Pre-Game
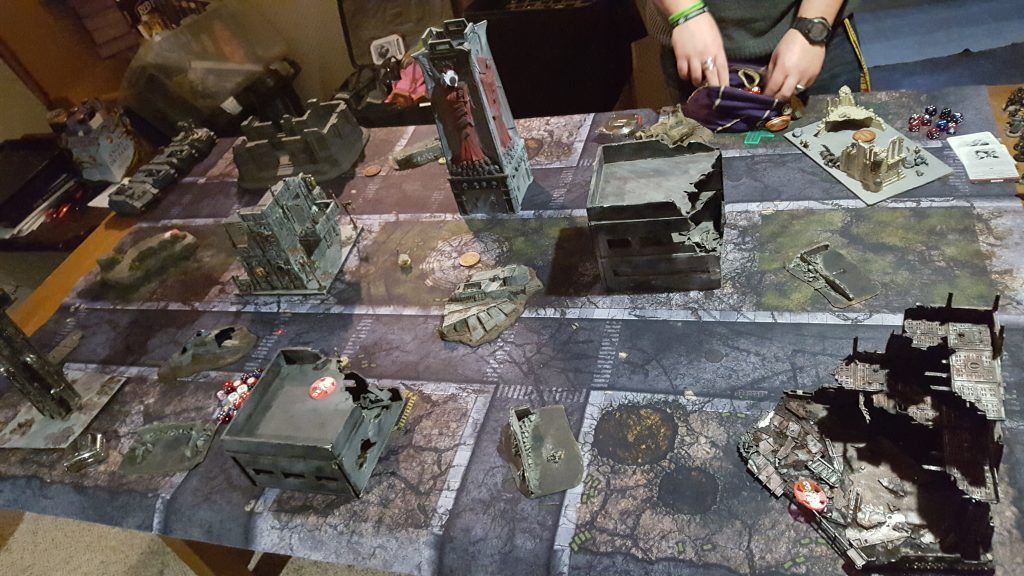
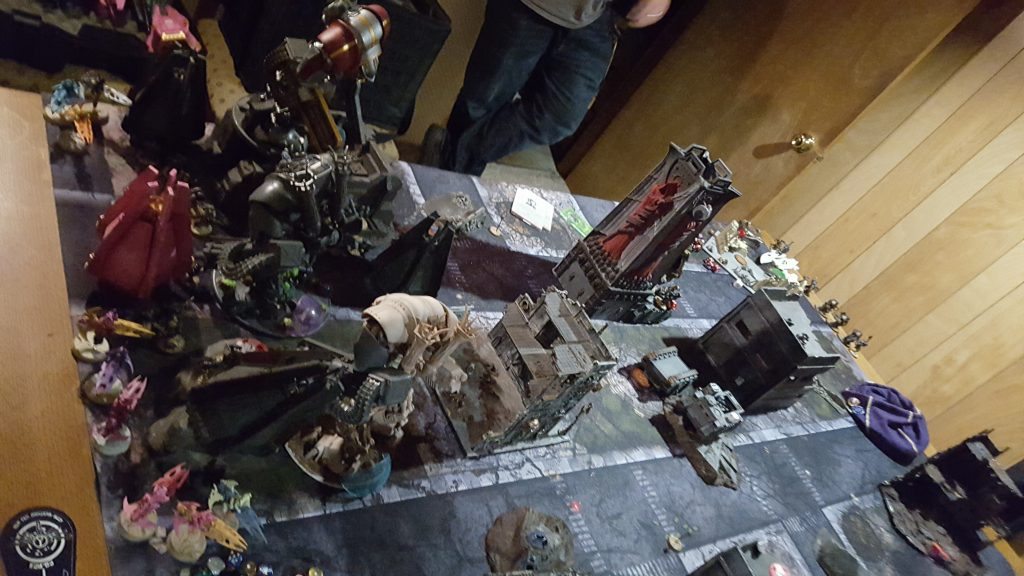
This was our terrain/objective setup; we rolled up ITC mission #4, which gave us the Scouring for a primary mission and Hammer/Anvil for our deployment type. My three objectives are the sexy pink ones- one in my deployment zone, barely visible on the center terrain piece near the left board edge, then a second on top of the building near the “bottom” and a third in the ruined building on the right-bottom. Ben’s three objectives are the wood tokens- one in front of the building at top left, one dead center of the board, and a third in the top right corner. Both of us favored the edges of the board somewhat with our objectives, me to maximize the chance of his Drop Pods mishapping if he went for them and him to make use of his outflanking potential. Terrain on the board was 4+ ruins for the big pieces and 5+ debris for the small ones, with only the Fortress of Redemption tower being impassible.
Ben wins the roll-off and chooses to take first turn after quite a bit of thought and discussion on the subject, since the new ITC missions have really changed the balance on that sort of thing. On the one hand, going first means getting in the alpha strike and being more proactive with Maelstrom. On the other hand, going second plays to the natural advantage of his superior number of units and his Scout movement, allowing him to gauge what I’m trying for and respond to it. We go back and forth on it a bit and eventually Ben decides to try for the alpha strike and takes first turn, simply to try out the new system as much as anything.
Ben’s henchmen units- which he characterized with a quote from Venture Brothers as “The perfect combination of expendable and invulnerable!”- all rolled on Telepathy, getting various unimportant powers but more relevantly Psychic Shriek on both of them. Thanks to Khan, his warlord trait was fixed. I had no psykers of my own (?!?!!?) and rolled up Master-Crafted for my warlord’s melee weapon, which was good enough- none of the Knight traits are particularly exciting, but it’s at least usable.

Here was our deployment, seen from a slightly different angle than before. Ben put his Grav Cannons forward on the 24″ line very centrally (you can see some of them on top of the building, which we were using as a convenience system for units that were on the lower floor), ready to Scout forward as needed and do damage. His Scouts went to Outflank and his Drop Pods, naturally, were ready to do their thing with one Centurion and two Henchmen units occupying the empty Pods. His two Servitors
My three Knights lined themselves up forming a “wall”near my backline with the warlord in the middle and the Shadow Weaver/Autarch behind them, ready to spring out and start pummeling whatever came in nearby. All four jetbike units were in normal reserve, with the two Hornets outflanking. I had placed my Knights such that even a full 12” Scout move would be insufficient to get them in range of the Grav weapons on the first turn, which would cut down on Ben’s firepower a bit in the early game.
With things all set to go we shook hands and prepared for the first turn, then Ben tossed out the question that he would regret all battle long:
“Don’t you want to try and Seize?”
Yeah, apparently I did.
(As an aside: I don’t often try to Seize the Initiative, because deploying to go second often precludes being able to take any useful advantage of- especially in Hammer/Anvil. However, in this case I had a lot more long-range weaponry and denying Ben the first-turn mobility of his transports felt like it would be pretty useful to me, so I decided to to for it. I’m not 100% sure it was the right decision, since it essentially denied me a turn of close combat attacks- pretty big when you’re playing Knights- but c’est la vie.)
Ben curses the dice gods and his big, dumb, stupid mouth and we go to the first turn.
Turn 1: Knights/Eldar
(Unfortunately, I do not have a picture for the top of turn 1, since I forgot to take one. However, it’s pretty easy to interpolate from the other pics, so I suppose we can make do.)
My first turn, despite the lucky Seize, is not actually all that eventful, though it can be argued it’s still important. My Knights shuffle around slightly, with the leftmost flank moving into a more forward position in case I need to move up and begin making assaults next turn and my right flank pulling back somewhat to try and maximize my forward facing. I open fire with Battle Cannons and miniguns, managing to destroy one Rhino as well as seriously damage (and Immobilize) another in the center of the field while also inflicting several HP of damage to the two hiding behind the Fortress tower. This was my main objective in Seizing- I needed to get a headstart on compromising Ben’s mobility before he flooded the objectives too heavily. I also manage to kill off most of one of the Grav marine units with some secondary shots, helping out a bit further in that respect.
Turn 1: Space Marines
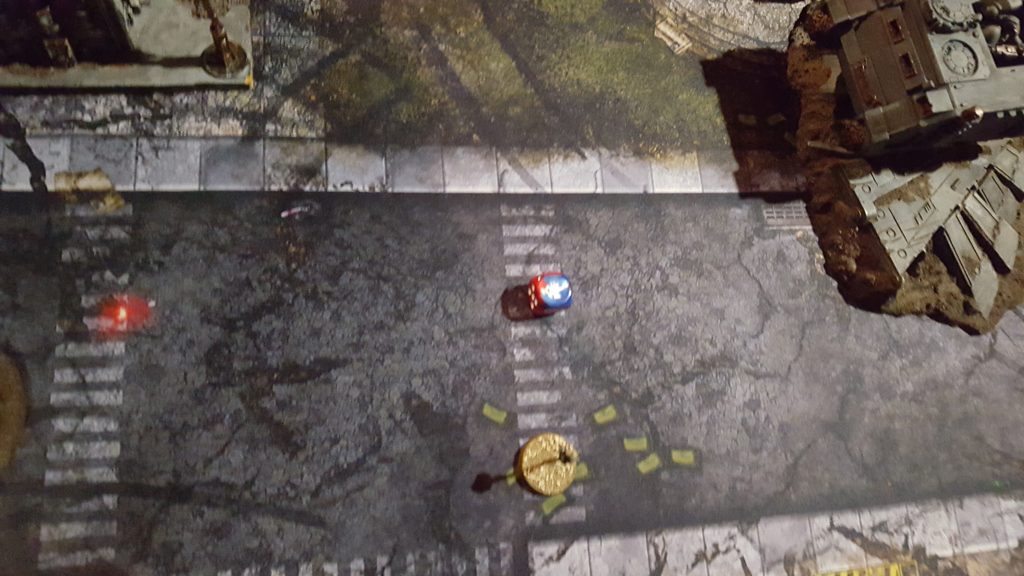
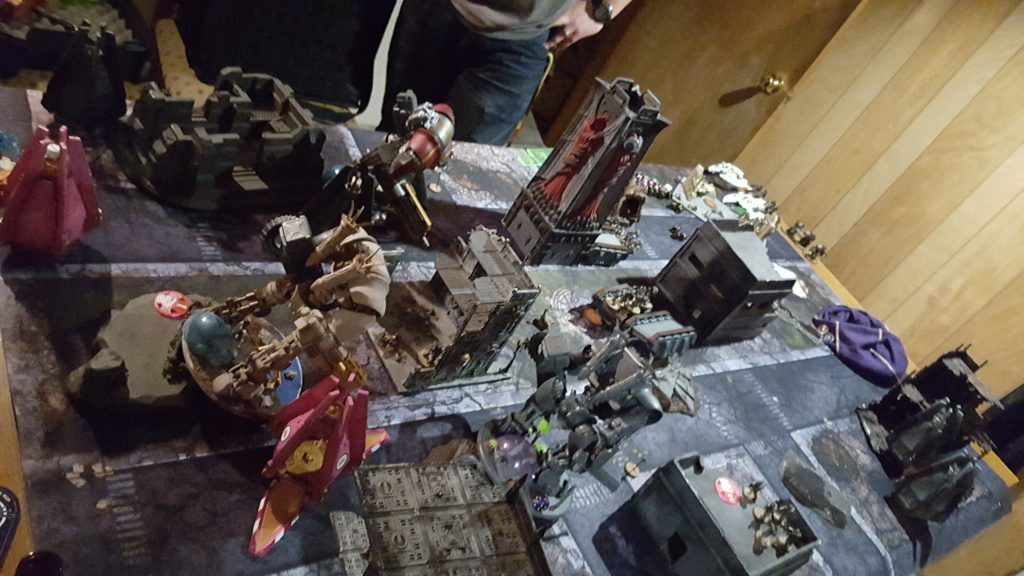
Ben brings in four of his eight Drop Pods this turn, choosing three Tactical Marine units with Meltaguns and one Henchmen unit with triple Melta. He places them in some pretty risky spots near the board edge, but the dice largely cooperate with him as three of the four come down on-target . He unloads models at several points around my Knights, but makes what I think is a fairly significant mistake as he places too many of them in similar facings, with two Melta units in my rear arc and one in my front. (The pink pod, courtesy of Ben’s fiance, is the Henchmen unit.) He activates Tactical Doctrine and chooses to keep his vehicles otherwise stationary, hanging out near objectives.
Ben’s Psychic Shriek manages to nick a wound off of my Shadow Weaver and his shooting does worse, killing off the crew and artillery in short order, leaving my Autarch sitting on his own. Ben makes a tough call and decides to aim one Melta squad at the Autarch, which succeeds in pulping him with a S8 hit- probably necessary, since that guy will wipe out most of a Marine unit on the charge by his lonesome. His other Melta units fail pretty miserably in their job, however- he hits with everything, but even in double-pen range only manages to push a single glancing hit onto me despite my divided Shield facings. That’s bad news for all of those guys standing next to units with lots of AP3 weaponry and Stomps.
Turn 2: Knights/Eldar
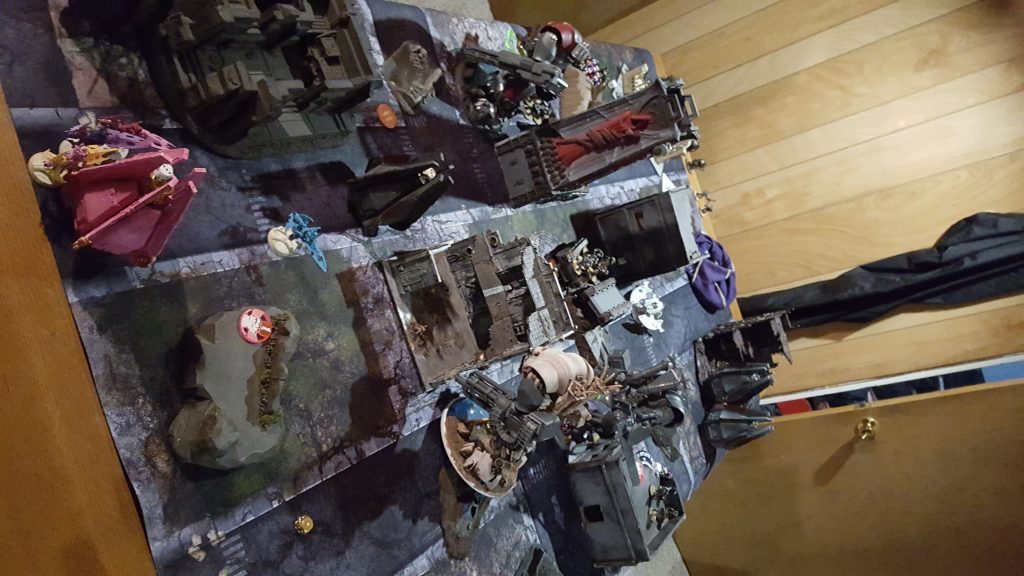
With my Autarch dead I lose the reserve bonus, so I end up with three units of Windriders and one Hornet, which comes in off the left edge. I bring it in near Ben’s back objective (the top-right corner of the photo) in order to continue sniping Rhinos without benefit of cover saves. The Windriders come in and hover near my board edge to finish off the various squads sitting there and try to avoid getting caught by any of the large blasts flying about.
In my shooting phase I wreck two of the Drop Pods with shots, exploding them both (and killing a bike in the process) as well as kill all of the Henchmen with Scatter Laser fire. The miniguns on the Knights prove their worth, vaporizing Marines left and right, and between them and assaults I kill everything but a single Tactical on my half of the field. The ability to split shots with the Knights is absolutely priceless against an MSU army like this, as I am able to consistently target 3-5 units with each Knight and cause meaningful damage to all of them. The Hornet blasts down a transport, as four S8 AP2 shots are wont to do, and a Knight pings the last one off the other Rhino next to it, leaving all of his units stuck hoofing it at this point.
Amusingly, as I am moving my first models on my turn Ben had cursed himself and said he forgot to pop smoke on his Rhino in the center of the table- being a gentleman, I let him do it retroactively, and of course since no good deed goes unpunished he proceeded to pass something like three or four 5+ cover saves in a row to stave off the last HP of damage that would kill it. However, given the “don’t you want to Seize?” moment earlier, we agree that it was only fair and just.
Turn 2: Space Marines

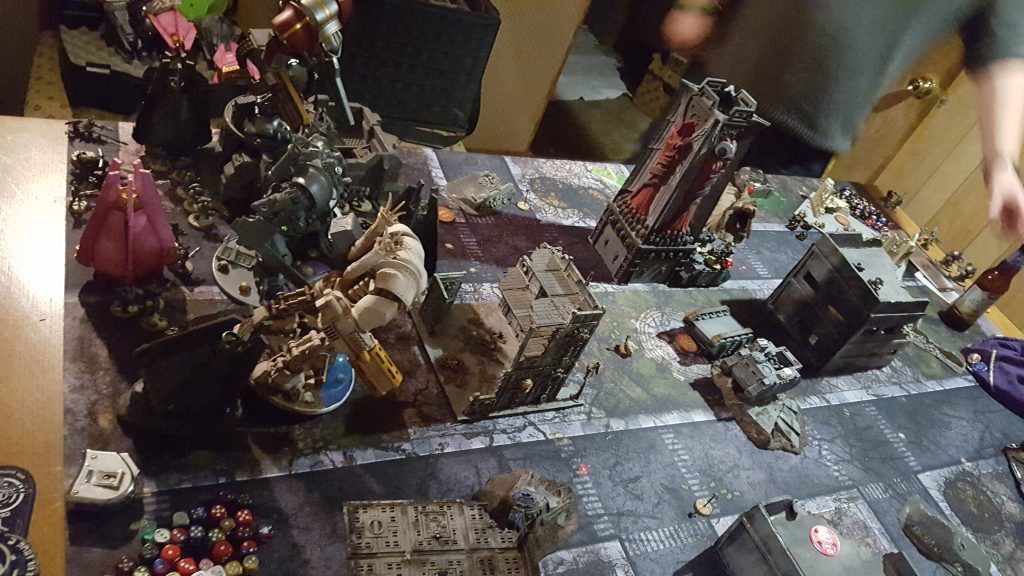
Most of Ben’s reserves arrive this turn- the remaining Henchmen squad, the Centurions, and both Assault Marine units as well as all of the three Scouts and one of the Servitors. One Scout unit comes in off Ben’s left flank (visible near the bottom middle of the photo); the other two come in on the right side, one taking position in the ruin near my Hornet and another in my backfield in the ruin by my jetbikes. The Cents attempt to drop in on top of a building where they can make a charge difficult, but scatter places them immediately next to my Knights. The Henchmen also come down next to the Knights, hoping to drop one, and one ASM unit goes for Ben’s back objective while the other one mishaps off the table and I put it next to the same, since I am not optimistic about my chances of taking that objective away from him in any case. He pops off his Devastator Doctrine this turn, which pays off fairly well- rerolls are always hot.
Unfortunately, Ben’s shooting phase does not go particularly well. The Devastators behind the tower take some potshots at the Hornet, which is all they’re really able to reach at this point, and manage to push through an Immobilize on it, though the Scouts’ Krak Grenade fares less ideally. The Henchmen completely whiff their shots, over which I breathe a sigh of relief as I had aimed my shield backwards towards the Centurions- however, Ben ends up making a small error in memory here and thinks he needs to kill two units for Maelstrom when he actually only needs one, so he ends up splitting the Centurions between two jetbike units and wiping them both out. Storm Bolters rack up a couple more casualties on the bikes, along with the Scouts in my backfield.
Unfortunately, with no damage at all put on the Knights this turn, the game is not going in Ben’s direction and he knows it; things aren’t over yet,but he is quickly running out of ways to hurt my big robots while I am whittling his forces down piece by piece.
Turn 3: Knights/Eldar
The Hornets fire into the Scouts immediately in front of them but do very little damage, which is awkward- I was hoping to destroy (or at least severely weaken) that squad so that I could try and contest that objective, but instead I’m looking like I’ll lost a skimmer instead. Oops. However, the rest of things go about as well as I could ask- Marine units start dying in droves, including both Tacticals, Khan, the Scouts in my backfield, and all of the remaining scraps of units (including the Drop Pods) on my side of the table. Only the Centurions make it through the phase intact, as I have a different plan for them.
Both my warlord and his white companion Knight crash into the unit full force and absolutely devastate them- it may seem a bit like overkill, but with them being White Scars I simply cannot risk the possibility of missing three or four of my attacks with one Knight and watching the unit scoot off somewhere inconvenient to kill another of my rapidly-dwindling supply of scoring units. The pile of S10 and StrD hits vaporize the unit in short order, and I consolidate towards the middle of the table.
Turn 3: Space Marines
(I missed another picture on this one, sorry everyone.)
It’s coming down to brass tacks for Ben; he needs to pull off something exciting this turn to stay in the game and he’s getting pretty low on active firepower, if not necessarily units. But my Knights are on the move and he knows that if they can keep rampaging around the field, the game is probably mine for the taking. His final, useless Servitor wanders onto the field, and as if by signal his other one locks up and goes stupid- normally a trivial concern, but it’s sitting right next to my vulnerable Hornets and has a Servo-Arm, worth a pair of S8 AP1 attacks. D’oh. But he’s still got some teeth left in him (including a full Devastator unit and a handful of Tacticals), so it’s time to give it the ol’ cool leg try. His final Tactical Doctrine goes off this turn to try and tip the balance of things in his favor.
The Grav weaponry aims towards the Knights- this unfortunately means trying to get past their Ion Shields, but he knows they’ve got to go down if he’s going to have any chance at things so he fires away. However, killing a Knight is a tall order at the best of times- and doing so with a mediocre weapon through the Shield is nigh-insurmountable. Thus, while he manages to ping a couple of HP off of them, the superheavy immunity to damage results continues to serve me well and I come through the turn largely unscathed in that regard.
He does manage to take out one Hornet in assault, at least, but it is the already-Immobilized one; the other survives to escape on my turn since the Servitor got dumbed.
Turn 4: Knights/Eldar
My shooting phase is pretty devastating; I’ve still got all three Knights going full force, and they chew apart almost everything Ben still has on the table. Heavy Flamers roast Scouts; Gattling Cannons and Battle Cannons vaporize Marines; even Heavy Stubbers plink off wounds where they can. I follow it with an assault from my warlord into the remaining Scouts and wipe them out, leaving Ben with nothing but a small handful of weakened units in his backfield- and with enough units alive to still control nearly all of the objectives as well as pulling ahead in Maelstrom, Ben decides to call it there.
Post-Game Thoughts: Sean
Knights suffered a lot during the 2015 ITC season because of their penalties in Maelstrom (and the increase of the importance of the Maelstrom missions during that season at the same time.) They haven’t been showing up at the top tables for a while outside of the occasional War Convocation or Chaos army bringing a solo one, so many people just aren’t prepared for them anymore, especially when you have to break through a 3++ shield.
I’m still not sure whether Seizing was the right decision in this match- sure, I managed to win, but that in itself doesn’t necessarily make the decision the correct one. Since I hadn’t really ever bothered to Seize all through the 2015 season, since going second was such a huge advantage even in Purge missions, I’m still getting back into the rhythm of using it.
Ben switched into this version of his list after having run no Centurions/SW/Inq and instead replacing them with a Knight Acheron, which I think would’ve served him a lot better against me. I think his big weakness here was the lack of any kind of melee threat to deter my Knights from just doing as they pleased; combined with his mediocre rolls with Meltaguns the first turn (which is always something you have to be ready for- nothing works 100% of the time, that’s why you need redundancy and options) meant that the bulk of my army was simply able to act unhindered for the whole of the game and tear his way through his forces. When he did get to shoot my non-Knight units he was causing significant damage to them but leaving 1200+pts alive and active on the table was just too much for his army to sustain itself against.