
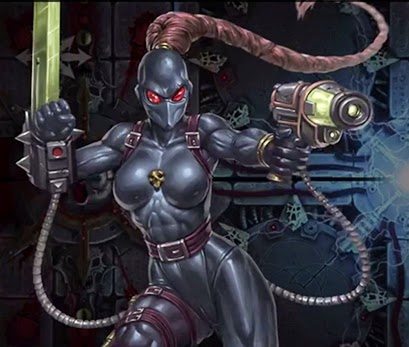
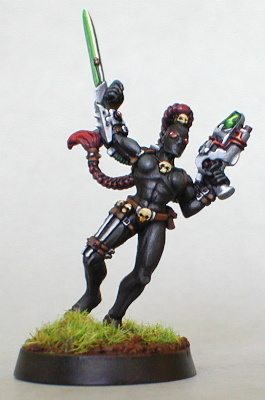
Today, Loopy brings us the Callidus Assassin; the Imperium’s own Lady Deadpool. She is a ninja warrior hopped up on combat drugs and spite. Check out the Tactics Corner for more 40k articles such as the other Imperial Assassins.
The Callidus may not be the most competitive choice among the Imperial Assassins available in the Execution Force, but this lady ninja can easily play a role in your army depending on your terrain situation or how many points you’re willing to spend on a delivery method. The Callidus also brings to the table a pretty badass ponytail.
Wonderful Toys
The assassin’s Neural Shredder is absolutely deadly. Games Workshop has rightly made number of AP2 Templates in the game extremely rare and this one always wounds on a 4+. You just have to get close enough to use it.
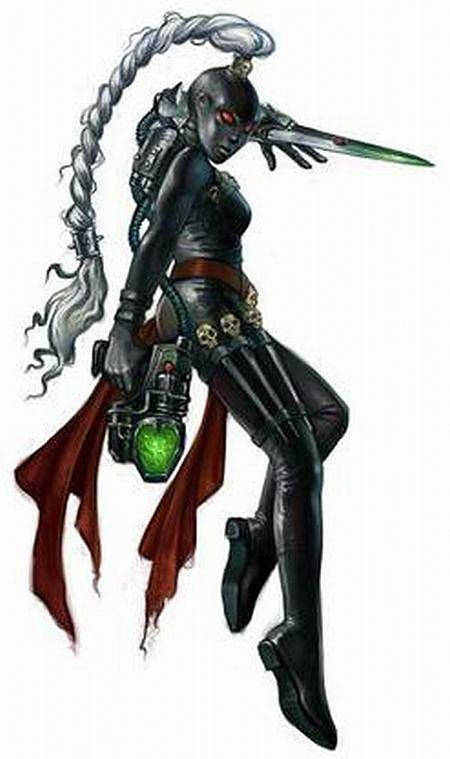
The Callidus has two melee weapons. The Phase Sword is an intriguing melee weapon which cuts through infantry with ease. Not only is it one of the rare AP2 weapons which strikes at initiative (7 in this case), but it has an impressive special rule called Phasing Hits which ignores invulnerable saves on a 6+. Unfortunately, this weapon is clearly not meant to deal with large threats such as Monstrous Creatures because it uses the Callidus’s strength of 4. The Callidus isn’t completely inept against Monstrous Creatures; her Poisoned Blades have the Poison 3+ and Rending special rules. Unfortunately, both of these weapons are either terrible or useless against Gargantuan Monstrous Creatures and Vehicles.
Dubious Durability
The Callidus Assassin’s Lightning Reflexes do provide her with a 4+ Invulnerable Save, but this is often not enough, especially considering she has no armor save, not to mention the odd omission of Stealth or Shrouded from her repertoire. With no ability to join a unit for ablative wounds thanks to her Independent Operative Special Rule and a Toughness value of 4, she is very likely to not survive the game (though thankfully not doubled out by Scatter Lasers). That’s okay as long as you can get her to do her duty before she dies.
Just be sure to avoid Walkers or Gargantuan Monstrous Creatures as she has limited tools to deal with them (although her rending gives her a small chance). Having said that, she isn’t the worst tie-up tank in the world. If you need a turn to breathe and regroup, she could conceivably hold off a big monster for a turn if she gets lucky on her Invulnerable saves and your opponent doesn’t get lucky on Stomps. She does have Hit and Run as well, to help her escape from situations she doesn’t want to be in.
Reign of Confusion
One of the more compelling rules for the Callidus is her Reign of Confusion. This rule has two parts. First, your opponent suffers a -3 on the first Reserve Roll they make during the game. This ability isn’t the best because your opponent will just reserve a Rhino or something if they are smart. You may even be doing them a favor if they want something to stay out longer. The useful part of this rule allows you to re-roll the dice when attempting to Seize the Initiative. This makes the Callidus a good choice if you find using Coteaz to be a morally repugnant act.
The Big Gamble
In a lot of cases, you probably want to Infiltrate the Callidus, but only if you have enough Line of Sight-blocking terrain that you’re almost certain she can’t get shot at on the first turn of combat. Sure, her Polymorphine Special Rule forces enemy models to Snap Shot against her on the first turn of the game, but don’t take silly chances if you don’t have to.
You can also make use of the Callidus’s Polymorphine special rule for a desperate gamble at the start of the game. This rule allows the Callidus to Infiltrate much closer to enemy units: up to an inch away. The idea is, if you’re going first, to lay down the Neural Shredder on a key enemy unit and hope they disappear. This gamble makes Coteaz a rather compelling choice regardless of whether his abilities overlap with the assassin because he also forces your opponent to re-roll their successful Seize Initiative rolls.
A Space Wolves player can make good use of an Imperial Assassin when combined with Grimnar’s War Council (Champions of Fenris), granting the army a re-roll to determine who deploys first (which often means taking the first turn in many tournament formats), and a +2 to seize the initiative. This means that your Big Gamble might not even be much of a gamble if you’re going second. It’s quite likely you’ll seize on a re-rollable 4+. It’s just highly unlikely that the Space Wolves would want anything to do with Coteaz, or any Inquisition for that matter.
There are a handful of other ways to manipulate deployment and Seizing the Initiative in the game. For example, you can also use the Talon Strike Force from the Warzone Damocles: Kauyon book to re-roll who deploys first. Check your favorite codex for other, similar abilities which could resonate with the Callidus.
The Safe Bets
In the end, it’s clear she really wants to go first, otherwise it may be smarter to simply start the game in Reserves since the Polymorphine’s Snap Shot effect also works on the turn the Callidus arrives from Reserves. It also allows her to arrive from your opponent’s board edge if she wishes. Since Outflank still counts as arriving from Reserves, it might make sense to Outflank unless you have reason to believe your opponent will be up in your grill early in the game. This threat can have a massive impact on where your opponent deploys their models and may push them a bit closer to you for your assaults. Just be careful of bait units placed on their board edge meant to steer your dangerous assassin away from their key units.
The safest bet for the Callidus would probably be to pay for a Dedicated Transport.
If you’re already taking Storm Wing, but don’t plan on putting a minimum squad of scouts to shoot out the back of the Storm Raven, then it wouldn’t be the worst idea to put your Callidus inside. She would end up being a late-game player at that point, but could assault out of the thing and might even survive the explosion if your opponent knocks it out of the sky.
You may also deploy her into what has become an Imperial Assassin’s best friend, a Fast Attack Drop Pod. This will get her into position to roast a unit with the Neural Shredder and still force your opponents to Snap Shot her. Of course, try your best to get her into terrain if you can, especially if the Drop Pod scatters so badly that you can’t get a good shot off.
Another highly expensive, but possible, delivery method could also be one of the various Land Raider variants or other Imperial Armour tanks. At that point, you aren’t doing much to exploit the Assassin’s abilities, however, and might be better off with a different, more traditional close-combat unit.
Dance of Death
The Callidus brings a character profile to the table which some armies lack. If you’ve always wondered what it’s like to have a fast and deadly Eldar character at your disposal, give the Callidus a try. She certainly outclasses a lot of other models in assault and can really bring the pain to one or two enemy units with her Neural Shredder. You just have to be smart and brave with your deployment and movement. You also have to convince yourself that smart and brave are not oxymorons. If played well, she will have a big impact on the game, causing massive backfield disruption. Played poorly, she will die without having done anything of note.
[yop_poll id=”53″]