
Hey Everyone, Scuba Steve here to discuss the Necron Obelisk, a mighty Lord of War for everyone’s favorite galaxy conquering robots. As always, for more tactics articles, check out the Tactics Corner!
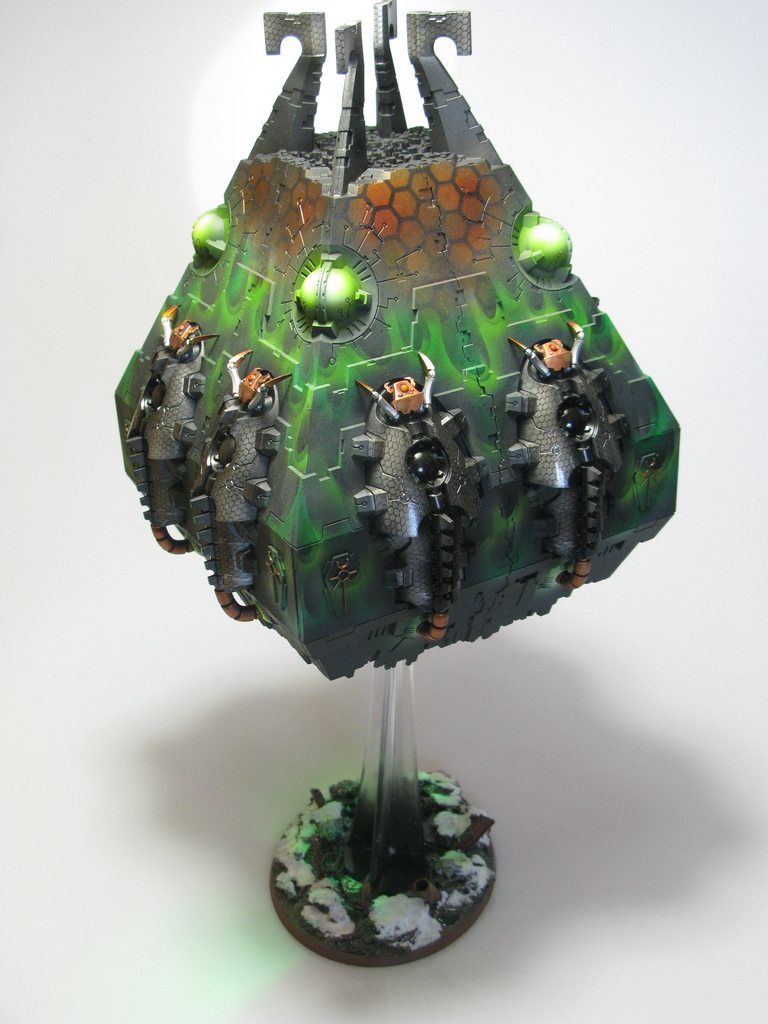
The Prettiest Floating Death Machine in all the Cosmos
Today we are going to talk about the Big Boy (not the burger stand), the Necron Obelisk. A unit that you seldom see on the table-top but has some seriously awesome potential to kick ass! Let’s break down what makes the Obelisk good and perhaps why they are seldom seen on the table-top. Hopefully after reading this article, more players will be inspired to bring this Floating Death Machine to more games and push the limits of what your army can do.
The Obelisk being a Super-heavy Vehicle drastically alters how you want to play it; believe it or not, there is a trick and it’s deceptively simple. Whenever I read a codex I usually have a good idea of what a unit is supposed to be used for and what the book wants me to do with it. The Obelisk is a challenge because how you win with it doesn’t jump off of the page at you, it takes a little bit of time to wrap your head around why it is particularly useful. So, sit back, relax, and let Scuba Steve walk you through the Scuba Steps.
To kick things off, let’s take a look at what kind of Wargear and rules this beauty comes with:
Wargear:
- Four Tesla Spheres (Essentially, an Auto-Cannon that has both a boost and a draw back)
Special Rules:
- Deep Strike (We all know what this is)
- Living Metal (Basically, “It Will Not Die” – but only on the result of a 6)
- Gravity Pulse (One of the biggest middle fingers that you could ever give to an Eldar player)
- Sleeping Sentry (Your first line of defense against an Alpha Strike army – trust me)
There are a lot of special rules to be aware of and how to use these rules to your advantage can be tricky, so let’s take a quick look at each one:
The Tesla Spheres: These weapons are both good and bad: they have a high strength, but no AP value and a short range. This can often equate to many players scratching their heads thinking “What, in God’s name, am I supposed to do with this?” Additionally, you can’t replace the weapons, so this pimp-wagon only comes stock (no CD player either) . This forced weapon load-out can often be a big “turn-off” for most players and really doesn’t match up with our general perceptions of what a Super-heavy Vehicle should be like. When I think about a Super-heavy Vehicle, I always imagine some kind of crazy killing machine that’s going to basically win the game single-handedly. That’s clearly not the case with the Obelisk, so now we have to brainstorm; what are great targets for the Tesla Spheres? Well, one of the best things about Super-heavy Vehicles is that they can take all of their weapons, shoot them at different targets, AND fire everything at full ballistic skill. So, this gives you options… and everyone love options. So, how does this weapon truly excel?
Ultimately, your primary target is going to be the “Objective-Grabbers” in your opponent’s army. These units are the ones that your opponent wants you to forget about, they usually aren’t incredibly powerful and are, all-in-all, not very impressive. Examples:
- Eldar Jetbikes (Though these units are strong, many people only run them in groups of three, which means that any wounds you cause are going to force your opponent to make leadership checks, this can be a scary moment because Jetbikes flee the battlefield on 3d6, and that is exactly what you want.)
- Combat Squads of Space Marines (Because you can easily forget about five marines sitting on an objective and you don’t really want to dedicate a whole squad of warriors to rapid fire them to death, do it with the Obelisk)
- Light/Open-topped Vehicles (Because the strength of the weapon is on the lower side, it can’t reliably punch AV12 and up, so shoot it at things you know it will hurt: Dark Eldar Raiders/Venoms, Ork Trukks, etc… blow the enemy out of their transports and then use your warriors to kill mop up)
**Additionally, if you’re a lucky sun of a gun, you may roll a few 6’s, each one generates TWO MORE HITS to whichever unit you’re shooting at. If you target the units I am suggesting you shoot at, you will almost always wound of a 2+, that’s a lot of armor saves your opponent has to make.**
These aren’t all of the examples, but it gives you a really good idea of the targets an Obelisk will excel against; the weaker MSU units.
Gravity Pulse: Get that big middle finger of yours ready because this special rule creates a massive 18″ bubble that all enemy Flyers, Skimmers, Jetbikes and Flying Monstrous Creatures treat as dangerous terrain. Wow… this means that those little squads of Eldar Jetbikes are making checks every single time they move, this gets your opponent rolling a lot of dice, ones are going to come up and they are going to hurt. Sure, it only causes wounds or immobilized results on 1’s, but what you really do is make your opponent start thinking about the risks of simply flying to an Objective, utilizing their assault moves, or getting in range to shoot their guns at the target they want. The more your opponent needs to think about, the greater the possibility of them making a mistake. An opponent’s mistake is your opportunity. The Gravity Pulse is, by far, one of the greatest weapons that the Obelisk can provide; because almost all tournament missions have an element of progressive objectives, you need the ability to control the armies that excel at moving quickly, this will do exactly that.
Sleeping Sentry: Has anyone ever lost something important during the first turn to a Drop Pod? (All hands should raise immediately). Okay, well this is your line of defense. ALWAYS DEPLOY AN OBELISK IN SLEEP MODE! There is no reason not to, you can power it up at the beginning of any of your movement phases, it then acts normally. Drop Pods are going to have a much more difficult time killing an AV14 Vehicle with a 3++ over something with no defenses what-so-ever. Few units have a built in Alpha Strike Defense, take advantage of it.
**If you’re playing the Living Tomb formation, the Obelisk cannot be deployed, but it automatically comes in on turn 2, so you can plan for that and avoid your opponent’s Alpha Strike entirely.**
Scuba Steve’s Scuba Steps to Kicking Ass with an Obelisk
Step 1: Do not be afraid! One of the greatest things about Super-heavy Vehicles is that they always count as remaining stationary, this means that you can use your full 12″ move to jump onto those objectives and get up close and personal with your opponent. This is not the kind of unit that wants to sit in your deployment zone and shoot, as we’ve discussed above, it’s weapons simply aren’t designed for that kind of battlefield role. Additionally, Super-heavy Vehicles shrug off any vehicle result aside from an Explodes! result, so feel relatively safe driving the Obelisk right up center field. Additionally, every turn you get to roll on the “Living Metal” special rule to revive its hull points, combine all of this with AV14 all around and we can all agree that the Obelisk is surprisingly resilient.
Step 2: Play the Maelstrom!: Because the Obelisk has the ability to move 12″, shoot all of its weapons, and make the battle field much more difficult for the opponent (Gravity Pulse), it lends itself to playing the maelstrom. Use it to grab the objectives you need, kill those smaller units for quick maelstrom points, jet to the opponent’s deployment zone for “Linebreaker” objectives, etc… Though it may not look like it, the Obelisk is one of the best units you have for succeeding in a maelstrom game. If you focus, wholeheartedly, on completing your maelstrom objectives with the Obelisk, it takes a great deal of pressure off of the slower moving parts of your army. And don’t forget to Thunder Blitz! That is a very useful ability, too that is often forgotten.
Step 3: Let it be a Target: Trying to hide a model this size is useless, almost every unit on the table can draw line of site to it at all times (lets be honest, its a beehive on a skimmer base, there isn’t enough terrain in the world to hide it). Surprisingly, this is what you want, because of it’s sturdiness, the Obelisk can stand up to a whole heck of a lot. If you set yourself up in such a way that the Obelisk is the focus of your opponent’s attention, they won’t be worrying about anything else, this means they won’t be targeting your Warrior blobs or Destroyers until it is later in the game (and too late). It seems strange, but the Obelisk is really just a big annoyance to your opponent; it doesn’t contain the bulk of your army’s fire power, but it still constitutes a major threat that is frustratingly difficult to deal with.
Well… I’m convinced… It’s the Greatest Unit of all Time!
Alright… settle down and change your shorts! It’s good, but there is one mighty drawback to the Obelisk. Getting around its point cost can be a bit of a bugger. As Super-heavy Vehicles go it is on the cheaper side of things, coming in at a strong 300pts. However, because it lacks the killing power of 300pts worth of other Necrons, you need to make that up in the construction of your list and really pay attention to the steps listed above. The great thing about the Obelisk is you can easily fit it into the Decurion Detachment; when you take the “Living Tomb” formation, you are able to include one Obelisk and 0-2 Monoliths… so, you can simply use this formation to include an obelisk (that automatically comes in on turn two) inside your Decurion Detachment.
Final Thoughts
The Obelisk is a really awesome model and does have a place on the battlefield; not every Super-heavy needs to have extreme killing power to be good. A unit like this just needs a little bit more finesse to play correctly. With some dedication and practice, you can turn the Obelisk from a shelf decoration to a mission conquering tyrant on the table-top! Give it a try!
Scuba Steve – signing out.