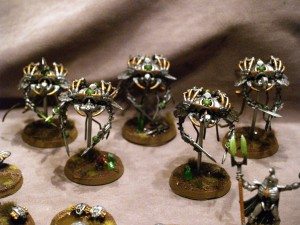
As stated before, the Canoptek Harvest is one of the best formations in the Necron Codex. By itself, it adds special rules to one some of the best units in the Necron Codex, Canoptek Wraiths and Canoptek Scarabs.
Overview:
This formation is comprised of one Spyder, a unit of Scarabs, and a unit of Canoptek Wraiths. At the beginning of the turn, you choose one special rule from the following: Fleet, Reanimation Protocols, or Shred. Models from the formation within 12” of the Spyder receive that special rule for the turn.
Wargear:
Your units and Spyder can utilize any wargear that comes with them. Spyders go to power will probably be a Gloom Prism to add some psychic defense to the formation. Wraiths go to power will usually be Whip Coils to bring your Wraiths up to Initiative 5, which will enable them to strike before most of the armies in and out of the Imperium. Scarabs do not have access to wargear anyways.
Special Rules:
Models in the formation get the Move Through Cover and Relentless rules. Move Through Cover mostly impacts your Spyder to keep it moving forward and within range of the squad and Relentless will mostly be used with Wraiths that take the Transdimensional Beamer to allow them to charge after firing.
Tactics:
What this formation really does and why so many players love it is that it gives extra durability to your already tough Wraiths. It also gives a layer of protection to your Scarabs which can just add to their tarpit nature against low and medium strength opponents. The rule that most every player utilizes is Reanimation Protocols as this gives your models with 12” of the Spyder that vital extra save that can mean the difference between losing the unit and keeping it alive. Combined with the Decurion Detachment and your Reanimation Protocol roll is a 4+ to shrug off any wound.
This means your Wraiths with a 3+ Invulnerable save and a Toughness of 5 will have great odds of avoiding most wounds out there up to strength 9! Even with Instant Death wounds that double out your toughness, you still get to make the save, albeit at -1. Your Scarabs also benefit from this as tucked in cover, they can also avoid losing bases. Combined with their multiple wounds, and they can hold up all kinds of units and pile one wounds themselves with their auto wounding and glancing on 6 ability.
The lynchpin of all this is the Spyder. Without the Spyder in play, your models do not receive the benefit of the special rules. Smart opponents will target this model first, then the rest of your army. Keeping your Spyder in cover, out of line of sight, as safe as can be will make your Canoptek Harvest last that much longer. One thing to point out is that in the ITC, they rule the Spyder as an aura power, meaning that only units within 12” of the Spyder receive the rule. Charge out of range and your Wraiths will be without their precious Reanimation Protocols.
There are many ways you can use this Formation. One of the major weaknesses of many of your core units in the Necron force is that they are not the best in close combat. This Formation shores up a lot of close combat weaknesses in the army. You can use it as a countercharge group to ward off incoming units that deep strike into your backfield. I often use it on one side of my army and work up then over into the enemy. You can also go right up the middle and shove it into the enemy. A good example of this is in a latest short form Batrep where Reecius flooded forward towards Frankie’s Tau line and was able to snare many key units in close combat, taking their shooting to a minimum.
I recently used this formation to make a Wraith Deathstar. I utilized 6 Wraiths, a Destroyer Lord from the Destroyer Cult formation, Overlord from the Decurion Detachment and then Orikan from another CAD detachment. With Reanimation Protocols, your Wraithstar rerolls saves of 1, your Overlord can have The Solar Staff to force units to snap shoot at it for a turn, and your Destroyer Lord gives the unit Preferred Enemy. This unit gets into combat turn two easily if you daisy chain models back. It is very resilient and can put a lot of pressure into an army quick.
The Canoptek Harvest is both fast and resilient if played correctly. Model placement is key with this Formation as you have to protect the Spyder and Scarabs from the wrong kind of fire that will cut through them and limit their effectiveness. Use terrain to block line of site and give them the extra protection they need to survive and do the most damage.
If you are looking for some close combat to support your Necron forces, then look no further than the Canoptek Harvest.

