
Article by Anonymou5:
This is a discussion on how to attack the Tau Pulse Bomb (and its variants). The tools are Daemon/Chaos Space Marines specific, but the general concepts are universal. It’s also a brief tournament summary; because context is vital and I learned something else very important that has nothing to do with the Pulse Bomb.
This past weekend I attended the ATC and got to test a working tactics theory, but in my style, first I must ramble, make excuses, and explain the back story. Also in my style, I must give more information about myself than is probably wise. As mentioned before, I’m in the Army. To further elaborate, I’m stationed at Fort Campbell (which is on the KY/TN line). This means the ATC is a local event for me. This is important, because at the last second (48 hours from list turn in to be exact, so the last several thousand seconds, to be accurate), two of my teammates dropped out (our Necrons and Eldar, respectively), and we had to find last second replacements. Unfortunately, last second replacements are, well, you can guess… One had never played in a tournament; one hadn’t ever played in a Sixth Edition Tournament. So, we crafted a Farsun/GOI bomb out of stuff we all had on hand (which means a lot of my Space Wolves were playing the part of Vanilla Marines) and threw together an Orks list. Props to the guys for stepping up, it was awesome of them, but they combined for four wins. This also forced us to shift our anti-meta counter punch Army (MSU Raven) into one of our “all comers” slots, and move our two Flying Circus Armies from the number 3 and number 4 All Comers slots into number 1 and 2 respectively.
That said, it was a local tournament for us, so there was no reason to cancel. Worst case scenario, it’s a chance to play against high level competition. Best case scenario, we surprise ourselves. We actually ended up hitting the best and worst case scenario simultaneously. But more on that in a second.
So, as you can imagine, my “local meta” is not incredibly good. It’s mostly young Soldiers who think Space Marines are awesome, Terminator Armor with maximum upgrades are worth it, and Canis Wolfborn is a boss. There are a few exceptions, but mostly I intentionally cripple my lists to allow for close games. I am not the best player, as this article will prove, but I am undoubtably a step or two above my normal competition. I attend regionals as far away as Atlanta, so I have played against most common tourney builds many times. That said, prior to the ATC I had not played against any pulse bomb lists, or any Eldar list with more than one Serpent in them. So I did a lot of theory crafting for how to crack those eggs, but did not get any actual game time.
So, day 1 of the tournament, we hit our best case scenario. We soundly beat two of our first three opponents, and I take down Wraithwing and Dark Eldar (the 88th and 24th ranked players for the Tourney respectively) and we go up against Quality Control. QC would actually finish in third place (by one point) and we win 3 games to their 2…unfortunately, our losses were both near tablings (our replacement players) and we lose on battle points. The final score is incredibly close, and I believe this kept QC from winning overall (so, you’re welcome Fluffy Bunnies). This puts us in 5th place overall, which I don’t understand, because our team is pretty damn weak (again not to knock on the replacement players, but experience is experience). I take down the Captain of QC, who is running a nasty Eldar/Tau build (finishes 49th overall), in an amazing game I may have to write about later.
This is where the worst case scenario comes in. Our “Big Three” are 9-0 and our “Little Two” are 3-3. Because are ranked 5th after three games, we get matched up with Wrecking BOLS (defending champions). And, well, get wrecked. They smartly game us on match ups, and win all 5 games (4 strongly). Goatboy beats me pretty soundly in a mirror match (here’s the entire Batrep, he kills all my Troops, I kill most of his). He’s good, ya’all. They finished 2nd overall.
This is where I learned something I found worth sharing. National Tournaments are different. Sure, everyone “knows” that…but how many people playing 40k actually attend and compete at the big tournies versus how many just post on blogs about how awesome they are without ever leaving the comforts of their home FLGS. I am on my “second run” of 40k, after a very long Army induced hiatus, and have only been playing nine months. In that time, I have started to do very well in Regional Tournaments (all over the place, as I travel a lot for work), but really hadn’t played in anything major. What I learned, and I think my overall performance for the tournament shows (which I will continue to cover) that I can beat anyone with any Army, but I cannot do it six times in a row. “Tournament Endurance” is a thing. The match against BOLS showed me that. Goatboy beats me in a mirror match probably 7/10 times, because he is absolutely better than me with the list. But I think a “fresh” me always steals more than just two points. The amount of mistakes I made due to exhaustion was catastrophic, and he was playing just as relaxed and efficiently as if he was on his first game. I think this is why the same players always tend to be at the top tables at the big tourneys, not because they cannot be beat, but because “Tournament Endurance” only comes with experience.
After that lesson was learned (by more than just me, I presume), well, it’s like BOLS ripped the competitive soul out of our team. We started matching for fun and to see what we wanted to practice against. I’m not really sure how it happened, to be honest. I know we pitted our counter punch anti-meta 4 Storm Raven build against 9 Scythes, an obvious loss, just because the players knew each other and wanted to play. And well, I got to play against two pulse bomb variants and put some theory hammer into action. Which leads me to the actual point of all this nonsense…
Fateweaver versus the World!
The first Tau game I’m going to gloss over, but he was running a Pulse Bomb variant that looked like this:
Commander (toolbox, dual marker drones)
Ethereal
Dual Riptides (IA, Fusion, Interceptor)
Crisis Suits with Marker Drones (missile pods)
18 Kroot with Hound
5×12 Fire Warriors
2x Skyrays
Longstrike in a Railhead
He was a great player, and ended up placing 22nd overall. I lost, but only because we did not have time to finish the game (in my obviously biased opinion). I would have won it on turn 4, but I failed my 8/9 Grimoire and had to retreat for a turn… But dice and time limits are a part of a tournament, and I lost fairly to an excellent player. I do think time limits should be by turn, because it’s frustrating to practice a psychic power phase (and make laminated cards) to speed my turns to sub 5 minutes, and then wait 35 minutes to do anything while my opponent does his thing. That said, this is the game we have, and that’s an argument for another day. However, despite my frustrating close loss, my theory hammer worked. I narrowly lost to a pulse bomb (on a table with nearly no terrain at that). If only I had a chance to try it again and refine it a little….
Oh wait, Tau is the new meta. My next game, another pulse bomb variant. Another chance to refine my anti Tau tactics. I’m going to focus on this game because the tactics worked a little better, and because I actually took a couple of photos. Visually, my opponent had perhaps my favorite Tau Army of all time, and I wish I had taken more photos. He was running this Tau/Eldar build:
2 x Ethereals
6 x 12 Fire Warriors
3 x 7 Pathfinders
2 x Missilesides with all the Missiles and Drones
Skyray
Farseer
4 Jetbikes
6 Jetbikes
Remember, this is an ATC list, and as such it’s tailored to a role within a Team. One of his functions was counter-horde, and he told me that he felt more Pulse Rifles did the job better than Riptide HBC within the team, and that he cut the Riptides and Kroot from his Singles Tourney list to maximize Fire Warriors. He placed 26th overall, so I’m willing to trust his logic on this one.
I was running Chaos Space Marines/Chaos Daemons
Level 3 Sorcerer (unmarked, axe)
Daemon Prince of Tzeentch (wings, armor, level 3)
2 x 10 Cultists
Drake (blaeflamer)
Drake (autocannon)
Fateweaver
2 x 10 Daemonettes
14 Hounds
Daemon Prince of Tzeentch (Flight, Armor, LVL 3, greater, exalted)
Bastion with Comms Relay
He rolled Guide, Prescience and Forewarning. I rolled Puppet Master (Sorcerer), Invisibility and Shriek (Daemons Prince), Puppet Master and all Change Powers (Fateweaver), Hallucinate and Puppet Master (Marines Prince), as well as powers that did not factor into the match up.
So, I have developed a tactic to deal with the Tau Pulse bomb, and plan to implement it. This is where I digress into military speak (and bastardized for Warhammer), a tactic is a plan to implement a specific goal or objective. To utilize my tactics it must nest into my strategy. Strategy, in laymans’ speak, is the overall plan for the battle. Generally, you should plan strategy first, even if you know what tactics you need to use, as the specific way you implement those tactics is dictated by the bigger picture.
Thus, we are playing the ATC Mission Type, Deployment 3. 5 Crusade Objective, 2 Emperor’s Will Objectives, and Purge the Alien. Crusade, EW, and PtA are all Primary. Secondary are the same as the book. Vanguard Strike Deployment. Heavy Support are scoring, and an extra Victory Point for PtA. No night fight.
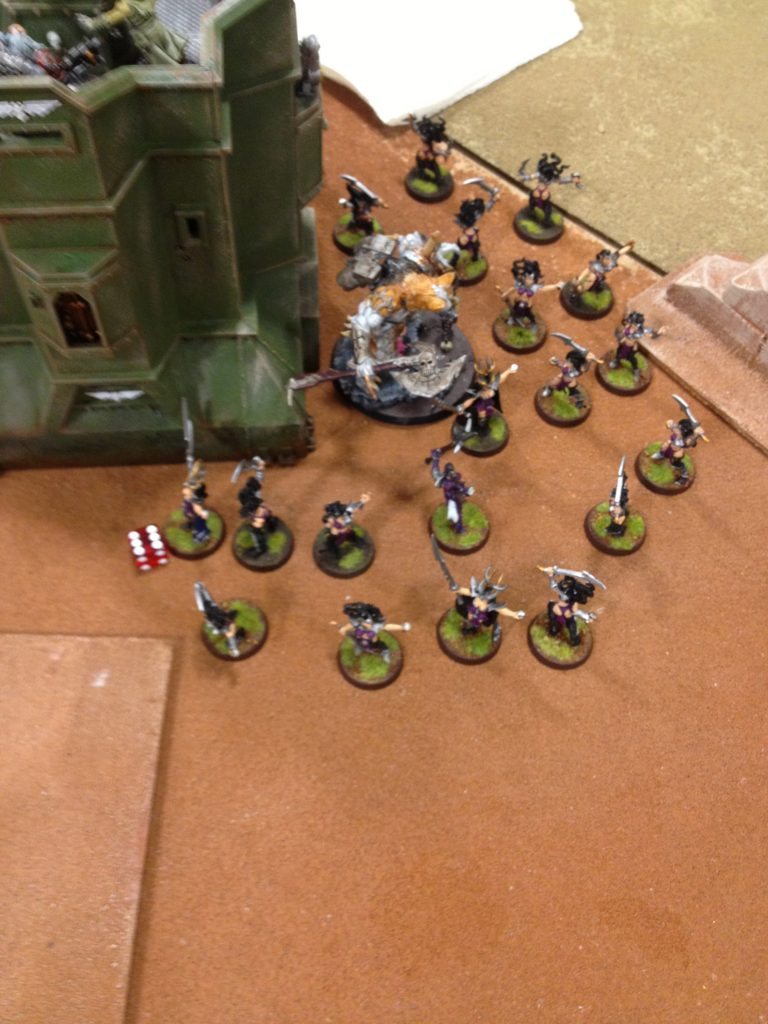
Just prior to deployment, the board looks like this (keep in mind this is a rough approximation and not exact, I apologize for the lack of photos):
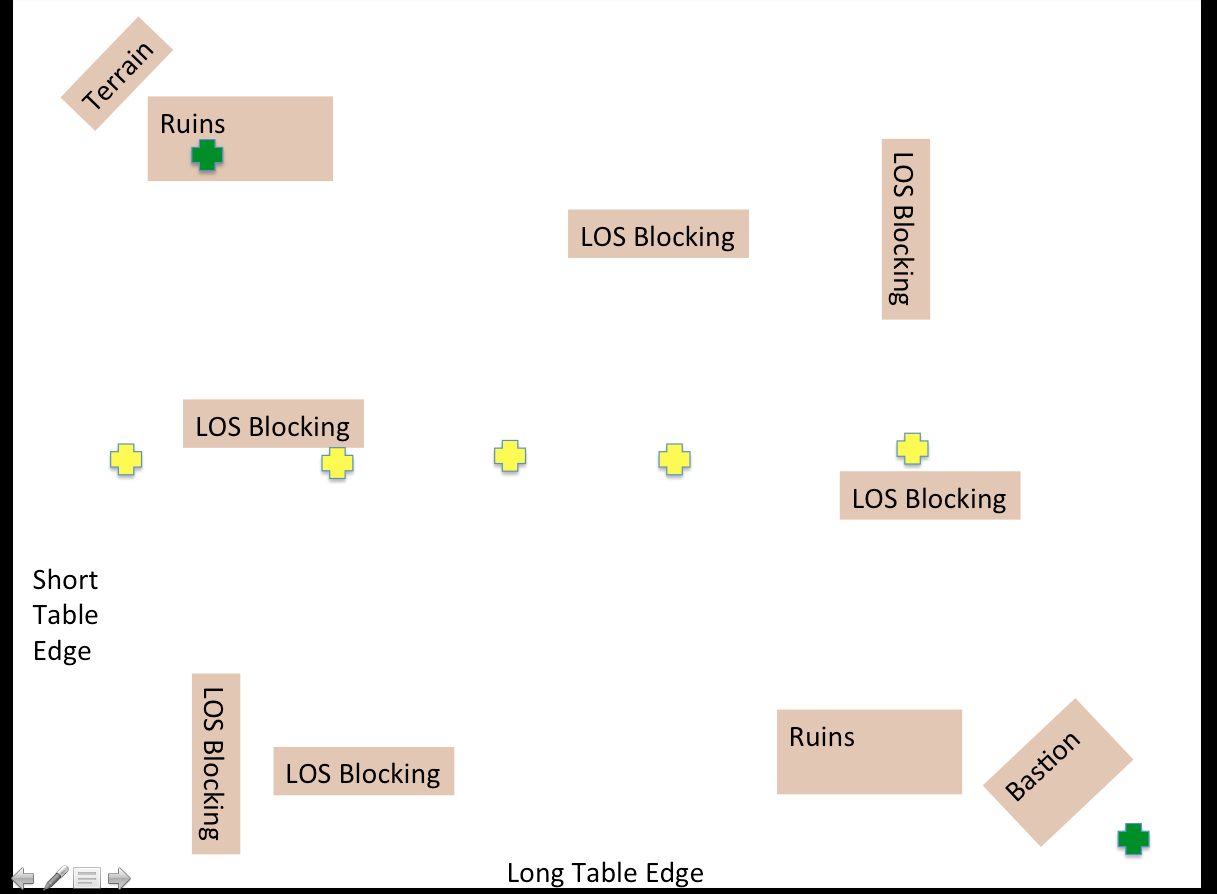
The LOS Blocking Terrain is effectively of uniform size, just large enough to block out infantry models, but not large enough to entirely block a FMC. However, with proper angling, it can be used to deny the majority of a squad from gaining LOS to a FMC. The yellow crosses are the crusade objectives; the green crosses are for EW. There are no models on the board and already I’m losing. I was so focused on how I was going to run my tactics that I let my opponent game me into placing the Crusade Objectives at midfield. I have no ability to score those objectives. Everything that comes midfield is going to die to 210 twinlinked Pulse Rifle shots.
This mistake dictates my strategy. I cannot win Crusade. However, I can still win the game. I am not worried about kill points, thus I need to either draw EW and win Secondary Objectives, or win EW and not worry about Secondary Objectives. This means I only need to protect one objective (which is hidden behind my Bastion), and take him off of one objective. Fortunately, I have a tactic ready to go that will enable this strategy to work.
I get first turn, and I deploy my three MCs behind the Bastion, in the corner of the map. I deploy one squad of cultists and my Sorcerer in the Bastion itself. I reserve everything else, including the Hounds. This was hard to do, as I love using the Flesh Hounds to dictate my opponent’s early turns. However, in this scenario, the Hounds are just going to die horribly to 200 Pulse Shots. This brings me to the first phase of how to beat the Pulse Bomb.
1) Present no easy targets
He fails to seize. I put the Grimoire on Fateweaver and fly the other two FMCs into reserve. I need to start whittling down Marker Lights and Pulse Rifles before I can come out to play.
Some Armies can implement this phase this easier than others. Some could use mobility to kite, some can use null deployment options, some can ram Land Raiders down their throat. Daemons have the best tool, in my opinion, an Invincible FMC.
Fateweaver flies forward the full 24, and exactly 24 inches in front of him is a Skyray. Puppet Master goes off, and two Marker Lights, six Seeker Missiles, and four SMS are emptied into a squad of Pathfinders. This was a mistake on my opponent’s part, he should have kept the Skyray further away. It was also a mistake on my part, as I should have used Flickering Fire on the Pathfinders to ensure First Blood. If the Missiles were still there on turn 2 I could have shot them then. I just can’t resist shooting Skyrays (I did it in my other game versus Tau as well).
Thus, at the end of my turn, the board looks like this:
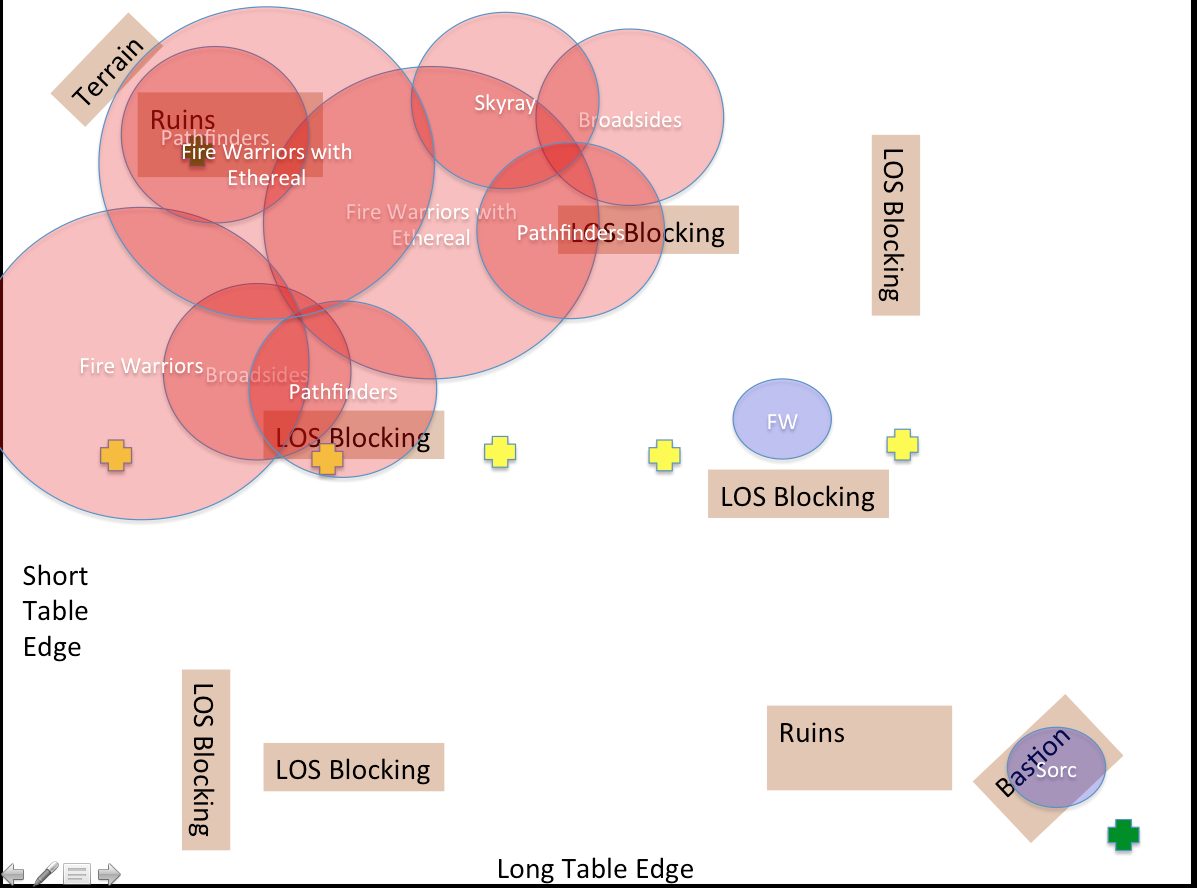
This is literally Fateweaver versus the world. He puts his entire Army into Fateweaver, everything. He fails to wound. He does however ground him, which is nice, because it lets me fly 360 on my turn versus only turning 90 degrees.
His units are depicted by giant circles to show the Supporting Fire Bubble that he has in place. It’s actually worse than shown, because there are three more squads of Fire Warriors (the graphic was getting too cluttered). His Castle is effectively charge proof….or is it?
I used red because obviously Tau are the bad guys. My units, the three I have on the board, are represented in blue. Fateweaver telling the Tau to “come at me bro” and the Sorcerer and his friends hanging out in the Bastion.
I have done some pre measuring, and my Grimoire Prince comes back in at 37 inches from his Broadsides, but 24 inches from Fateweaver, and puts the book on him. This Forces the Broadsides to adjust for counter fire (and robs them of intercept), which forces the entire castle to shift. He still only manages to get two Broadsides into Range, snapfiring, and my Prince is fine. This also brings the Broadsides within 24 inches of my Bastion, opening them for Puppet Master from my Sorcerer.
The following turns continue Phase 1, but also begin to institute Phase 2.
2) Attack the Seams
Fateweaver uses his mobility to take advantage of directional wound allocation, and starts attacking Fire Warrior squads on their edges (he also also attempts to kill the Warlord, but gets denied). By killing or whittling down the Squads that connect the Castle, Fateweaver starts to break down the power of his overwatch. He also uses the Bolt of Change to effectively split fire, and force toughness tests in an attempt to remove more guns and marker lights from the fight. I will depict this with a graphic.

Note: If that is an illegal use of a Beam Power, I would like to know. As I understand it, as long as the beam goes through the same unit FF is shot at, any other unit targeted is effectively “collateral damage.” As a result of this trick, many Fire Warrior and Pathfinder units are set on fire, and a few gain free Feel No Pain.
As my Reserves come on, I generally hide them. My Hades Drake tries to kill the Skyray, but my Bale Flamer Drake actually stays out of range. He has a job to do later and needs to not die right now. The Flesh Hounds creep onto the board, staying out of LOS/Range as much as possible, and the Princes hover just out of range as much as possible (and the Daemons Prince stays invisible). The Invisible Prince can get closer, but not too close, as I can’t kill all the Marker Lights. She does take a wound at one point, but is never in any real danger. The Daemonettes begin to surround my Crusade Objective.
On turn 4 Fateweaver has killed a pretty good number of Pathfinders and Fire Warriors, through Flicking Fire, Toughness Tests and Soul Blaze. Because of leadership 10 none have run off the board. That said, I’m just about ready for the next phase of my plan.
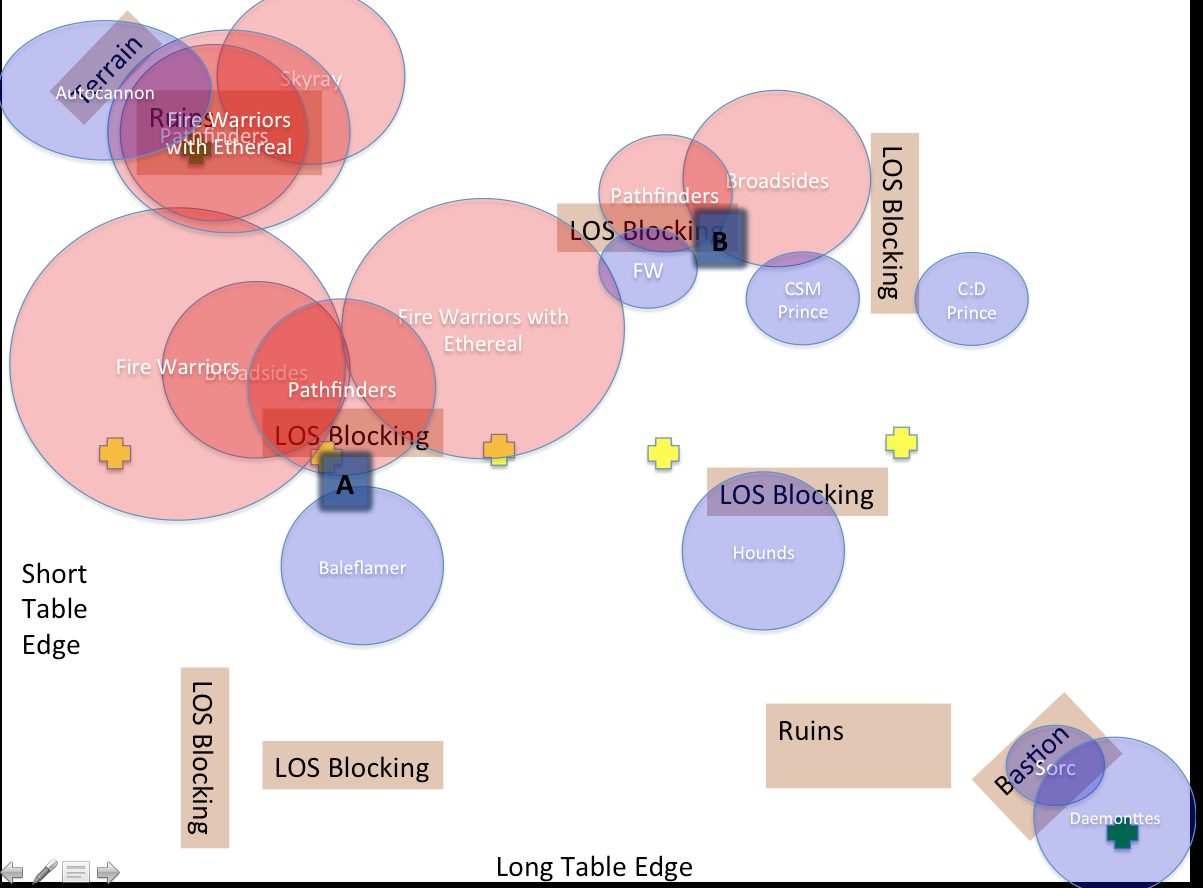
As you can see, I have broken down his castle pretty well. This graphic is not perfect, because It does not actually reflect all the exact position of everything on the battlefield, but it conveys an accurate enough picture of how I have shaped the fight. I marked my last two steps for Phase 2 (Steps A and B). First, A: I use my Baleflamer to knock the Pathfinders and untouched squad of Fire Warriors out of supporting Fire of the center Fire Warrior squad, but there is nothing I can do about the Broadsides. Then on Step B, I use dual Puppet Masters (Prince and Sorcerer) to have his Broadsides kill off some Pathfinders, knocking those Markerlights out of Supporting Fire of his far right Broadside squad. This brings us Phase 3.
3) Assault with something durable or expendable first
Fateweaver Charges the big FireWarrior blob with the Ethereal in it. He’s currently invincible, and that blob has to overwatch him, because he’s not failing the charge. Then the Hounds Charge, safe from the majority of the Supporting Fire, due to the fact that most of his squads are seven inches apart. I still lose a Flesh Hound base, but it’s not the end of the world. Finally, my Chaos Space Marine Prince charges the Broadsides…who are overwatching without supporting fire Markerlights. He makes it in as well.
This trick could be done by charging in a Dreadnaught, or an expendable Gaunt squad, or one Marine, or anything the big Fire Warrior blob cannot kill, or anything you don’t care if they kill. Then the real unit follows.
This leads to phase 4.
4) Break his Lines
My opponent made a mistake giving his big blob extra shots on his last turn, because he never imagined I would actually make it into combat. This is the hubris of the castle, they assume they are safe. As such, his big blob of Fire Warriors and Ethereal are not stubborn. My Hounds easily sweep them and consolidate to certain doom. My Prince kills the Broadsides and consolidates as much out of LoS as possible. Fateweaver consolidates next to the Hounds, who consolidate around him, to make it hard to charge and tarpit him, because I need him free.
The Board now looks like this.
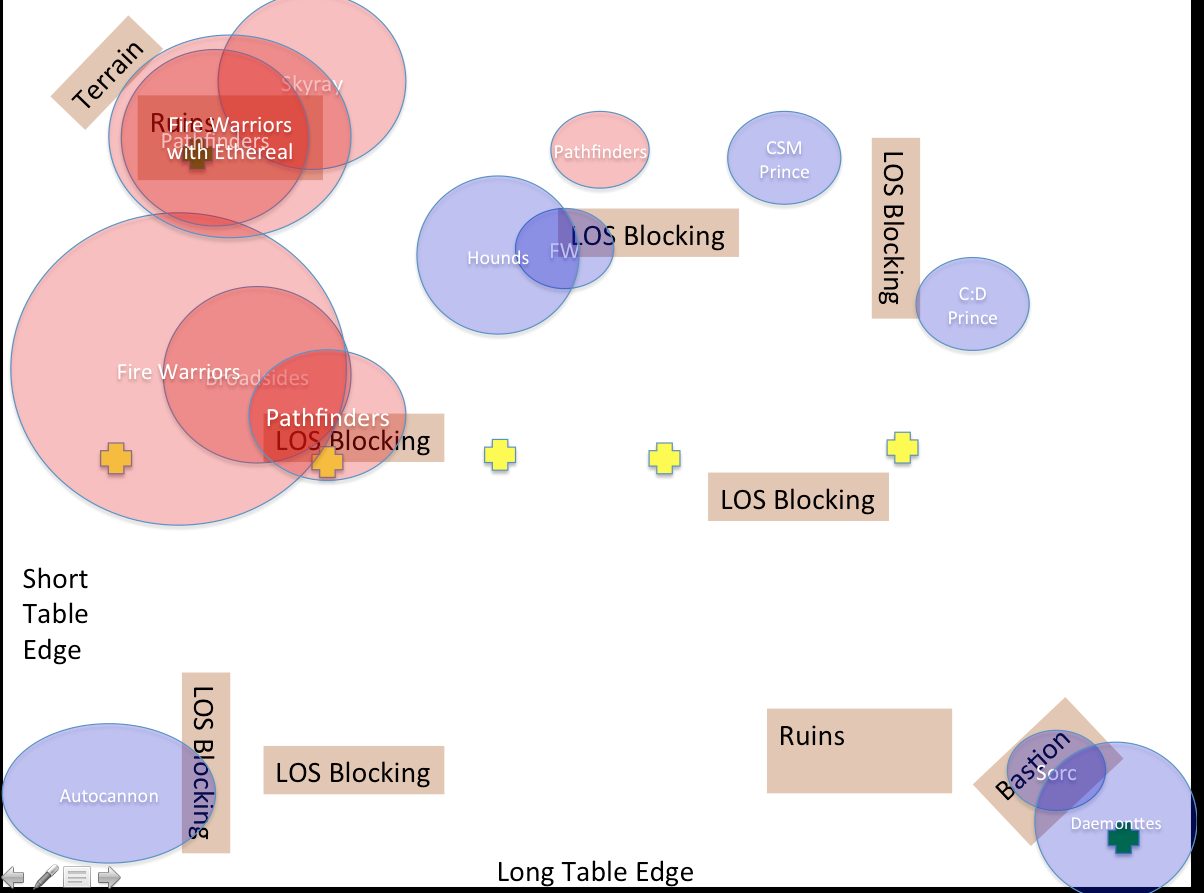
On the bottom of 4, he kills the majority of my Fleshounds, and hangs a few wounds on my semi-hidden Prince (who makes his saves). He also tries to maneuver to block access to his EW objective, which is now in jeopardy. He also kills my Baleflamer Drake, who only managed to kill 7-8 Fire Warriors and Pathfinders all game, but he also helped me win.
For turn 5, I essentially repeat Steps 4 and 5. I put the book on Fateweaver again, and jump him directly next to the squad with the Warlord Ethereal, which is sitting on his EW objective. The Chaos Daemons Prince returns to my EW objective, which is now entirely surrounded by Daemonettes. I move my remaining Hounds up to attack his Skyray (and net me another 2 Victory Points due to the Scenario), and move my Chaos Space Marines Prince to charge his remaining two Pathfinders on the right side of the board. Fateweaver unloads Flickering Fire into the Ethereal squad, killing everyone but the Warlord. He then charges the Ethereal, putting him within 3 inches of the EW Objective. Then my Hounds assault the Skyray, which is protected by very little supporting fire (as the squad with the Ethereal is now dead); they make it in and destroy it. The Chaos Marines Prince briefly does something awesome, as he puppet masters the Pathfinders and takes away the cover save on some Jetbikes…who then die to Fateweaver’s Bolt that came along with his Flickering Fire barrage. The Marine Prince then fails at life, as he almost dies to overwatch and then fails his charge. So those Pathfinders survive the game.
On his turn, he concedes. As I am way ahead on kill points, and he cannot take away my EW objective, nor rescue his own. Also, the game ends with an Ethereal and Fateweaver in single combat. That’s a fight they will sing sagas about.
Why can’t he take my EW objective? Well, it looks like this:
Note 1: I know objectives are impassible, but it was more cinematic to place the Prince on top of the objective for the picture. That’s why we play 6th Ed, right, for cinematic moments?
Note 2: Please don’t tell me this tactic only did not work because he didn’t have Riptides. I used it against a Riptide list as well. If they had been at midfield, I would have had a great change of catching them in a sweeping advance or they would have been locked down with Hallucinate. Had they come into my backfield, I would have used Puppet Master to add their weapons to my shooting phase, and then my well hidden Daemonettes would have killed them.
Note 3: I’m not saying this tactic would always work, but it is a method that can work. A good Tau General could take steps to mitigate it. Or Dice or time limits can thwart it.
Note 4: To my Tau opponent, great game, and if I forgot anything important, let me know.
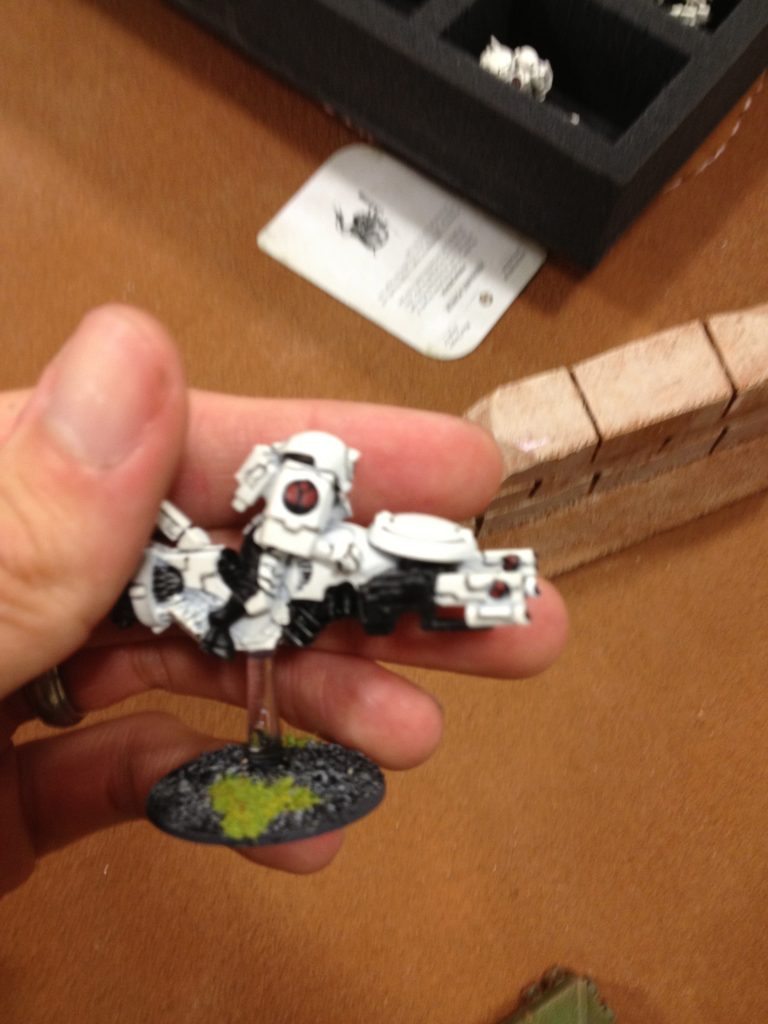
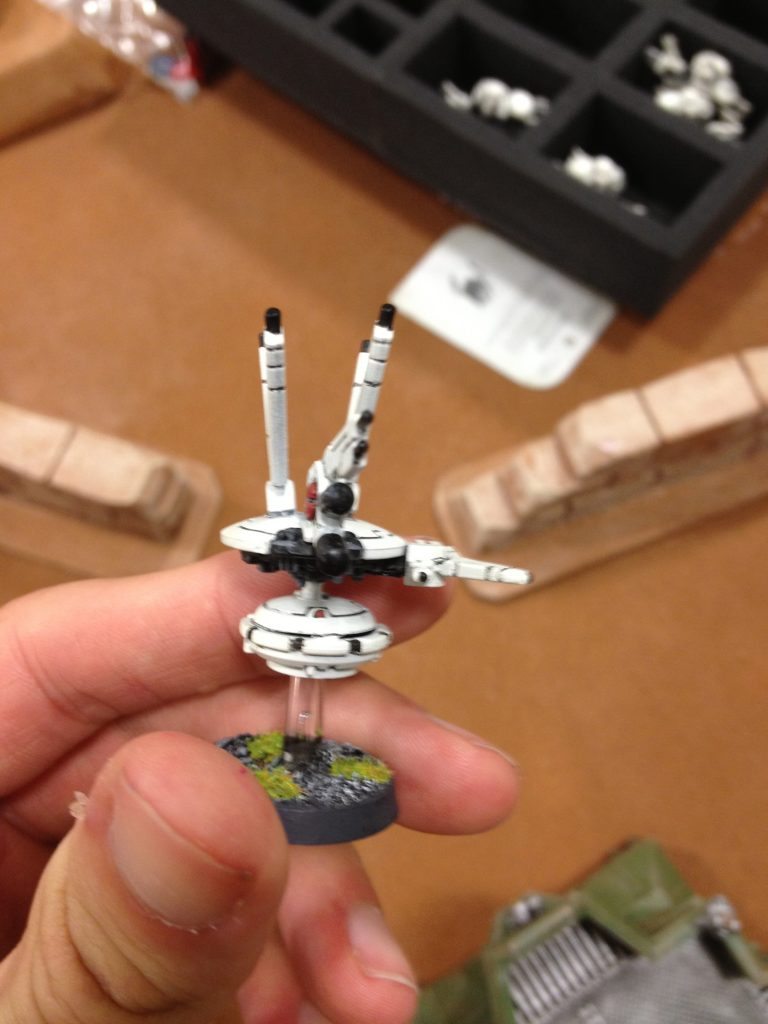
Finally, I want to show you a couple pictures of my Tau opponent, as I loved his Army. I wish I had more.
His jetbikes:
His Farseer:
In conclusion, remember:
1) Present no easy targets
2) Attack the Seams
3) Assault with something durable or expendable first
4) Break his Lines
I hope these concepts help, as Tau can be a very frustrating fight. How do you approach them?