
Beer-Hammer, Hoooooo! Another awesome Beerhammer battle report from Adam over at the Dice Abide blog. Don’t forget, Adam will be running a Beerhammer 40K tournament at the Las Vegas Open! Tickets for that event go up for sale at the end of this month!
Another weekend means another round of forcing myself to drink an uncomfortable amount of PBR, though any amount of PBR might be considered an uncomfortable amount… We decided this time we would test the Beer-teor Shower scenario from my Beerhammer 40k Scenarios.
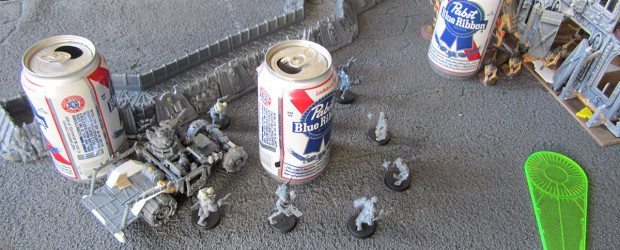
For this game, I had just finished getting my second Trukk put together, so I wanted to give it a shot:
Chaos Lord: Mark of Nurgle, Chaos bike, lightning claw, Burning Brand of Skalathrax
5 Plague Marines: 2 plasma guns, in Rhino with havoc launcher
5 Plague Marines: 2 meltaguns, Champion with combi-melta, in Rhino with havoc launcher
13 Chaos Cultists
Heldrake: baleflamer
5 Chaos Spawn: Mark of Nurgle
Maulerfiend: lasher tendrils
Maulerfiend: lasher tendrils
Maulerfiend: magma cutters
Ork Warboss: power klaw, shoota, Attack squig, cybork body, bosspole, ‘eavy armour, stikkbombz
11 Ork Boyz: shootas, Nob with power klaw, in Trukk
12 Ork Boyz: shootas, Nob with power klaw and bosspole, in Trukk
Pete brought his fairly nasty combination of threat overload and psychic choir Tyranid army:
The Swarmlord: 1 Tyrant Guard
Tyranid Prime: Pair of bone swords, rending claws, toxin sacs
3 Zoanthropes: in Mycetic Spore
3 Zoanthropes
The Doom of Malan’tai: in Mycetic Spore
10 Termagants
10 Termagants
10 Termagants
Tervigon: catalyst, cluster spines, adrenal glands, toxin sacs
Trygon: toxin sacs
Trygon: toxin sacs
Biovore
Set Up and Pre-game
We didn’t have as much terrain this game as our last, but we still had enough to make a fairly nice feeling board. The first to go is always my large cathedral building, which Pete promptly placed in his deployment zone. Pete’s psychic powers definitely helped me by not giving him Iron Arm on the Swarmlord, though his Warlord trait was Stealth (Ruins), which would be very good considering the terrain I own; my Chaos Lord got the re-roll reserves power, which would actually be pretty handy as well.

Turn 1
Right off the bat, Pete chugged a beer to hit my clumped up Chaos Spawn and hope to take down my Ork Trukk too, unfortunately for him though, all he did was cause a single wound to a Chaos Spawn. Pete defended his decision stating that it was more a maneuver done out of thirst than strategy. Fortunately for me though, that meant my Maulerfiend had something to punch right away and score me First Blood.
During Pete’s turn, I quickly chugged a beer myself, though it scattered off the board. Not to be let down, I quickly grabbed a second and plopped it down in front of the Zoanthropes to try and block their LOS. We quickly discovered that the Beer-teor Shower scenario is really a game of “Trollhammer.” The Zoanthropes, with one not having LOS due to a beer can shoot off a power fist on my Magma Cutter armed Maulerfiend, while the Biovore completely missed it’s target. The Trygon decides to take a long charge at the Shoota Boyz in my right-most trukk, suffers a wound from Overwatch and fails the charge (which will become a recurring theme this game).

Turn 2
The Heldrake makes an early appearance, which always makes me happy and causes 2 wounds to a Trygon with it’s Vector Strike. Frantically trying to beat me to moving my models, Pete chugs a beer to have it fall on my bunched up Ork Boyz, though it misses entirely. Not to be outdone, he then shotguns his third beer, landing it in the middle of my boyz, killing 2 and making my charge to the Zoanthropes a bit more challenging. As if he planned it, the boyz charged the Zoans, but fell an inch short on their roll… Damn you beer!
For Pete’s reserves, he manages to roll snake-eyes for the Termagants, keeping them off the board, while the podding Zoanthropes, Doom and Trygon all come on. Once again, I beer can the Zoanthropes, blocking their LOS again. The deep striking Zoanthropes annihlate my Trukk with the Warboss, though due to the Trukk’s fancy damage table, I was able to disembark a safe distance away from the Trygon, which fails to charge, followed by the Swarmlord failing to charge, and then the Tervigon also failing to charge.

Turn 3
The action really started picking up on Turn 3. My Chaos Cultists came on and entered a bunker, while pete chugged a beer to get in the way of my Chaos Spawn, killing off one. The Heldrake cannily kills the Tyrant Guard, separating the Swarmlord from the Tyranid Prime. My Meltaguns fail to kill the Doom, which is super annoying. I Waaagh! and Pete chugs yet another beer to kill off 3 Orks from the Warbosses unit, though that’s not enough to stop them from charging in and doing the job my Meltaguns couldn’t. All of my Maulerfiends declare charges to the Swarmlord, though the Magma Cutter fiend fails to make it in, and do a few wounds, on top of the damage it has already suffered from Vector Strikes and Baleflamers.
Pete decides that he’s had enough of Lord Humongous (the Warboss), so his Trygon shoots the orks, killing the Nob, leaving the Warboss with a couple boys. To avoid running the Warboss clobbers one of the survivors to show them what’s up, and they pass their re-roll thanks to the bosspole. The wounded Trygon then charges the Warbosses unit, wiping them out though becoming reduced to a single wound itself in the process. The Termagants who arrived last turn charge the weakened Orks on my left, wiping them out as well. The Swarmlord continues fighting the Maulerfiends, killing one, but being reduced to a single wound in the melee. Pete picked up a total of 4 VP’s this turn, swinging the game to 8-4, his favor.

Turn 4
A lucky vector strike from the Helldrake caused 4 wounds to Pete’s Tervigon, while my plasma toting Plague Marines finishes off the severely wounded Trygon. Pete attempted to stop them with a Beer-teor, but it scattered into the Rhinos and did no damage. My Magma-fiend made it’s charge into the Swarmlord, who regenerated a wound at the end of Turn 3, hoping to finish it off, and not only failed to do so, but also lost it’s second power fist. My Chaos Lord and Spawn tried to multi-charge the termagants, but only made it into combat with one, wiping it out.
The Swarmlord failed to cast Endurance, but was helped out with Catalyst from a Tervigon. His first unit of Zoanthropes shot the combi-bolter off of a rhino, while his second unit does a mere 1 HP of damage to a Beer Can, though their Mycetic Spore finished it off. Pete’s Tyranid Prime fails another charge, and his Tervigon decides that he’s had enough of the cans and crushes one. After this turn we take a quick reprieve while my girlfriend moves his car (damn San Francisco parking).

Turn 5
Seeing that Pete is making a bunch of VP’s by killing my cans, I decide I’d better get cracking if I’m going to catch up! My meltaguns claim a can, while the Drake vector strikes and kills the last living gaunt from a squad that I’d been working on all game… The Chaos Lord’s Burning Brand kills 5 gaunts out of a squad of 6, and the Plasma Marines did 4 wounds to the Tyranid prime, but he passed all of his cover saves, argh! The Swarmlord kills another Maulerfiend, but the other fiend finishes him off, thanks to his Magma Cutters, and then he regenerated a HP through It Will Not Die.
On Pete’s turn I am worried that the game might end, so I quickly chug my last beer and drop it on his Zoanthropes, finishing one off. The second squad of Zoanthropes tries finishing off the mauler, but it passes his invulnerable save (one of the few times I did this game). The Tyranid Prime charges into the plasma toting Plague Marines and easily slaughters the champion. Seeing an easy target, Pete’s Trygon charges into the bunker full of Cultists, blowing it up and causing a mighty 34 S6 hits on the Cultists, which I’m sure made a hell of a mess. Finally, the Tervigon is fueling it’s taste for beer and it kills yet another of my beer cans.

Turn 6
The Heldrake unsurprisingly has been quite useful, and continues it’s feast of kill points by vector striking the lone Biovore, impaling it on it’s wings. My Plague Marines forgot to disembark (so that the champion could shoot), and only managed to cause 1 HP of damage on a beer can. Meanwhile, the Maulerfiend takes a cue from the Tervigon and goes off to smash another can itself. Both the Lord and the Heldrake fire into Pete’s Termagants, bringing them down to a single model, meaning I have to charge in to ensure that it gives up it’s precious victory point.
Pete’s podding Zoanthropes suffer another perils, finishing off one of their number, while the survivors cause a single glancing hit on the Rhino. His second squad of Zoanthropes cause a Penetrating hit on the Maulerfiend, but it ignored the crew shaken result and lives due to having regenerated a HP the previous turn. Pete’s Tervigon claims a third can, while his Tyranid Prime wipes out the remaining Plague Marines.
Aftermath
Pete won the game, 15-13 VP. There were tons of tactical errors made on both sides, especially in the later turns, but that’s part of the charm of Beerhammer 40k!