By Chris Smith, a.k.a. Ozymandias
Last year, I came across a birdhouse at my local art supply chain store, Michael’s. It was a medieval watchtower and I figured with a few modifications, it would be perfect for my games of Warhammer Fantasy. Plus, at only $5, it seemed like a fun project. You can find this project on DakkaDakka: http://www.dakkadakka.com/dakkaforum/posts/list/382682.page.
A couple weeks ago, I visited Michael’s again and came across a log cabin birdhouse for $10 (though I found a 40% off coupon, so I only paid $6). I’ve been working on a snow-themed table for Malifaux (which I hope to cover in another blog post) and a cabin in the woods seemed like a perfect fit.
This will be a two-part blog series. Today, I’ll cover the modifications I made to get the terrain piece ready and next time I’ll cover painting and details.
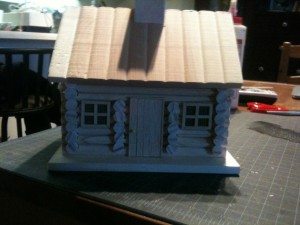
Here is the original birdhouse:
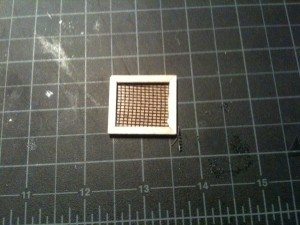
The first modification I made was to cover the windows and door. I don’t want any birds making a home in my terrain piece! I started with the windows and using some balsa wood, I made a frame slightly larger than the hole.
You can see that I cut the corners of each piece at 45 degree angles. This is super easy to do on a cutting mat, just use the guide. It actually makes the fitting easier as you cut every piece the same length, then cut the edges off at the 45 degree angle to get a perfect join.
Next I made a backing for the frame out of thin cardboard (like a cereal box) and covered that with a piece of screen door material I got at the local hardware store. I can’t recommend screen door material enough. It’s super cheap and excellent for all types of terrain features, whether it’s windows like I made or grating on a futuristic spaceship interior, this stuff is perfect. I repeated this for both sides.
Now only the central hole needed to be covered. I cut a piece of thin cardboard to the right size, then used balsa wood as the planks of the door and made a frame out of thinner balsa wood turned on its side. Finally, I raided my wife’s sewing supplies for a pin (she was not pleased at my ingenuity), which I added as the doorknob.
But something didn’t look quite right. The door was bugging me, so I added a thin strip of plasticard and topped it with some rivets made out of plasticard rod cut into tiny slivers. This finished the look of the door and I will eventually paint this part in metallic paint to look like nails.
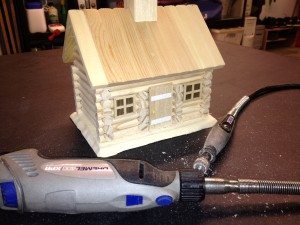
The final step before painting was to bevel the edges of the base. The base was quite thick, and once I realized I couldn’t pry the birdhouse off of it, I broke out my trusty Dremel (seriously one of the MOST useful items in my toolbox for terrain making) and beveled the edges all the way around.
If you don’t have a Dremel or other rotary tool, I suppose you can do this step with sandpaper, though I don’t envy how long that would take. If you are using any sort of power tool, be sure that you wear eye protection, and since this is throwing off a lot of sawdust, I’d recommend wearing some sort of mouth and nose protection too.
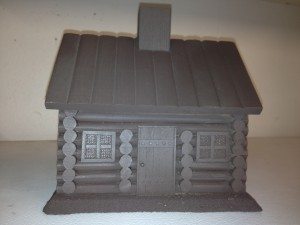
Even though I said that I would cover painting in the next blog post, I was so impatient that I broke out some brown spray paint and gave the whole thing a basecoat to get it ready.
I’ll be back soon to show you how I painted this bad boy up and all the finishing touches. Soon, I’ll have a stunning piece of terrain and all I spent was $6!
